Get the best of RAID's features with SyncToy
Back up your data and access it from anywhere
1. FIRST RUN
Click Create new folder pair. SyncToy creates pairs of folders to synchronise, making it easy to see where your data is going to and from.
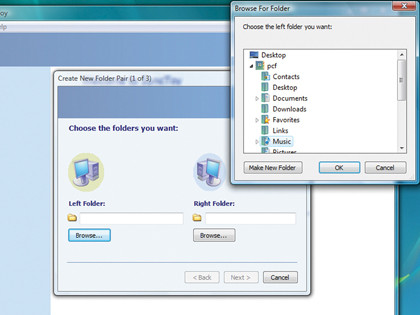
The left folder is the source folder, the folder you want to copy your data from. Click Browse, then choose the drive you want to back up – for example, Music. Hit OK.
2. CHOOSE DESTINATION
The right folder is the destination folder, or where you want to copy your data to. Click Browse on the right, then choose a folder on an external or back-up drive and click OK.
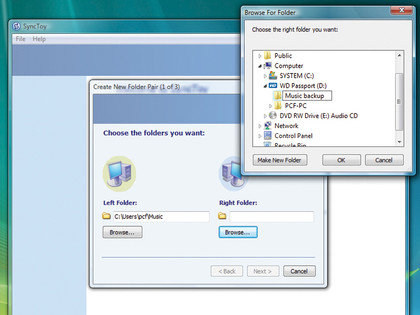
If no destination folder exists, click Make new folder. Give it a relevant name. Now click Next.
3. OPTIONS
Get daily insight, inspiration and deals in your inbox
Sign up for breaking news, reviews, opinion, top tech deals, and more.
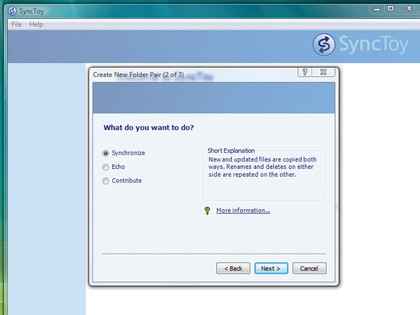
Synchronise: changes in left and right folders are repeated each way, so files you delete in the destination folder are deleted in the source.
Echo: changes you make in the source are repeated in the destination, but changes in destination are overwritten.
Contribute: adds new files to the destination without changing it.
4. NAME THE PAIR
Choose Contribute, click Next, and give your folder pair a name, then click Finish. We're almost ready to synchronise, but first it's a good idea to see what exactly SyncToy is going to do.
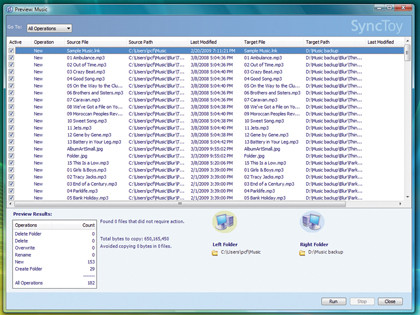
Click Preview to see a list of its proposed changes, then click Run to make the changes.
5. RUN IT AGAIN
To add more folder pairs, click Create new folder pair. It's not necessary to run SyncToy every day, but it's worth it if you've just uploaded a batch of photos to your PC.
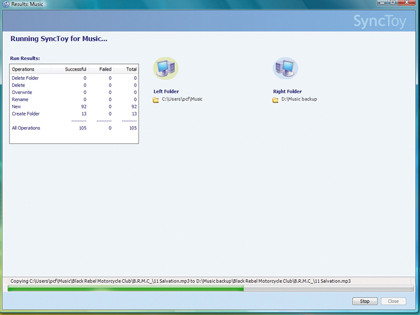
Open SyncToy, and choose the folder pair you want to update from the left. Click Preview, then Run.
6. ENTIRE DRIVES
SyncToy can mirror your entire hard drive but it may take a while. Instead of specifying a directory as your left folder, select your hard disk drive – C: for example.
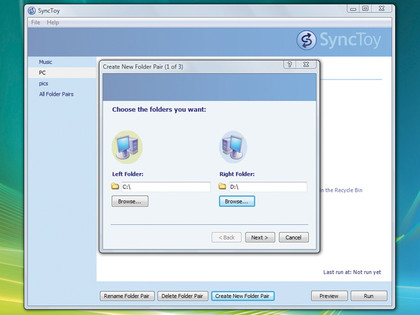
As the right folder, specify a drive of at least the same capacity as your main hard drive. Then select Synchronise and name the pair, as above.