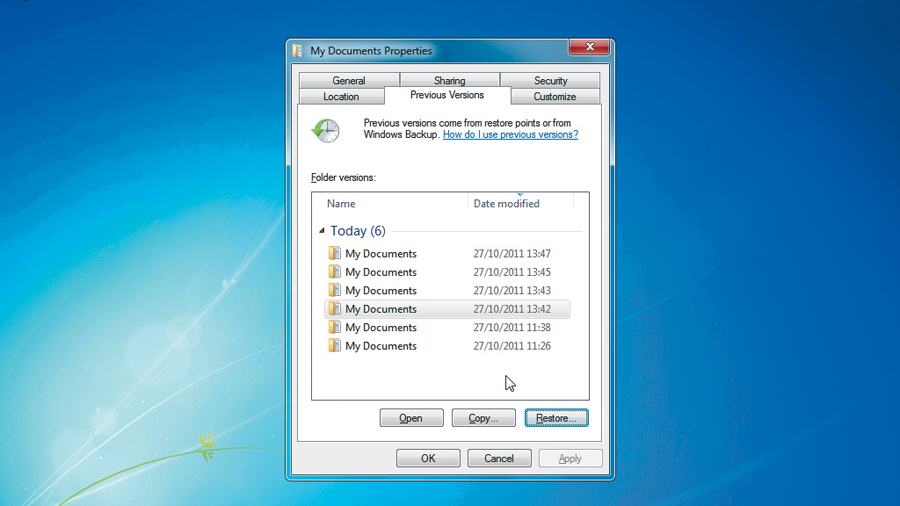
Accidentally deleting files - it's something we've all done, but erasing a file isn't the only thing that can go wrong when you're working in a hurry.
It's also very easy to edit a document, save it and then later change your mind about the editing you've done.
The good news is the Previous Versions feature of Windows 7 can help you eliminate these problems by saving snapshots of your hard drive automatically, so you have the option of reverting individual files to an earlier version if necessary - or even restoring files that have been accidentally deleted.
The Previous Versions tool is surprisingly easy to get up and running, and you never know when it might come in useful in the future.
Protect your work
Use Previous Versions to rescue files after accidental edits or deletion
1. Enable System Protection
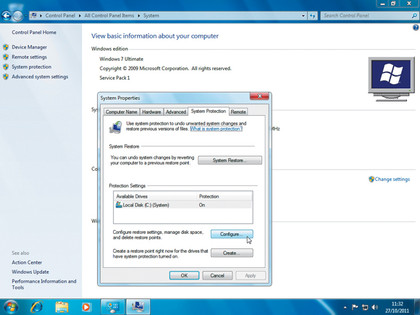
Click the 'Start' orb and then the 'Control Panel' shortcut to the right. Now click the 'System' icon followed by the 'System Protection' link to the left of the window.
Get daily insight, inspiration and deals in your inbox
Sign up for breaking news, reviews, opinion, top tech deals, and more.
In the Protection Settings section towards the centre of the dialog that appears, click the entry for your C: drive and then the 'Configure' button.
2. Configure restoration options
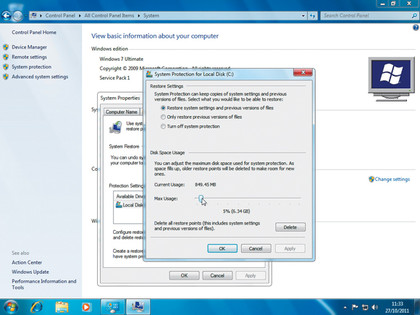
Select the option labelled 'Restore system settings and previous versions of files'. Use the slider that appears in the bottom portion of the dialog box to choose how much disk space should be set aside for previous versions of files and system backups. Click the 'OK' button once you've finished.
3. Create restore point
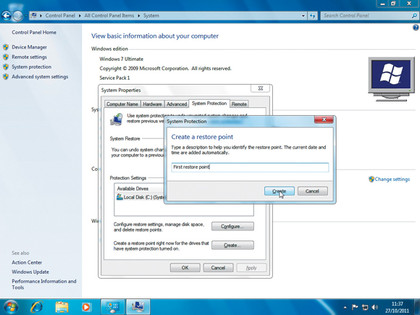
Windows will automatically start to create restore points and save multiple versions of files for you. Get things started by clicking the 'Create' button on the System Properties tab. Enter a name for your first restore point before clicking 'Create' - note that the date and time will be added for you automatically.
4. Complete system restore
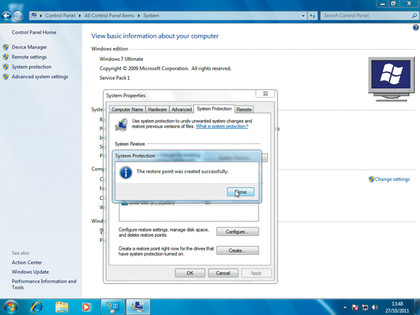
You may have to wait for a little while as the system restore point is created, depending on the amount of data stored on your hard drive. Once it's complete, click the 'Close' button that appears to complete the backup process. You can then close the System Properties window and the Control Panel.
5. Accessing previous versions
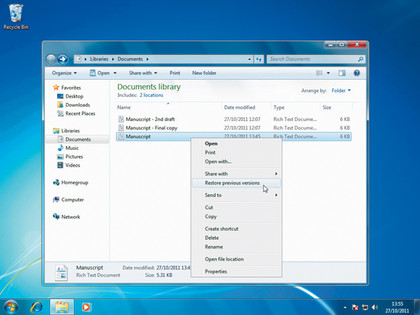
If you discover that you've made and saved unwanted changes to a document, right-click it and select the 'Restore previous versions' option. Alternatively, you can right-click a file and select the 'Properties' option from the context menu before moving to the Previous Versions tab.
6. Check file contents
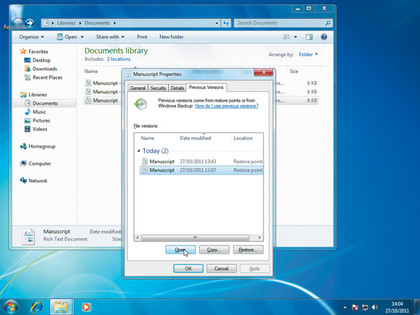
A list of previous versions of the selected file will be displayed, and you can then choose which one you would like to work with - click the 'Open' button to check the contents of a particular document. Work through the list until you identify the version that you would like to restore.
7. Restore previous version
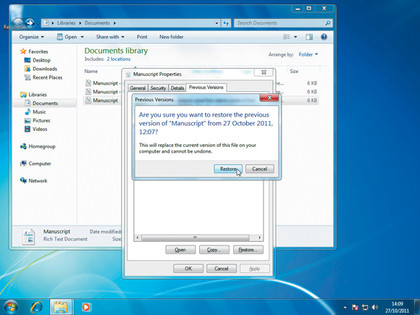
Once you've decided which file you're interested in, click the 'Restore' button. Take note of the warning message that appears explaining that continuing will overwrite any existing file, and then only click the 'Restore' button if you're happy to continue. Once the process is complete, click 'OK'.
8. Create a copy
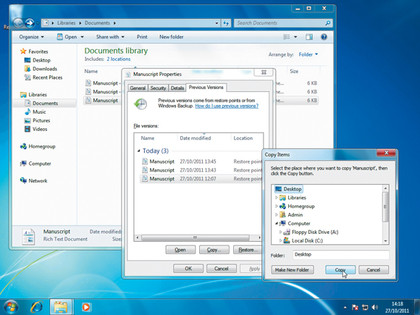
To avoid overwriting an existing file with one you're restoring - which could cause a problem if you accidentally restore the wrong file - it's a good idea to create a copy of the older version. To do this, click the 'Copy' button, navigate to the folder you would like to use and then click 'Copy' again.
9. Restore deleted files
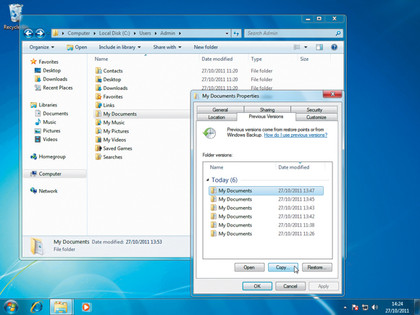
If you've deleted a file by accident, right-click the folder it was stored in and select the 'Restore previous version' option from the menu that appears. You can then double-click one of the previous versions of the folder and create a copy of the file you're trying to retrieve.
10. Work with your documents
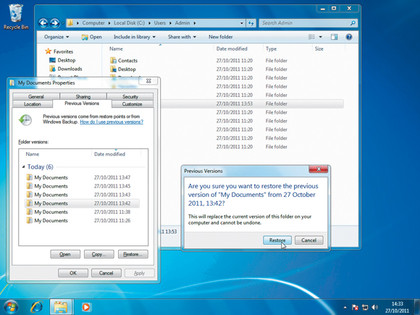
Having breathed a sigh of relief, you can now continue to work with your files as if nothing untoward ever happened. Whether you made an unwanted change to your CV or accidentally deleted some photos, Windows Previous Versions can help to save you a great deal of work and frustration.