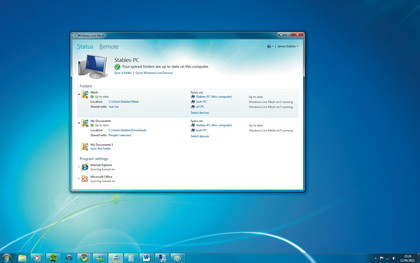
You can then choose to have the folders synced with your PC so they appear among your other files as normal. To do this, click one of the folders and a box will appear letting you choose a folder from your local PC with which to sync the Windows Live Mesh content. This can be any existing folder, like 'My Documents', but you can create a new one if you want the synced content to stay separate.

If you're using a PC without the client installed, you can then go to SkyDrive from any PC or mobile device to retrieve it. While it might seem cumbersome to use SkyDrive to access files you synced using Windows Live Mesh, it means you don't need to have client software installed at the other end to access your files - perfect for locked-down corporate networks.
Unfortunately, there's no provision yet for syncing to other services like Dropbox, so if you want to take advantage of Live Mesh, you need to use SkyDrive. This is something Microsoft would do well to change, because Mesh is a great service that gains nothing by being tied to SkyDrive, which is adequate at best.
Syncing settings

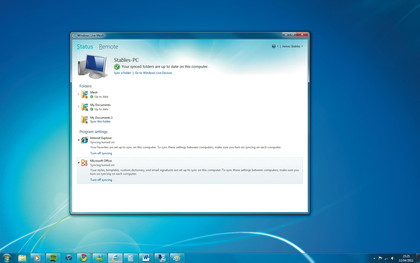
Windows Live Mesh doesn't just deal with your files - it can sync your settings as well. This is one of the most innovative yet simple parts of the service, and essential for anyone who's particular about the way their PC works. Live Mesh can save settings from Internet Explorer and Microsoft Office, which can be synced to other PCs.
Syncing your Internet Explorer settings may sound duller than a fortnight in Penzance, but it lets you port your favourites and bookmarks from one PC to the other as if by magic. This means that any web page you find while at work will be accessible from your home PC, so there's no need to hunt for information you've already found. In Microsoft Office, the syncing goes further, extending to templates, dictionary entries and email signatures.
To enable settings syncing, you need the Windows Live Mesh client installed on every PC on which you want the settings to appear. On your main PC, install the Live Mesh client and a list of supported programs will appear under 'Program settings'. You can choose to enable these individually by clicking on the program name and choosing 'Turn on'. You need to install the client on any PC on which you want to use the settings, log in with your Windows Live ID and turn on syncing.
Get daily insight, inspiration and deals in your inbox
Sign up for breaking news, reviews, opinion, top tech deals, and more.
Remote connections

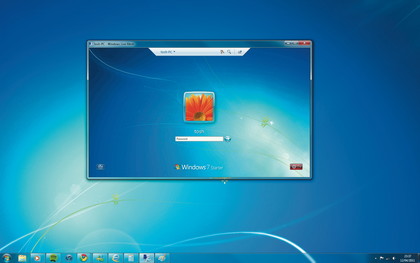
One of the best features of Windows Live Mesh is the ability to remote-connect and share the screens of computers within your Windows Live circle. This has plenty of benefits, like the ability to access your files from anywhere in the world, or help family members overcome PC problems without having to go round and listen to their explanations.
To share screens remotely, you need to do a little groundwork. First, you need to have the client software installed on both PCs, and be logged in on both with your Windows Live ID. When a PC is connected for the first time, it's added to the list of devices in the Windows Live Mesh console, although it's greyed out initially.
To bring these devices to life, you need to activate remote sharing. In the Windows Live Mesh console, click the 'Remote' button at the top to be taken to a special menu. Click the 'Turn on remote connections' link at the top to allow other PCs to connect to yours. Your Windows account needs to be password-protected.