1. Debox the motherboard
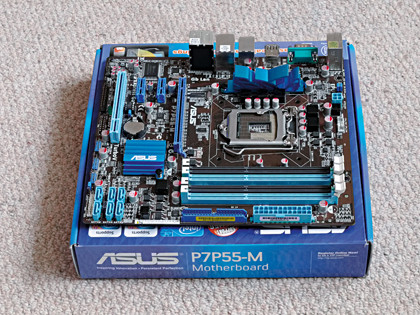
We're going to assemble some basic components before we put them inside the PC case, because it's a hell of a lot easier to do it now before things start to get cramped.
2. Slip in your CPU
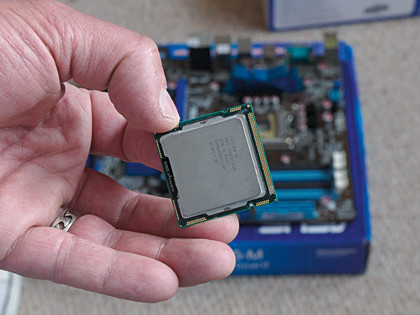
Open up the processor socket by lifting the metal retaining arm and folding back the rectangular cover. Hold the CPU by its edges, there are two notches on the sides.
3. Easy tiger, don't force it
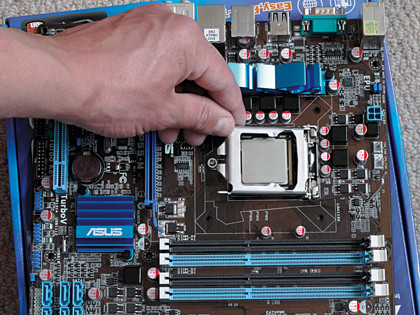
The notches on the CPU match up with the shape of the plastic socket. Sit the chip gently on the pins, taking care not to bend any, so that the notches on the socket and processor match up. It should ease neatly into place, allowing you to fold over the metal cover and push the retaining lever back without exerting any pressure.
4. RAM it in (gently now)
Get daily insight, inspiration and deals in your inbox
Sign up for breaking news, reviews, opinion, top tech deals, and more.
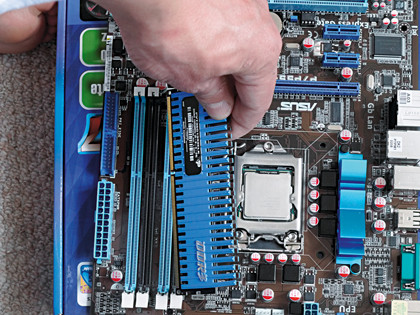
Memory modules use the same method of matching up notches to make sure chips can't be inserted the wrong way round. Align the notches and open up the clip on the edge of the port.
5. The second channel
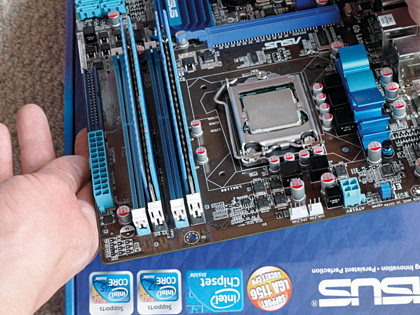
As you gently push the memory module into place, the clip should slowly lock down on itself securely, holding the chip down. To ensure that you get dual channel performance, you'll need two sticks of RAM, in this case they are slotted into similarly coloured ports – although be aware not all motherboards use the same colour coding.
6. Get primed for the heatsink
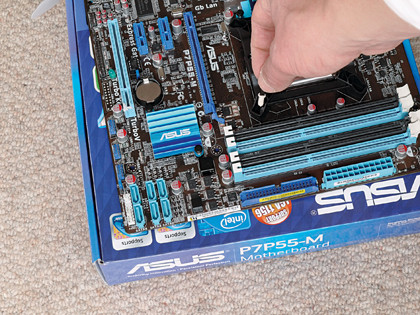
Before we fit the motherboard into the chassis, we need to attach the plastic mounting bracket for the heatsink. Use a pair of long-nose pliers, if you have them, as you will need to push the white plugs into the middle holes and lock them in place with the black pins.
7. Two fans – bad, one big'un – good
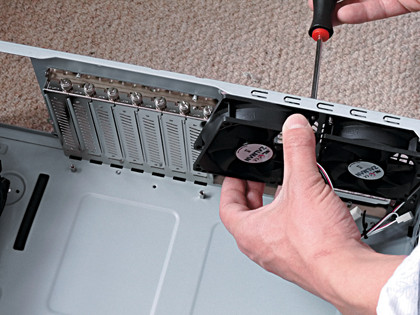
Now you need to open up the chassis. Make sure you put the lid to one side where it won't get scratched. We're going to remove the two small fans located at the back of the case. We're going to place one much larger 12cm fan in the side mount above the CPU, which will provide just as much airflow with a lot less noise..
8. Shields up, gentlemen
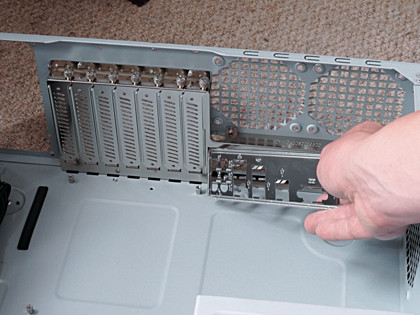
With the fans out of the way, take the RF shield (it should be in the mobo box) and push it through the slim rectangular hole beneath the case fan slots. The shield is the metal strip that's pierced with cutouts for the rear ports. Make sure it goes in the right way up…
9. Mount the motherboard
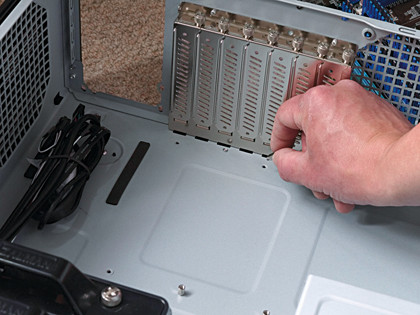
With the RF shield in the right way round, it's time to slide the motherboard into place. The board must not touch the case or you'll create a short and bork the board, so you'll have to move the brass risers into the holes in the tray that match up with the pattern of pre-drilled holes in the motherboard.
10. Stop, Hammer time
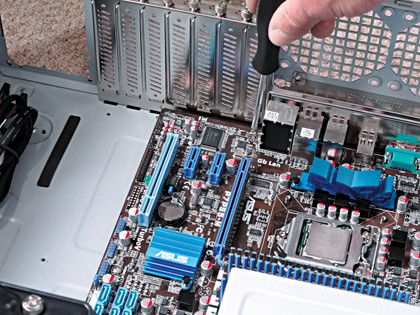
If everything has been aligned correctly, the motherboard should simply drop into place and slide into the holes in the RF shield. Check all the risers match up one last time and screw the motherboard into position with the large screws supplied with the case.
11. Heatsinking the CPU
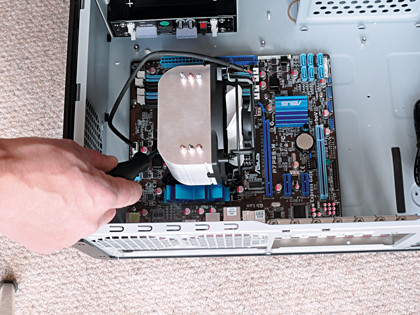
While there's still room in the case we'll fit the CPU heatsink. Screw it on top of the plastic bracket we fitted in step six, taking care not to disturb the square of thermal paste.
12. Start your fans please
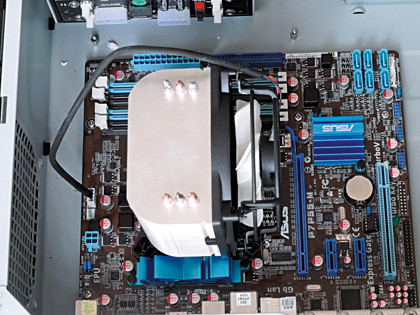
Attach the fan power supply to the CPU fan header pins and move on to the hard drives – you'll find an adaptor for the slimline SSD drive in the case accessories. The drive sits inside and is locked into position with small screws.
13. Strip out the caddy shack
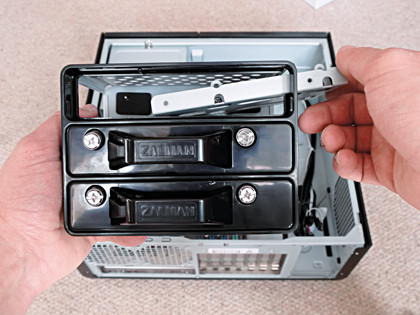
Now remove the hard drive caddy in the chassis by releasing the large thumbscrew. There's space for three regular drives – more if you're using SSDs. For now, fix the SSD into its adaptor and put it into one of the removable trays before putting the caddy back into place.
14. Swappable shoppable
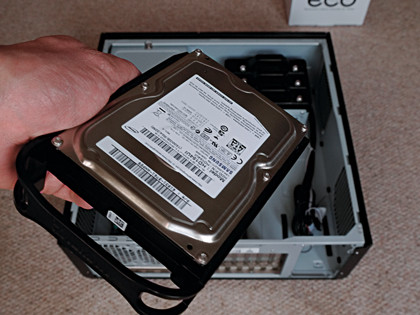
Our largest drive, the Samsung Spinpoint 1.5TB is going to go in the hotswap bay in the front of the chassis. To fit it, just open the lower door on the front and pull out the plastic tray. The hard drive should fit snugly in the retainers. Note: before you put the tray back in, we'll need to fit the Blu-ray drive.
15. Blu-ray me so fa
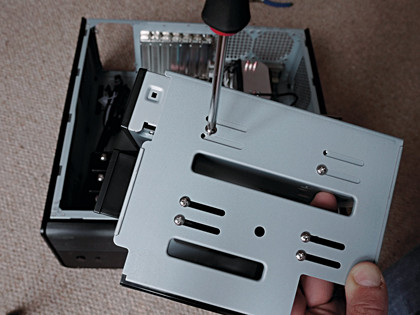
Remove the optical drive and hotswap bay by loosening the thumbscrew inside the front of the chassis and the bolt on top. Like the hard drive caddy, it lifts out for easy access. Slide the Blu-ray drive into the top bay until it clicks, then screw it into position.
16. Exhaust port
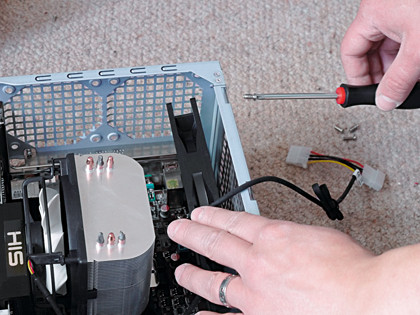
With the caddy out of the way, pop off the side of the case nearest the processor by releasing the plastic clips on the inside and unscrewing the back, then slide the 12cm fan into place behind the grill. Make sure that the fan is oriented to blow air out of the case, not to suck it in (or you'll be in for a surprise), and bolt it down from the outside.
Current page: Build a media PC: how to put it together part 1
Prev Page Build a media PC: choosing components Next Page Build a media PC: how to put it together part 2