Use Raspberry Pi to stream to any device with SqueezePlug
Remote control your Pi to play and stream music and video files

Outside of education, the most popular use of a Raspberry Pi is to play multimedia. For starters, you can use it as a nifty little HTPC with the XBMC media centre. In this tutorial, we'll transform the Raspberry Pi into the ultimate media streaming box.
The puny little Raspberry Pi packs enough punch to stream multimedia content all over your house, and to any device. So you can hide it behind your Hi-Fi speakers, along with a USB drive, and control music playback via your Android phone. Or, you can use it to stream high definition video from a NAS to a tablet. Best of all, you can also use it to stream music from your Android phone to the Hi-Fi speakers, à la AirPlay.
Many of us already have a similar setup, perhaps using a NAS and a dedicated low-power machine in the living room. These living room machines have to be small, so they don't clutter up your living space; silent, so there's no noisy fan to spoil your movies; and cheap, because you've wasted all your money on a big plasma telly. The Raspberry Pi is all three.
Usually to set up such an environment you'd need an assortment of server software and ninja-level command-line skills. But thanks to the SqueezePlug project, which does all the grunt work, you can be up and running in a matter of minutes. Let's get started.
Download SqueezePlug

Begin by downloading the latest version of the SqueezePlug image for the Raspberry Pi.
Once downloaded, you can check its consistency by verifying its MD5 checksum on Windows with the WinMD5Free tool. The image is distributed in a ZIP file, so you'll have to extract it before transferring it to the SD card.
Note that since the extracted image is almost 4GB, you'll need an SD card that's at least 8GB. The developer also recommends a Class 6 or higher card. The class number represents the speed of the card - the higher the value, the faster the card.
Get daily insight, inspiration and deals in your inbox
Sign up for breaking news, reviews, opinion, top tech deals, and more.
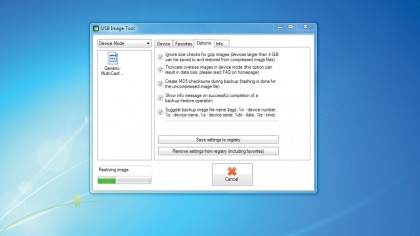
To write the SqueezePlug image file in Windows, grab USB Image Tool. You don't have to install the tool, just download the ZIP file and extract its contents. Now right-click on the USB Image Tool.exe file and select Run as Administrator in the context menu. The app will list your card in the left pane.
Make sure the tool is in Device mode by selecting it from the pull-down menu in the top-left. To write the image to the card, click the Restore button and navigate to SqueezePlug's .img file. The process may take some time, depending on the speed of the card.
If you are using Linux, you can use the venerable dd command to write the SqueezePlug image to the SD card. Most distros will automatically mount the card when you connect it. You can find where the card is connected using the mount command. Assuming your card is mounted at /dev/sdc1, unmount the card before writing the image:
$ sudo umount /dev/sdc1
$ sudo dd bs=4M if=SqueezePlug_HF_602.img of=/dev/sdc
Accessing SqueezePlug using the first method is straightforward. If you are using the second method, you'll need an SSH client to access SqueezePlug. All Linux distros ship with the ssh utility to create an SSH session. On Windows, you'll need a client, such as PuTTY.
Stream media

Power up the RPi, wait for a minute and go to your router's administration page to find out the IP address it has assigned to the machine. If you are using PuTTY, launch the app and enter this address in theHost Name field. On Linux, fire up a terminal and enter sudo ssh root@192.168.2.100 assuming that's the IP address assigned to the RPi.
With almost two decades of writing and reporting on Linux, Mayank Sharma would like everyone to think he’s TechRadar Pro’s expert on the topic. Of course, he’s just as interested in other computing topics, particularly cybersecurity, cloud, containers, and coding.
