I'm a digital artist, and this is my secret weapon
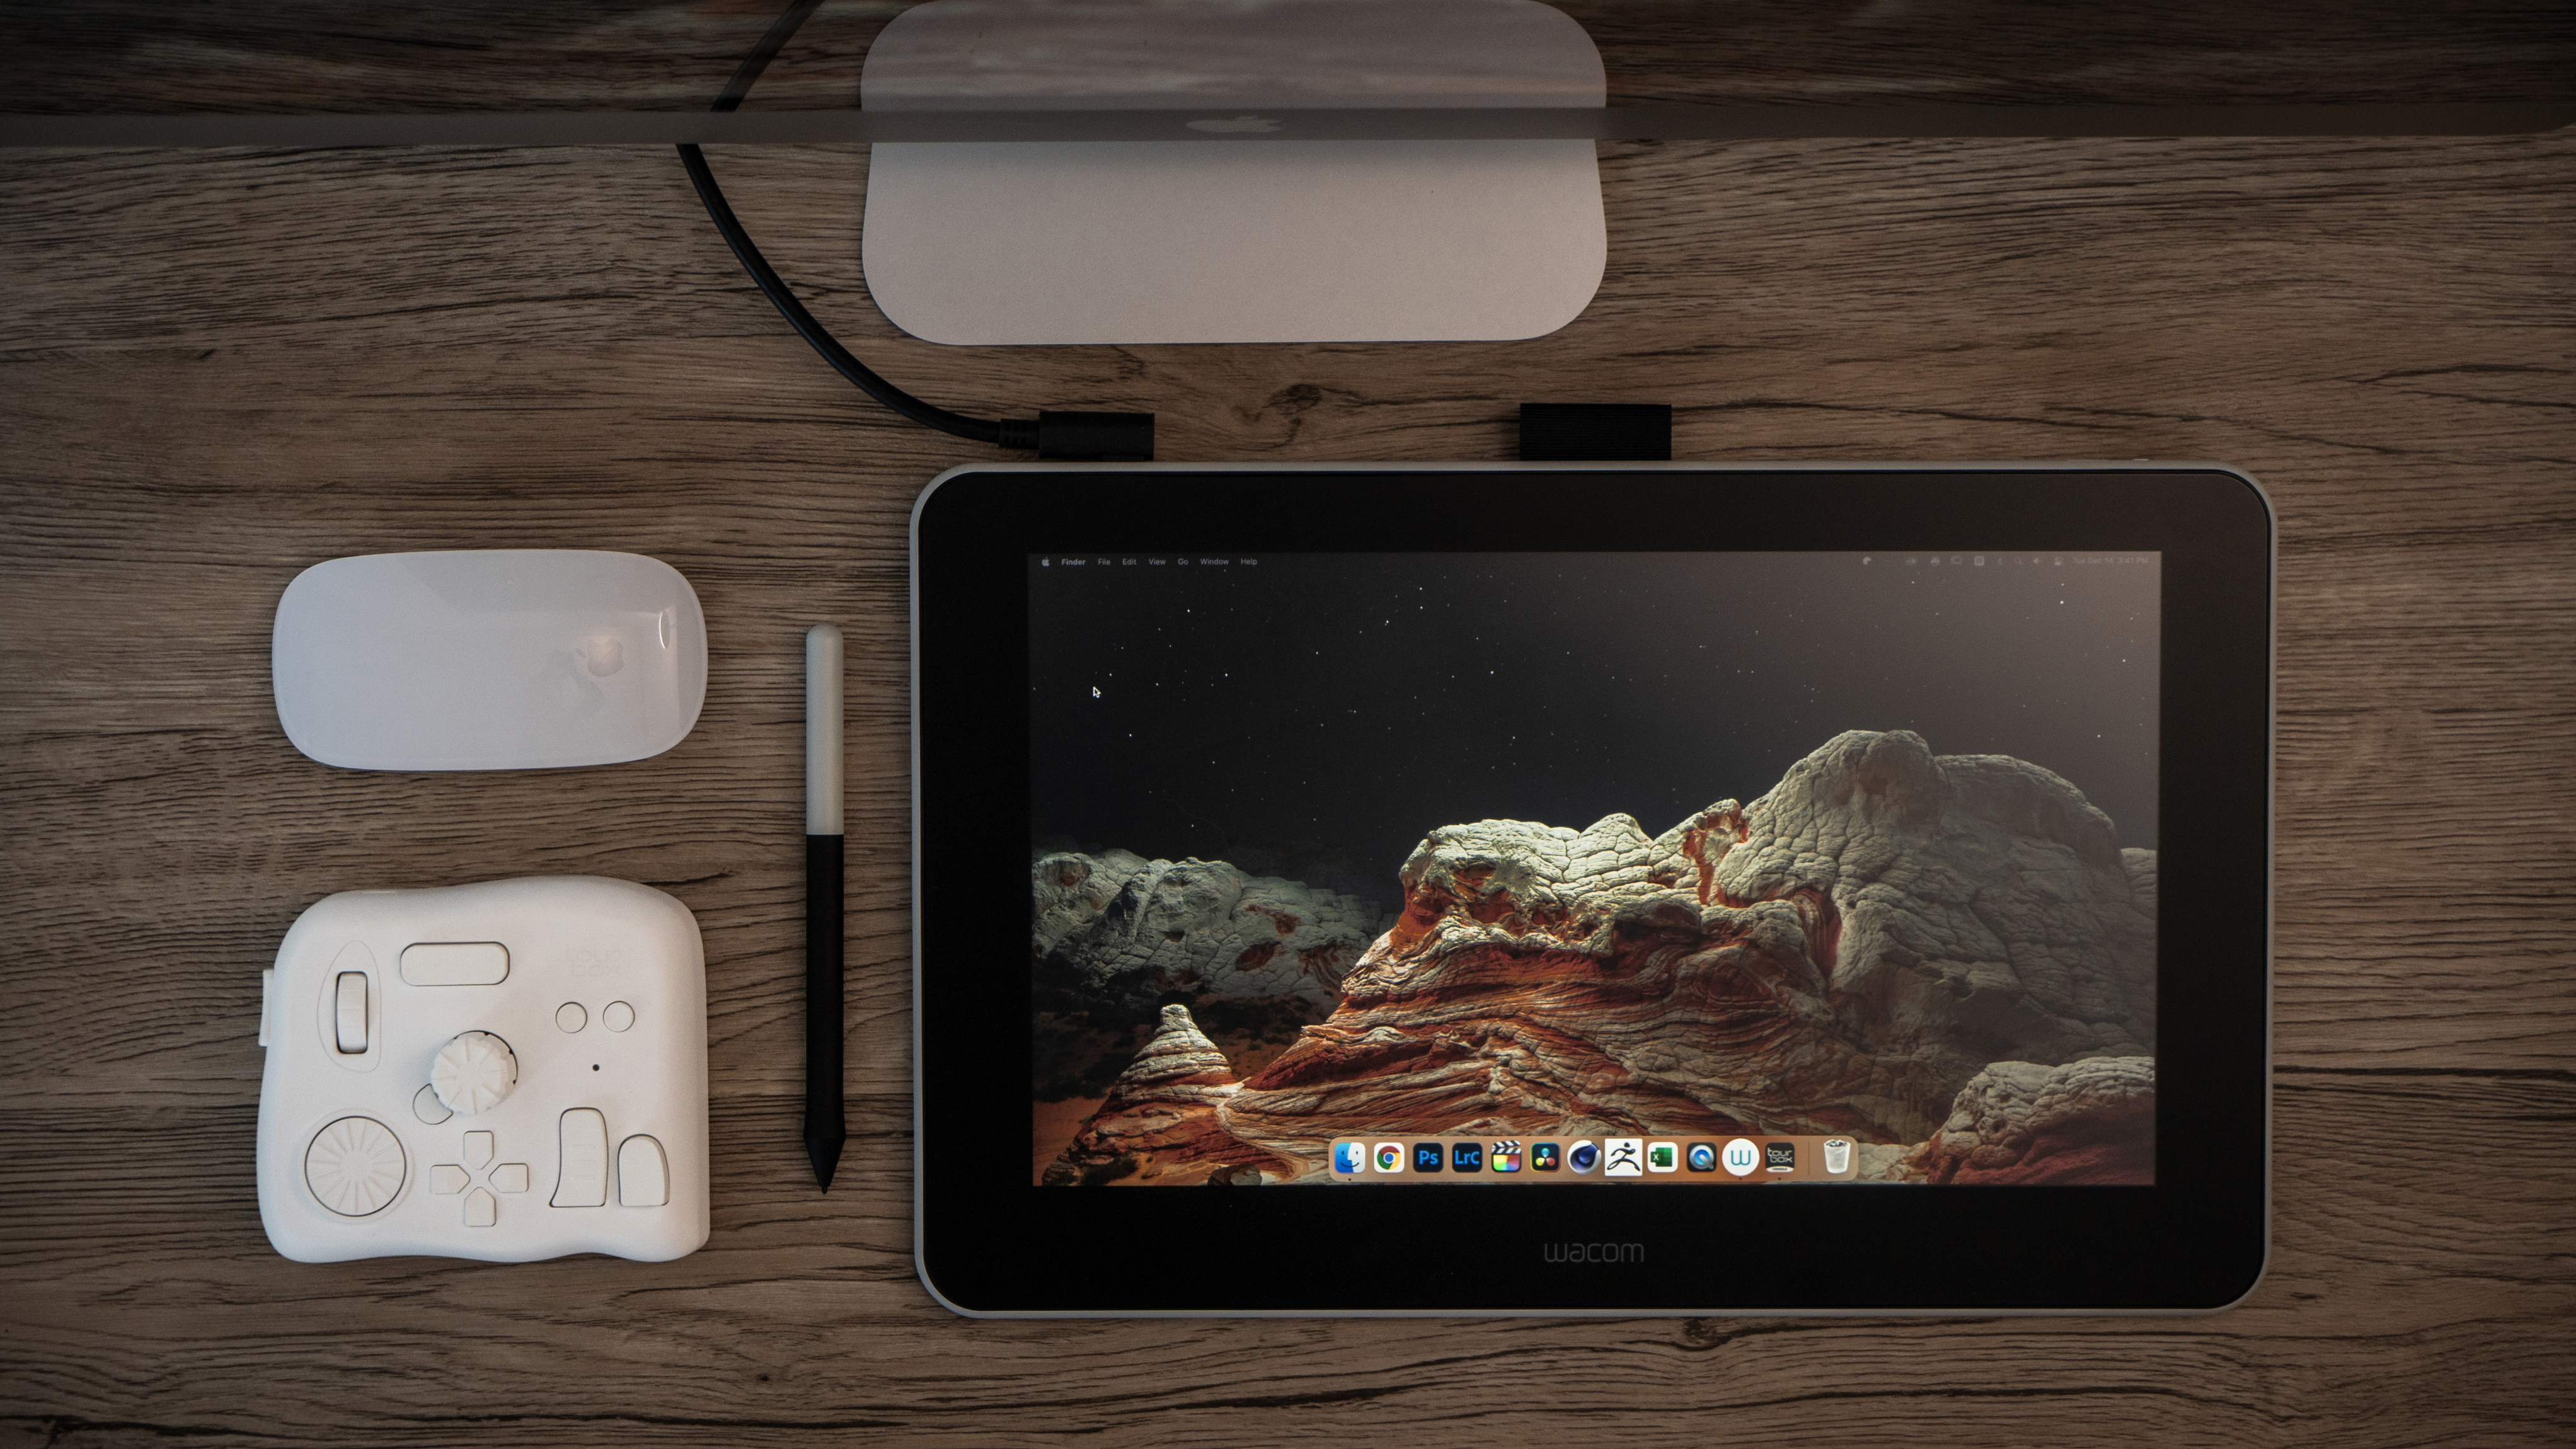
It's hardly unusual to see a digital artist using the keyboard alongside their drawing tablet or mouse. But it's hardly ideal either. Keyboards were made for text entry, not other kinds of content creation. And that means you're constantly interrupting your workflow.
I was aware that there are editing controllers such as TourBox, which are designed for digital content creators such as illustrators, photographers, filmmakers and designers. And I'd seen the testimonials, such as:
Garret James is a freelance artist who specialises in digital portrait painting. Currently living in Spain, Garret has over 12 years experience in traditional and digital painting.
"I use TourBox for every one of my Adobe apps as well as everyday use!"
"I love mine. For digital painting there is nothing to rival this device."
"Totally worth it even if you only use it for brushes!"
But I'd never tried one. As a content creator I've been using the keyboard from the very first day I started painting, so keyboard commands are engraved in my muscle memory.
But then I saw that TourBox had released a new generation of their product, called the TourBox Elite – and it's Bluetooth.
I can't resist the lure of a new Bluetooth gadget, so when the TourBox team reached out and asked if I'd like to test the TourBox Elite I said I'd love to. So here I am, testing it: the device is the white one.
First impressions of the TourBox Elite
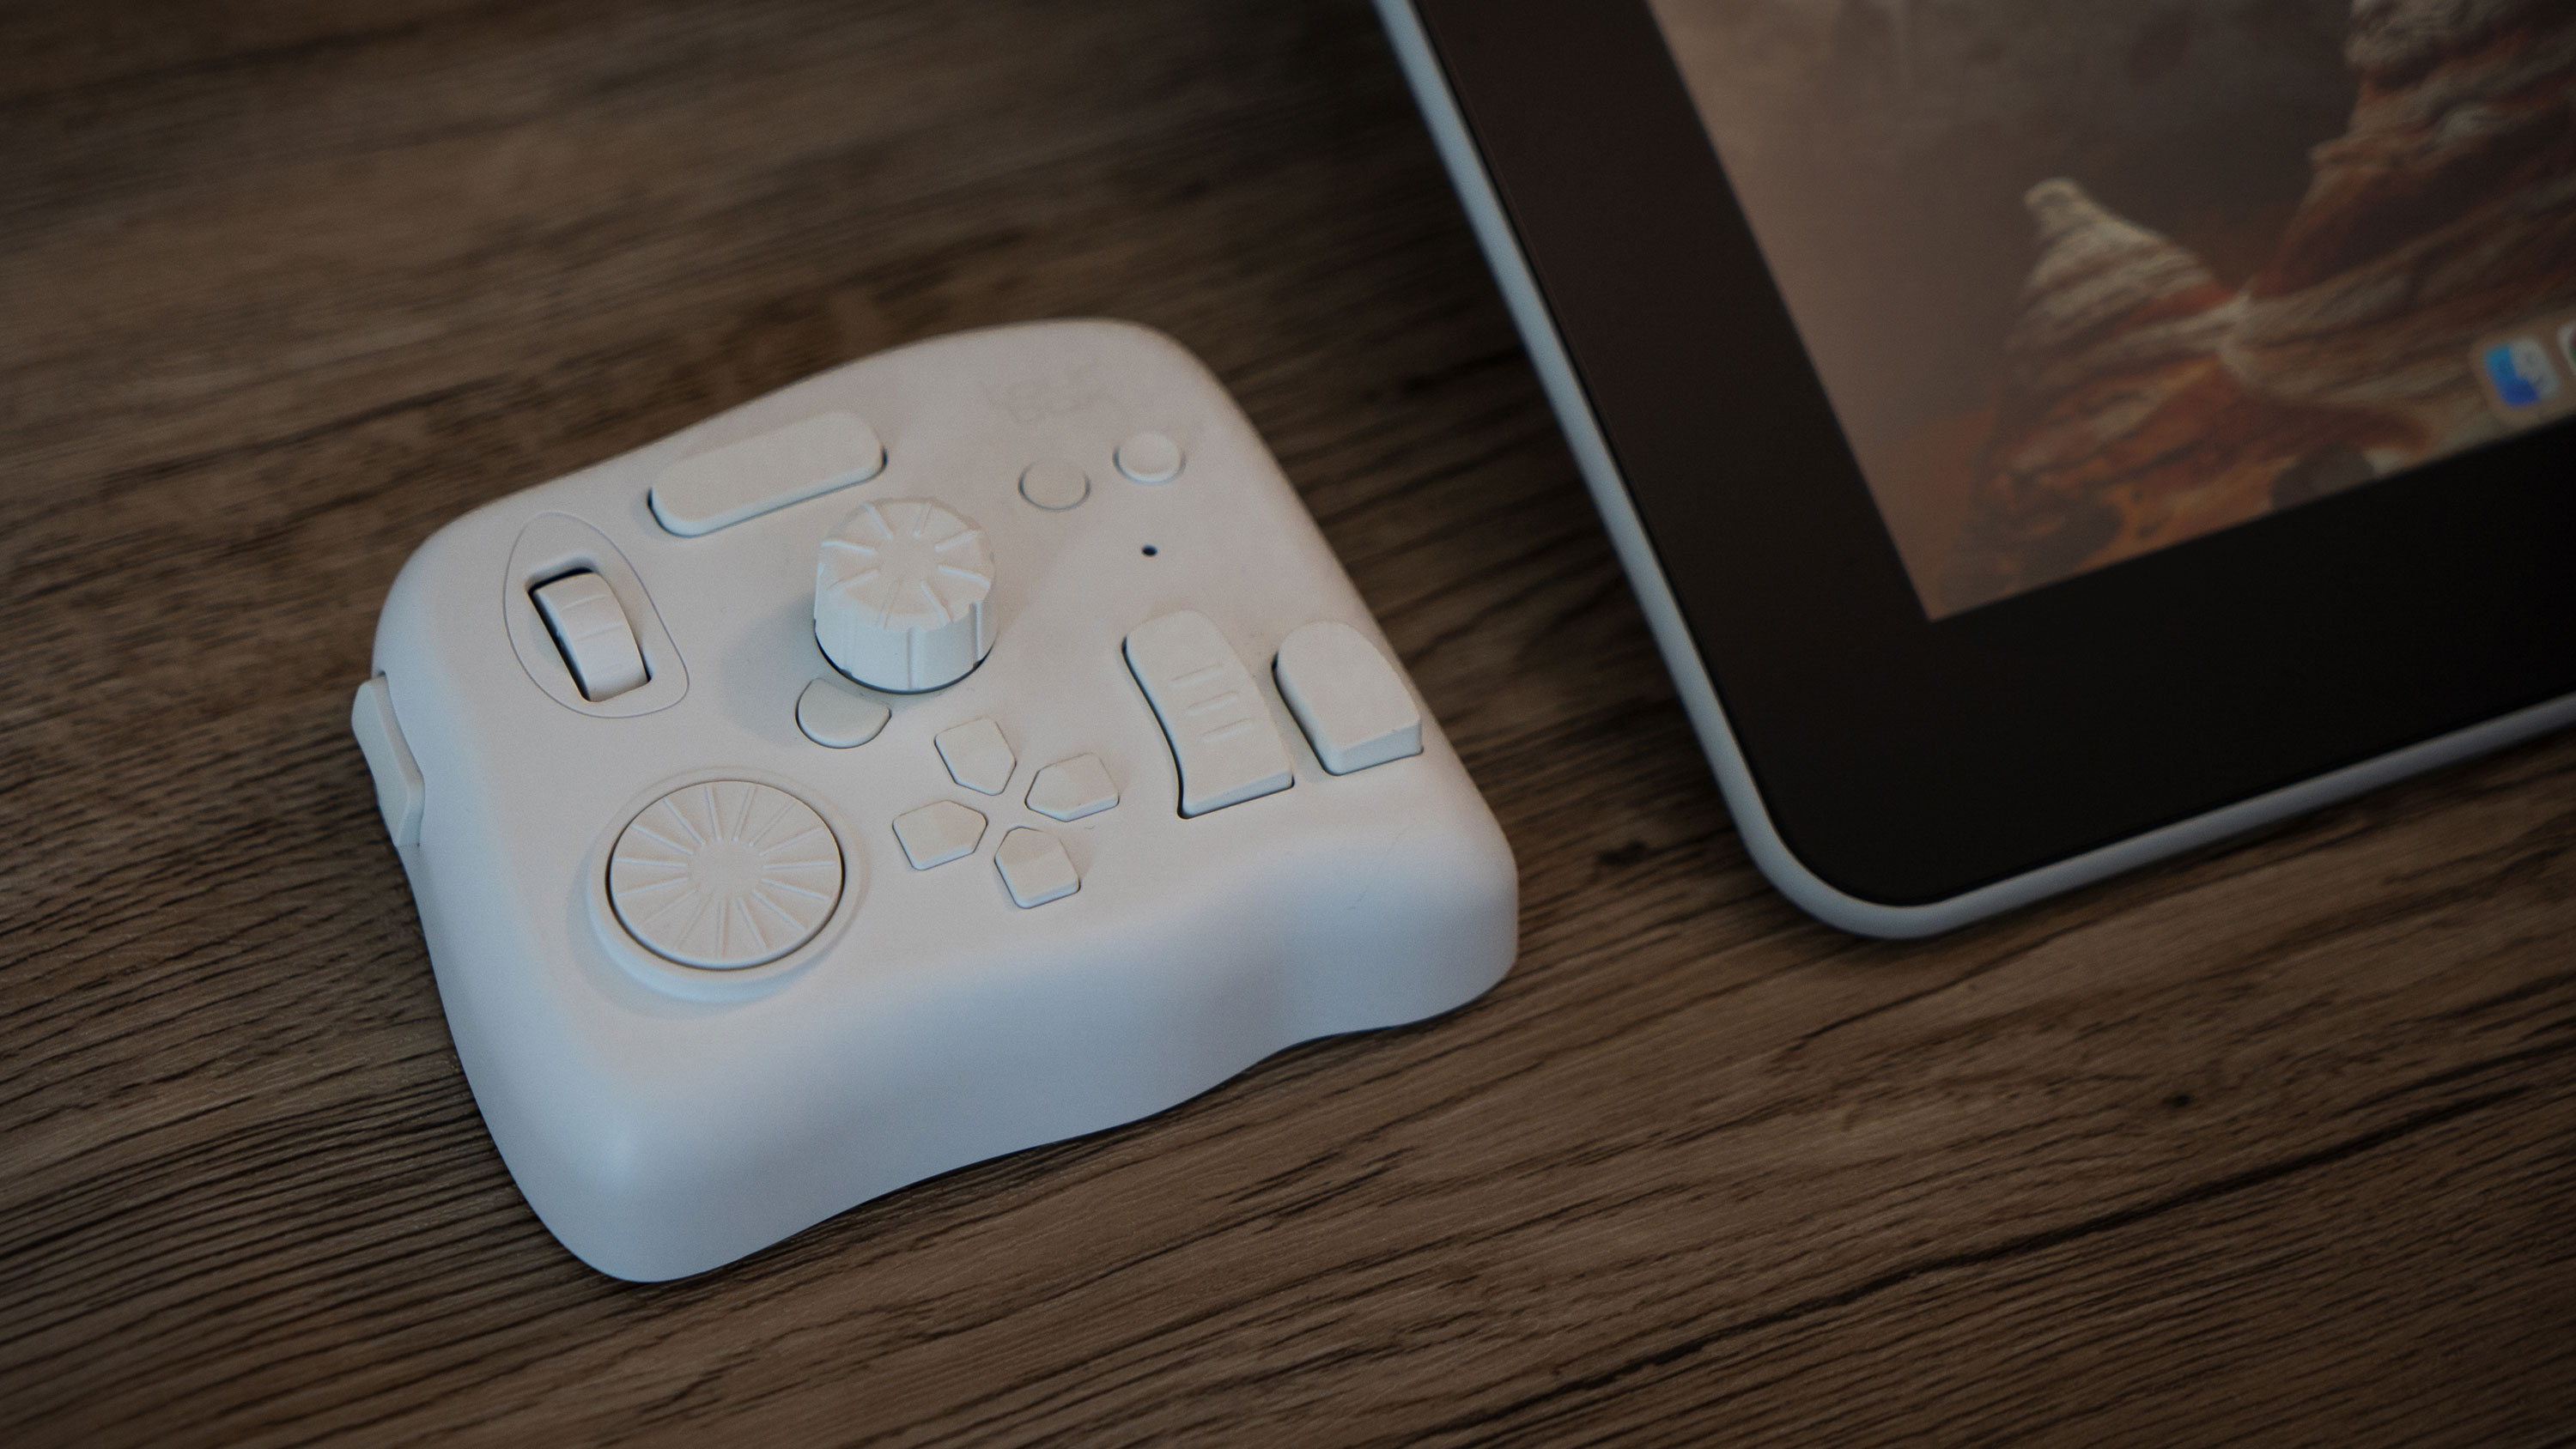
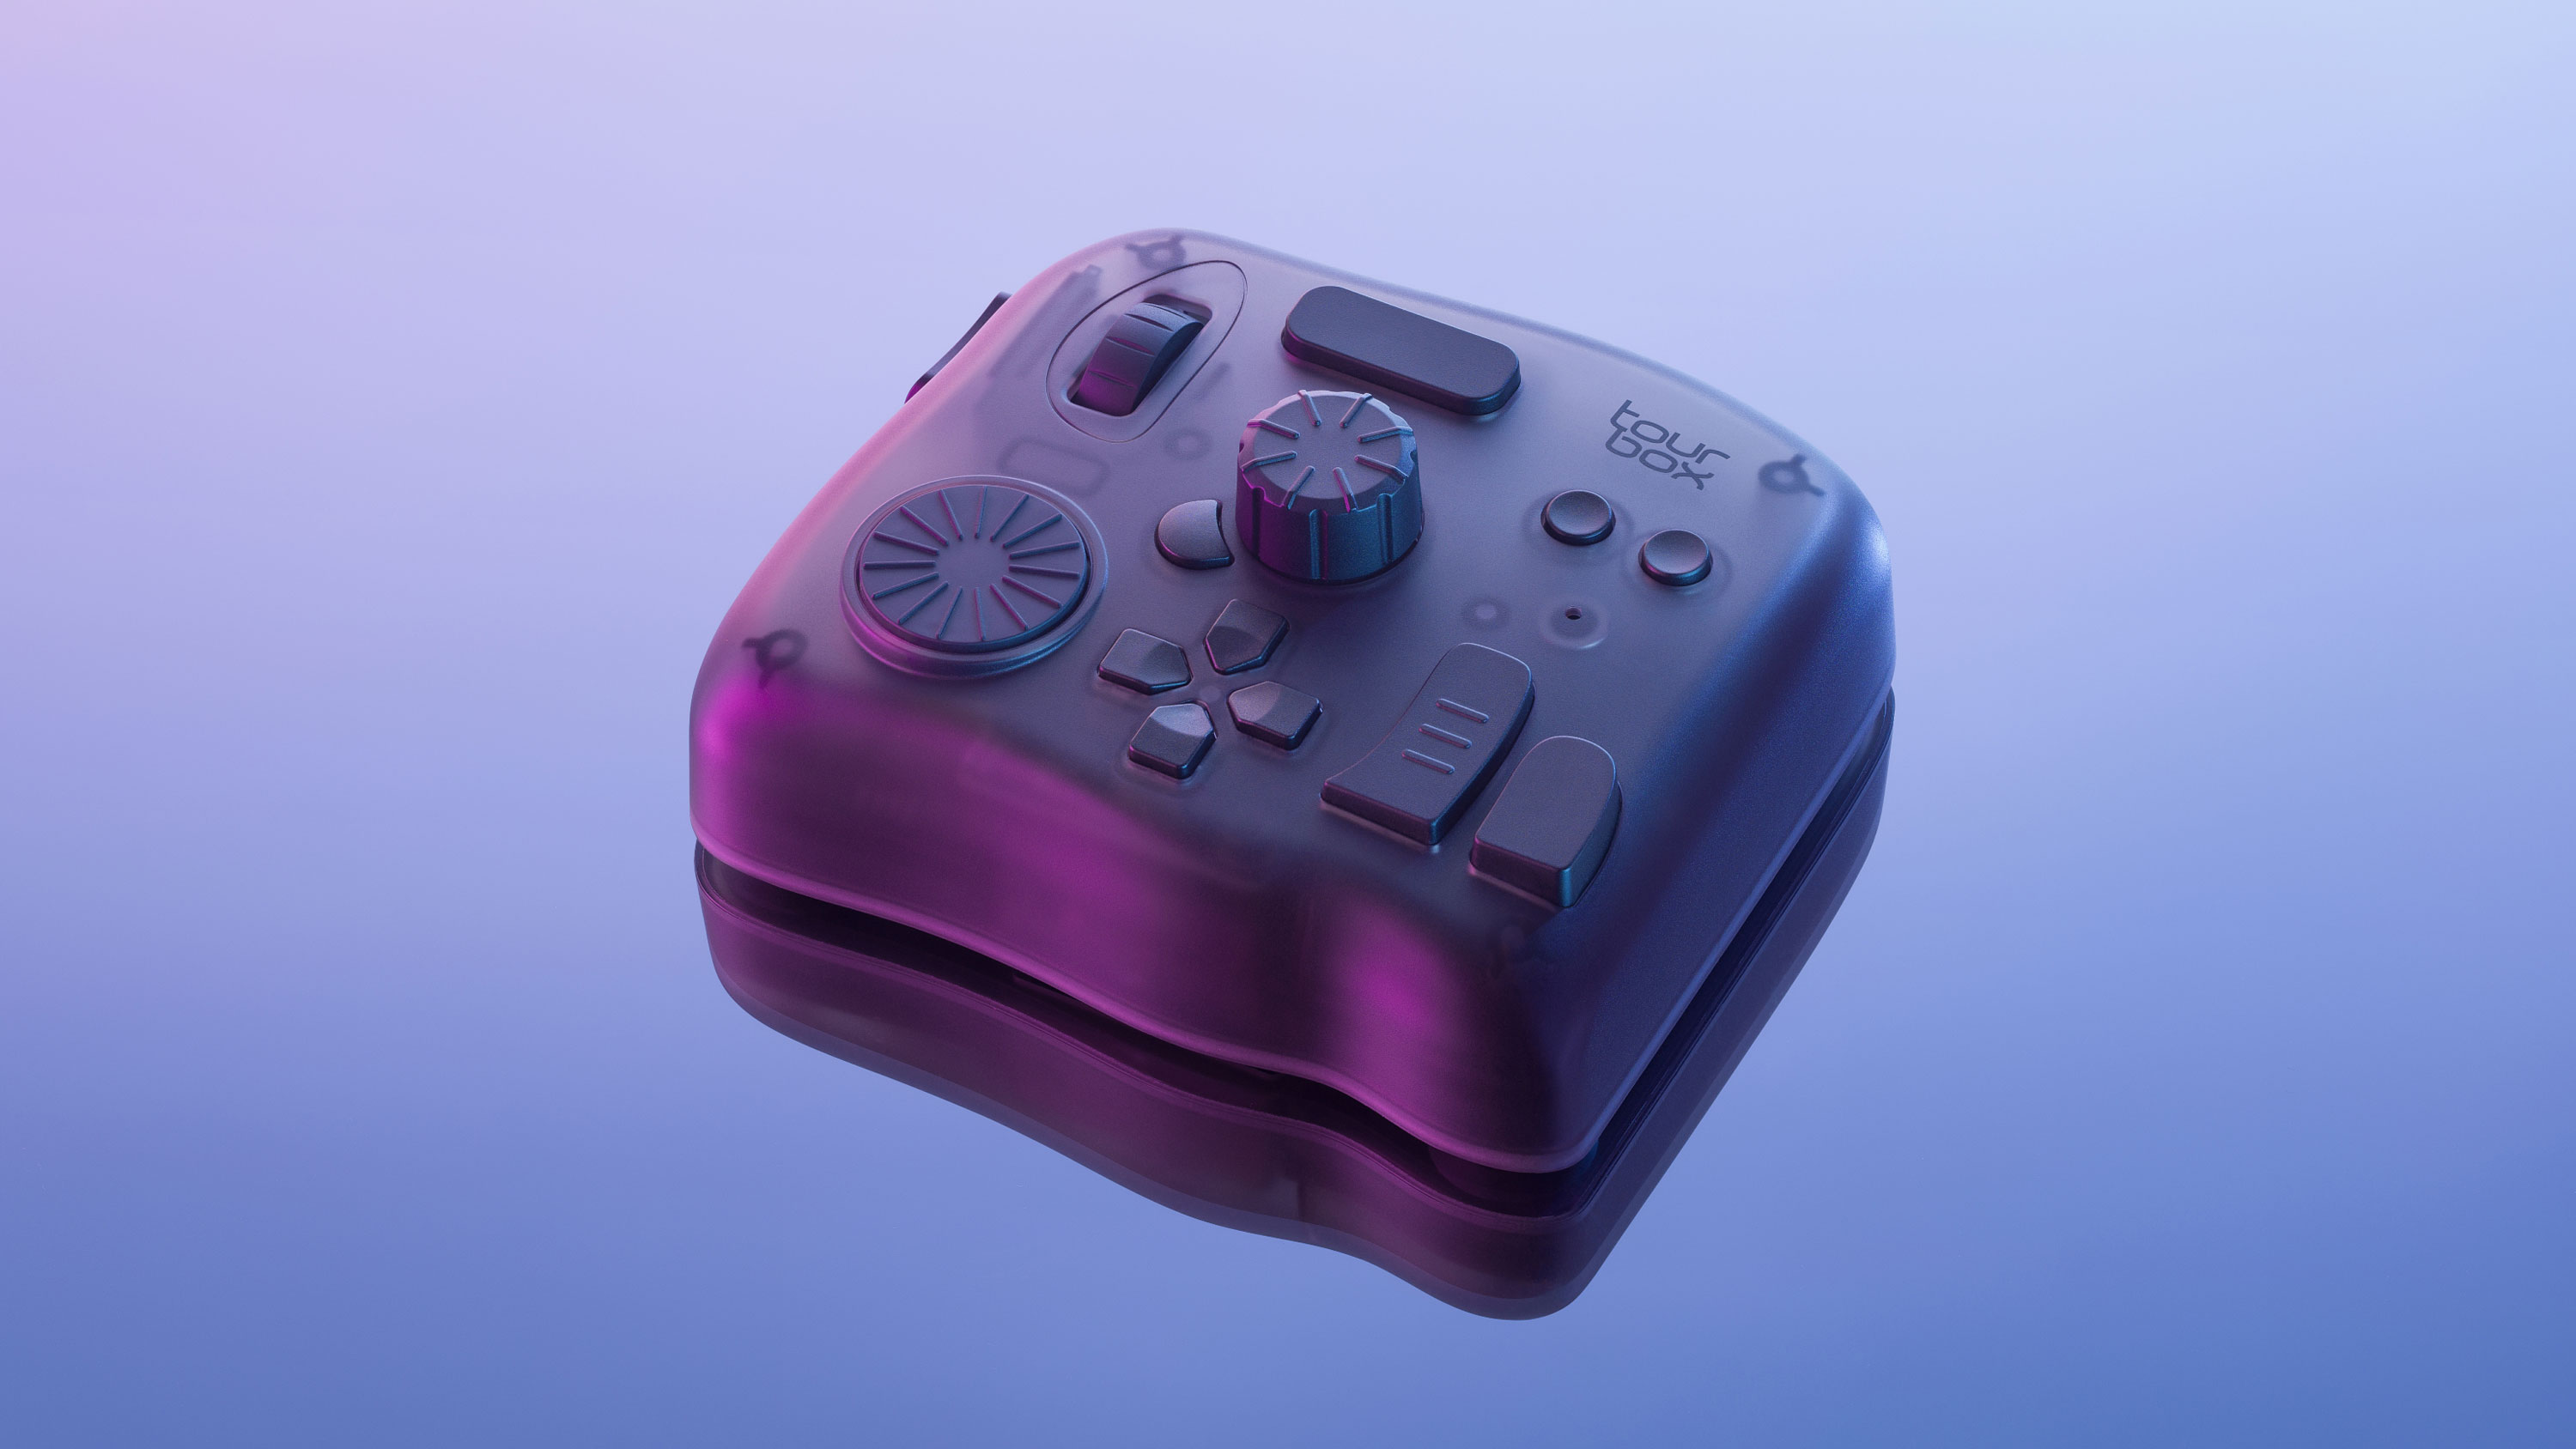
The TourBox Elite comes in three colourways: Classic Black, a smoky Black Translucent and Ivory White. That latter one is the one I've been testing. I was surprised by how good it looks – online photos don't really do it justice – and how precise it feels.
Its soft touch finish makes it feel good in the hand, and it’s small enough to fit on my desk alongside my MacBook and my drawing tablet.
I expected the learning curve to be steep – there are 11 buttons and three rotary controls with over 100 ways to apply them – but it really wasn't.
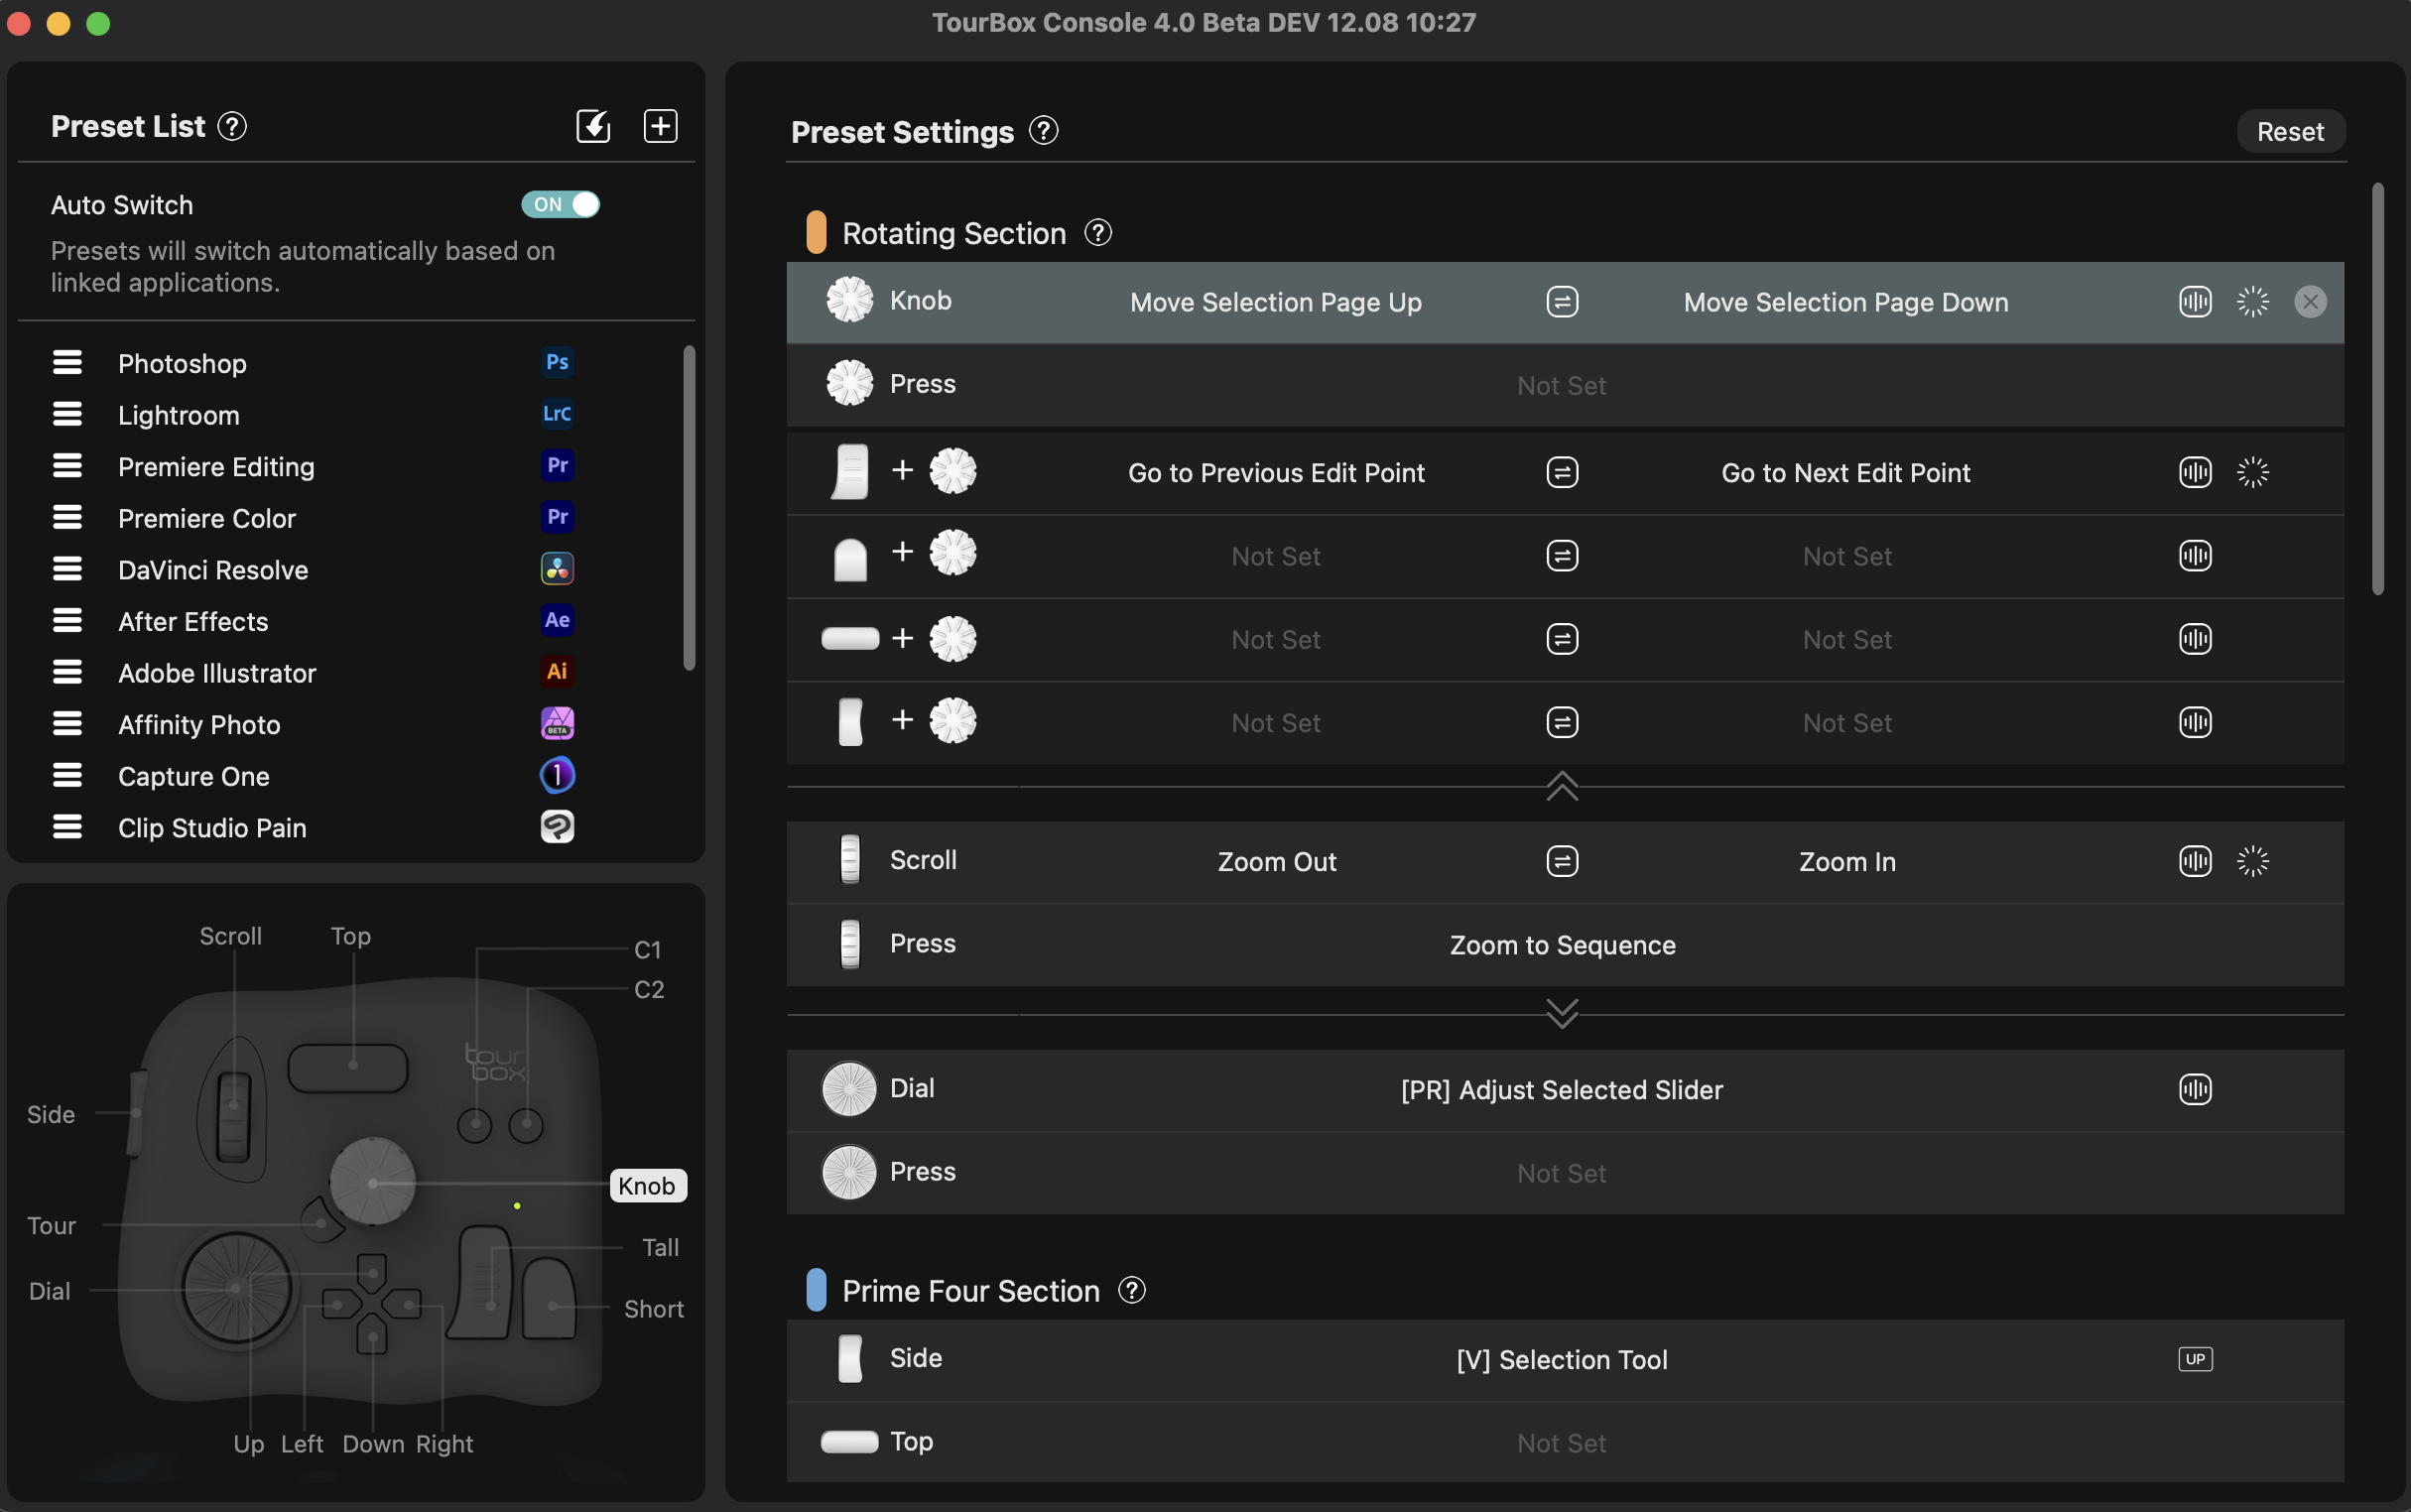
The TourMenu plugin made it easy to configure the single and double clicks, the combos and the macros, and the unusual shape of the buttons really helped with the muscle memory: you can feel exactly what button you’re touching without having to take your eyes off your creation.
I think my favourite feature is being able to change the brush size in Lightroom and Photoshop with the rotary knob.
It’s not the most powerful feature the TourBox Elite offers – as I’ve discovered, it’s a very powerful device that’s almost infinitely configurable – but it was enough to sell me on the product. It just feels right.
Using the TourBox Elite for painting, retouching and graphic design
I love using it in Photoshop. Back in the day, when I was retouching fashion portraits I’d use a combo of shift and number buttons to change the flow – sometimes two-handed because my left hand couldn’t stretch far enough for the higher numbers.
But with the TourBox Elite I could do all that with a single hand. So I mapped the Tall button to opacity, the long button to hardness, the short button to flow and so on.
Now all I need to do is click the button that matches the parameter I want to change and turn the knob to get the correct value instantly. I’ve mapped the C1 button to step back through my editing history and C2 to step forward, which feels pretty intuitive as they’re nested next to one another.
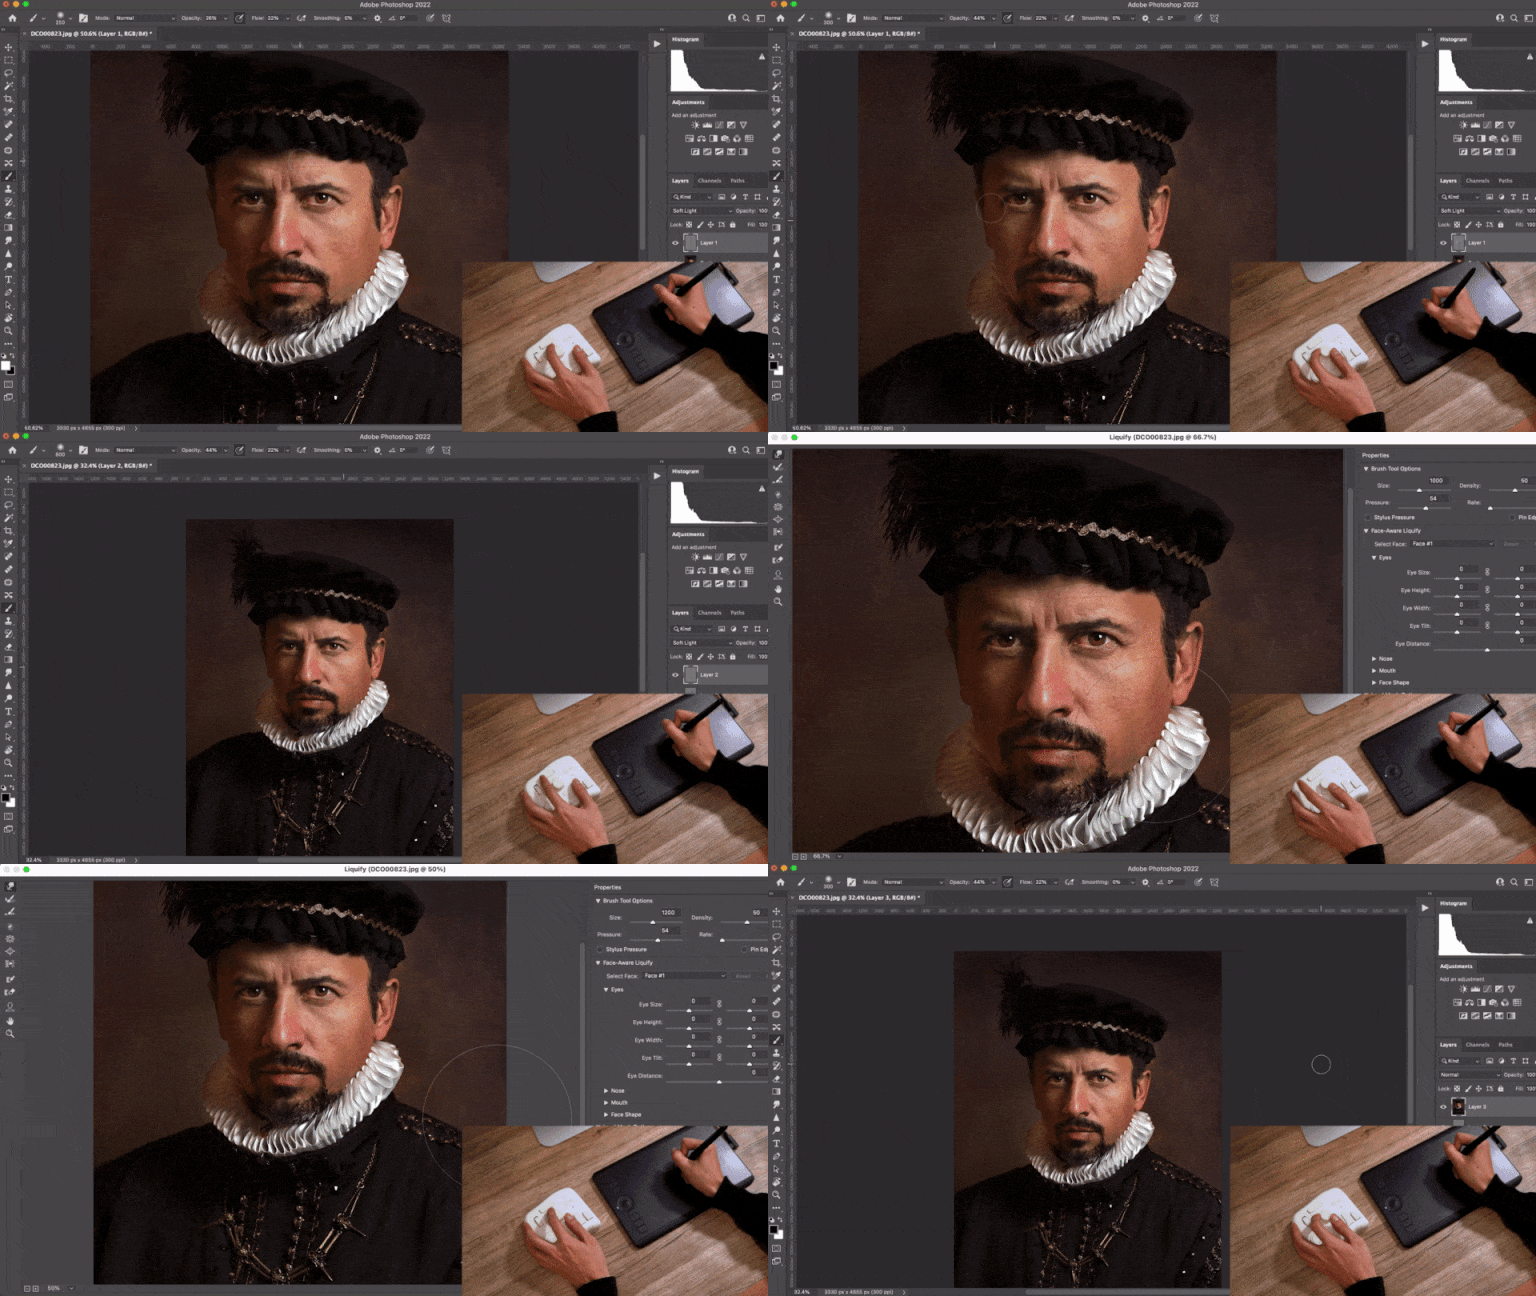
Another customisation I really like is using the Side button and the knob to rotate the canvas and the Scroll to zoom in and out. Because the controller layout is pretty compact I barely need to move my wrist.
In addition to the TourBox Elite itself, the TourBox team also created TourMenu. It’s a nifty menu tool that appears when you interact with the controller: think of it like a right-click but much more configurable.
You can map the TourMenu to almost all of the buttons, so I’d crate a TourMenu that gathered various adjustments that I could call out with the Tour key and toggle through with the Scroll to start colour grading.
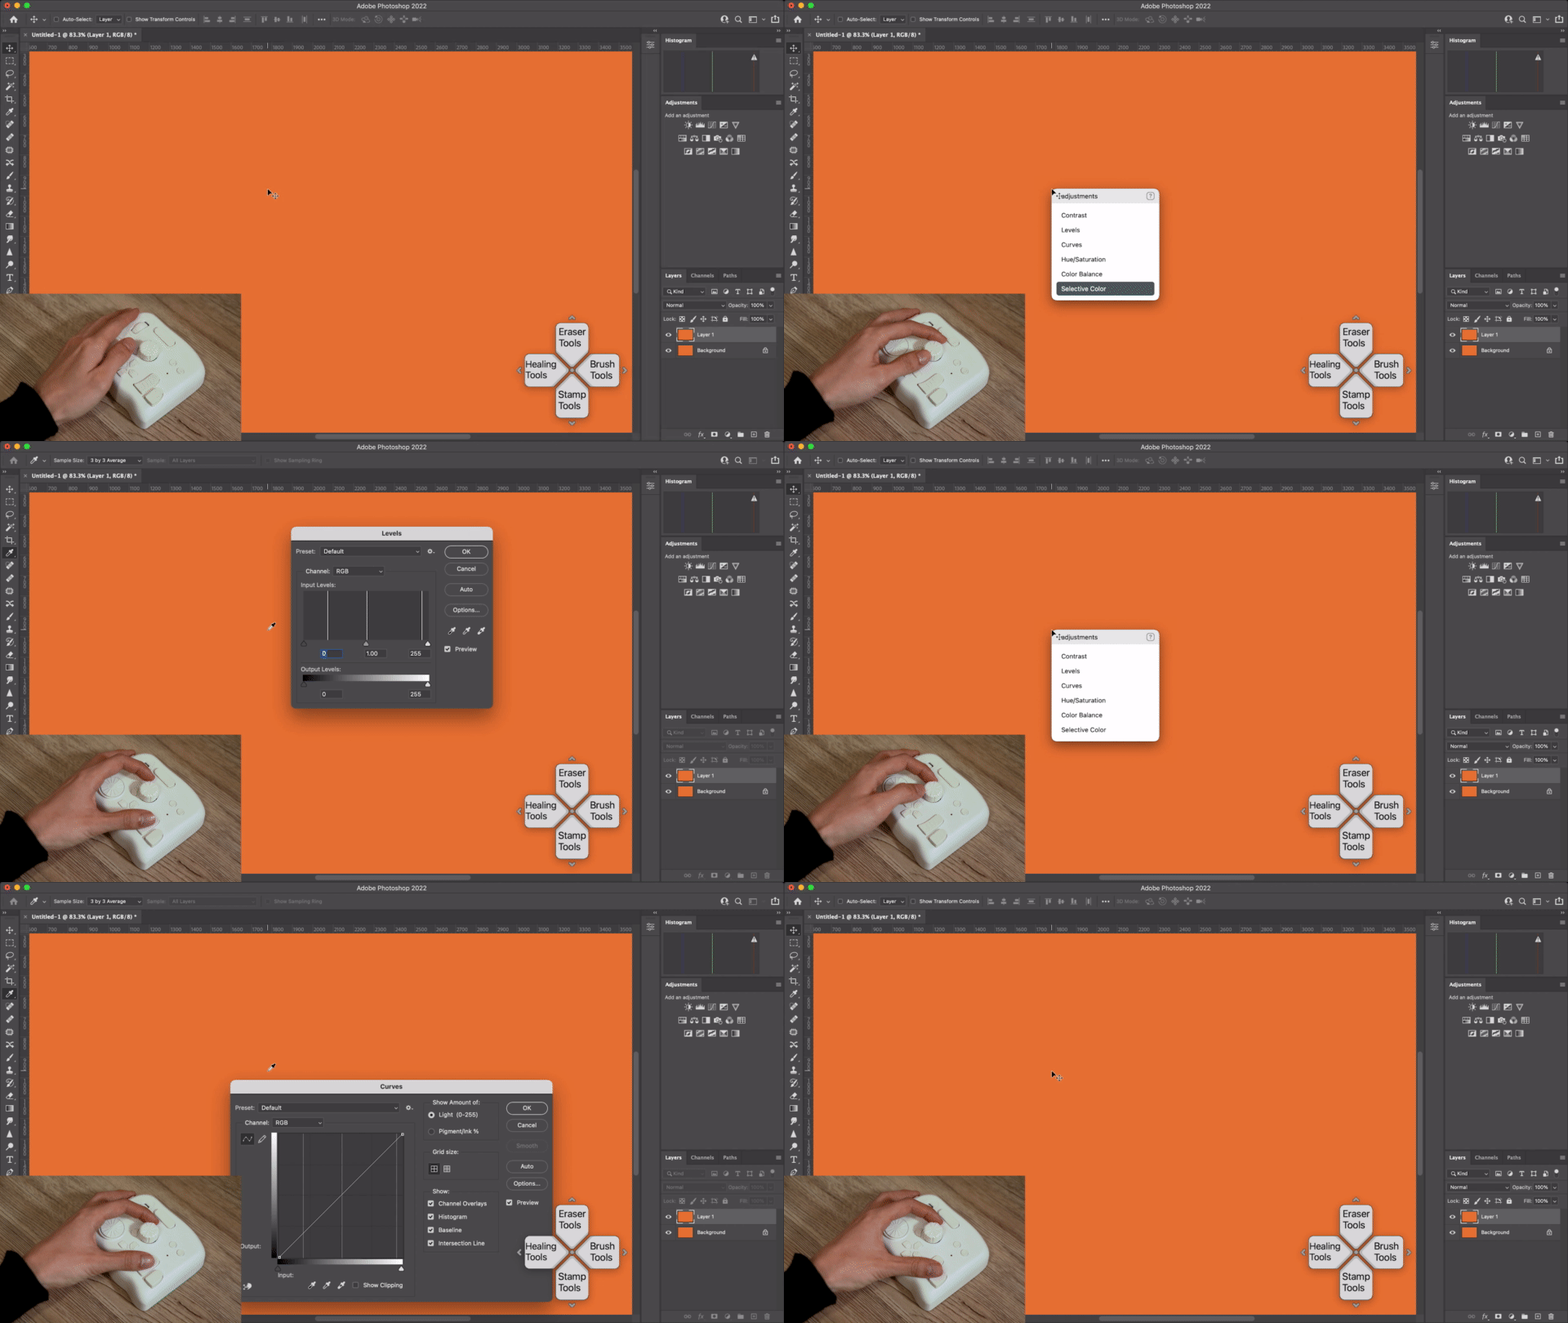
I’ve had a lot of fun mapping all kinds of tools and brushes onto the directional pad (D-pad) either alone or in combination with other buttons.
There’s a heads-up display that reminds you what you’ve mapped to what, and I found that really useful at first: I mapped a lot of things at once, so it was a really useful reminder until I memorised them all.
It also means I don’t need to look up from the cursor to look up commands, so editing was much quicker.
I’ve looked into this and the same features I liked so much in Photoshop are also available in other apps such as Adobe Illustrator, Clip Studio Paint, Paint Tool SAI, Corel Painter, Affinity Photo, Rebelle and so on.
Using the TourBox Elite in Lightroom, Capture One, Camera RAW and more
I do most of my colour grading in Capture One, but I’m captivated by the built-in features the TourBox Elite offers in Lightroom.
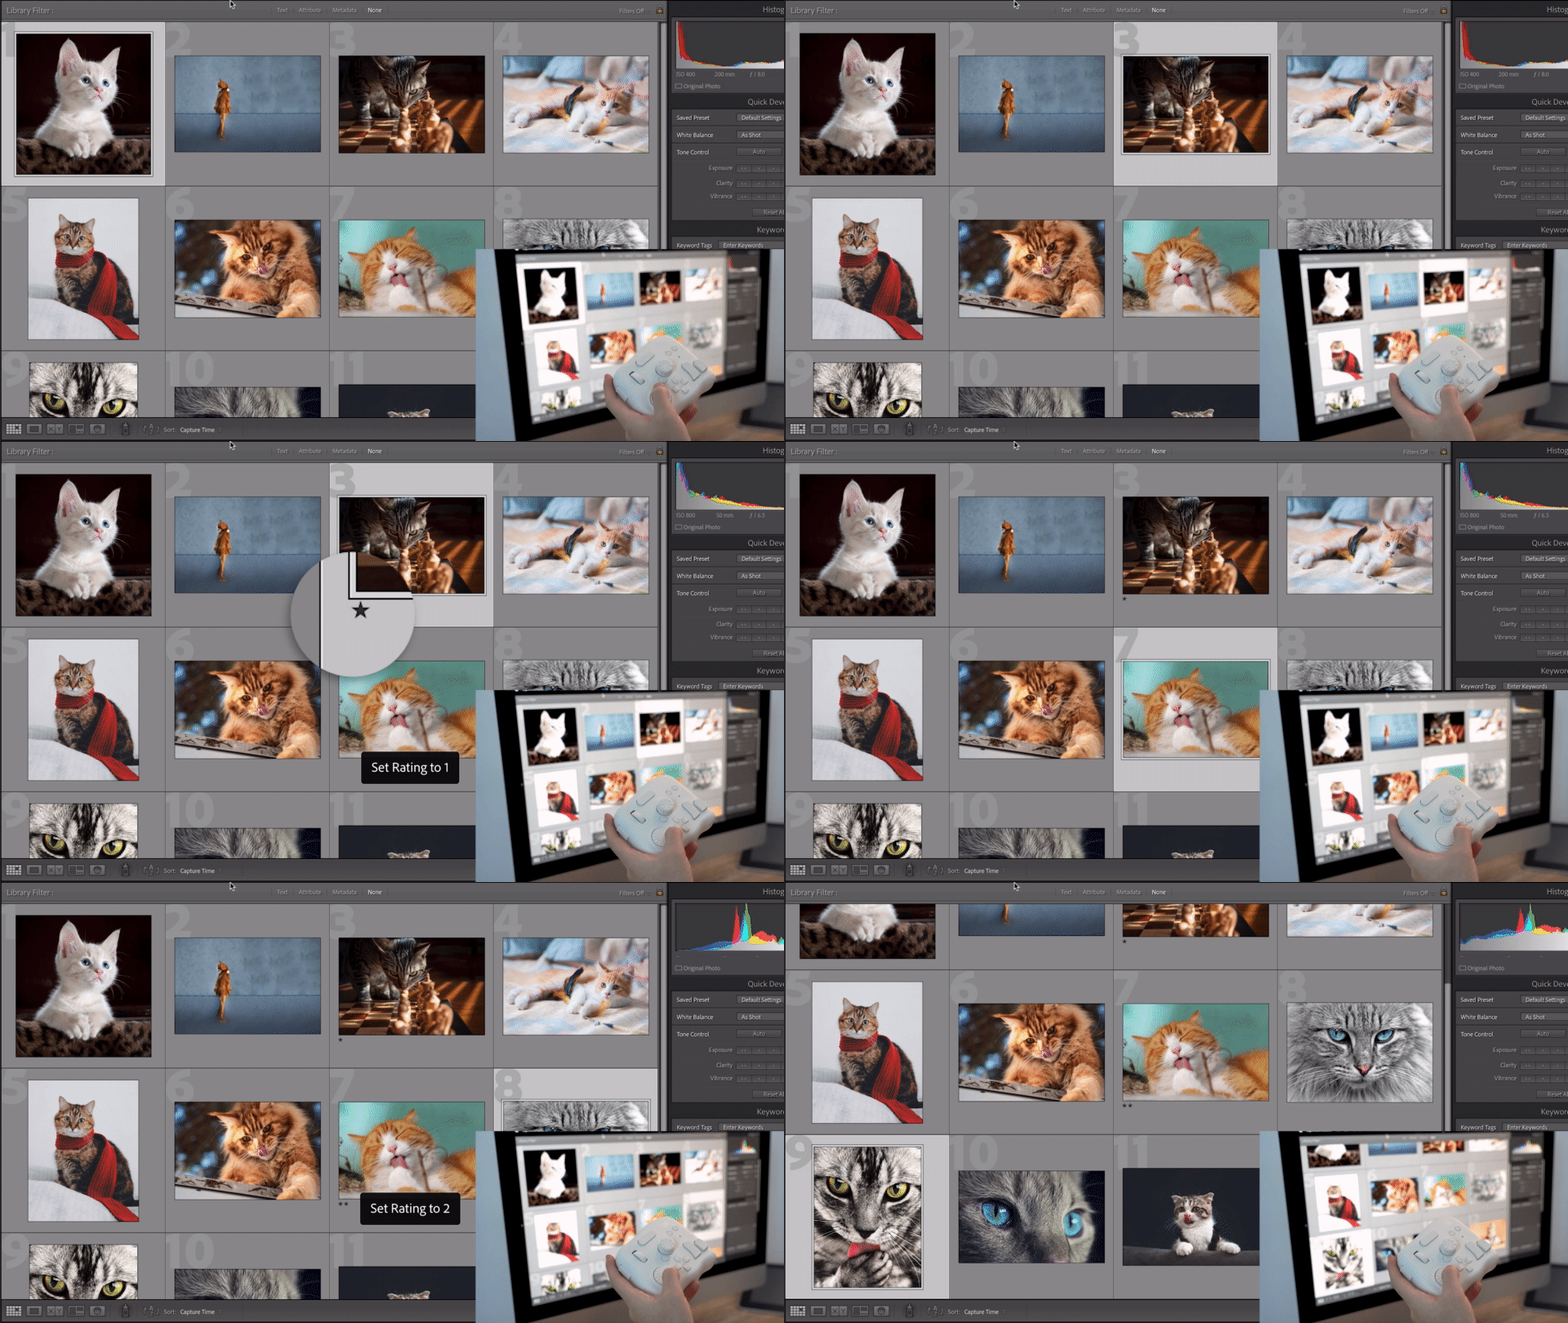
So I’m back in the Library Grid, spinning the knob to swoop through images, using the Tall button to add colour flags and scrolling the wheel for star ratings.
With features such as removing marks, undo, delete and so on mapped to the TourBox Elite buttons, culling and selecting one-handed is awe-inspiring.
I’m even more impressed in the Colour Grading panel. In here the scroll, dial and knob controls enable you to map sliders such as tone, temperature, exposure, contrast and so on to your preferred buttons and then adjust them all using the same scroll control.
For example, if I wanted to change the tint control I’d click the Side button and spin the knob to change the sliders.
That control is a big deal to me. Dragging sliders with a cursor isn’t 100% accurate: it’s all too easy to move from blue into orange if you drag too far.
By using the knob instead I have much more precise control, and I don’t need to look at the sliders. And because the reset is mapped to the Tour button, if I change my mind it’s a one-click reset.
I’ve been using the clickable scroll control on the TourBox Elite to control HSL. It’s just a matter of hitting the scroll button, toggling through the HSL and scrolling to choose the desired colour. Then I can calibrate it with the knob. I find this much more natural and much faster than using a mouse.
You can choose from three different speed modes for all linear adjustments. Here’s a test of sliders in each of those different modes.

I said above that I spend most of my colour grading time in Capture One, so I downloaded the presets for that, for Affinity Photo and for Camera RAW.
The user-created presets worked fine for me and I didn’t feel the need to do much tweaking. A big part of that is the auto switch feature, which automatically detects the program I’m in and picks the appropriate preset for me.
I didn’t find the learning curve very steep in these apps, but I did find that I was a lot more efficient. Let’s say I need three minutes to edit a picture via keyboard and mouse.
With the TourBox Elite it would be less than one minute. Think about how many pictures you process in a day and how many hours that’ll save you.
Using the TourBox Elite for video editing
Moving from a keyboard to the TourBox Elite’s rotary controls is a real game-changer for timeline scrolling. The built-in Move The Timeline Pointer gives me very precise control of the timeline position and scrolling speed.
The dial, scroll and knob controls are definitely my favourites for video. I apply them to adjust audio gain, volume and colours, and it all works much as it does in Lightroom.
Premiere Pro is very well supported with over one hundred pre-defined features for it, and I also tested the Elite with the colour grading panel in Final Cut Pro.
Macro commands for 3D artists
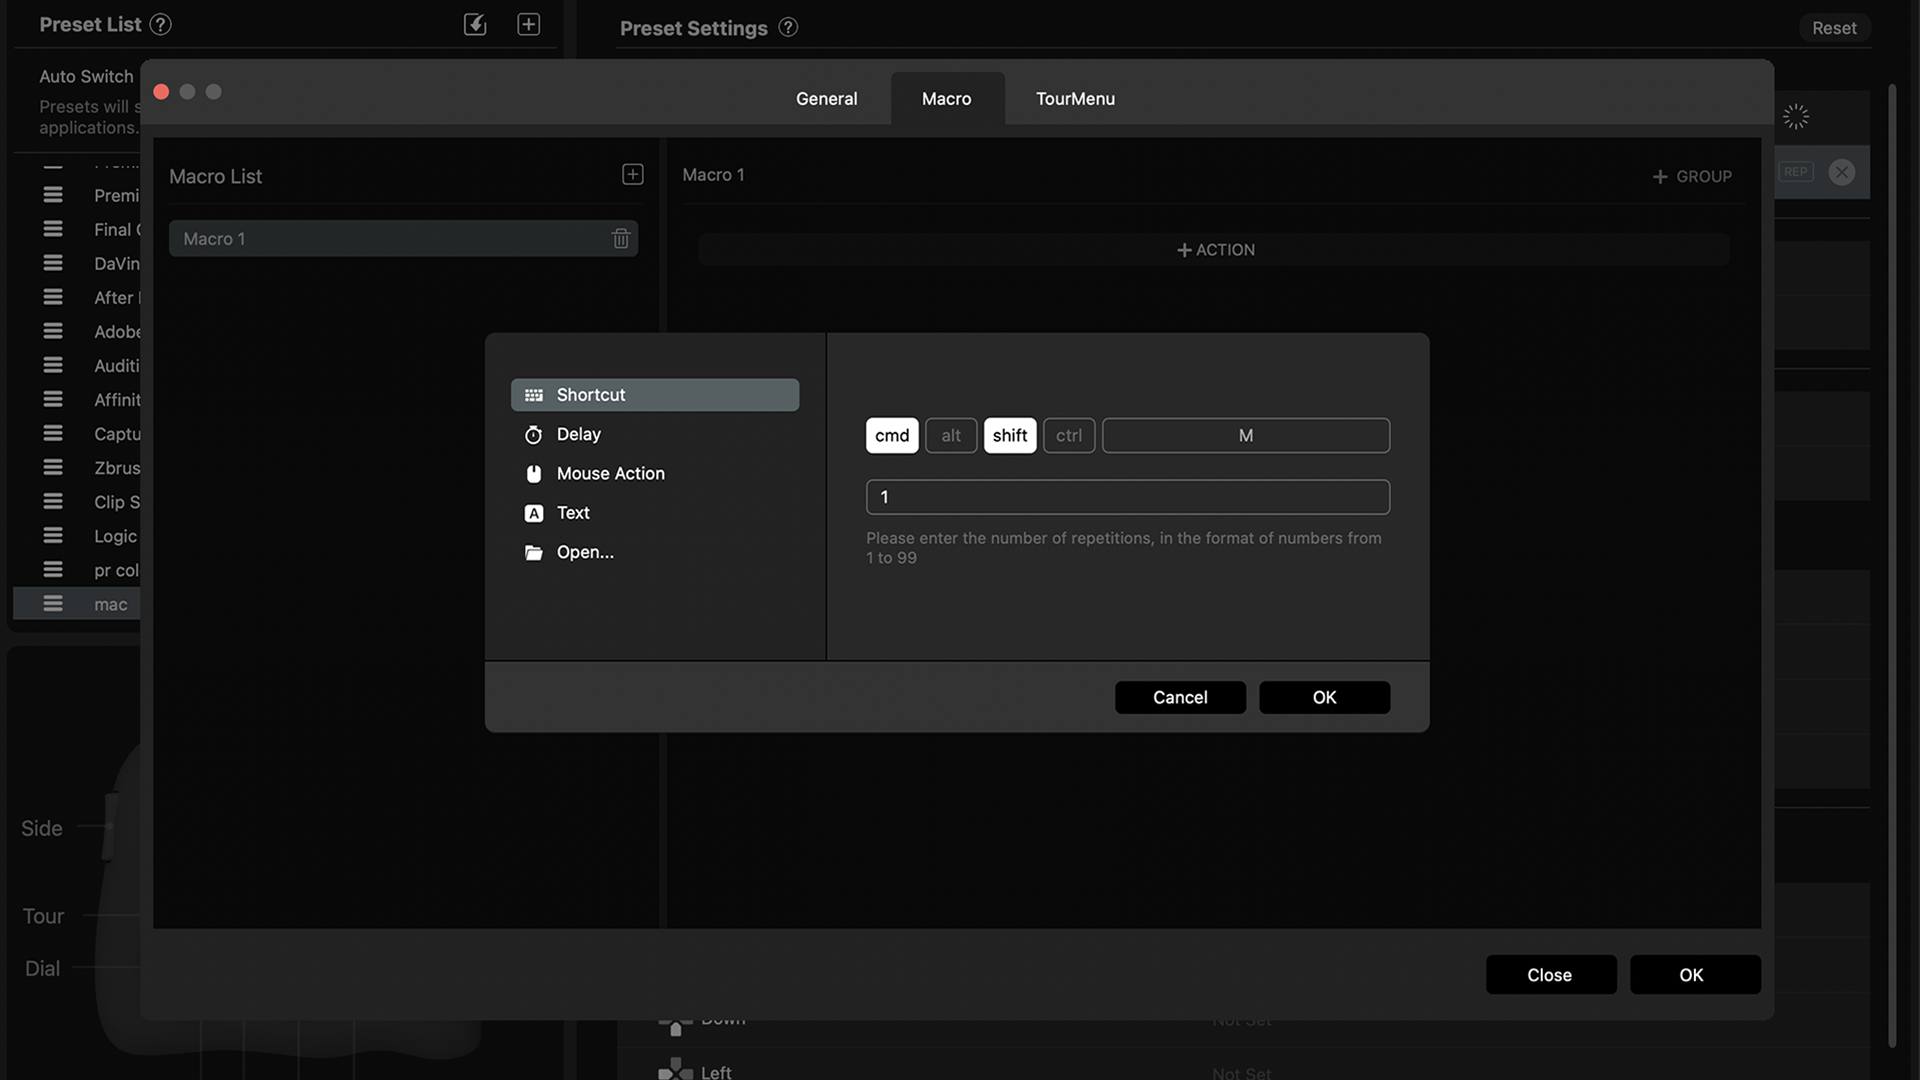
I know keyboard macros are a really big deal for people using hundreds of shortcuts in their workflow, but I’m not a big fan. But testing the TourBox Elite’s macro features in Photoshop really impressed me.
It automates all the repetitive and complex tasks in the editing workflow so you can replay them with a single click.
I know there aren’t many macro-enabled scrollers out there, so the TourBox Elite is in pretty rarified company here – and there’s a lot of power to harness, including keyboard shortcuts, mouse action, delay, text input, file and folder opening and link directing. That opens up all kinds of possibilities for streamlining complex workflows.
Haptic Touch for more feeling
Another feature in the TourBox Elite that I really like is the force feedback, which makes the knob, dial and scroll controls feel more engaging and intuitive.
I like the fact that you can configure the level of feedback for each of the three controls so it’s not a one size fits all option.
Conclusion
So as a digital artist testing the TourBoxElite, I’m really impressed – although I think I’d rather have the smoke-black translucent one than the white one I’ve been testing.
I particularly like the fact it’s Bluetooth, so I can hold it like a game controller and sit wherever I like when I’m doing colour grading so there aren’t any keyboards getting in the way.
The unit I’ve been testing is a prototype of the final product, which is just about to ship, and after a month of using it I don’t think I’d go back to my old setup.
The TourBox Elite doesn’t require me to buy a bigger desk to make room for it, and I’ve found that since I started using it my fingers and wrists aren’t hurting after long sessions any more.
It took a little while to tweak the TourBox Elite to my liking, but I think that’s been more than repaid already: I’m getting things done in 40% of the time, and it feels much more creative and intuitive when I’m using it.
The TourBox Elite is on Kickstarter, and I think you’ve got about a week left to grab an early bird ticket. And I think you should, because when you feel it in your hand I think you’ll be as enchanted as I am. Like I said up top, it’s a real game changer.
Get daily insight, inspiration and deals in your inbox
Sign up for breaking news, reviews, opinion, top tech deals, and more.