Getting exposure wrong in-camera is one of the easiest mistakes to make when taking pictures, but fixing it can be rather hit and miss.
Exposure is a complicated blend of brightness, luminance and contrast, so simply changing one of those factors won't result in a well-balanced image.
Moreover, an image that's badly exposed is starting on shaky ground – it doesn't matter how good the rest of your image is in terms of its subject, composition or sharpness – if it's too bright or too dark, people's eyes will simply skip over it and move on.
Fixing exposure can be the work of mere minutes once you know what you're looking for. The tool you need can be found in any photo editor worth its salt, from totally free software like Picasa to high-end software costing hundreds of pounds like the full edition of Photoshop.
We'll also be demonstrating how you can edit your photos effectively without using any software at all, and how to make the most accurate adjustments, whatever monitor and camera you're using.
The right photo
Choosing your shot for this one should be simple, right? Simply find an image that's too bright or too dark and go from there. Not quite.
It's true that modern photos, even JPEGs, contain a huge amount of data beyond what you see in the final image, and that finding and using that data is the secret to successful photo editing.
Get daily insight, inspiration and deals in your inbox
Sign up for breaking news, reviews, opinion, top tech deals, and more.
For instance, just because your image appears far too dark doesn't mean there aren't significant areas of detail lurking within the shadows, which can be brought to light by a judicious tweak of the exposure slider.
As always, this kind of photo editing isn't infallible. Large areas of shadow in your image might contain as much unwanted noise as they do desirable detail, so attempting to salvage a big under-exposure might produce as many problems as it solves. Likewise, badly over-exposed images might appear muddy grey once you've attempted to tone down the white highlights.
That means you should choose the image you want to work on carefully – it's not enough to see a very dark or very bright image and try to correct it, because the worse the problem is, the less likely you are to produce a successful result – even if you're using high-end software.
Choose an image that is successful in every other important way, and is only slightly too dark or too light. Consign everything else to the recycle bin, and resolve to do better next time you're behind a camera!
What you'll need

With this tutorial, we're attempting something different. Standalone desktop software is phenomenally powerful these days, and attempting to persuade a professional photographer to abandon Photoshop in favour of an online product might result in actual violence.
For everyone else though, there's some fantastic software available online. You don't need to pay for it, you don't need to download it to your computer, and because it's on the internet, you don't need to worry about upgrading it. In this case, we'll use Google-owned Picnik.
Google bought Picnik last year, and it's the default editor you see if you choose 'Edit' from photo-sharing site Flickr. It's a sensationally useful resource; simply upload a photo to it and all the normal tools are there. If you want higher-end tools, you can pay for a Picnik Premium subscription, although the tools we're using this month are available in the free version.
Another of Picnik's benefits is that you don't need to worry about uploading a high-resolution image, which can take quite some time on a standard internet connection. If your image is already uploaded to one of the many supported photo sharing or social networking sites, you can supply your details and choose from your existing online albums.
For example, if you've got a lot of photo albums on Facebook, you can access your shots directly from Picnik. Clever stuff.
Getting going
Using an online photo editor keeps life pretty simple – go to www.picnik.com and you're ready to begin.
Picnik's home page is fairly busy, but if you click on the 'Library' tab at the top of the page you'll be able to choose your shots. 'Get from computer' is what you want if your images are on your hard disk, or you can choose from one of the other options along the top row if you want to edit a shot that's already been posted online. You can enter the URL of any image on the internet – just make sure it's not protected by copyright first.
Once you've chosen your image, you'll be taken to the editing screen. This is bursting with features, although it defaults to the basic edits screen, which is what we want for fixing exposure.
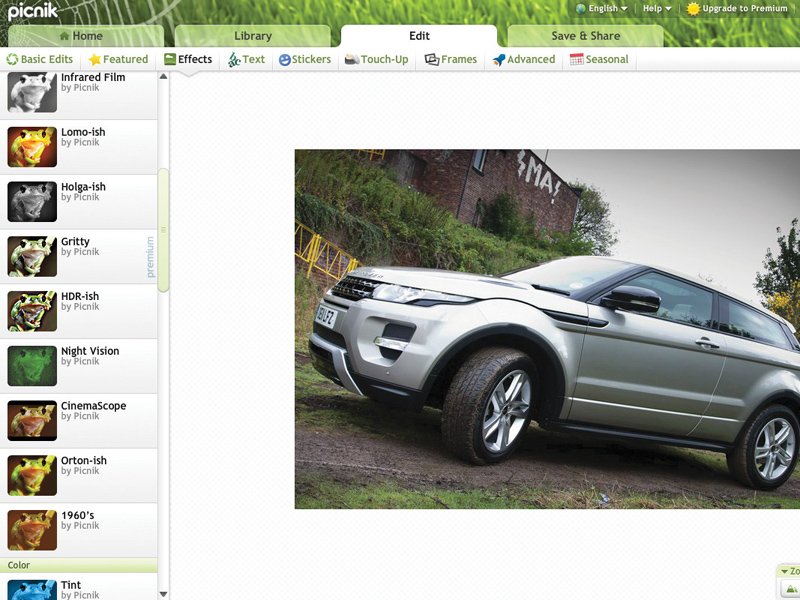
There's plenty to explore, particularly under the 'Effects' tab. Here you'll find tools for adding high-quality effects for your images in single click.
How it works
Exposure refers to the way an image is created – that is, the result of light hitting the sensor in your camera. Any exposure is the result of your camera's sensor being exposed to light for a certain amount of time; the longer the sensor is exposed, the brighter the resulting image will be. Logically, the less time the sensor is exposed, the darker your shot will be.
The problem is that, even with a decent camera making all the decisions for you, getting exposure right can be difficult. Cameras are easily fooled, and snowy scenes or pictures of very dark coloured things will fool a camera into thinking it's looking at a very bright or very dark scene, producing the wrong exposure time and a dodgy image.
Correcting exposure isn't just about adjusting the brightness of an image – it's a cocktail of contrast and luminance values, and is easy to get wrong. Even photo editors with dedicated exposure correction tools will struggle, so while exposure correction can be a very useful tool, take a look at 'In-camera editing' for more on getting things right first time.
In-camera editing
Getting your exposures right when you take your photos is important for two reasons. The first is that every time you make a post-production change to the exposure level in your image, you're removing a bit of detail. Most of the time this detail loss is controlled and unnoticeable in the final image, but sometimes this loss will result in a less sharp image.
The second reason is a simple question of time: if you come back from a holiday with hundreds of shots, the last thing you want to do is spend a day fixing them all because they're under-exposed. Even if it only takes 30 seconds to fix each shot, that's a decent amount of time wasted if you've filled a memory card.
Getting your shots right in-camera means learning how to use the light meter. All DSLRs, some high-end compact and some super-zoom cameras have one. The light meter is a scale in your viewfinder that tells you whether the camera thinks it's about to take a good exposure. A scale ranges from under-exposed to over-exposed, and a pointer moves up and down to tell you what would happen if you pushed the shutter button at that moment.
It's most useful when you're using a manual mode like aperture or shutter priority, but getting to grips with your camera's exposure compensation function will also help you nail more shots in camera, and spend less time editing later.
How to fix minor exposure mistakes online using Google Picnik
1. Connect to Facebook

In this tutorial, we'll import a shot into Picnik from Facebook. Getting started is simple – go to the 'Library' tab at www.picnik.com, and choose Facebook.
You need to authenticate your account, which means logging into Facebook, and you may prefer to click the cross next to the box that allows Picnik to post on your wall if you want to avoid potentially annoying your friends.
2. Access albums
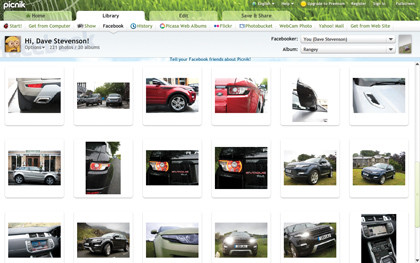
Once you're logged in, you can choose from your albums, or the public photos of any of your friends. The default view is pictures of you; click the box marked 'Album' to see all of these, organised by album.
They may take a while to load, depending on the speed of your internet connection, but once they're loaded you can start rifling through them to see the ones that need a bit of help.
3. Pick your shot
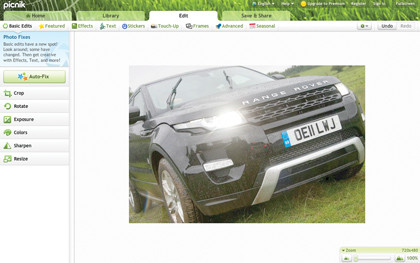
Double-clicking any thumbnail will load Picnik's editor. Here, the main subject is a dark colour, there are bright highlights from the headlamps and there's an overcast sky in the background.
These could all contribute to a camera getting things wrong if it's in Automatic mode. Crucially, the exposure isn't too far off, meaning that most basic editors will be able to correct it without losing stacks of detail.
4. Adjust brightness
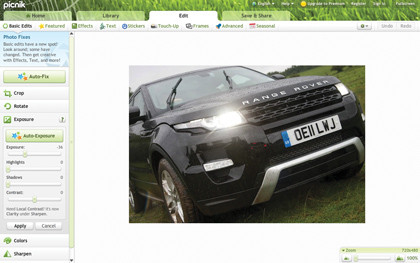
Picnik's exposure tool is found under 'Basic edits'. Click 'Exposure' to access the main tool, plus options for adjusting highlights, shadows and contrast.
For now, adjust the main slider in small increments – left will make your shot darker, right will make it brighter. The numbers on the slider don't correspond to stops, but if you move the slider beyond 50 either way, you run the risk of losing detail
5. Apply changes
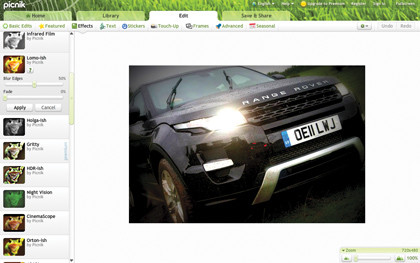
The rest of the exposure tools are fairly blunt instruments, and you need to take care to avoid creating rough gradients. Once you're happy, click 'Apply'.
This doesn't save your image just yet – it simply applies the effect you've chosen and lets you start experimenting with Picnik's other tools. These range from the realistic to the weird and wacky. Picnik is non-destructive, so don't be afraid to experiment.
6. Save and share
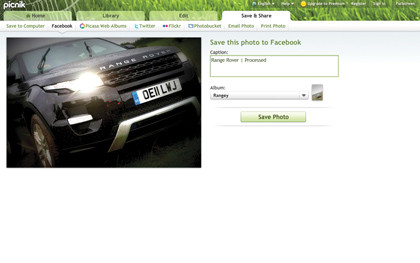
The 'Save and share' tab is your next stop. The default action is saving it back to Facebook, but there are lots of other options, including downloading the finished file to your PC as either a JPEG or a PNG, and sending the image to your Flickr account. There's also an email client built-in to Picnik, or you can opt to print straight from your web browser. Not bad for a free application.
--------------------------------------------------------------------------------------------------
First published in PC Plus Issue 316. Read PC Plus on PC, Mac and iPad
Liked this? Then check out our camera reviews at TechRadar
Sign up for TechRadar's free Week in Tech newsletter
Get the top stories of the week, plus the most popular reviews delivered straight to your inbox. Sign up at http://www.techradar.com/register
Follow TechRadar on Twitter * Find us on Facebook * Add us on Google+