As for cleaning, you'll need similar tools to those you'd use when cleaning out a desktop machine. A can of compressed air, a soft-bristled brush and a small vacuum cleaner may all come in handy. You'll use the vacuum cleaner far less than you would when cleaning a desktop machine.
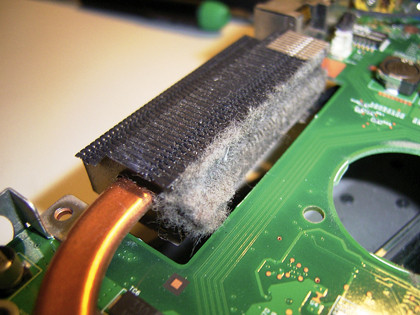
There's much less space inside a laptop for dust to waft around, so it tends to gather in wads. These are much easier to remove with a pair of tweezers. Don't be tempted to pick these bits out with your fingers, because grease transferred to electronic contacts can exacerbate your computer's hygiene issues.
Finally, you'll need some cotton buds and a little surgical spirit. Get them from a pharmaceutical discount shop.
Under the hood
With your cleaning kit at the ready, it's time to remove some real grime. Power down your laptop, unplug it from the mains and then remove the battery. We'll target specific areas that usually need to be cleaned.

Your computer's keyboard is likely to be the most contaminated part of the machine, with crumbs, dust and dandruff dropping into it all day. Now imagine what it must be like underneath.
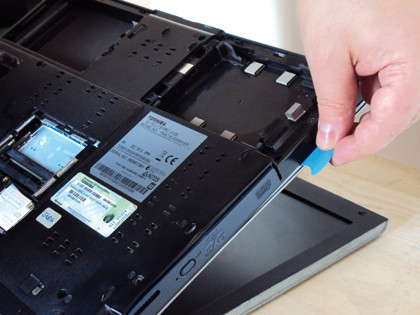
Task one is to remove the keyboard and clean underneath it. In most cases, the keyboard will be held in place by two or three screws, hidden underneath a clip-on panel that runs along the top of the upper case. Every laptop model is different though, which is where your service manual comes in.
Get daily insight, inspiration and deals in your inbox
Sign up for breaking news, reviews, opinion, top tech deals, and more.
One last tip before you proceed: ground yourself before you begin work to dissipate any static charge. Touch a radiator or the fridge, or better still, wear an anti-static wristband as you work.
In most configurations, your keyboard will fixed in place at the top end. At the bottom end there'll be some plastic lugs that slide into slots, so once you've removed the screws at the top you can usually pull the keyboard unit towards you. Don't just yank it out though - you'll damage its connector.
When it's at an angle of about 45 degrees, you should see the ribbon connector under it. Disconnect this from the mainboard.
Chances are that you're now looking at a lot of metal or plastic shielding, much of it covered in an assortment of stale crumbs, eyelashes and inexplicable tiny bits of grit. Who knows how that stuff gets in there, but your trusty vacuum cleaner can be used to get it out.
If, at this stage, you can remove the top of your case and get under the trackpad with your cleaner, even better.
Motherboard and case
Under that protective shield, in many cases, you'll find the motherboard. In some notebook builds you may be able to access it from the bottom up. Either way, there's little subtlety required in the cleaning process here.
Any gaps in the casing will attract balls of dust, and these can be extracted with your trusty tweezers. A light cleaning with the soft-bristled brush should help to remove any layering of dust on components. Make sure you sweep it out of the case.

The real targets here are the laptop's heat sink and fan, where dust tends to gather and can have the most impact on performance. If you access these from the top of the case, proceed cautiously and make sure you're keeping track of screws as you remove them.
Some laptops give you direct access to the heat sink and fans through a panel at the bottom. If that's the case, follow the tips above for dealing with access panels.
Before we proceed any further, it's important to remember that if you have to remove a heat sink that's in direct contact with the machine's CPU, you'll need to wipe the top of the chip clean and re-apply a thin layer of thermal grease before refitting it. Use cotton buds and a little surgical spirit to do this. Wipe away any old grease with a lint-free cloth.