What's new in Photoshop and Lightroom?
Even more control for the photographer
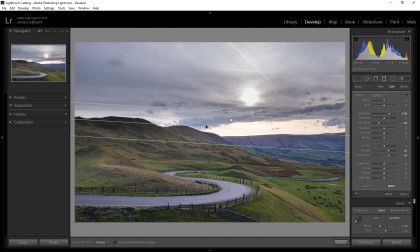
New features for more effective editing
When Adobe announces a new release of Photoshop and Lightroom, the world of photography takes a deep breath and waits in anticipation to discover what new features are on offer. When you're talking about the two leading photo editing programs it can be difficult to imagine how they might be improved, but with Photoshop CC 2015.5 (June 2016 release) and Lightroom CC (2015.4-2015.6) there are some impressive features that make a number of tasks faster, easier and more effective.
Photoshop CC 2015.5 (June 2016 release)
The most recent version of Photoshop is packed with a whole host of improvements that will make your workflow more efficient. While many of the improvements could easily go unnoticed unless you're looking for them, there's a lot going on under the hood in terms of speed. Documents are said to open faster, and Content-Aware Fill is now up to three times faster, and produces improved results. One key point to consider with this latest version of Photoshop CC is that plug-ins from earlier versions aren't migrated, which means you'll need to reinstall them again.
Lightroom CC (2015.4-2015.6)
Lightroom was first released back in 2007, and in less than 10 years has become one of the most popular image management and raw processing programs on the market. And for good reason – Adobe has incorporated powerful features aimed directly at photographers, and most importantly responds to feedback by producing and revising features photographers want and need.
Here are the key new features you need to know about in each program…
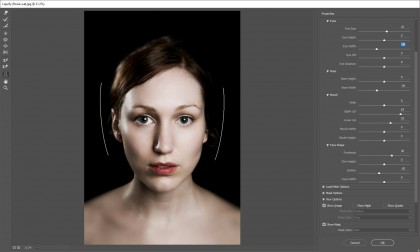
Photoshop: Face-Aware Liquify
Photoshop's Liquify filter has been around for a while now, and it's a highly effective tool for pushing, pulling, expanding and contracting different elements of subjects in images. The filter now features face-awareness, which can automatically identify individual facial features, giving you more precise control over the size and shape of the eyes, nose, mouth and face shape.
This new feature is incredibly powerful, and makes facial reshaping a fast and simple task for all photographers, regardless of Photoshop know-how. To use Face-Aware Liquify simply activate the Liquify filter as normal, and click the Face tool icon. Individual facial features can now be adjusted using the controls on the right. Plus, applying Face-Aware Liquify as a smart filter means all your adjustments will be non-destructive, so you can go back and make changes if you wish.
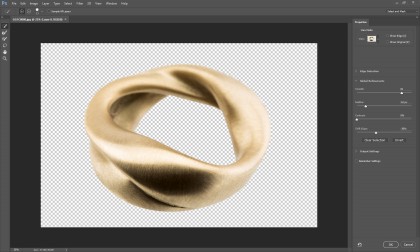
Photoshop: Select and Mask workspace
Select and Mask workspace
Say goodbye to the Refine Edge dialog, which is now replaced with the Select and Mask workspace – a similar control that provides a more refined way to fine-tune your selections. With the Select and Mask workspace you can take advantage of a wider range of controls and tools, including the Refine Edge Brush, to brush in and out parts of selections.
The Select and Mask workspace is similar enough to the Refine Edge dialog that you'll feel very much at home when using it, but the degree of control on offer is leagues ahead. The biggest advantage is that the workspace is clean and well laid out, enabling you to focus on the task in hand. You can activate the workspace once a selection has been created using the keyboard shortcut Cmd+Option+R (Mac) or Ctrl+Alt+R (Windows).
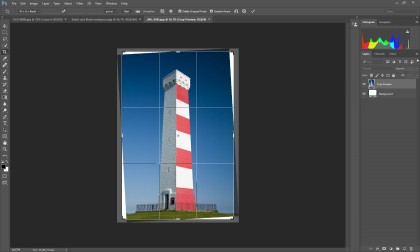
Photoshop: Content-Aware Crop
Content-Aware features have become increasingly prevalent in Photoshop over the past few years, and the latest tool to get a Content-Aware option is the Crop tool. The feature is exactly what it says on the tin: if you crop outside the boundaries of an image, Photoshop will fill the empty space automatically, based on surrounding pixels.
To envisage how this works on a practical level, consider a landscape shot with a wonky horizon. Straightening it with the Crop tool would normally mean cropping within the confines of the frame. But with Content-Aware Crop you can comfortably crop just outside the image, and Photoshop will fill in the edges; it can't work miracles, but it is very impressive. To activate the feature simply check the Content-Aware box in the options bar.
Lightroom: Guided Upright
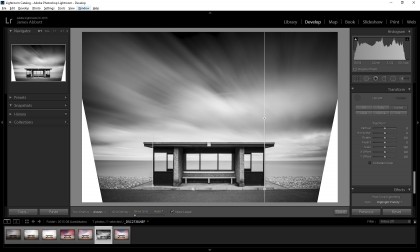
The ability to correct perspective distortion has been around for a while, but the functionality has now been moved from the Lens Corrections panel to the new Transform panel. And Guided Upright takes things further by offering the ability to tailor corrections directly to the image you're working on. By simply drawing guides – by left-clicking the mouse and dragging at the angle of the distorted line of a building, for instance – you can correct both horizontal and vertical distortion to perfection.
If you've ever used the Ruler tool in Photoshop to straighten horizons you'll have a good idea of how Guided Upright works. The reorganisation of the Transform controls makes accessing the controls much easier, as they're more visible than they were previously – and Guided Upright makes manual corrections both quicker and more effective.
Lightroom: Boundary Warp
Panoramic photography is a staple technique for landscape photographers, and Lightroom's ability to merge a number of raw files into a panoramic DNG is a powerful feature. You get all the flexibility and quality of raw, along with the powerful global and localised adjustments in Lightroom.
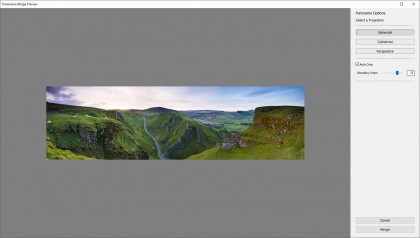
Once a number of images have been selected and Photo Merge has been initiated, the Panorama workspace opens. The new Boundary Warp slider can be set between 0-100, and intelligently warps the edges of the image to remove minor distortions and fill areas of transparency. This control can be used alone, or in conjunction with the Auto Crop feature, to help you produce the perfect panoramic image.

Lightroom: Dehaze as a local adjustment
When Adobe announced the Dehaze feature last year it quickly became the talk of the town. Haze in scenic shots has long been a problem photographers wrestled with, but this new control promised to make it a thing of the past. It's not quite as simple as moving the Dehaze slider and everything falling into place, but with a few tweaks here and there you can create natural-looking results with ease.
Dehaze is now available as a localised adjustment, which means it can be applied when using the Radial Filter, Graduated Filter and Adjustment Brush tools, enabling you to apply the effect only to the parts of images where it's required, rather than globally.
- Check out our guide to the best free photo editors
James Abbott is a professional photographer and freelance photography journalist. He contributes articles about photography, cameras and drones to a wide range of magazines and websites where he applies a wealth of experience to testing the latest photographic tech. James is also the author of ‘The Digital Darkroom: The Definitive Guide to Photo Editing’.