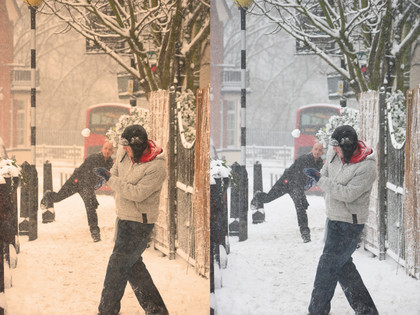
In truth, once you've got the hang of spotting incorrect white balance, fi xing it should take a few seconds per photo - it's important to trust your eyes when you're working on your images. You certainly don't need to carefully adjust your image to a precise colour temperature value.
Your eyes are only half of the equation, of course - you'll be looking at your shots on your monitor before you print them. If your display is badly calibrated, or you've never taken the time to find out whether it's set up correctly, you could accidentally make incorrect white balance corrections - or, worse, make changes to images that didn't need it in the first palace.
Before you start, it's worth comparing an image you've already printed with its onscreen version. If they're radically different it'll be worth checking your monitor before you embark on processing. Otherwise, working in RAW has its advantages, although you'll generally be fine even if your camera only shoots JPEGs.
You should consider saving a copy of every image you work on in a lossless format like TIF to preserve image quality. This doesn't apply in non-destructive editors such as Picasa or Adobe Lightroom, which don't change your original image.
How it works

Whenever you take a picture, your camera assigns it a colour temperature, which is measured in Kelvin. A candle, whose light glows orange, has a temperature of around 1,800 Kelvin. Daylight, which is generally more blue tinted, has a temperature of around 5,000 Kelvin. Other light sources - an overcast sky, an electronic flash, or fluorescent or tungsten lighting - have different colour temperatures again.
The temperature your camera assigns to an image is where the white point lies. This is the point at which something that should be white appears that way in the final shot. If the camera gets it wrong, something that's a neutral shade of white in real life will appear to be the wrong colour, looking either too blue or too orange in the shot. Everything else in the image will be too warm or too cold as well.
Get daily insight, inspiration and deals in your inbox
Sign up for breaking news, reviews, opinion, top tech deals, and more.
If you're fixing an image that contains people, the best approach is to look for skin tones and change the white balance settings until they look right - it should usually be easy to tell when you've got it right. If you don't have people to use as reference points, you can either rely on your memory of the scene, or you can identify an object or surface in your scene and tell your photo editing software to use that as the white point for the rest of the image.
When you do this, your software will change the colour temperature of the photograph so that the object you've chosen is rendered a neutral white or grey. The colour temperature of the rest of the image is changed by the same amount, which should bring everything into line and present you with an accurate, fully colour-corrected image.
How to fix white balance in JPEG images with Photoshop Elelements
1. Choose a shot

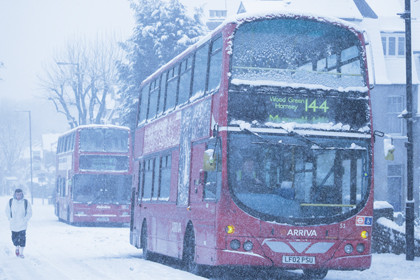
This snowy scene in north London has been captured well, at considerable risk to the photographer's frostbitten fingertips. However, the huge expanse of snow and overcast sky have conspired to produce an image that's far too cool.
The white point has been set too low, and so the snow has turned blue. Help is at hand though, and Photoshop Elements offers several ways to correct white balance.
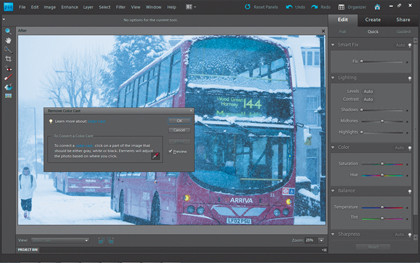
2. Try the Colour Picker

The simplest approach is to use Photoshop Elements' Colour Picker, which lets you tell the software which point to use as a neutral reference.