How to create your tilt-shift image
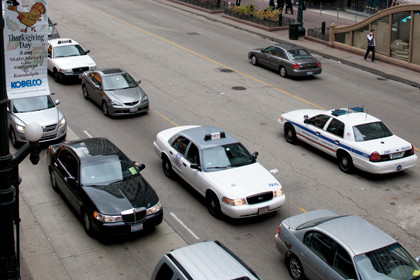
The file you choose can be virtually any format, although the two you're most likely to see are RAW and JPG files from your camera. Working on RAW file will pay dividends in terms of how much editing you're able to do, particularly when it comes to editing the colours in your image.
If you decide to work on a JPG, the first thing you should do is save your original file as a different format, such as TIF. Not only does this protect you from making an irreversible change to the original file, but using a lossless format is best for your workflow.
Otherwise, every time you tap [Ctrl]+[S] to save, you'll lose a tiny amount of detail from your file. This won't be noticeable the first few times, but after a while you'll have a file that won't print as well as you might like at high resolutions.
Otherwise, as long as you have a picture in your mind of the final image you want to produce, creating miniatures from photos doesn't need to take long at all.
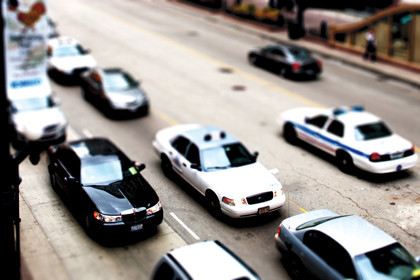
The effect of miniaturisation on an image is similar to the effect you can get from a tilt-shift lens. This type of lens allows the photographer to place the focal plane of a camera at an angle to the sensor. Traditionally, this means you can correct perspective distortion if you're looking up or down at something, but it also means you can be extremely precise about which parts of your image are in focus.
This lets tilt-shift users throw the top and bottom of their images out of focus, leaving just a sliver of detail in focus. This is much like the effect you get when you take a picture of a model building or city, fooling your viewers.
Completing the effect
Using miniaturisation effectively doesn't stop at creating a new depth of field effect, though. You have to think in terms of how a model is constructed and what it might be made of. Using realistic colours will ruin the illusion, so while it might be best practice to create a true-to-life image, this is one area in which you'll want strongly saturated colours to help maintain the illusion.
Get daily insight, inspiration and deals in your inbox
Sign up for breaking news, reviews, opinion, top tech deals, and more.
Create a miniature photo in GIMP
1. Pick the right shot
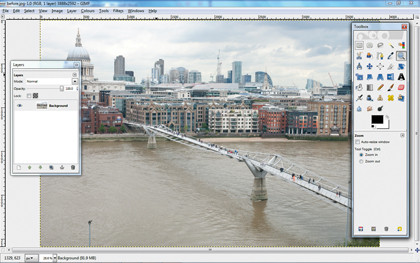
A bright, panoramic image like this is the perfect candidate for the miniaturisation treatment. In GIMP, the process revolves around the Quick Mask tool - a speedy way of creating a selection area that follows a particular shape or pattern.
In this case we'll create a selection area that fades in and out, then blur the rest of the image.
2. Create a Quick Mask
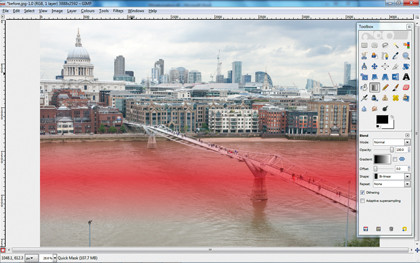
Go to 'Select', then 'Toggle Quick Mask', or press [Shift]+[Q]. The whole image will turn red - this is the area that will be affected by your next change.
Choose the Gradient Fill tool (L) and, under 'Shape', select 'Bi-linear'. Click and drag the mouse down across the area of the image you want to be in focus.
3. Gaussian blur
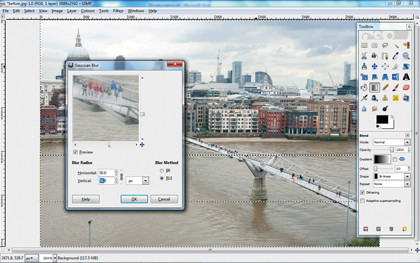
Press [Shift]+[Q] to exit Quick Mask mode - you'll see lines of marching ants denoting the selected areas. To simulate depth of field, click 'Filters', then choose 'Blur | Gaussian blur'.
A bit of experimentation will help - start with the blur radius set to around 50, and don't be afraid to tap [Ctrl]+[Z] to undo your work and try again if need be.
4. Adjust curves
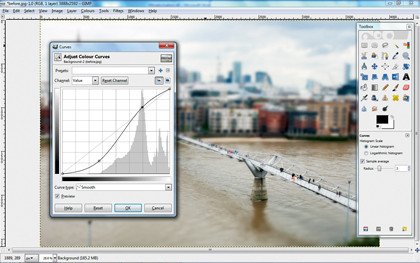
Without saturated, fake-looking colours your image won't quite come together. Go to the menu and choose' Colours | Curves'. In the resulting dialog box, click on the straight diagonal line and drag it into an S-shape.
For once, subtlety takes a back seat to effectiveness - don't stop until you've got a striking effect.
5. Fine-tune levels
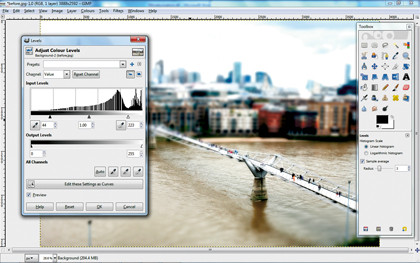
Choose 'Colours | Levels'. Choose the chart named 'Input levels' and drag the two pointers under the chart towards each other. The further in you drag the left-hand pointer the darker your image will be, and vice versa with the far right slider. You want punchy colours, so being heavy handed with the left-hand slider is a good thing.
6. Finish and save
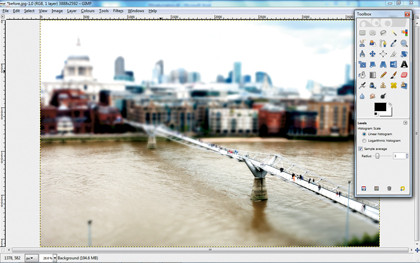
Hit 'OK' in the 'Levels' box and your changes will be applied to the image. Assuming you're happy with the result, press [Shift]+[Ctrl]+[S] to output your shot as a finished file. This isn't a one-size-fits-all process: some of your image will look better with more subtle handling, or with wider or narrower blurred areas.