Upgrading and wiping a Google Nexus 7 or any Android device can be a scary process, especially if you've never done it before. If you're selling a device, passing it on, or picking up an old Android tablet, you want to be sure it's as good as new.
At the very least you'll want to run a factory reset, but better than a reset is ensuring that you're running the latest build of Android too.
The benefit of owning a Nexus model is that it gets the latest Android release first. Beyond just an Android update, options to unlock your Google Nexus provide greater flexibility and features not supported by standard devices.
Flashing the original Google Android build completely resets your Nexus back to its factory state. Beyond selling, for your own use Android isn't immune to being overloaded and occasionally you might just want to wipe the lot and start from scratch.
A complete clear
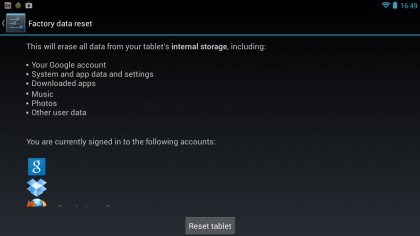
Before we go any further, some of you might be thinking, "What about a factory reset?" It's a good thought - and if you do want to reset your tablet, that should be your first step.

Select Settings > Backup & reset > Factory data reset. Boom! You've reset your device to the factory default. If, for any one of many reasons, you want to flash an official Google Nexus firmware, the company makes a full range of different versions freely available for you to download. This enables you to reset the device to its shop-bought condition or refresh it to the latest build. The question is how?
The official route is to use a command called 'fastboot' that's part of the Android SDK. We're going to recommend you download and install Google Nexus 7 Toolkit created by the clever ladies and gents over at XDA Developers.
Get daily insight, inspiration and deals in your inbox
Sign up for breaking news, reviews, opinion, top tech deals, and more.
Androids assemble!
There are a few things you need to know how to do before continuing. The first is how to discover exactly which build of Google Nexus you have.
Select Settings > About and make a note of the Build number. The original WiFi release was JZ054K, the latest 4.2.2 is JDQ39 and the 3G version is also JDQ39, but it uses a separate firmware release to support the 3G radio.
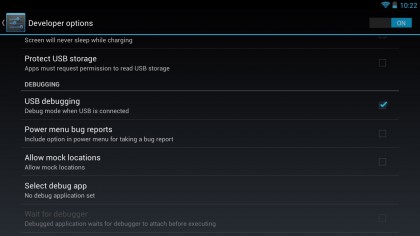
While in the About section, you can also put your Google Nexus into Developer mode. This enables external software to do all sorts of unspeakable things to your Nexus.
From Android 4.2 onward, under the About section, you need to tap the Build number seven times. This opens up the hidden Developer options settings menu.
Go back to Settings and select this. Make sure Developer options are switched on at the top and then activate the USB debugging mode.

Finally you need to switch your Nexus 7 into Fastboot mode. This is its bootloader from which you can do recovery and flash procedures.
Power down your device, and once off, press and hold the power button and the volume up and down buttons. After a second or two the Fastboot menu appears.
Don't select anything, but plug the device into your PC using a USB cable. If you've never done this type of thing before, you may have to wait for the debugging drivers to install. If there's a driver install problem, use the Nexus Toolkit to install this using option one.
By default, Android devices are set in a locked state. This protects their bootloader and stops malicious programs managing to do anything, well, malicious. To perform a flash it needs to be unlocked.
Run the Nexus Toolkit and it'll ask you what version of Android you have. Only people who have donated can check for updates - don't worry if you're not offered exactly the right release, just select the nearest version. As long as it's within a point-build it'll be fine.