Best Linux apps for managing your media
Organise and edit your music, movies and photos
The most common media file format can be the one with the most problems
Moving music files around, copying them to players and organising a collection can become a full-time job if you like music. Fortunately, things have got a lot better for music lovers recently, thanks to the widespread use of tagging and metadata.
Information such as album, track and artist names is embedded in the files, which can then be read and sorted automatically by your music software or MP3 player. Importing your collection into an application such as Rhythmbox or Amarok can take a long time, because they build a database using all the parameters to create a table you can browse and choose your music from.
Importing files
It's important that tags for each file are correct when you import your music. If you're importing your CD collection, for example, use a tool that detects the title and tracklist, and embed this information in each file it creates. Many tools can do this, including the excellent Sound Juicer. It's easy to use and can be installed from most distro repositories.
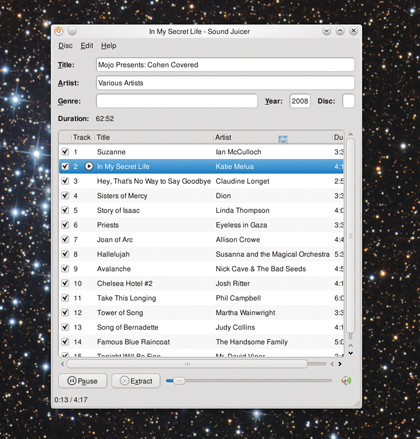
With the app running, insert an audio CD. Sound Juicer will detect it, calculate the track times and check these against MusicBrainz's database. Unless your music is incredibly obscure, or self-penned, MusicBrainz will return the title, artist and track names. Click Extract to start converting the CD to encoded files on your hard drive.
By default, these will be encoded into Ogg Vorbis format, but you can change this in the Preferences.
Get daily insight, inspiration and deals in your inbox
Sign up for breaking news, reviews, opinion, top tech deals, and more.
If you've got a large collection, metadata can become inconsistent. You may find an artist's name is sometimes spelt differently. Media apps such as Rhythmbox will think these are different artists, as will many portable MP3 players, which can make finding the track you want harder.
One solution is to use an app such as Rhythmbox to edit these inconsistencies out of your collection. The amount of effort involved depends on the volume of music, but it's a useful quick fix for a single album containing incorrect details.
A better solution is an application called Picard. It's the official MusicBrainz tagger. Get it from http://musicbrainz.org, or Ubuntu's package repository.
To use Picard, click the Add Folder icon and navigate to your music. Picard will add every music file it finds to a to-do list on the left of the window. Click the Cluster icon in the toolbar to group disparate music files into collections of albums, according to the data in each file.
Each cluster, or album, will be listed in its own folder in the left panel of Picard, while those that haven't been detected will be listed in Unmatched Files. Some tracks, such as those in a Greatest Hits collection, may be wrongly clustered. Drag these into a more accurate folder.
Now select each folder or cluster and click Look Up. This will check the data within each file and folder against the MusicBrainz database, and when accurately detected, move the cluster to the right-hand panel.
When you open one of these albums within the right panel, you should see that each track is coloured green, orange or red. This represents the confidence Picard has in whether the track has been correctly identified. If tracks are orange or red, you may need to drag them manually, edit the metadata yourself, or use the Lookup button to check local data against the MusicBrainz database.
Identity sleuthing
Files in the Unmatched folder contain too little metadata for Picard to guess their identity. But it has another trick up its sleeve. Select these files and click Scan. This will create an audio fingerprint from the files, and check this against those held for the files online. It's slower than using tags, but it means Picard can retrieve information for even the most faceless and randomly named files.
These won't have a colour confidence tag when they're moved to the right panel, but will have a pair of quavers icon. When you feel your collection's been correctly detected and categorised, select everything in the right-hand panel and click Save.
Of course, you don't need a collection of audio files to keep your ears entertained. There's a whole world of internet podcasts and radio, and both the big Linux apps for listening to music support these streams.
Unfortunately, neither provides integrated radio browsing without modification. This means you need to find a URL for an internet radio station before passing this information to your music player.
Internet radio
Rhythmbox and Amarok prefer the URLs to be formatted as PLS playlist files, which is what most online radio stations use. A good place to start is www.shoutcast.com, which lists nearly 40,000 free stations grouped by popularity and genre.
One of the best features of the online interface is that you can search for a song you like to find a station currently playing it – a good indication you'll like that radio stream. Earlier this year, the Shoutcast website moved to a new format, making it easier to play radio embedded in a web browser.
Sadly, it also lost the direct link to the PLS file. But it's still there. When you find the radio station you want, hover your mouse over the large Play button, right-click, and copy the URL it links to. Now switch to your music player.
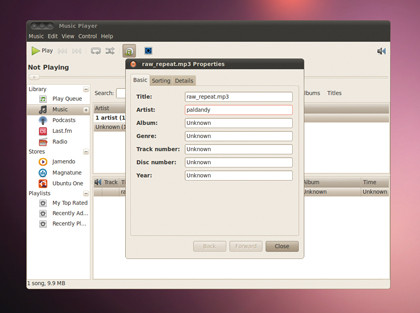
Rhythmbox users need to click the Music menu followed by New Internet Radio Station. Amarok users should click Playlist > Add Stream. In the windows that appear, paste the URL from your browser. The resource will be added to the application's main window – click Play to listen to it.
If you're using the latest version of Amarok and a station that embeds song information in the stream, you'll even see lyrics for each song as it starts playing.
Podcasts
The difference between a podcast and an internet radio station is that you subscribe to a podcast, and each time a new version is released, your music player will download the latest show.
Most podcasts provide an RSS URL for your player to subscribe to. Your chosen podcast should make this URL obvious from its website. For the TuxRadar podcast, the links from the Subscribe Today section point to RSS files for the MP3 or Ogg Vorbis version of the show. Copy these by right-clicking and selecting Copy.
To add the URL to Amarok, choose Home in the left panel to see the Podcasts source, and click this. Now click the Add Podcast button and paste the URL into this. Amarok will detect all the available podcasts in the stream, any of which can be played by clicking them. When a new podcast is released, it'll be added to the list automatically.
Rhythmbox users need to click Music > New Podcast Feed.
Finally, if you like to have album art in your music library, the best tool we've found for grabbing it is the Cover Manager within Amarok. Opened from the Tools menu, it'll pop up a window that displays a thumbnail for every album within your collection. Click Fetch Missing to fill in the gaps.
Step by step: Tagging files with Picard
1. Import your music
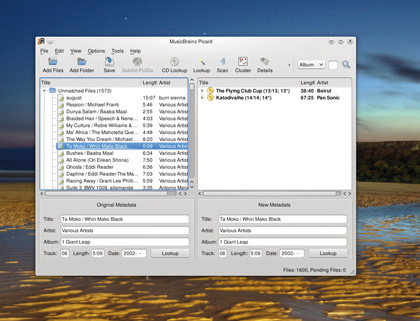
With Picard running, point it at the folder containing your music collection. It will quickly scan the current status of tags.
2. Cluster
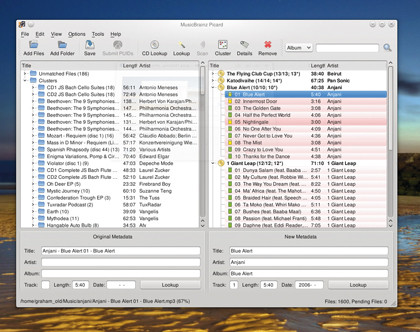
Select all your music on the left and click Cluster. This splits your music into albums. Problem files will be highlighted red or orange.
3. Fix problems
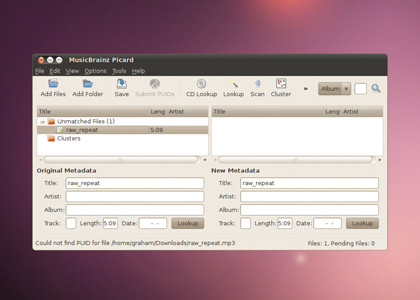
Any files not detected by metadata can be fixed manually, or by trying the Scan function. Remember to click Save to write the new data.