Get the Microsoft Office Ribbon exactly how you want it
Use Office quicker and smarter
The Ribbon in Office 2007 and 2010 is designed to make commands more accessible by making them more visible.
It works admirably, but it's likely you find that most of your frequently used options are scattered across the various tabs, which can prove very frustrating if you find yourself constantly switching between them.
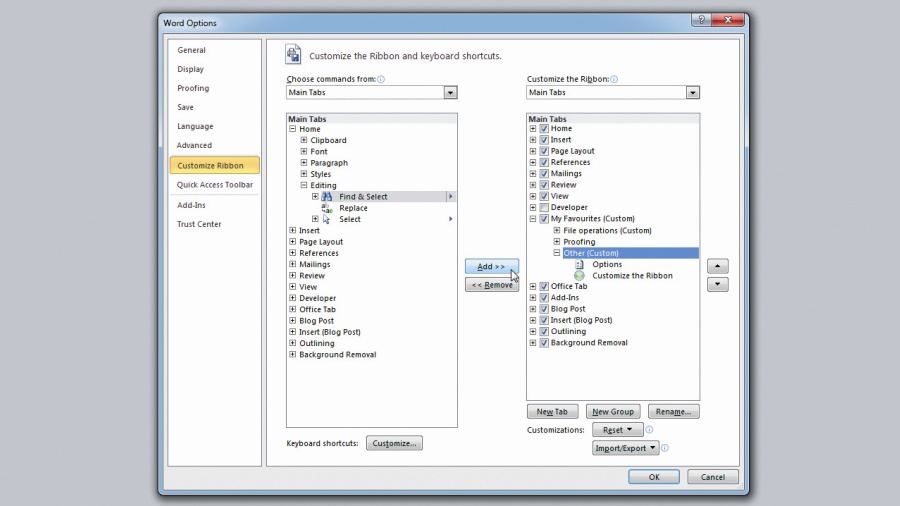
Thankfully, there's a quick and easy solution to this conundrum: Microsoft Office 2010 enables you to create your own customised Ribbon tab in each individual application, such as Word or Excel. These can be populated with all your favourite Office commands, including those not found elsewhere on the Ribbon.
In addition to creating your own Ribbon tab, we'll show you how to back up your customisations and even export them onto another computer running Office 2010.
1. Access Ribbon options
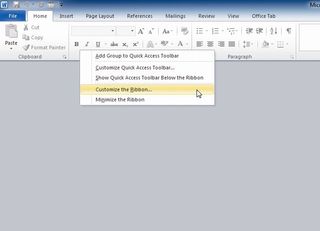
Open your chosen Microsoft Office 2010 application – in this tutorial we're using Word, but you can customise the ribbon in Excel, Access, Publisher and other Office programs that use the ribbon too.
Start by right-clicking anywhere on the ribbon to reveal a pop-up menu. Select 'Customize the Ribbon…' to open the Options dialog box at the Customize Ribbon section.
2. Create new Ribbon tab
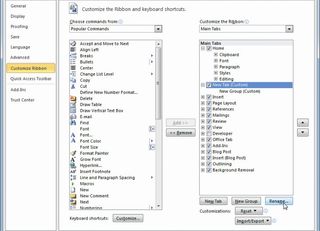
Click the 'New Tab' button and you'll see a new tab – handily titled New Tab (Custom) – appear in the Main Tabs list in the right-hand pane of the Customize Ribbon dialog box.
Get daily insight, inspiration and deals in your inbox
Sign up for breaking news, reviews, opinion, top tech deals, and more.
Make sure New Tab (Custom) is highlighted – if it's not, click on it once to select it – and then click the 'Rename…' button to change its name to something more descriptive.
3. Rename and reorder
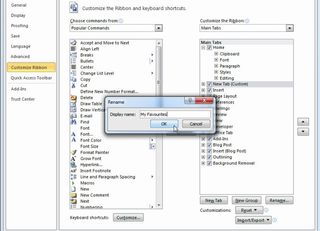
Type a new name for your customised tab – something easily identifiable such as your own name or My Favourites, which we've used, then click 'OK'.
Use the up and down arrow buttons on the right of the screen to change the tab's position in the Ribbon – move it up the list to make it appear further to the left on the Ribbon.
4. Set up groups
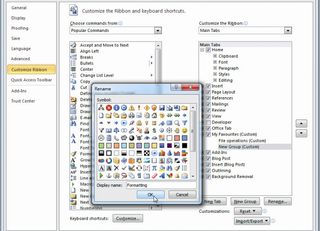
Next, set up the groups that you wish to organise your various commands into. One is created by default, named 'New Group (Custom)'.
Start by selecting this and clicking 'Rename'. Give it a suitable name – ignore the option for creating an icon – and click 'OK'. Add more groups by clicking the 'New Group' button.
5. Locate commands
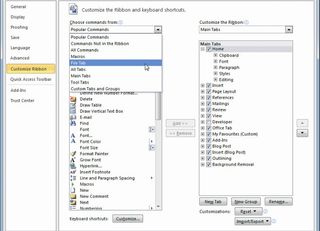
By default, 'Choose commands from list' on the left contains the most popular commands in your chosen Office app.
Click the drop-down menu to pick a different set – you can filter according to other Ribbon tabs, choose all commands or show those not available on other tabs.
6. Select and add commands
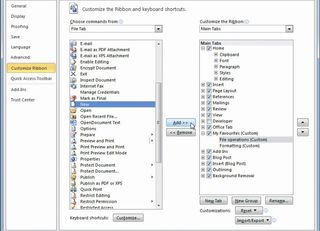
Scroll through the list looking for commands you'd like to add to your customised Ribbon tab. Click on entries with a '+' sign to expand their contents.
With your chosen command selected, click on the tab group you wish the command to reside under, then click 'Add >>' to add it.
7. Organise commands and tab groups
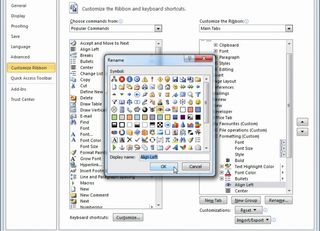
Entries can be removed from groups by selecting them and clicking '
Individual commands can be renamed and assigned another icon to the default – click 'Rename' to do so.
8. Test your new Ribbon tab
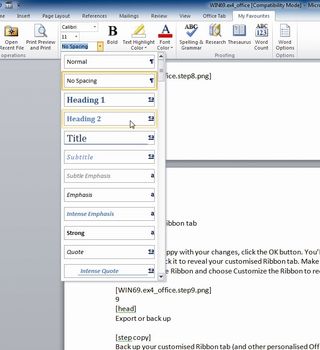
When you've finished making changes, click the 'OK' button. You'll see your tab heading appear on the Ribbon – click it to reveal your customised Ribbon tab.
If you're happy with how it looks then continue to the next step. If you want to make further changes to the tab, you can do so by right-clicking anywhere on the Ribbon and choosing 'Customize the Ribbon' to reopen the Customize dialog box.
9. Export or back up
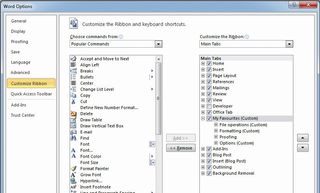
Back up your customised Ribbon tab (and other personalised Office settings) by clicking the 'Import/Export' button and choosing 'Export all customizations'.
Save the file somewhere safe, such as your backup drive. Restore your settings by clicking 'Import/Export' and choosing 'Import customization file'.
10. Your favourite commands, at your fingertips
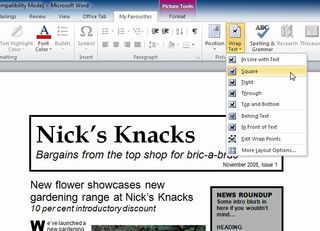
Congratulations – you've just placed all of your favourite Microsoft Office commands on a single, easily accessible Ribbon tab.
Now you can quickly and easily access all your most commonly used Office tools and shortcuts without having to switch tabs, speeding up your workflow and making you more productive as a result.
