How to make a movie trailer with iMovie 11
Build excitement about a forthcoming home-movie
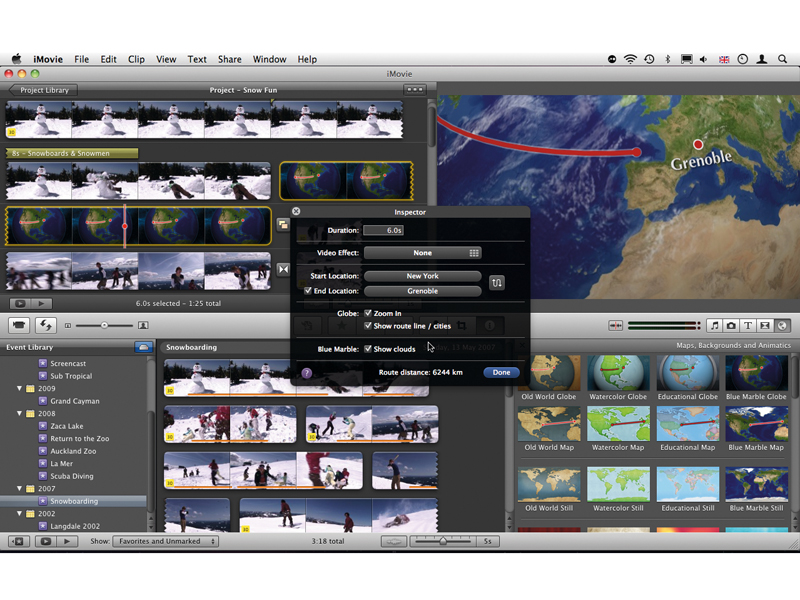
Making a movie is hard enough, but designing a trailer for it and condensing the essence of your story into a minute and a half without revealing too much or cramming it with just your best parts is even more difficult. At least it would be, if you didn't have iMovie '11.
One of the most advertised features of this new version of Apple's video-editing program is its ability to do most of the work when you've decided to design a trailer. All you have to do is supply the shots it requires and the results will look impressive. That's the theory, anyway.
In reality, things are a little more complicated. Apple's engineers have done a great job of explaining with images which type of shots are required. They can't go and do the job of choosing the right one for you, but at least they can help narrow down your clip search.
Coupled with the Movie Trailers feature is another extremely useful new tool added to iMovie's arsenal: the ability to identify people within your footage and determine which type of shot you were recording for each clip.
This isn't like Faces in iPhoto: it won't be able to discern whether you've shot Jane or Jack, but it will be able to tell you if you've got one or more people in the shot. Once that information has been determined by iMovie, you'll find making a trailer a much easier and rewarding experience.
We'll be using this tutorial to guide you through the initial steps of creating a project using one of the new Movie Trailer themes. This is a big subject and we can't cover it all in just eight steps, but we will be able to get you started, so you can enjoy this new feature. We'll cover other parts of this process in detail in future issues. For now, let's see what iMovie '11 has to offer off the bat.
How to get started making a trailer in iMovie '11
Get daily insight, inspiration and deals in your inbox
Sign up for breaking news, reviews, opinion, top tech deals, and more.
01. Finding people
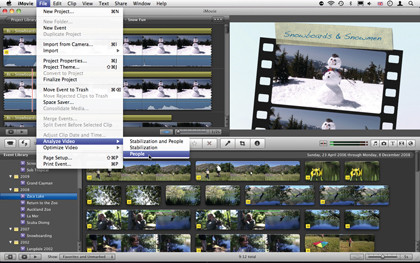
Let's start by analysing your clips. You can do this with one, some, or all your Events, but this can be very time-consuming.
To select one, click on it; for two, Command-click on another. For all of them, go to Edit > Select All Events. Then, go to File > Analyse Video > People.
02. Initialising keywords
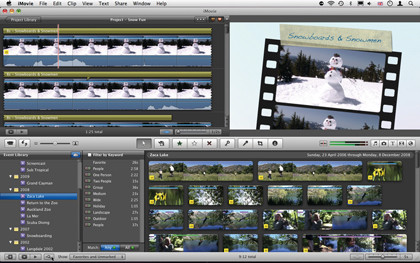
You must reveal some concealed features to help you in the forthcoming steps.
Go to the Preferences window (hit Command+,) and tick Show Advanced Tools. Next, reveal the Keyword pane by clicking on the magnifying glass icon, bottom-left of the interface.
03. Previewing themes
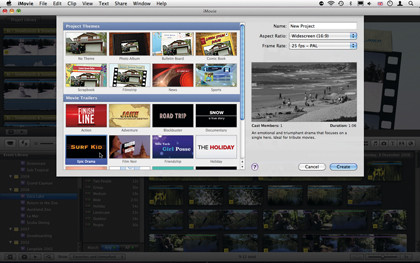
Go to File > New Project. At the bottom of that drop-down sheet are the 15 new trailers you can work with.
To help you decide, click on one and watch a trailer based on your selection in the preview pane to the right. The music you hear will be the same as the one used for yours.
04. Initial settings
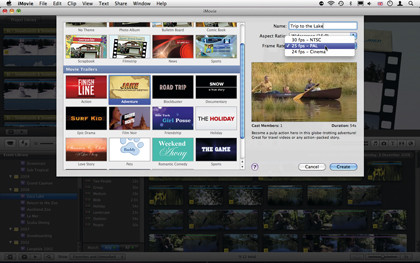
Once you've chosen, name your project (in the field top-right of the drop-down sheet), select your aspect ratio (you can choose either standard or high-definition) and your frame rate (which will most likely be PAL at 25 frames per second for us Europeans). Then click Create.
05. The Outline
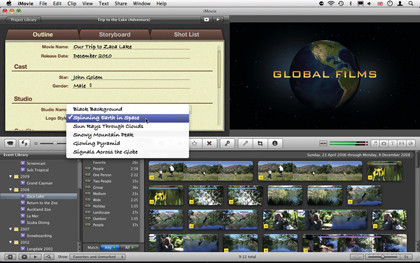
The regular project pane will be replaced with an outline of your story. Mouse over each editable field to see a preview of how it'll get used, top-right of the interface.
Customise any text to see the changes. Once you're done, click Storyboard to start building your trailer.
06. Focused selection
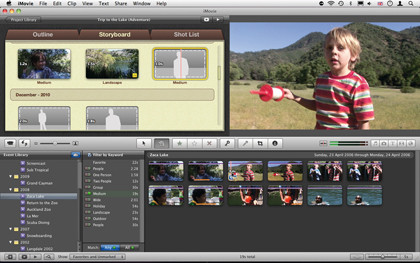
The trailer will be deconstructed into a series of images representing the type of shot that is needed at a specific time. Click on one needing one or more people in it. The Keyframe pane will light up the request and the Event pane will display shots matching that criteria.
07. Next image
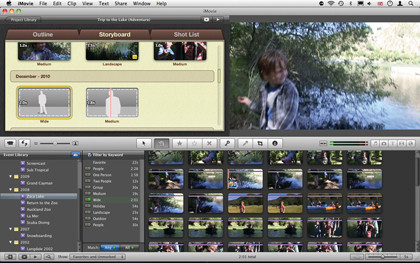
The image you selected will be replaced by the clip you chose and the next image will be automatically highlighted. This will change what is displayed in the Event pane so you can focus on finding the shots you want from a reduced selection, speeding up the process.
08. Fine-tuning
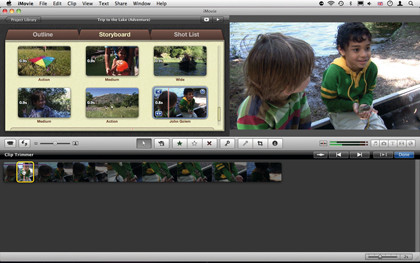
If your selection wasn't good enough, mouse over the clip in your Project and click on the icon, lower left of the thumbnail. This brings up the Clip Trimmer to help you choose another part of the same clip. To remove the clip, click the icon top-right of the thumbnail.
Steve has been writing about technology since 2003. Starting with Digital Creative Arts, he's since added his tech expertise at titles such as iCreate, MacFormat, MacWorld, MacLife, and TechRadar. His focus is on the creative arts, like website builders, image manipulation, and filmmaking software, but he hasn’t shied away from more business-oriented software either. He uses many of the apps he writes about in his personal and professional life. Steve loves how computers have enabled everyone to delve into creative possibilities, and is always delighted to share his knowledge, expertise, and experience with readers.
