Type the command format fs=ntfs to finalise the filesystem on your USB drive so that it can be read by Windows when it boots. This process can take a few seconds to complete, and you'll be returned to the prompt when it's done.
Now type ASSIGN and EXIT to complete the process. When the USB stick is prepared, if you burned your disc using the built-in tool, insert it into the drive and explore the contents when prompted.
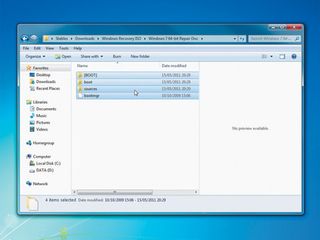
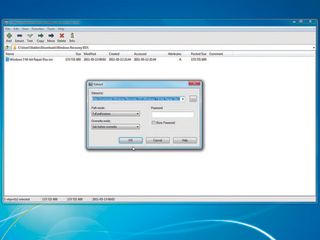
There will be three folders on the CD. Drag these from the CD onto the USB drive, and then safely eject it. If you opted to download the ISO file, then you need to extract the file. You can use 7-Zip or WinRAR to extract the folders, and save them into a new folder on your machine.
When it's extracted, navigate to the folder and drop them onto your USB drive to finish the process.
Enable USB booting
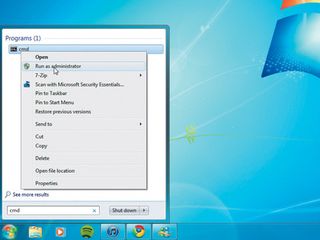
Now that your USB rescue disc is set up, you can breathe a sigh of relief - almost. There's still one more task left.
Your PC has a pre-defined boot priority, which tells it which devices to read from when it starts up. Normally, the first will the CD-ROM drive, so that an installation disc can be found before the hard drive, where the BIOS will expect to find your installed operating system. USB booting is normally disabled, or last on the list.
Get daily insight, inspiration and deals in your inbox
Sign up for breaking news, reviews, opinion, top tech deals, and more.
The upshot is that if your PC suffers a huge crash, then your shiny new USB rescue disc will be as useful as a chocolate fireguard.
There's a simple workaround though. Restart your PC with the USB stick connected and enter the BIOS menu. This is traditionally done by hitting the [Delete] key as soon as your PC starts, but manufacturers like to make life difficult and it could be [F1], [F2] or even [F12].
The key to access your BIOS should be labelled, but you can search Google for your PC brand if you're having trouble.
When the BIOS has loaded, you need to find the boot menu, which is normally to the right of the screen. Check if there's an option for USB booting, which might be labelled 'External device'. Scroll down to this option using the arrow keys, then hit [Enter] and choose 'Enabled' if it isn't already selected.
Next, you need to promote your USB drive to the top of your boot list. Every BIOS works differently, but you need to change the boot order to promote your stick above the optical drive and hard disc drive. When you've finished, go to 'Exit' and make sure you save your changes.
There is a downside to enabling USB booting, which can become tiresome. While non-operating CDs won't affect the boot when the optical drive is chief of the boot list, USB sticks that are plugged in will often confuse your PC, making it fail to boot, citing an unrecognised partition.
It's easy to fix though (just remove the offending stick) and you can recover your PC using your rescue kit if things go wrong.
Rescue package
Now that you've made your USB rescue disc and your PC is primed to recognise it, you will be protected if your machine goes wrong.
In the event of a crash, just plug your USB stick into a spare port and boot your system from cold. The BIOS will see a bootable disc and present you with a host of diagnostic options, which you can use to fix the problem.
When your PC reboots, you can choose the right tool to fix it. The options are Startup Repair, which scans your PC for any issues that might be preventing it from booting up, or System Restore.
System Restore is the most useful of these two. It lets you roll back your entire setup to a previous point in time, eliminating most problems at a stroke. Windows 7 is especially good a setting restore points when the slightest changes are made to the operating system, which means you can resurrect your system with a minimum of fuss.
If you use the advanced features, you can also run Memory Diagnostics, or use System Image Recovery so that a complete system recovery can take place.
Finally, you can boot to the command prompt and remedy problems like it's 1999. Having the option to recover your PC from USB is extremely handy, and it can make up part of a larger USB recovery toolkit together with Linux distros, which can keep your data totally safe.
Of course, it's still essential to maintain regular backups of your files, and to take advantage of tools like System Restore and images of Windows, so that when you do recover your PC, getting back on track is as easy and painless as possible.


