Generate your own SUSE appliances with your browser
Novell recently launched SUSE Studio, a service that enables you to create SUSE respins from any browser.
At the time we went to press this service was so exclusive it was strictly invite-only, though you could request an invitation via www.susestudio.com. Even in beta this is a powerful, easy-to-use tool.
The primary aim of the service is to enable you to generate virtual appliances using SUSE as a base for almost any purpose, but for our purposes we can also use it to create our own distro respin. From the outset there is a lot of potential to tailor your distro.
You have a choice of which version of SUSE to use, and then you choose a base package that defines which desktop and hardware platform you're likely to be running your respin on. This could include choosing Gnome, KDE or LXDE as your desktop, or deciding that you're going to run it on a server.

We recommend you choose OpenSUSE as your platform choice with this service as this tends to be more appropriate for home users, though you do have the option to choose SUSE Enterprise if you so wish.
Further options allow you to define which software is included or rejected using a search tool towards the bottom of the page, and you can also add repositories and custom RPMs by simply clicking on the relevant link. In each case the interface works logically as a browser-based service and is surprisingly intuitive.
Get daily insight, inspiration and deals in your inbox
Sign up for breaking news, reviews, opinion, top tech deals, and more.
Custom file storage
You can then customise the look and feel by selecting from the logos and wallpapers provided, or you can upload your own to give your respin that personal touch.
Uploading files to include from the /home directory of your respin is also a painless exercise, which is an added bonus if the idea of transferring a large music collection every time you reinstall your distro fills you with dread.
The configuration options are also fairly extensive, enabling you to define your locale, whether you want 32- or 64-bit operation, any apps or services you would like to run at startup, and even a virtual hard drive if you are creating an appliance rather than a live CD.
The flexibility and potential of the service is excellent, and is one of the easiest ways to create a SUSE respin customised to your particular needs. And despite all the options available to you, SUSE Studio sets up appliances with a sensible set of defaults depending on which base package you choose, so you can simply make the changes in the areas you want to rather than worry about the formalities.
SUSE Studio is no more difficult to use than any other standards-compliant website, and the navigation enables users to easily to cycle back and forth through the creation stages simply by clicking on the right tab.
An excellent service?
Compared with Ubuntu Customisation Kit SUSE Studio gives you far more freedom to customise your respin, especially as you can run the service on any host through a browser.
However, if you don't have a particularly fast internet connection then downloading your finished appliance or live CD may be a major downside, which you'll feel especially keenly given that there are other offline tools that you can use to accomplish much the same purpose.
Even if you do have an internet connection fast enough to use this service, you may feel stymied by the fact that you can only create SUSE respins, though this is to be expected from a service that has been developed by Novell (which owns and maintains SUSE).
However, the code behind SUSE Studio will be released under an open source licence once it moves out of beta, so we may yet see similar services spring up for rival distros in the not-so-distant future.
SUSE is enterprise hardened and well-supported by the Linux community, but if you're dead-set on respinning another distro then an good alternative is Instalinux.
Step by step: Creating a SUSE Studio Appliance
1. Appliances
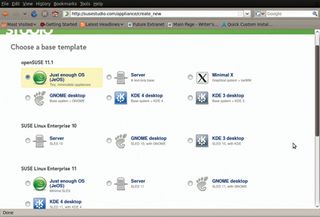
You can choose the desktop, hardware platform and version of SUSE here with a simple click in a radio button.
2. Choose a name
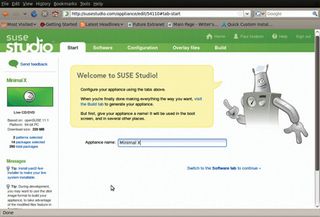
The current statistics about your machine are available in the left-hand pane and update with each choice you make.
3. Software
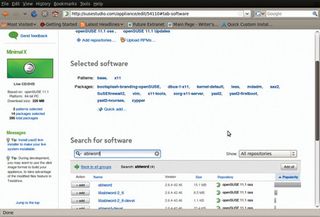
Here you can search for packages using the search tool to add or remove them, and also add additional repositories or upload your own RPMs by clicking the relevant links.
4. Configure
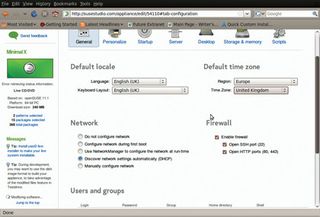
Feel free to change the nuts and bolts of your system, including which users are added, locale, startup applications and any scripts you want to include.
5. Design
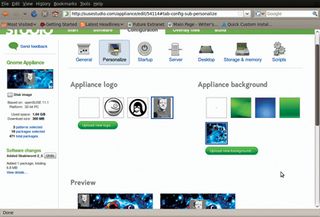
In the same Configure tab you can choose a logo and a wallpaper, or upload your own. The windows at the bottom of the page show what your appliance will look like.
6. Build
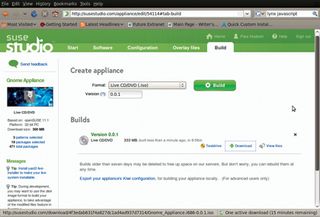
We chose to build an ISO image, but you can also build virtual appliances for use with VMware Player and images to run your appliance from a memory stick.
