How to install Windows 8 on a flash drive with Windows To Go
Windows To Go: your Windows takeout on a stick
Take Windows 8 with you wherever you go
The first time you boot a Windows To Go drive on a new PC it will scan for devices, and install appropriate drivers. That set up remains cached, so you'll be able to boot much more quickly in future. Drives can hold several system configurations, so you can take it from work to home to an internet café to a client's offices to a friend's home without worrying about losing data or drivers. It's this flexibility that makes Windows To Go an ideal tool for employees who can work from any PC, anywhere. It's also a tool you can slip into a pocket to use anytime you need secure access to your business systems, without having to carry a work laptop with you.
Once setup, a Windows To Go system works like any Windows PC. Just boot from USB, and you're in the familiar Start screen, and able to use the basic Windows store applications that come with Windows 8 or any pre-installed applications in the image (and install others by more traditional means). Users are able to log in with a Microsoft account, though by default there's no access to the Windows store – so you'll need to use Intune or System Centre to sideload Windows Store applications onto managed devices. If you want to enable access to the Store you can use Group Policy to allow access to the store, but applications are only licensed to a specific PC, so won't be portable (unlike the stick).
Unlike Windows RT ARM devices, Windows To Go sticks can be part of an Active Directory, making them easier to control and manage. If you're using any of the Microsoft Desktop Optimisation Package (MDOP) tools to deliver a managed desktop, Windows To Go will provide that same desktop to a user wherever they are – so you can use it to give home workers access to work resources, or to give casual staff access to office resources, without having to worry if your desktop optimisations will overwrite their personal settings. You'll also be able to use System Center to push updates and policies to Windows To Go, as well as using Direct Access to simplify connections to your IT resources.
Microsoft has taken several routes to supporting BYOD in Windows 8, with Windows To Go one of the most attractive. It's low cost, easy to set up, and relatively secure. IT teams don't need to learn anything new, and users have a simple way of using their applications and data, without reconfiguring their PCs. If you've got a Software Assurance agreement, Windows To Go could be your reason for upgrading to Windows 8.
Windows To Go step-by-step guide
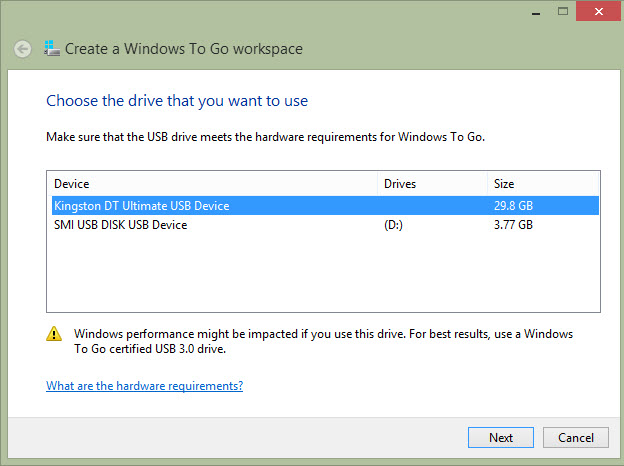
1. Start installing Windows To Go by choosing the USB disk you want to use. Microsoft recommends using a USB 3.0 disk, and has a list of certified devices.
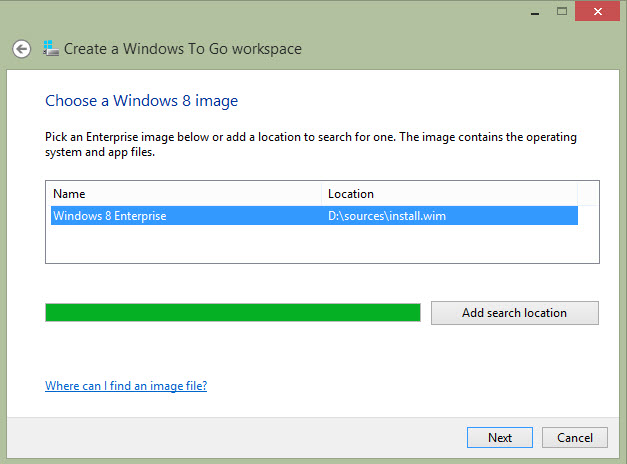
2. The Windows To Go wizard will scan local drives for suitable Windows images – or you can manually connect to an installation share, and use Windows deployment tools to deliver pre-configured images with OS and applications.
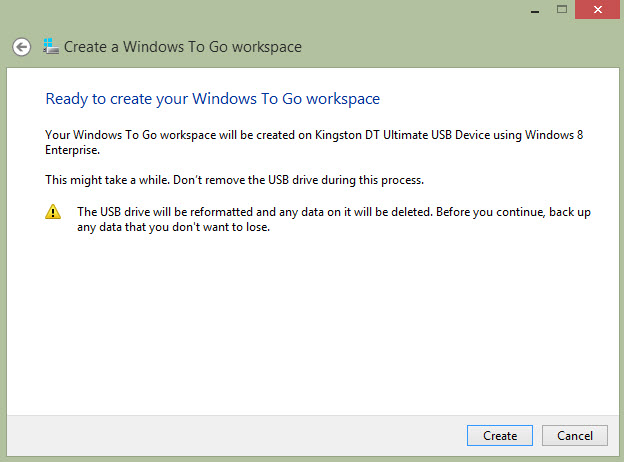
3. Once you've chosen a flash drive and an image, you're ready to create your Windows To Go disk. Just click to get started.
Are you a pro? Subscribe to our newsletter
Sign up to the TechRadar Pro newsletter to get all the top news, opinion, features and guidance your business needs to succeed!
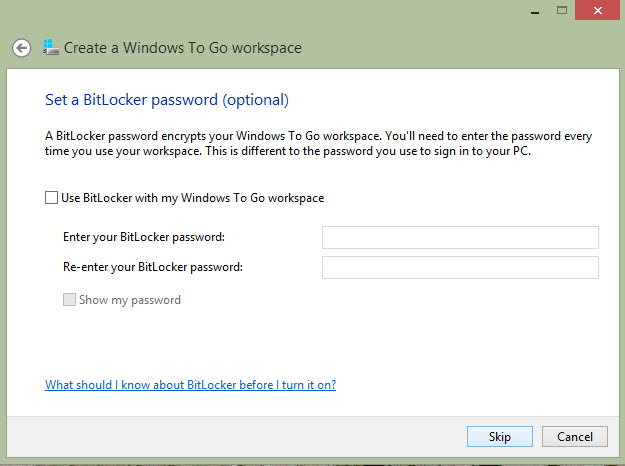
4. Encrypt Windows To Go drives as part of the setup process, using BitLocker. Just type a password to turn it on.
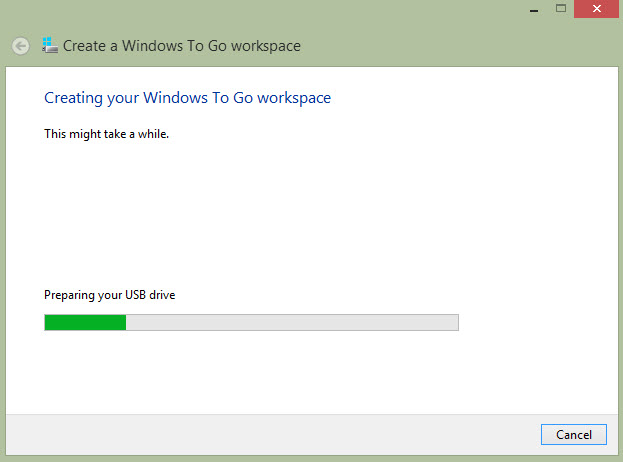
5. Preparing the drive is more than just formatting it – the disk is partitioned like a full Windows install, complete with recovery partitions.
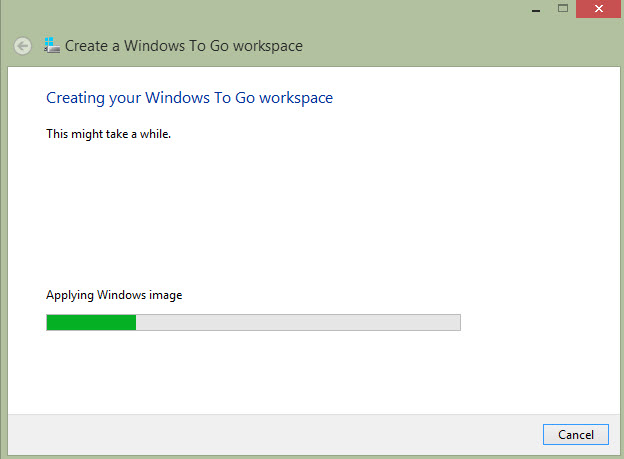
6. The last part of the process takes the longest – installing Windows 8 on your drive ready to go. The installer gives you a Windows 8 install that's ready to install devices the first time you plug it into a PC.
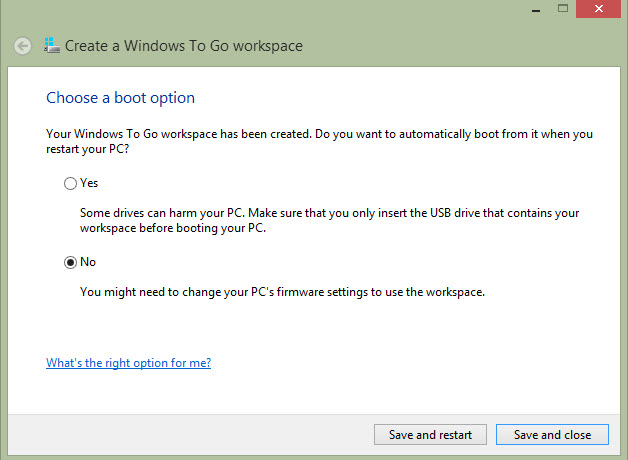
7. Once a stick has been made you can choose whether to set up the host PC to boot from USB devices, or leave it as it is.