How to launch your blog using Squarespace
Launch your personal blog within minutes with Squarespace

Squarespace is a user-friendly website builder that lets you create a professional-looking blog without knowing any code. It offers a wide selection of customizable templates, design tools, and built-in features to help you get started. Whether you’re a beginner or an experienced blogger, Squarespace has everything you need to launch your blog easily. With AI powered tools, you can make a blog that appeals to your audience with both visual aesthetic and valuable content.
In this guide, we'll walk you through the steps you need to take to create and launch your blog on one of the best website builders - Squarespace. From choosing a template to publishing your first post, we’ll cover everything you need to know to get your blog up and running quickly.
You can read our expert-written Squarespace review if you want to know everything about what the platform has to offer. You can also use our Squarespace promo codes to save yourself some cash when building yourself a blog.
So, let’s get started.
Initial setup of a blg on Squarespace
Getting set up on Squarespace is quick and easy. Below we walk you through the steps you need to take to get your new blog started.
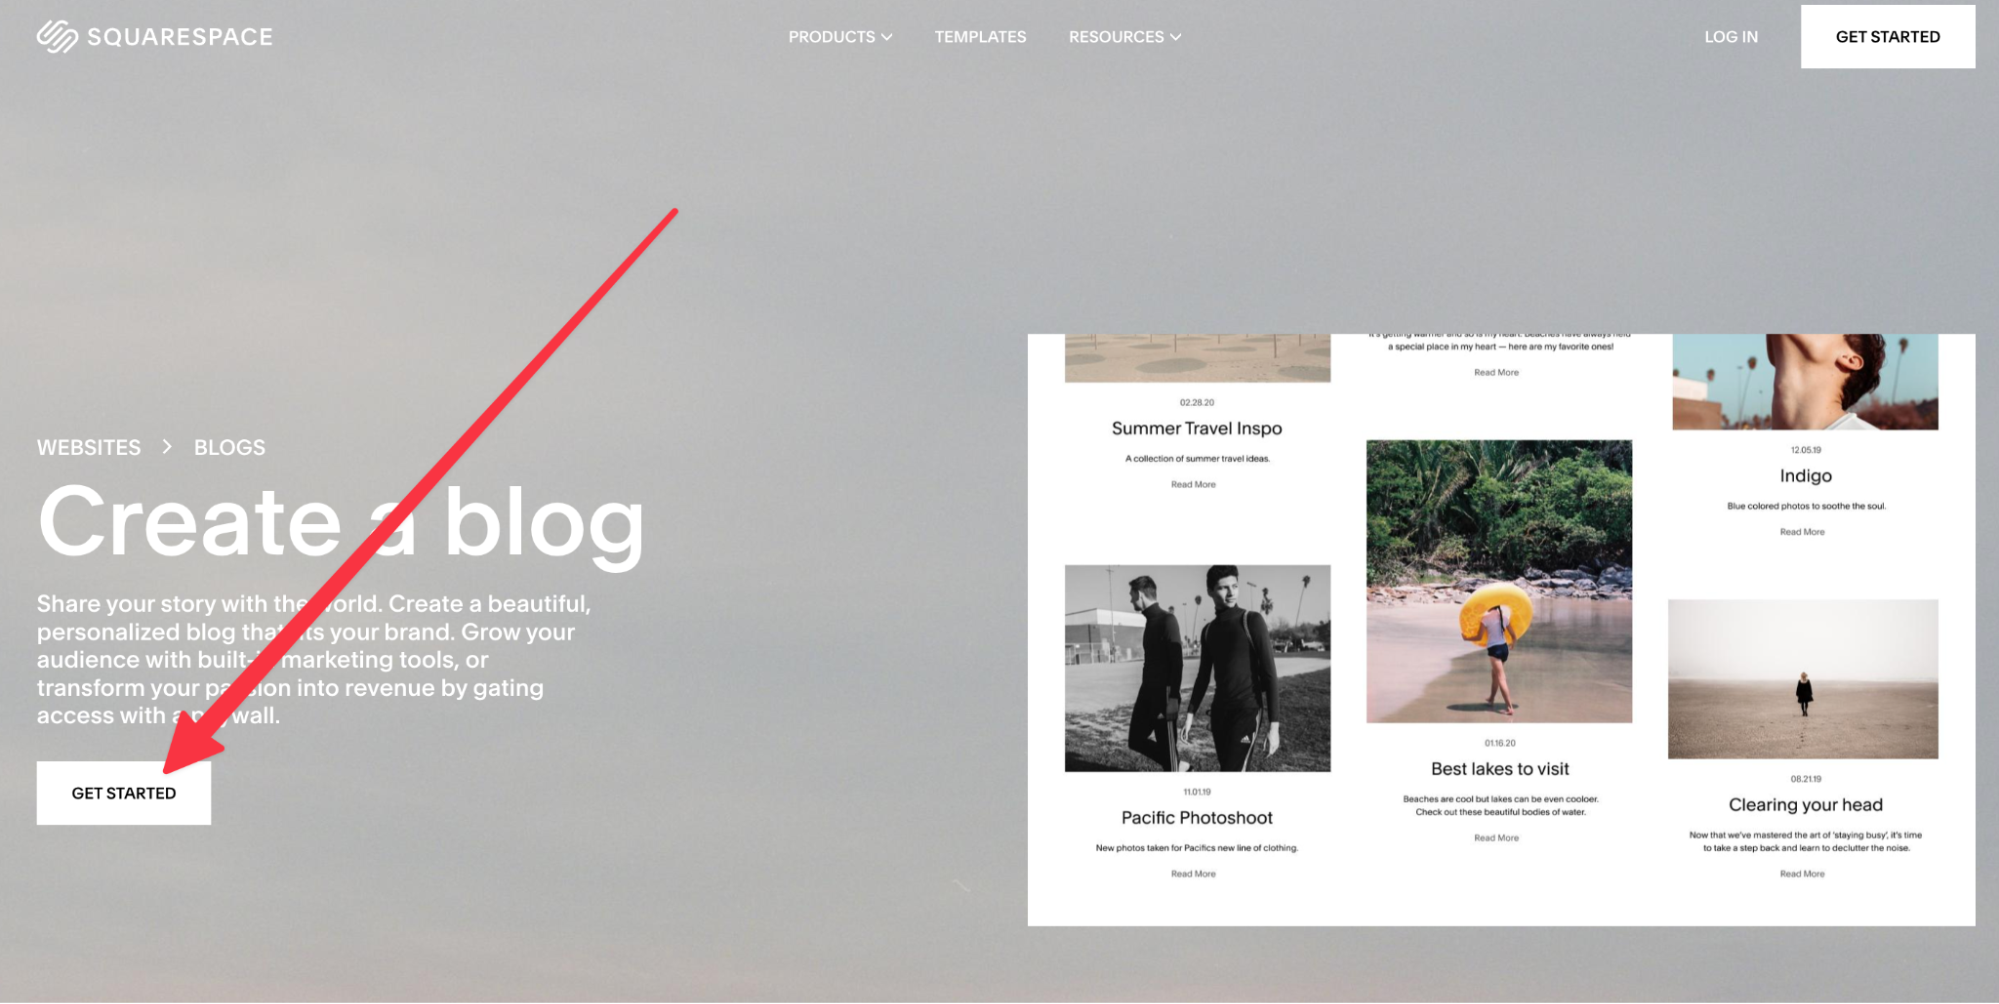
1. Head to Squarespace Blog building page and tap on Get Started.
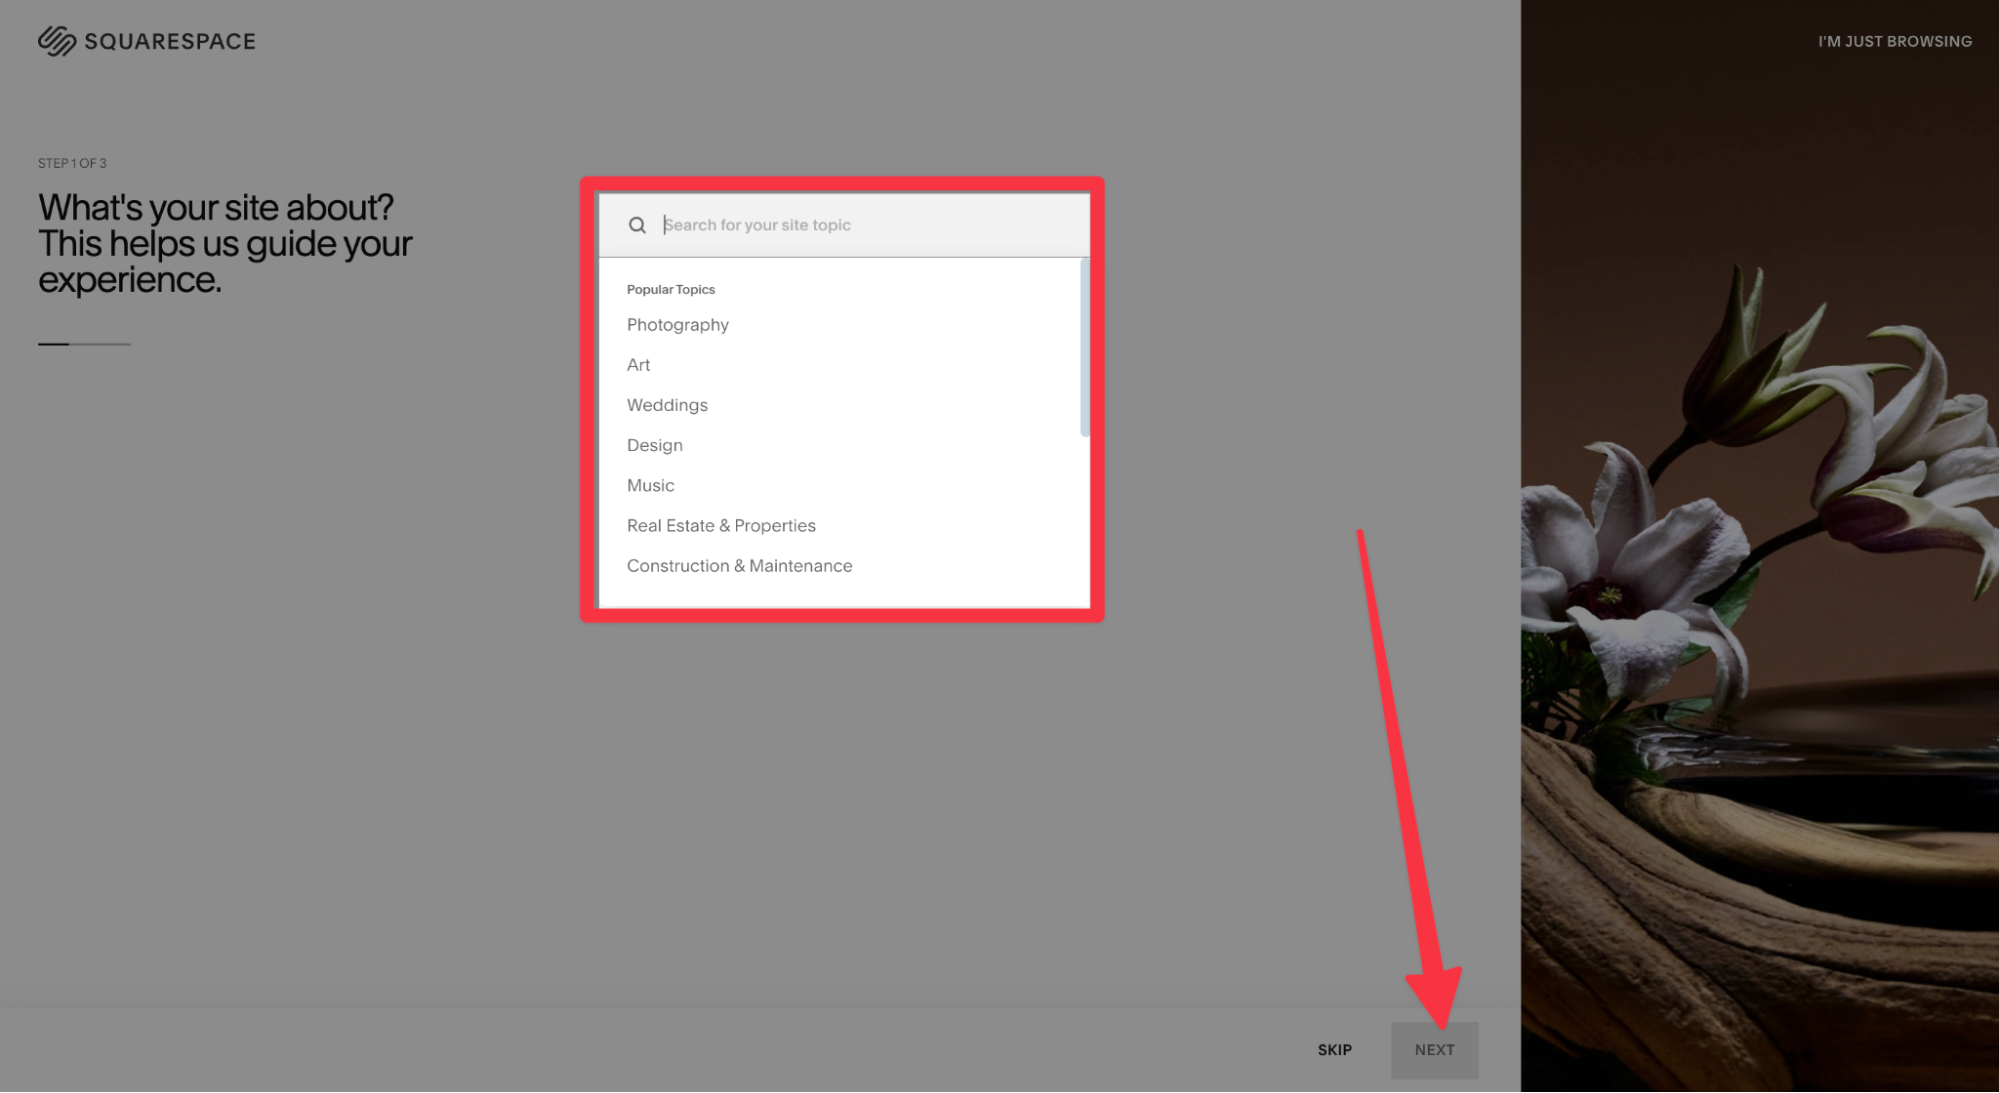
2. You'll be directed to Squarespace's template section, where you'll find a variety of broader categories to choose from. Skip or select your site topic and click "Next" to proceed.
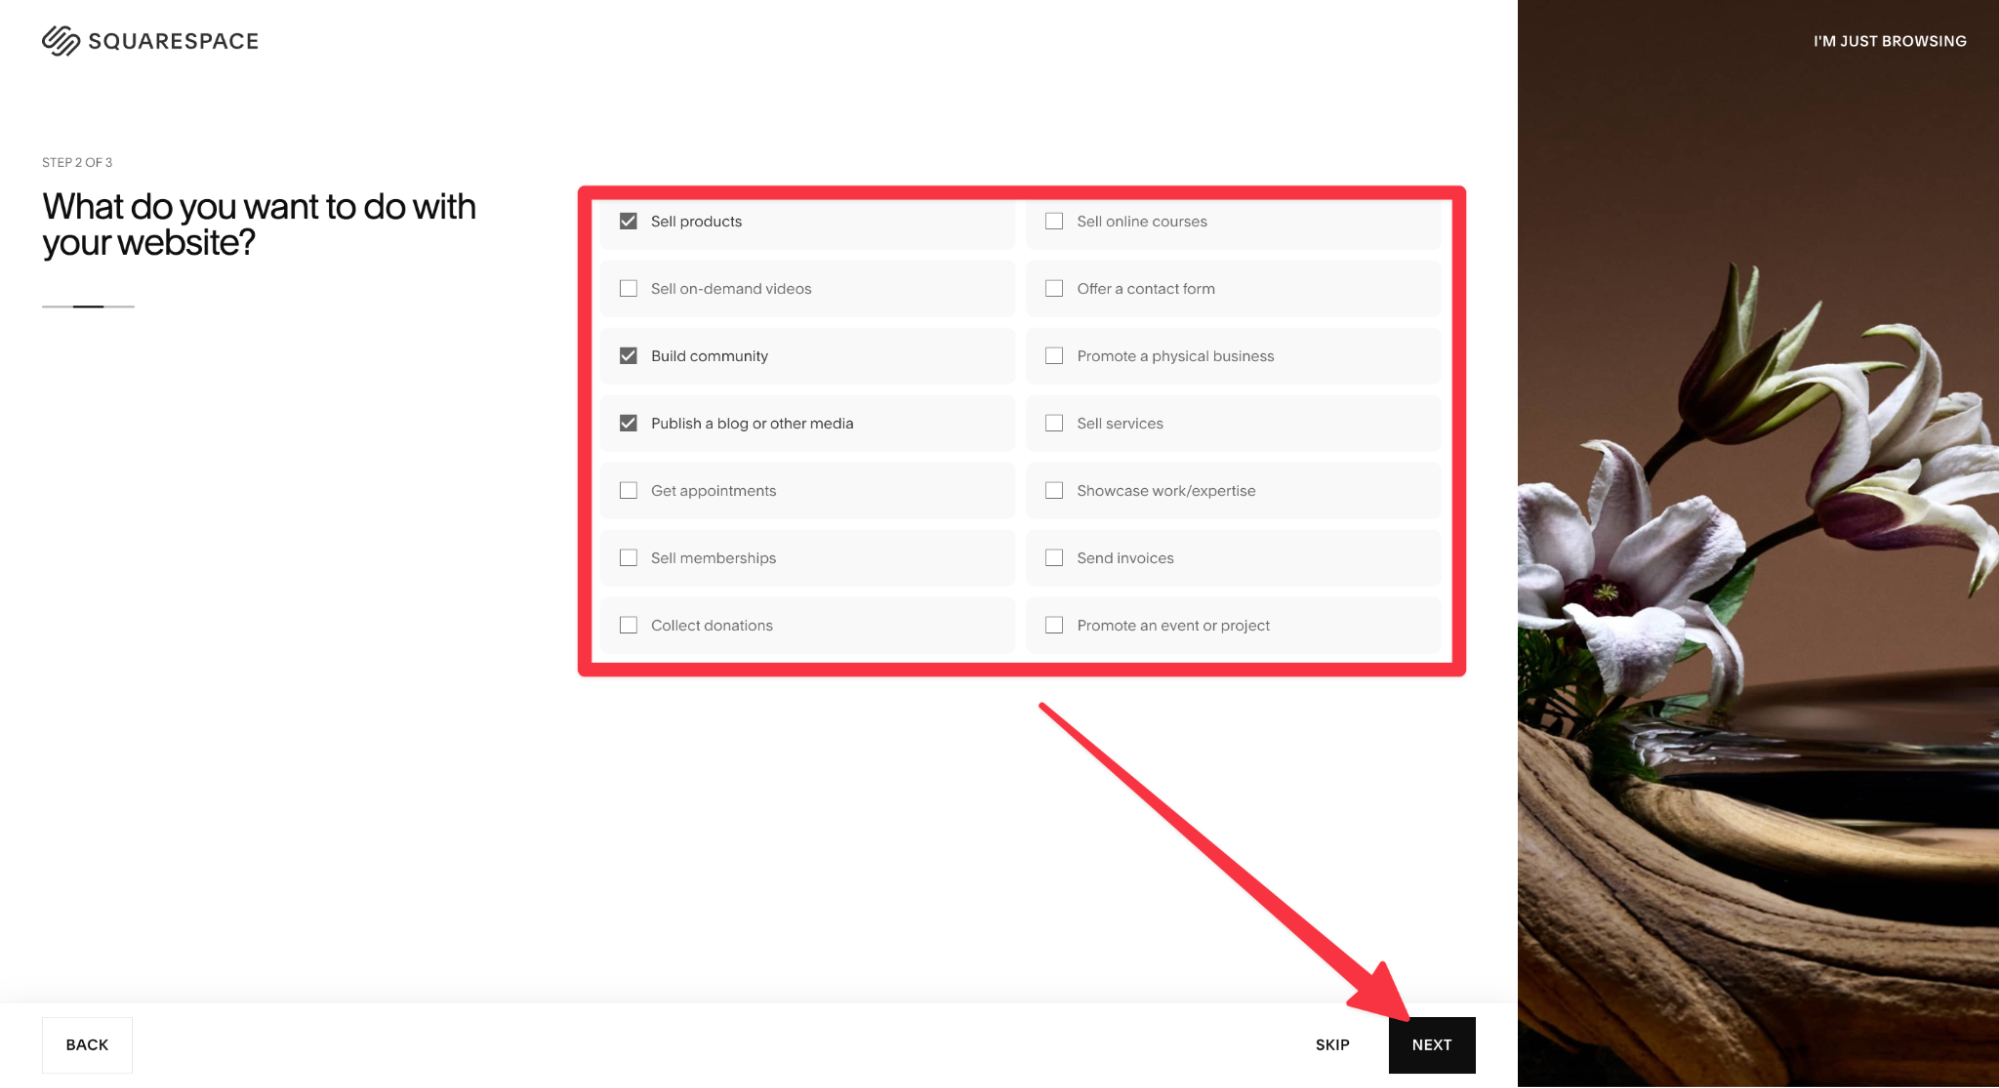
3. Since you're creating a site without any coding, Squarespace will ask a few questions about your business. Simply choose your goals and requirements for the site by selecting one or more options, then click "Next" to continue.
Are you a pro? Subscribe to our newsletter
Sign up to the TechRadar Pro newsletter to get all the top news, opinion, features and guidance your business needs to succeed!
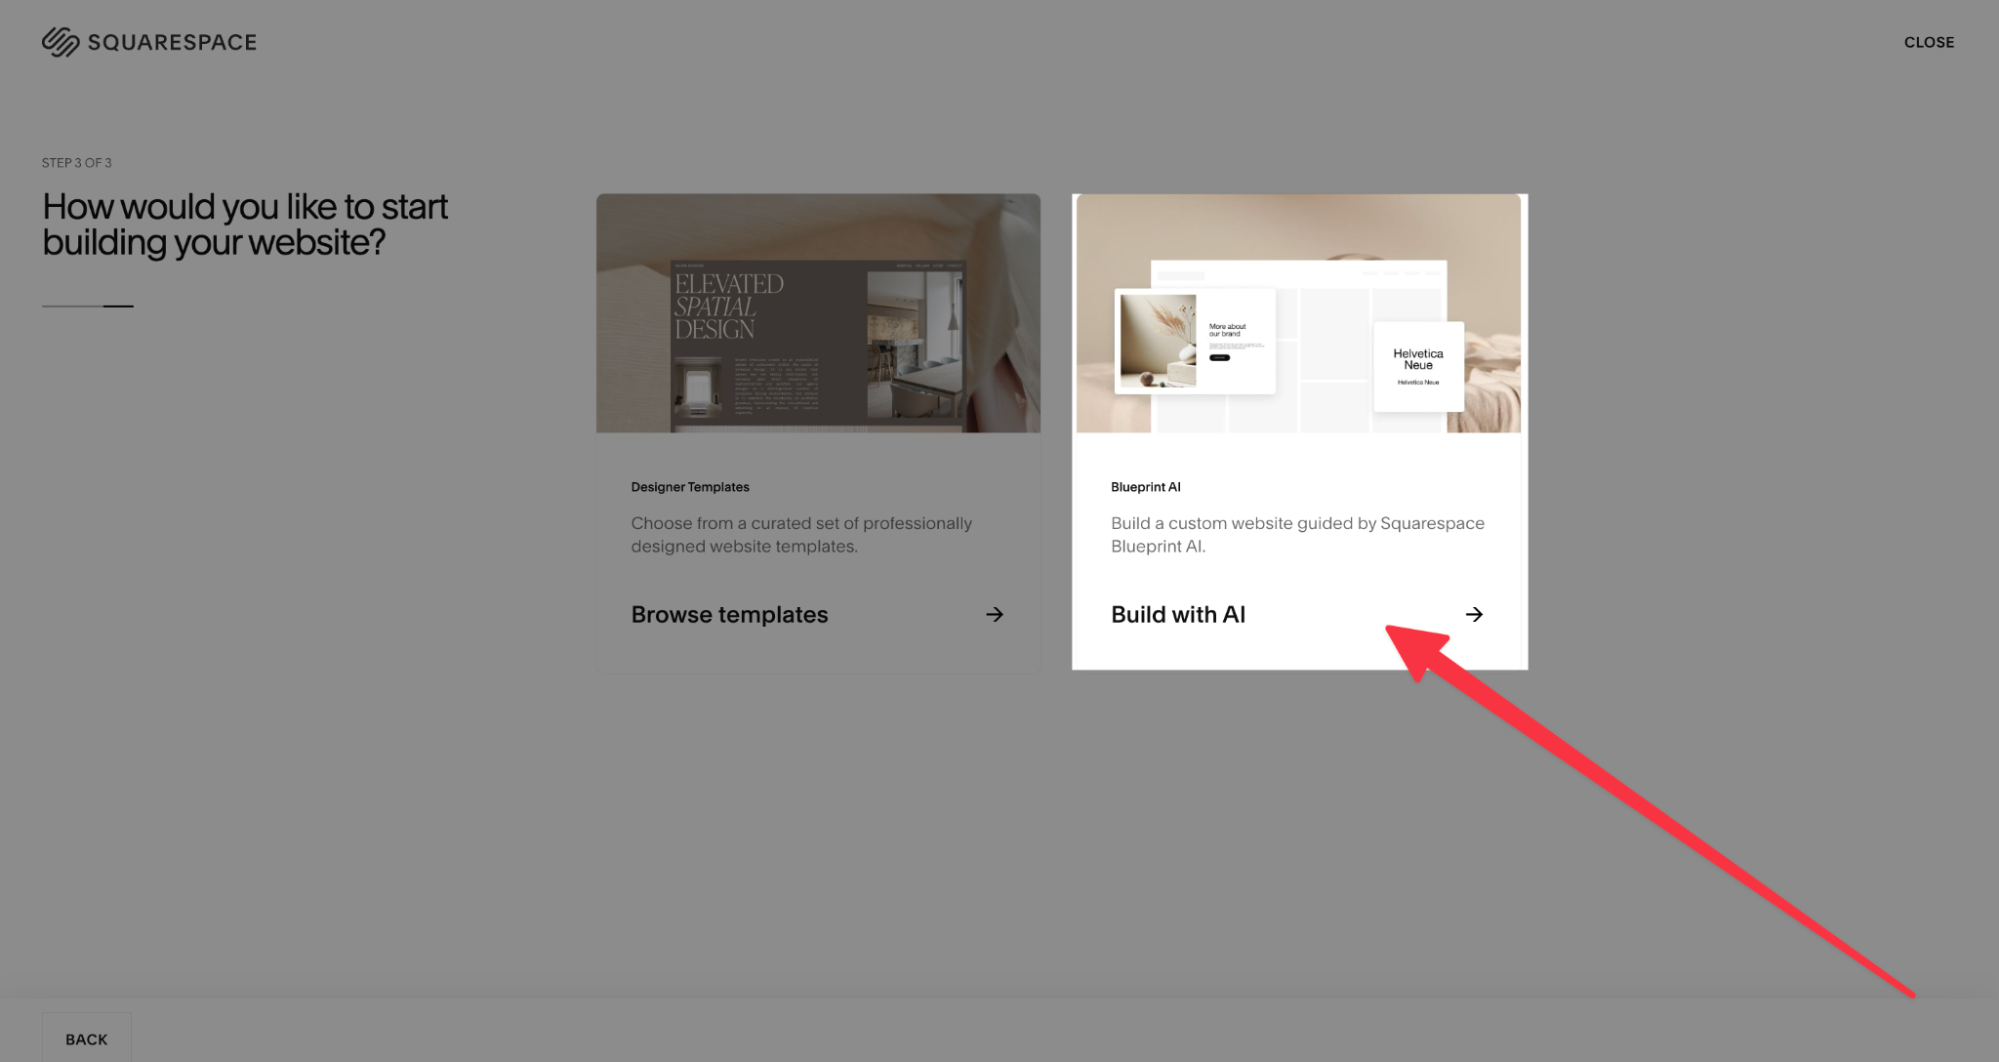
4. Now you're ready to start designing your blog. You can either choose Build With AI for a more personalized and custom site, or select Browse Templates to quickly pick a design template. In this example, we’ll be building a custom portfolio with Squarespace’s AI in this guide. So, tap Build with AI to proceed.
5. Click on Create Site to start customizing your Blog site.
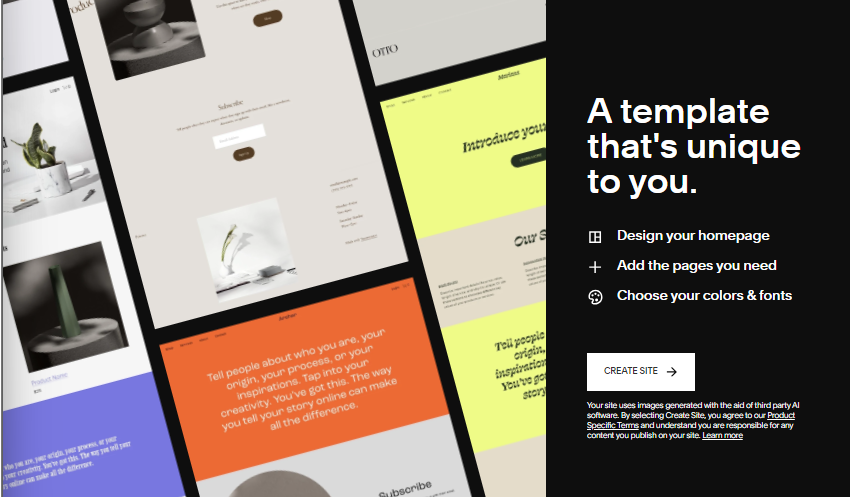
6. At this stage you will need to set up your site's name or title. If you're unsure, you can enter a temporary name since you can always change it later. Next, choose a brand personality that matches your blog's style. Based on your selection, Squarespace will automatically suggest suitable colors and fonts. Once you're happy with the choices, click Next to continue.

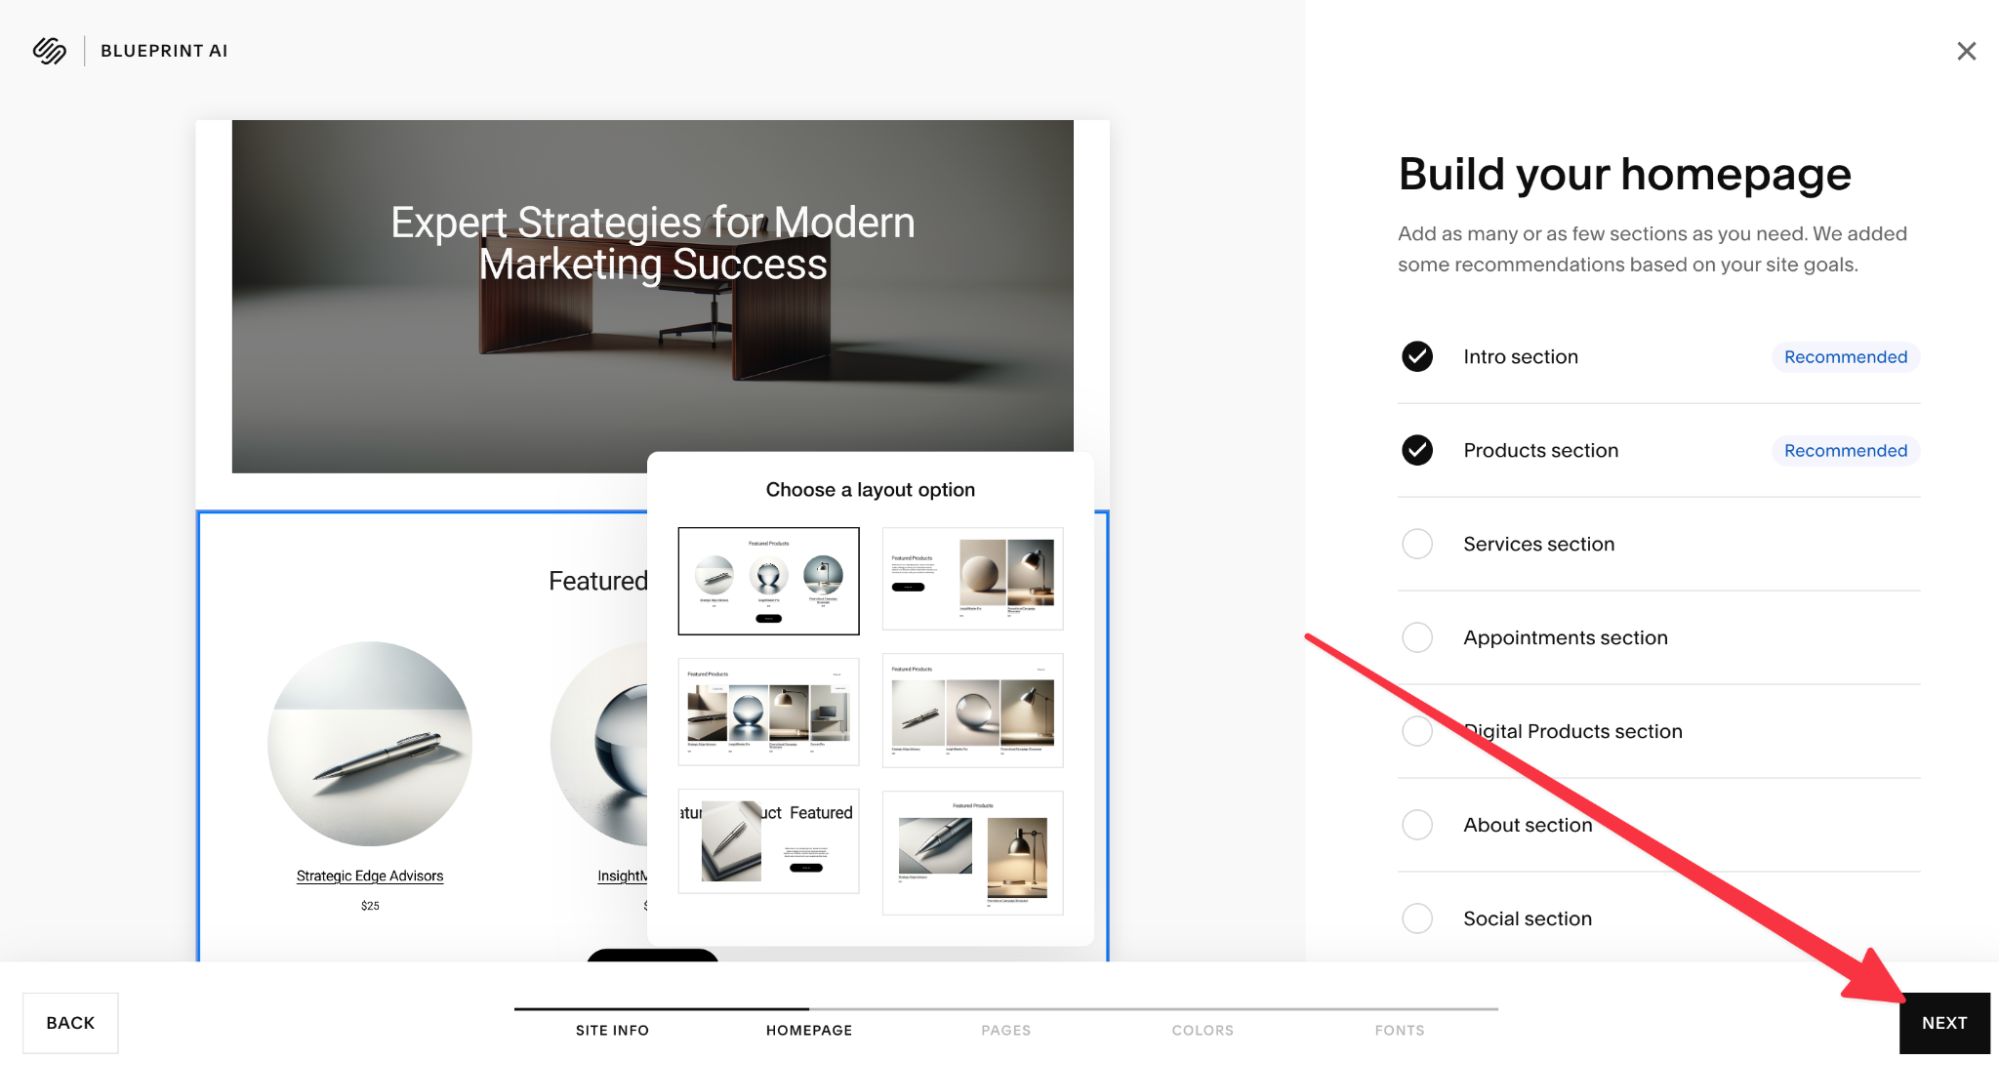
7. Now it’s time to build the homepage of your Blog. You’re free to include as many sections as you want. In the left hand panel you get a preview of the site’s layout in real-time as you add or remove sections. Based on your site goals, Squarespace recommends you include a few sections, but there are no compulsions. Once you’ve chosen your desired sections, tap Next to continue.
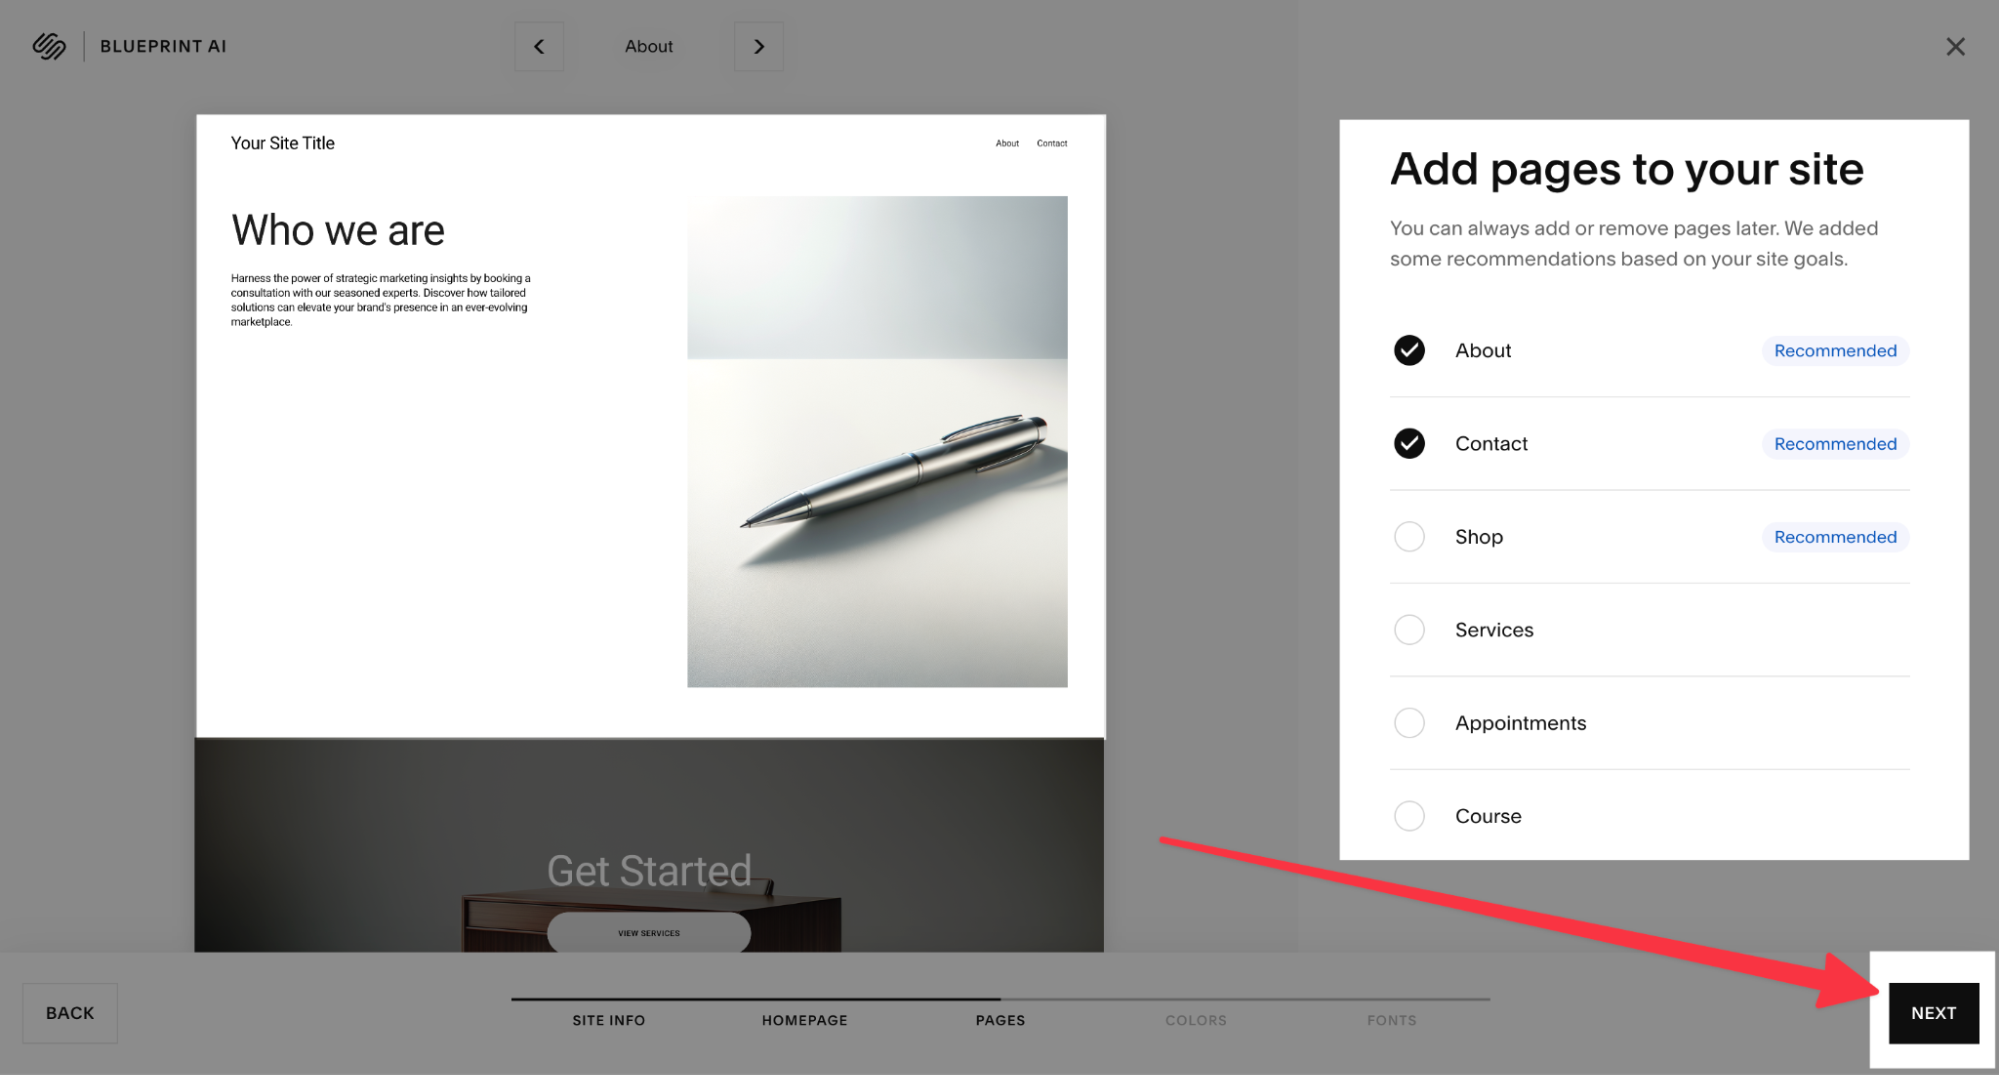
8. Once you’re done setting up your homepage, add other pages which are essential for your blog. For example, you can include a Contact Page to connect with your audience on popular social media platforms like Instagram, X, Facebook, etc. After selecting, tap Next to move forward.
9. A blog’s impact comes from both the quality of your work and how it’s presented to your audience. So, choose your blog’s custom color palette accordingly. Squarespace’s designers curate these and categorize them into different themes.

10. Now, select a font for your blog. While exploring options, keep an eye on the preview section to find the perfect fit. For our test site, we'll be using Anton Epilogue.
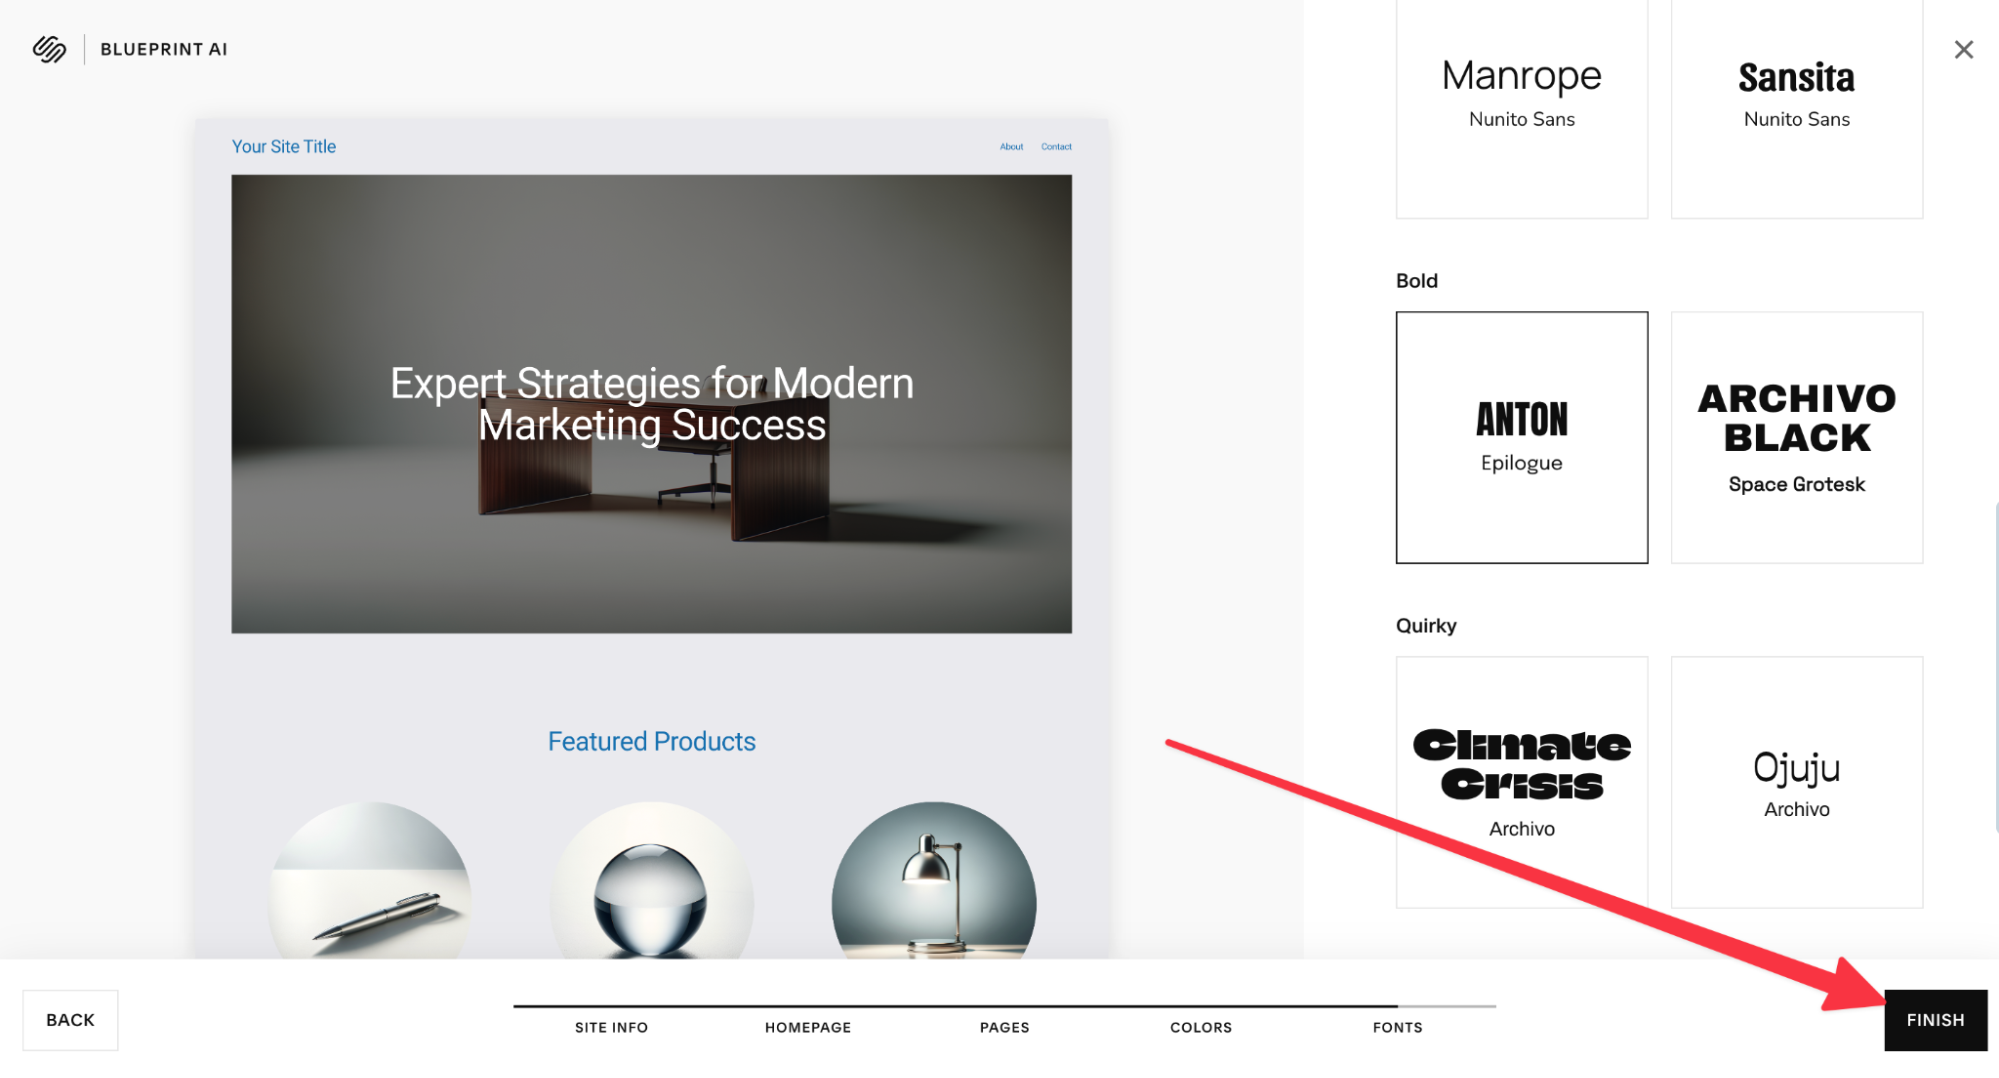
10. Once done, tap on Finish to complete the setup process.
Customizing Your Blog with Squarespace
1. First, let's update the homepage with relevant details. Click on Website and then go to Edit to begin customizing.
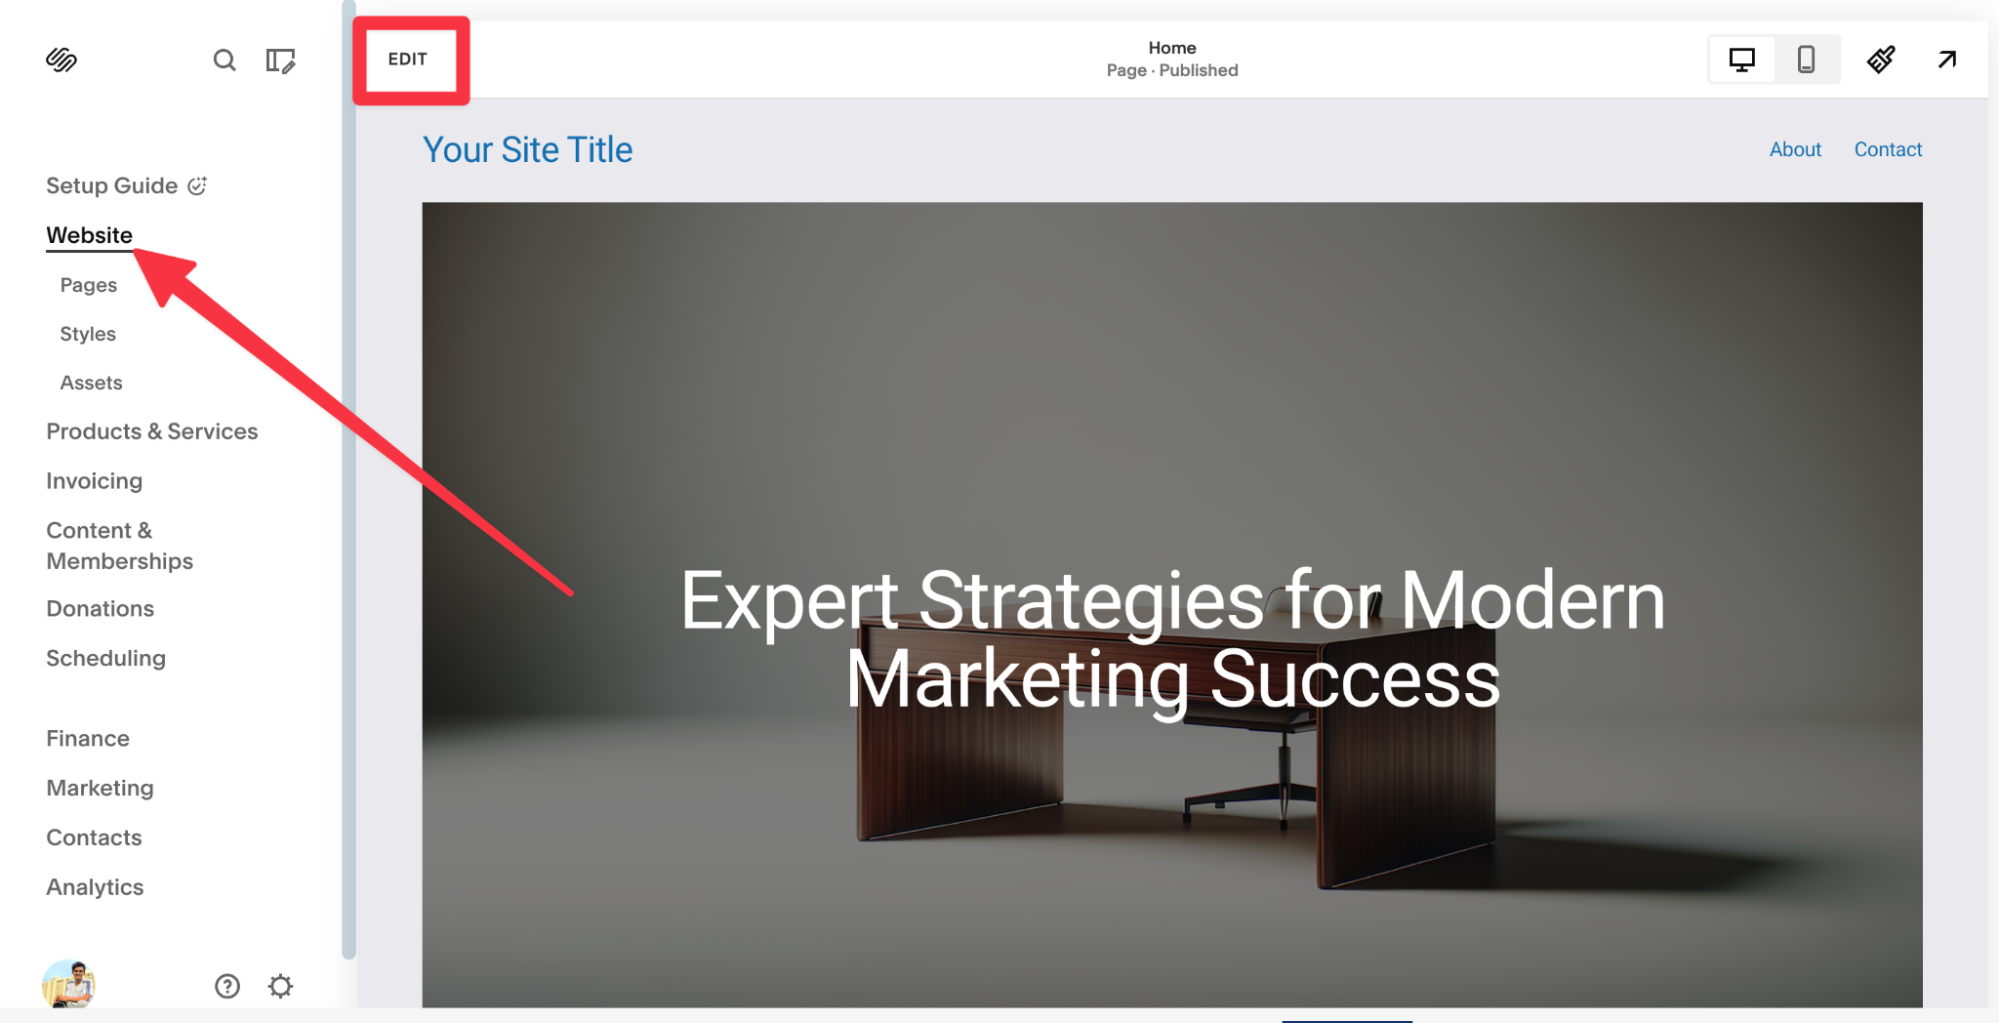
2. As you move your cursor, you'll notice the sections you can customize. For example, I've added an intro to my blog with a gist of what it offers. You can also change the font style, color, and text alignment and add lists, links, and quotes to the text section. Just make the edits you need and save your changes.

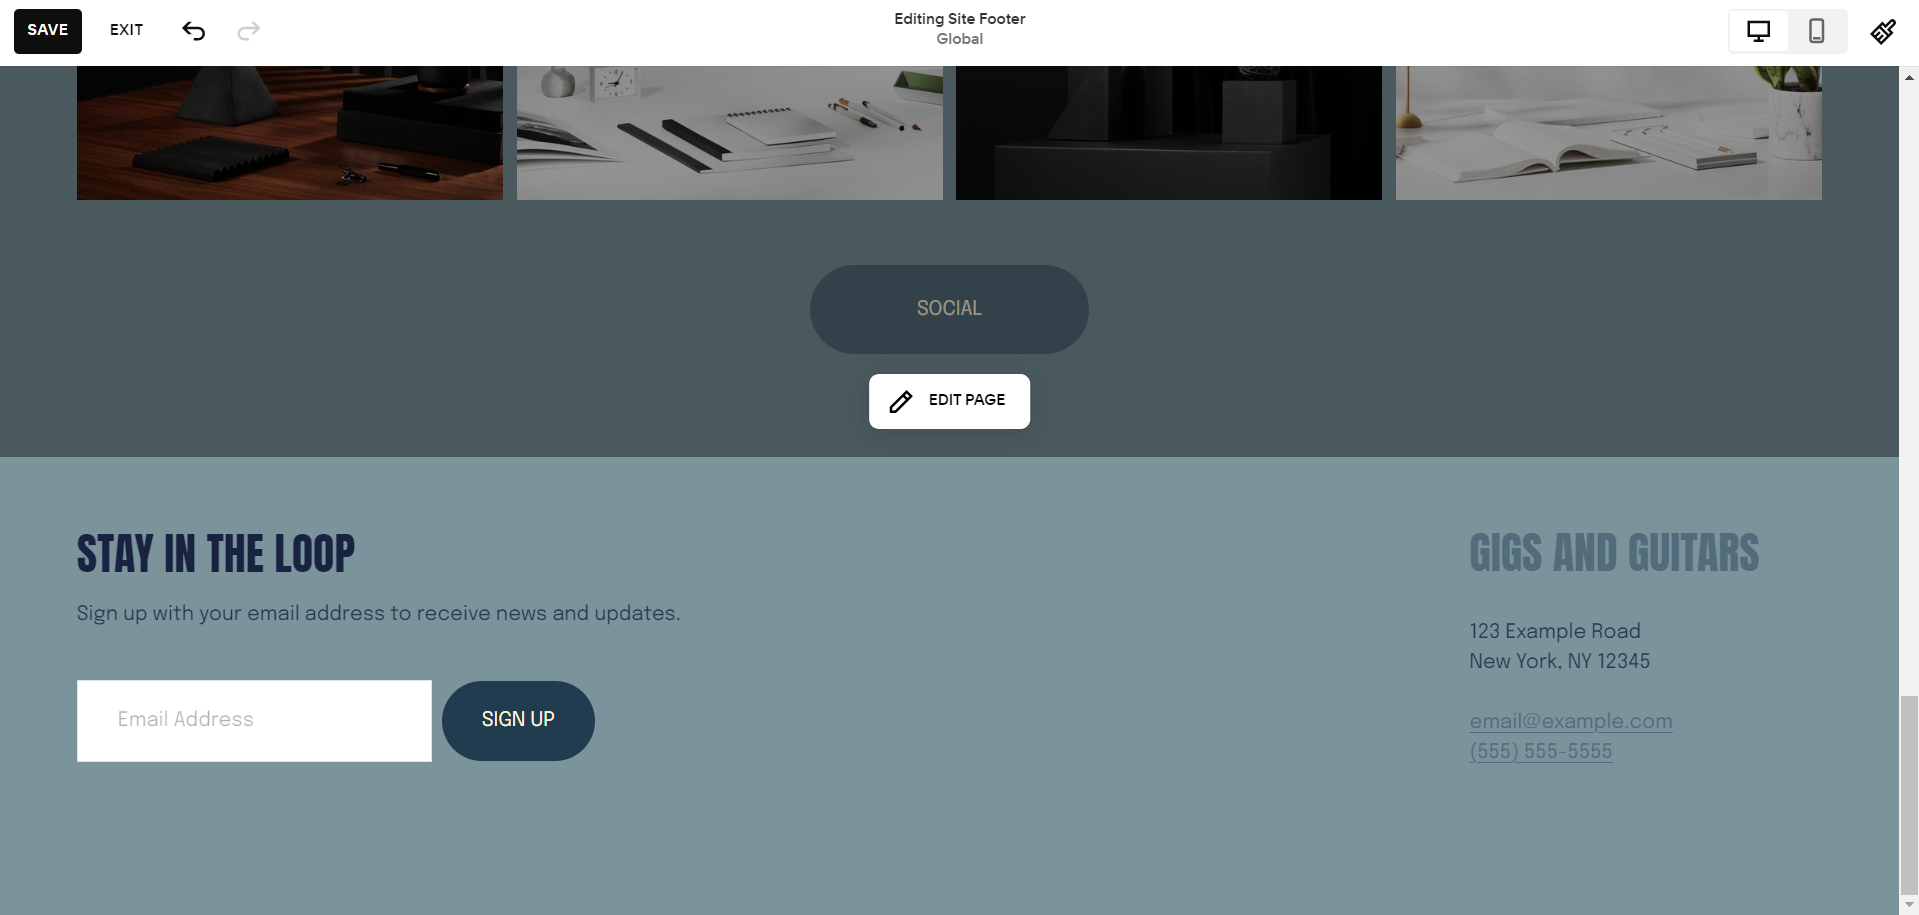
3. Likewise, you can edit other sections of your blog, such as featuring products, adding your social media links and contact details, inserting a newsletter sign-up section, and more. Just scroll through, and you'll be able to add and customize sections on your homepage easily.
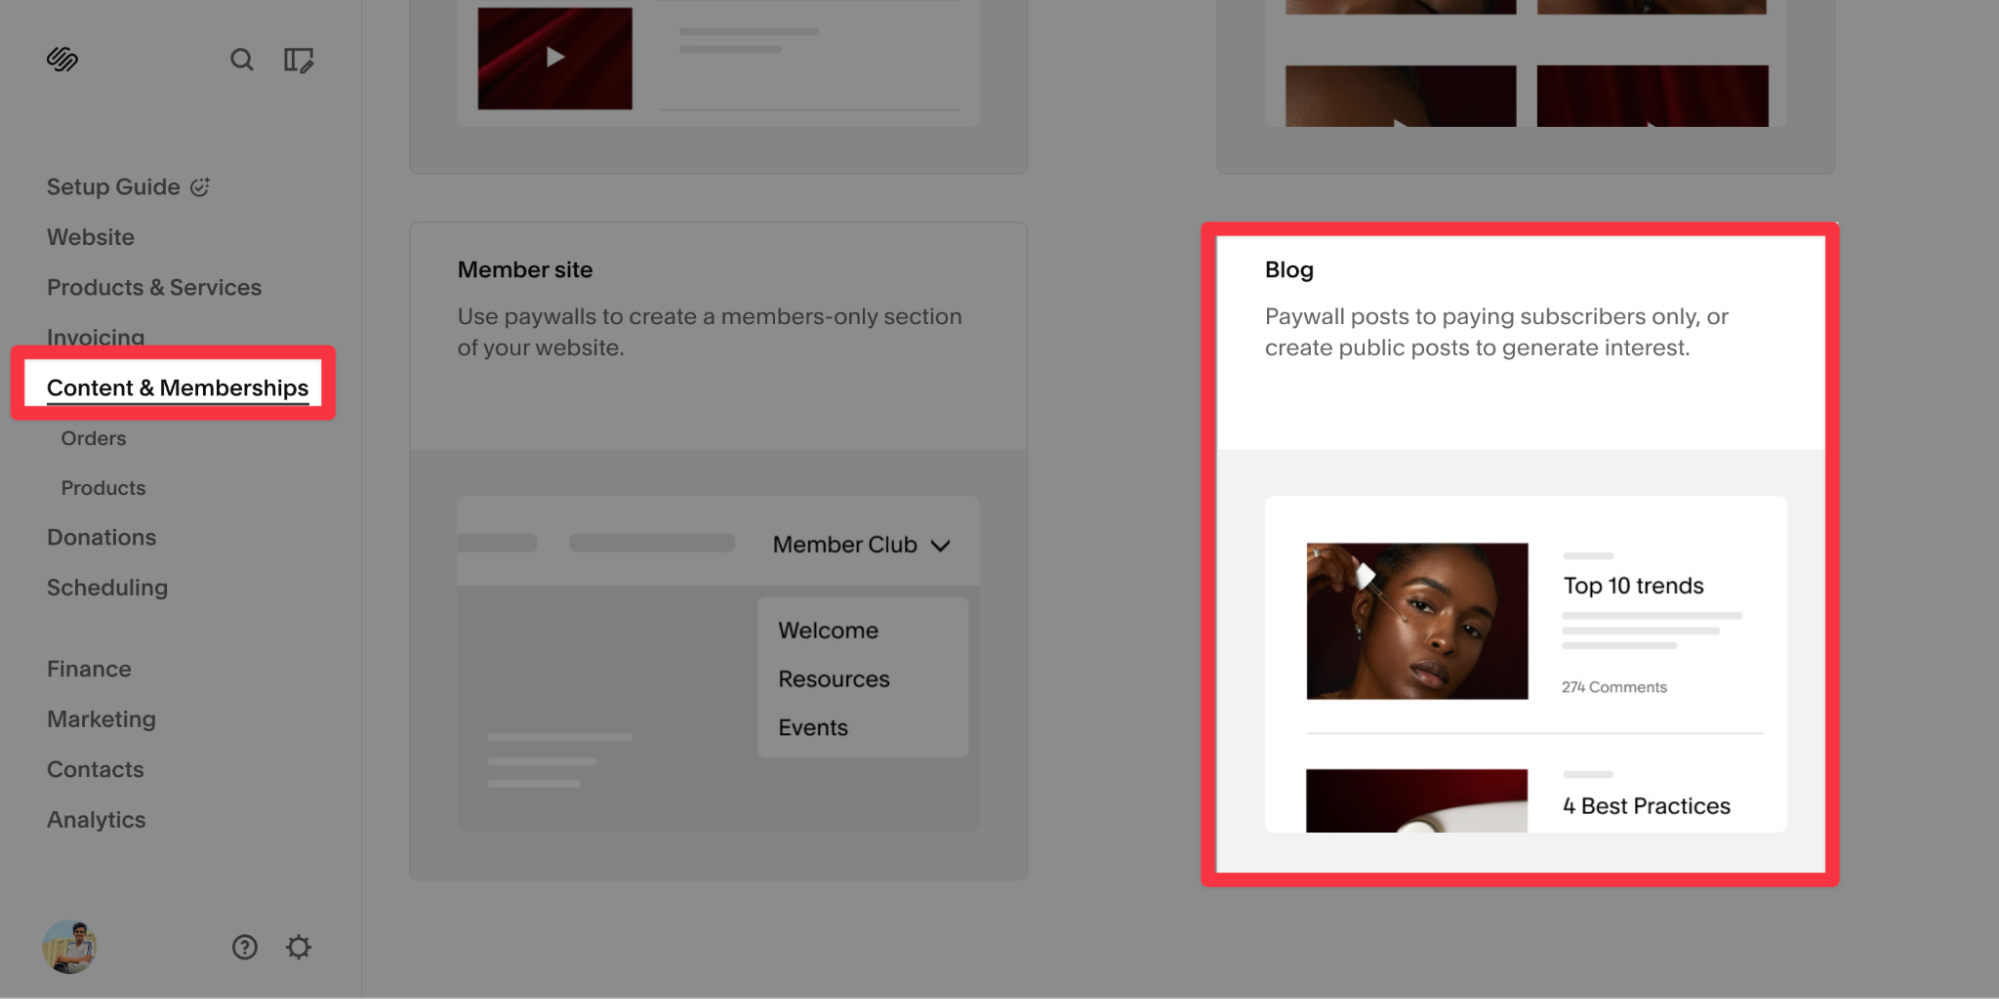
4. Now, head over to Content & Membership from the left column of the editor and select the Blog tab.
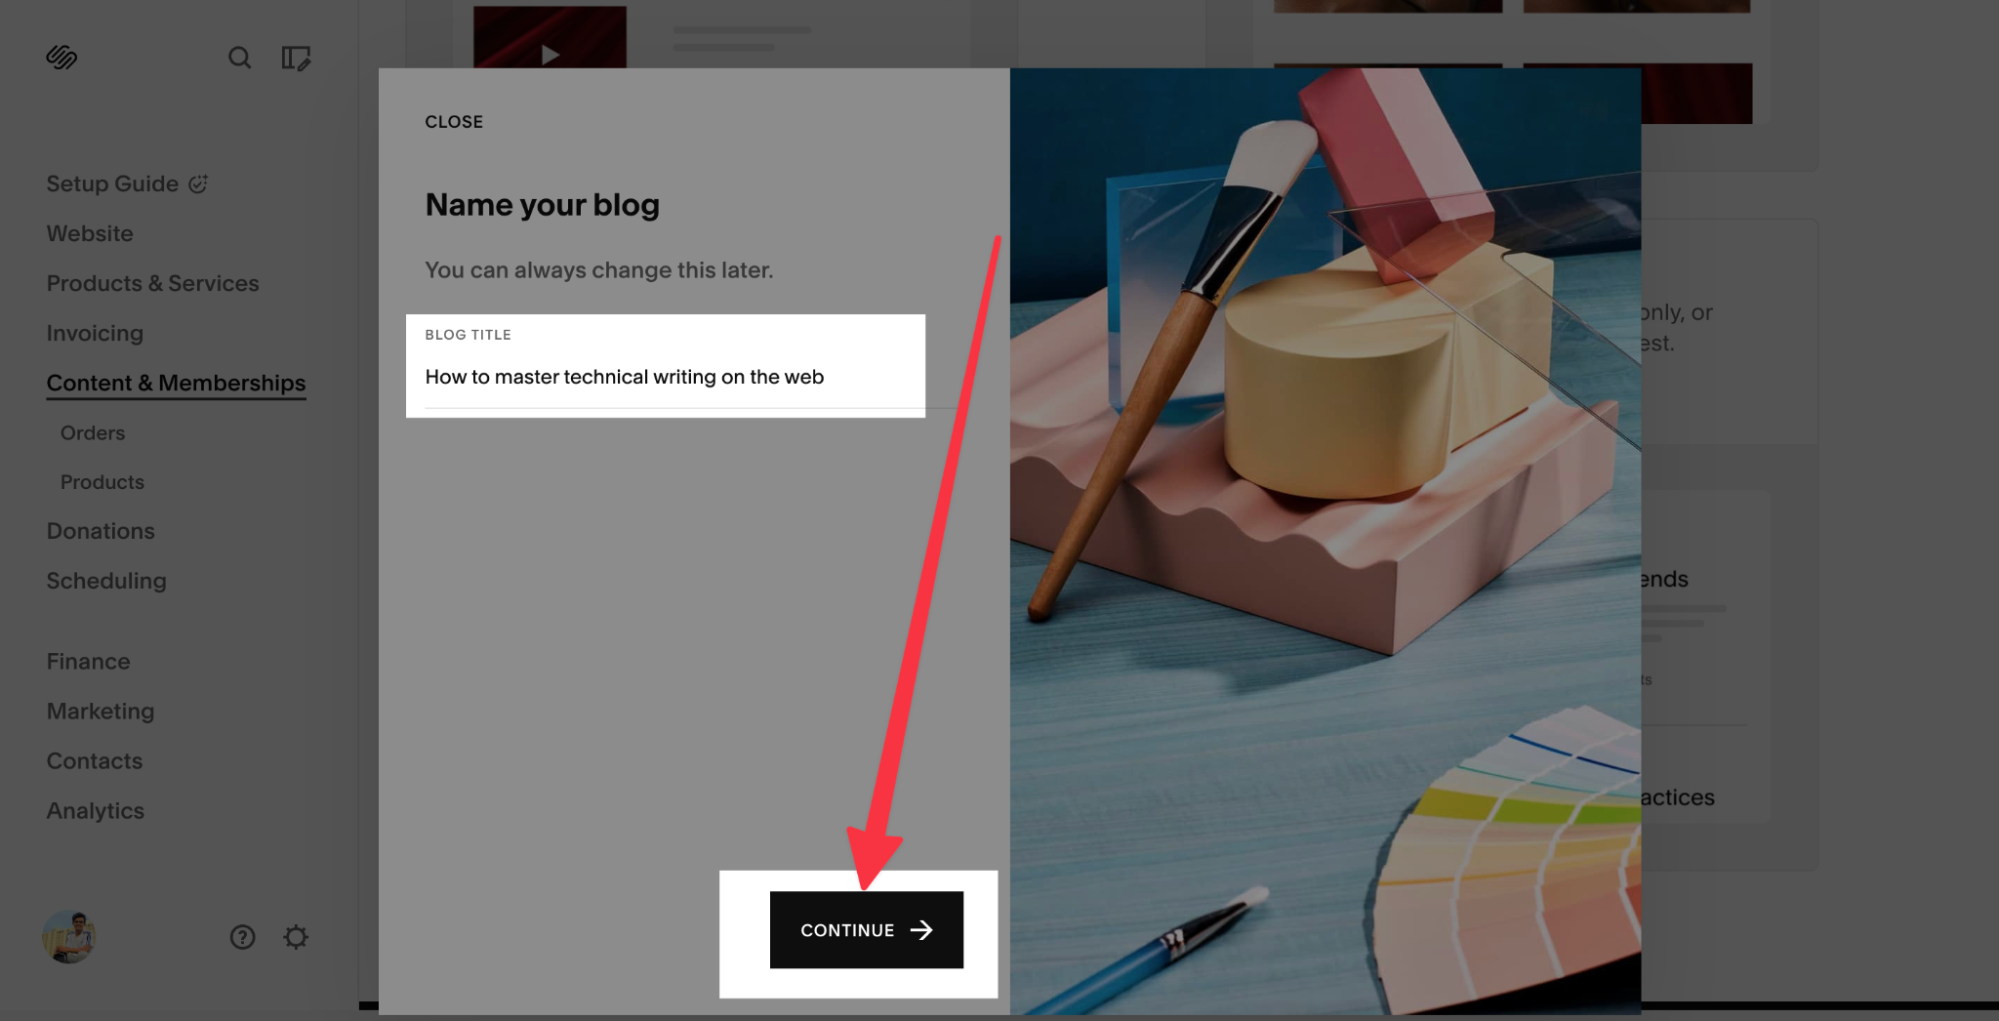
5. Now, you’re all set to write your first blog. Just enter a title and tap Continue. Note that you can always change the title later.
6. Squarespace organizes your content into blog pages and individual blog posts. In this step, you can select the layout for how your blog will be displayed to your audience.
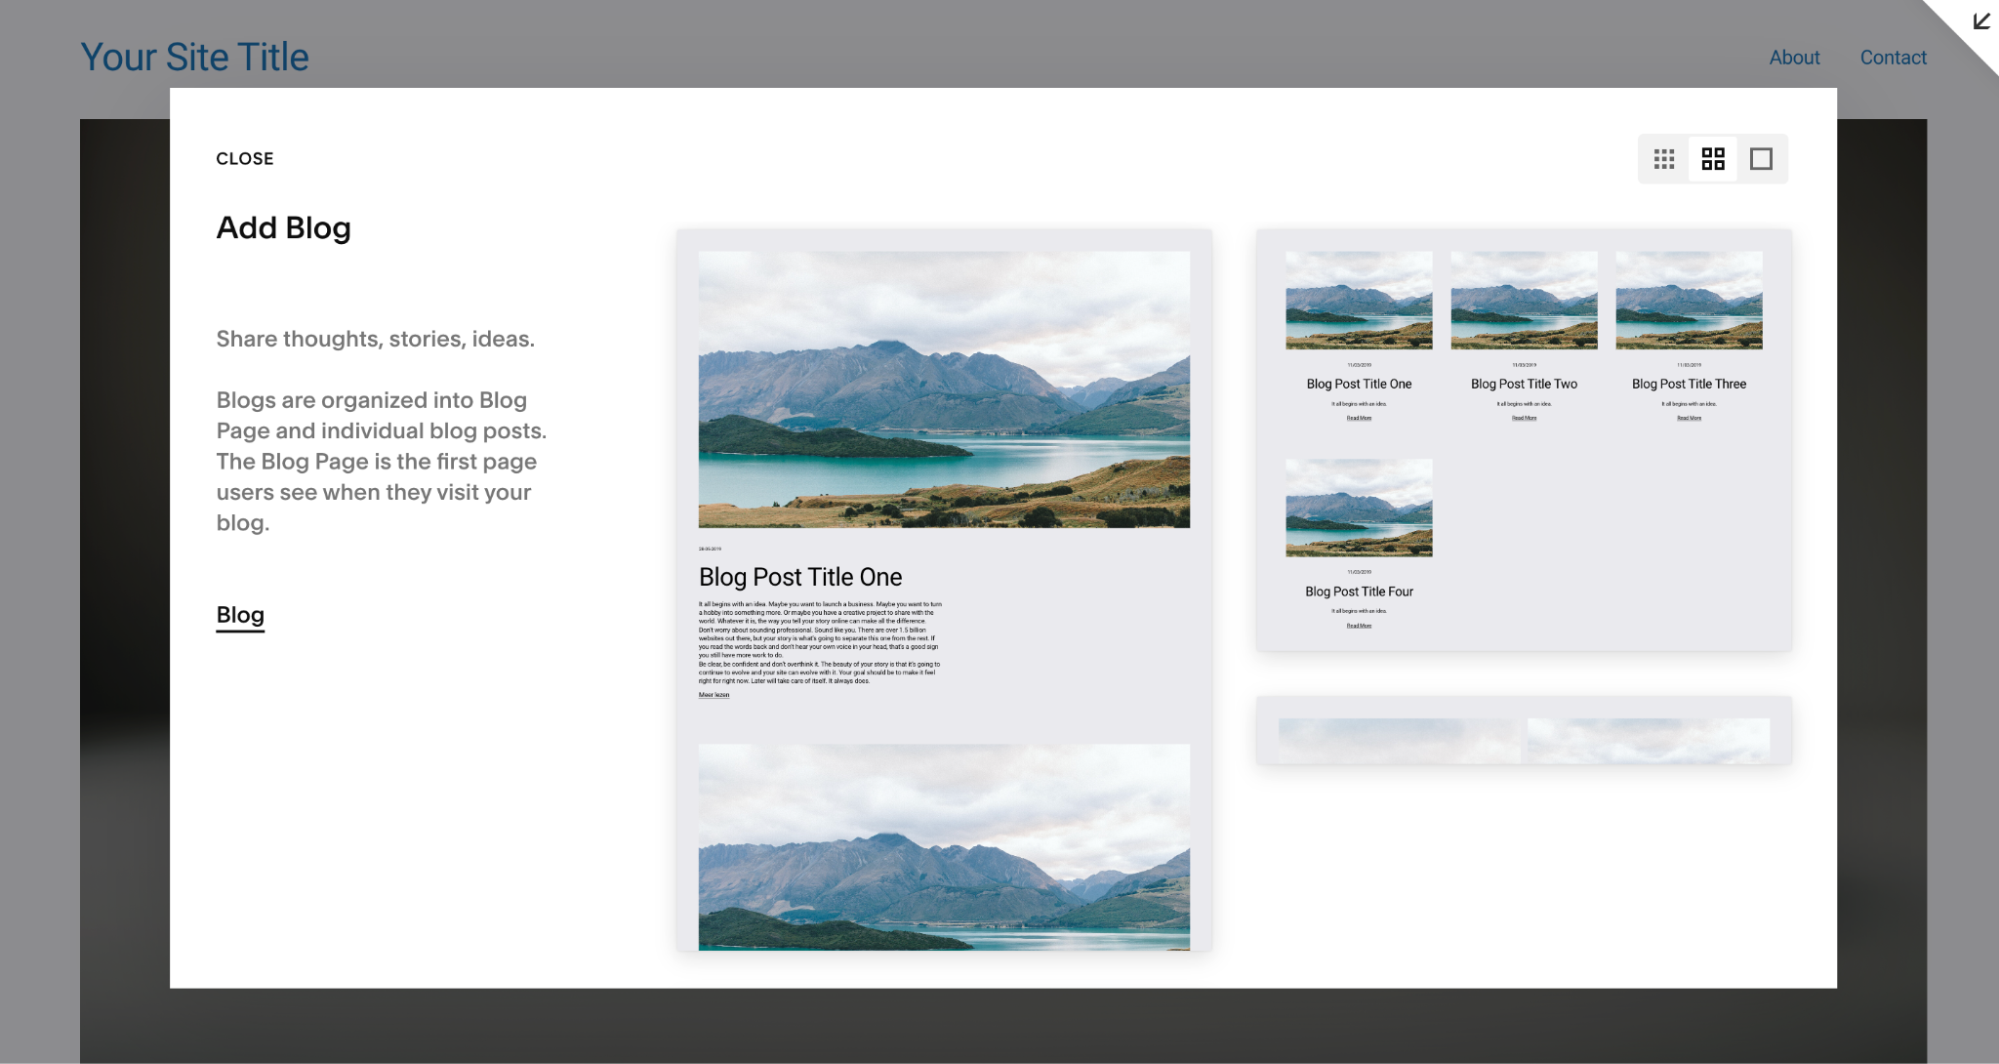
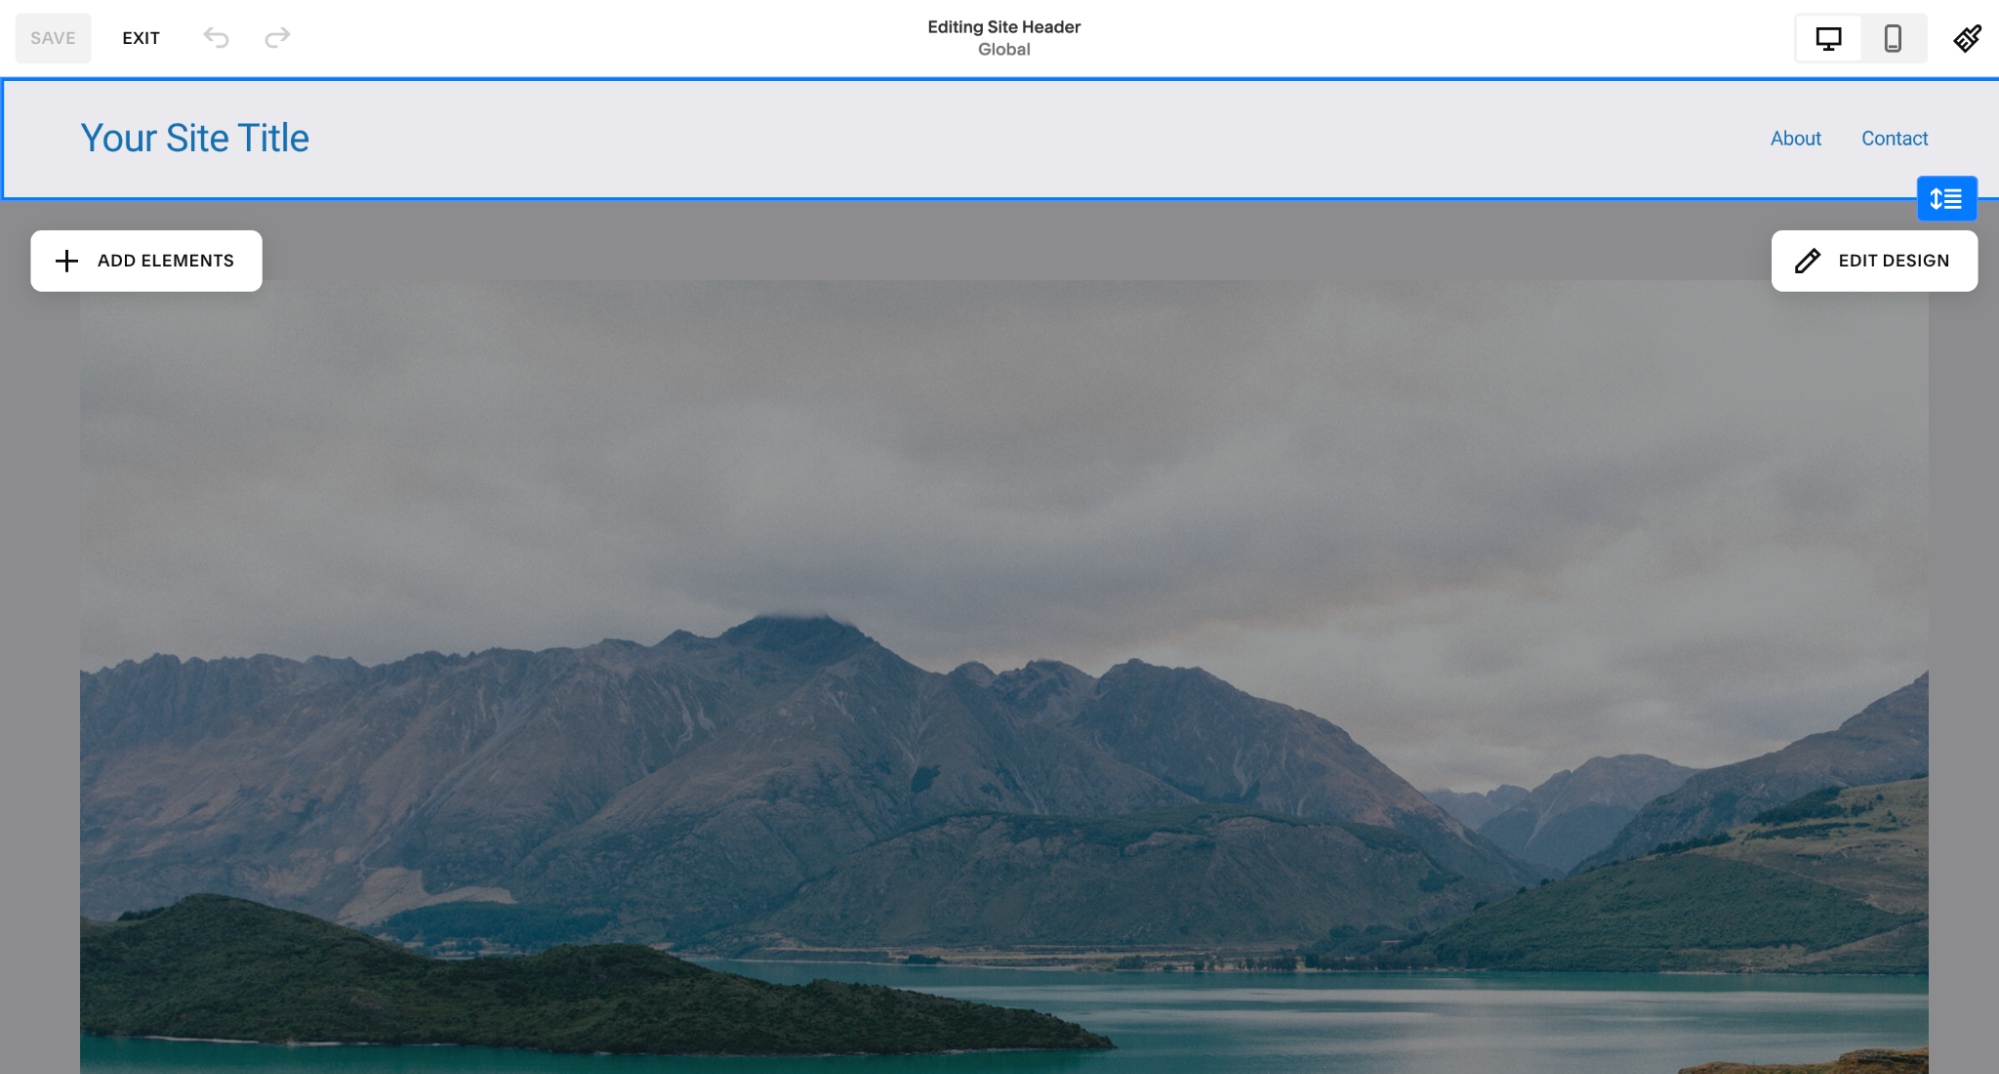
7. Now, click on Edit to add your title and content to the page.
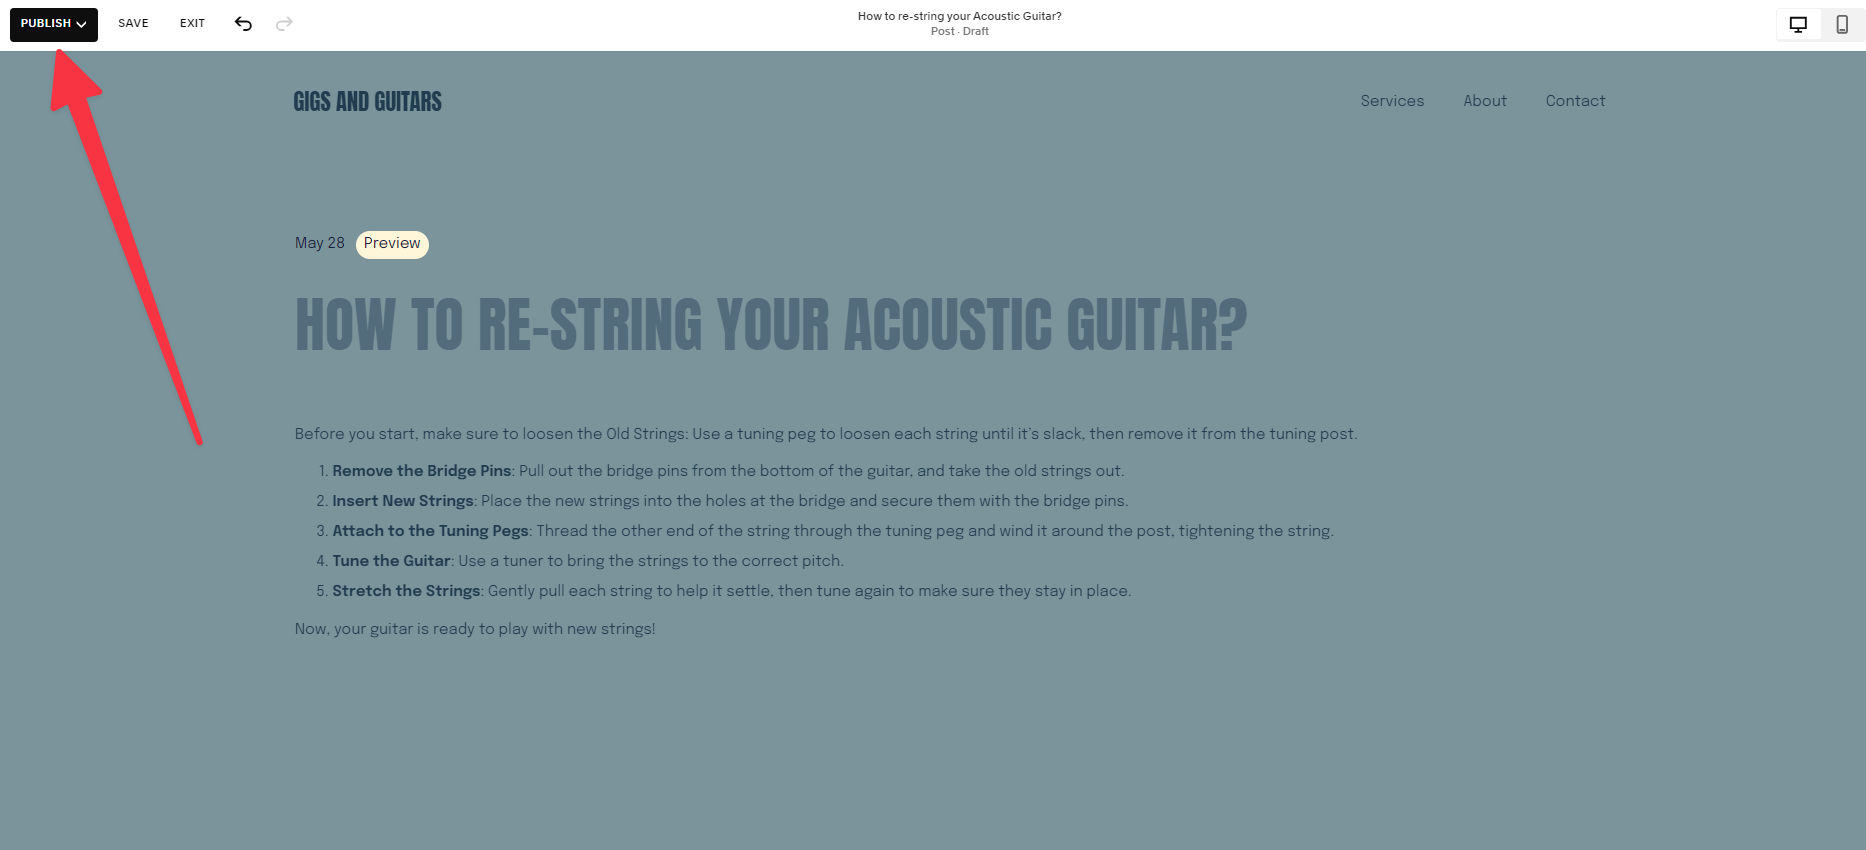
8. Once you've finished writing, you can simply tap Publish to get your article live instantly. Or, you can even choose to Save it so you can edit it later.
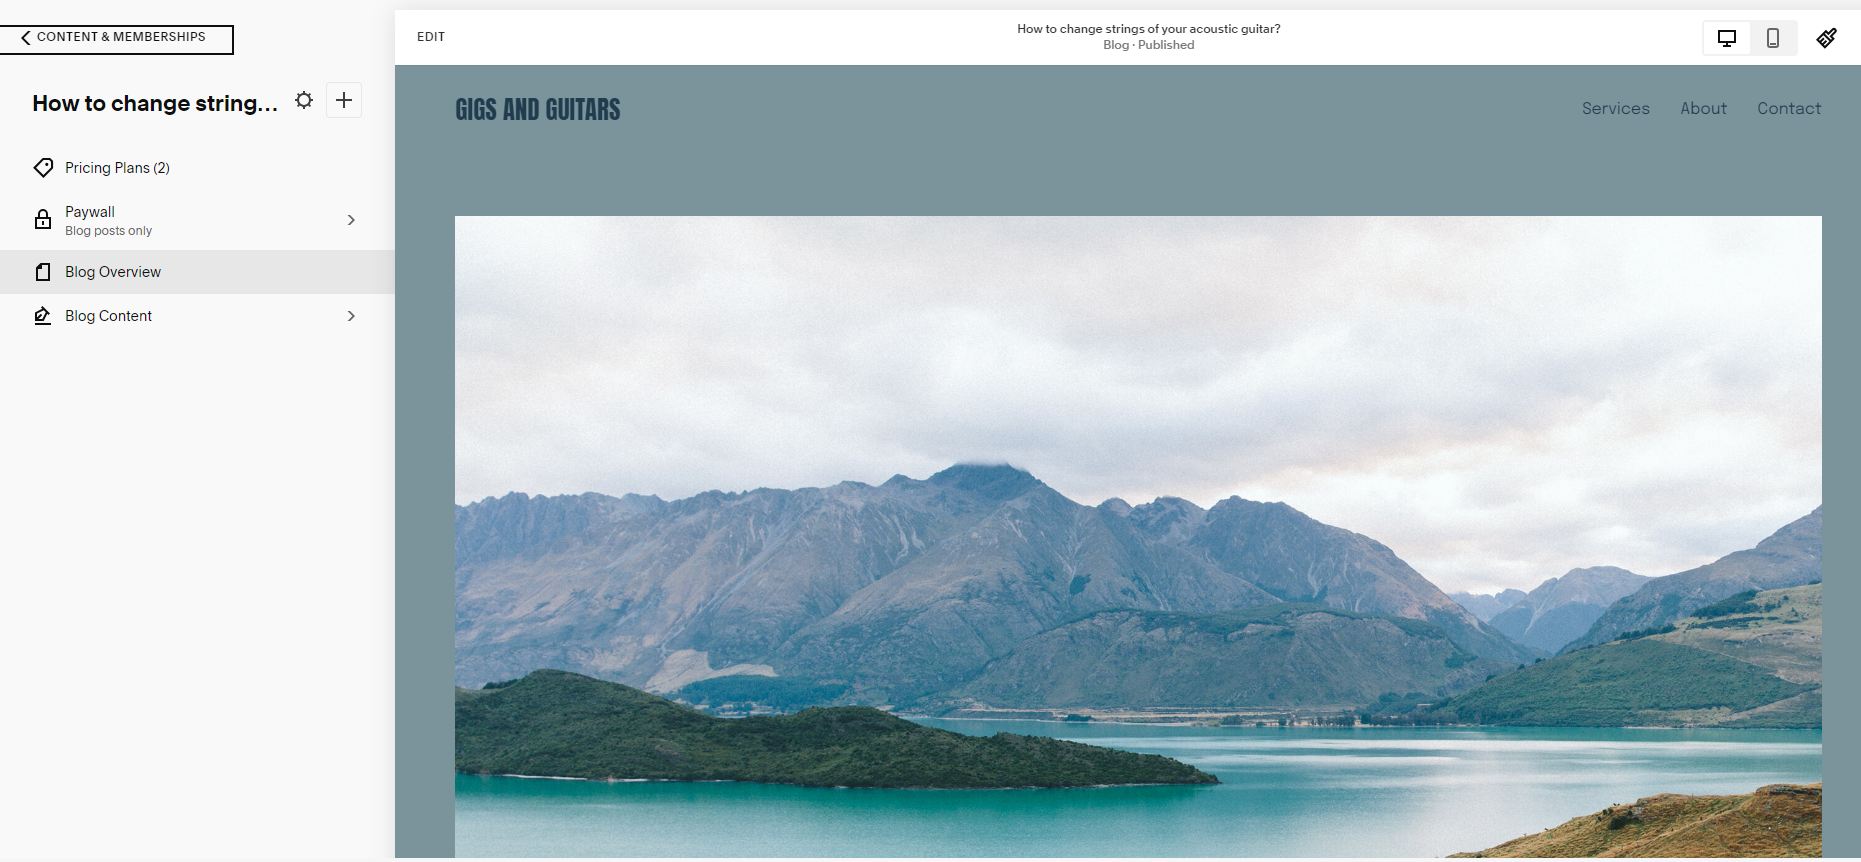
9. For further customization, tap on Blog Content to edit your post. Remember that this will also apply to all the other blogs you’ll continue to add to your site.
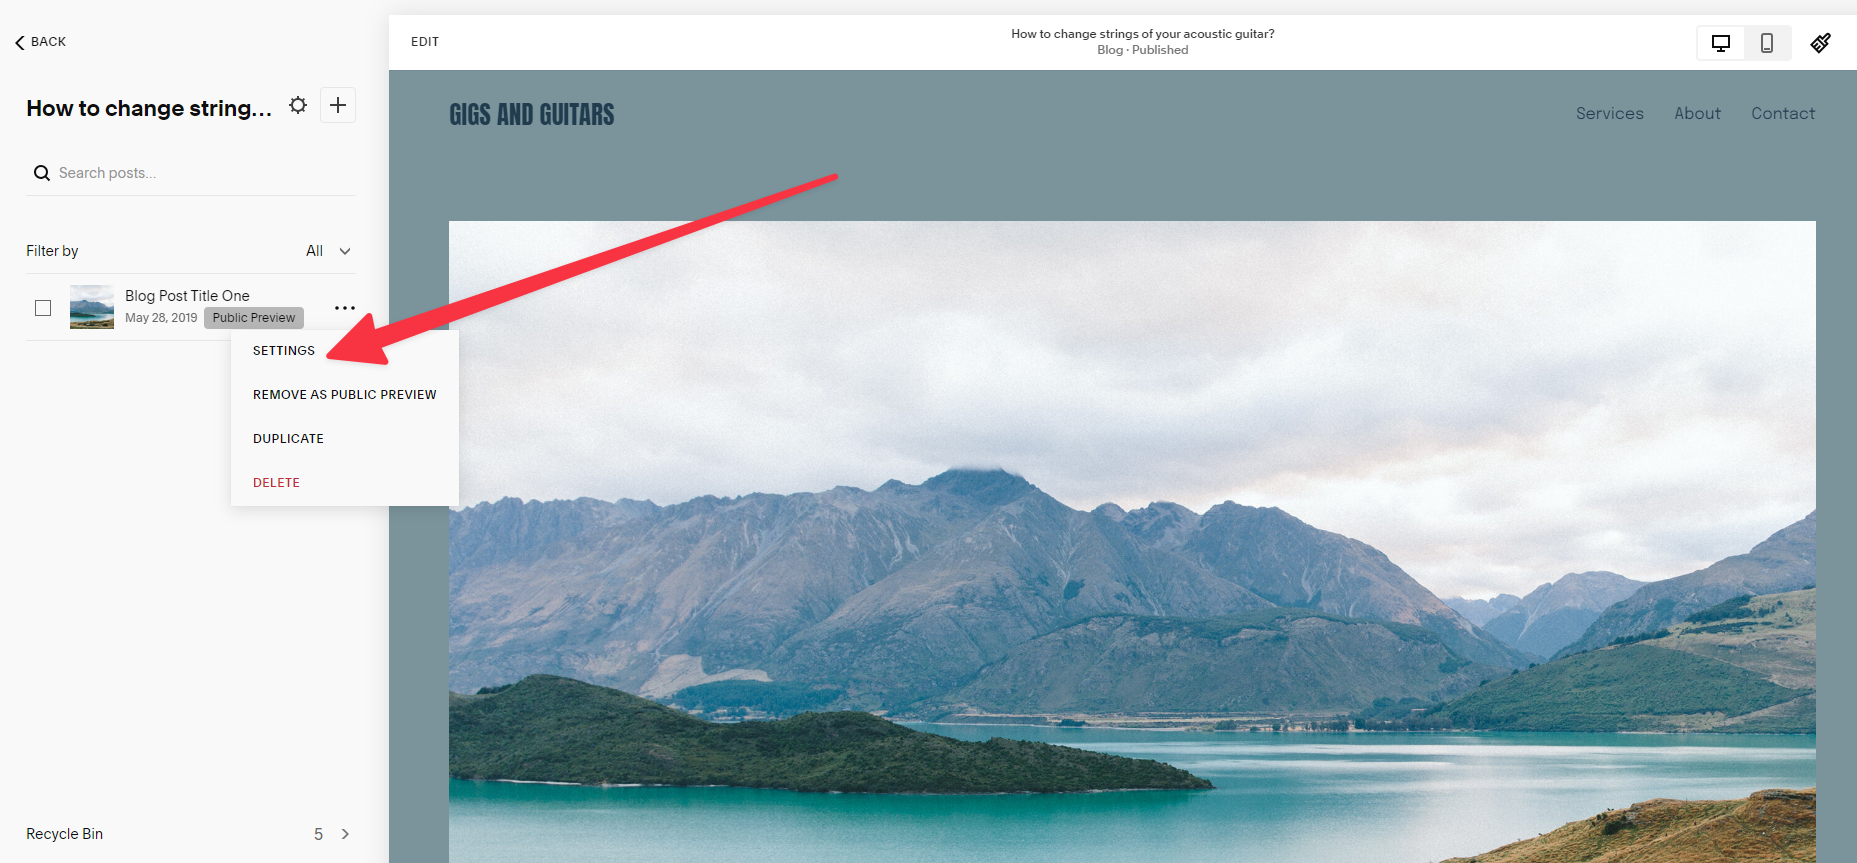
10. Now, choose the blog you wish to edit from the left layout section and tap on the three dots. Then click on Settings to edit the specifics of your blog post.
11. It’s important to take into consideration and tweak your post’s Cover image, SEO, Location, Author, Tags, etc. Make the necessary changes to optimize your post and save the changes to make your blog live.
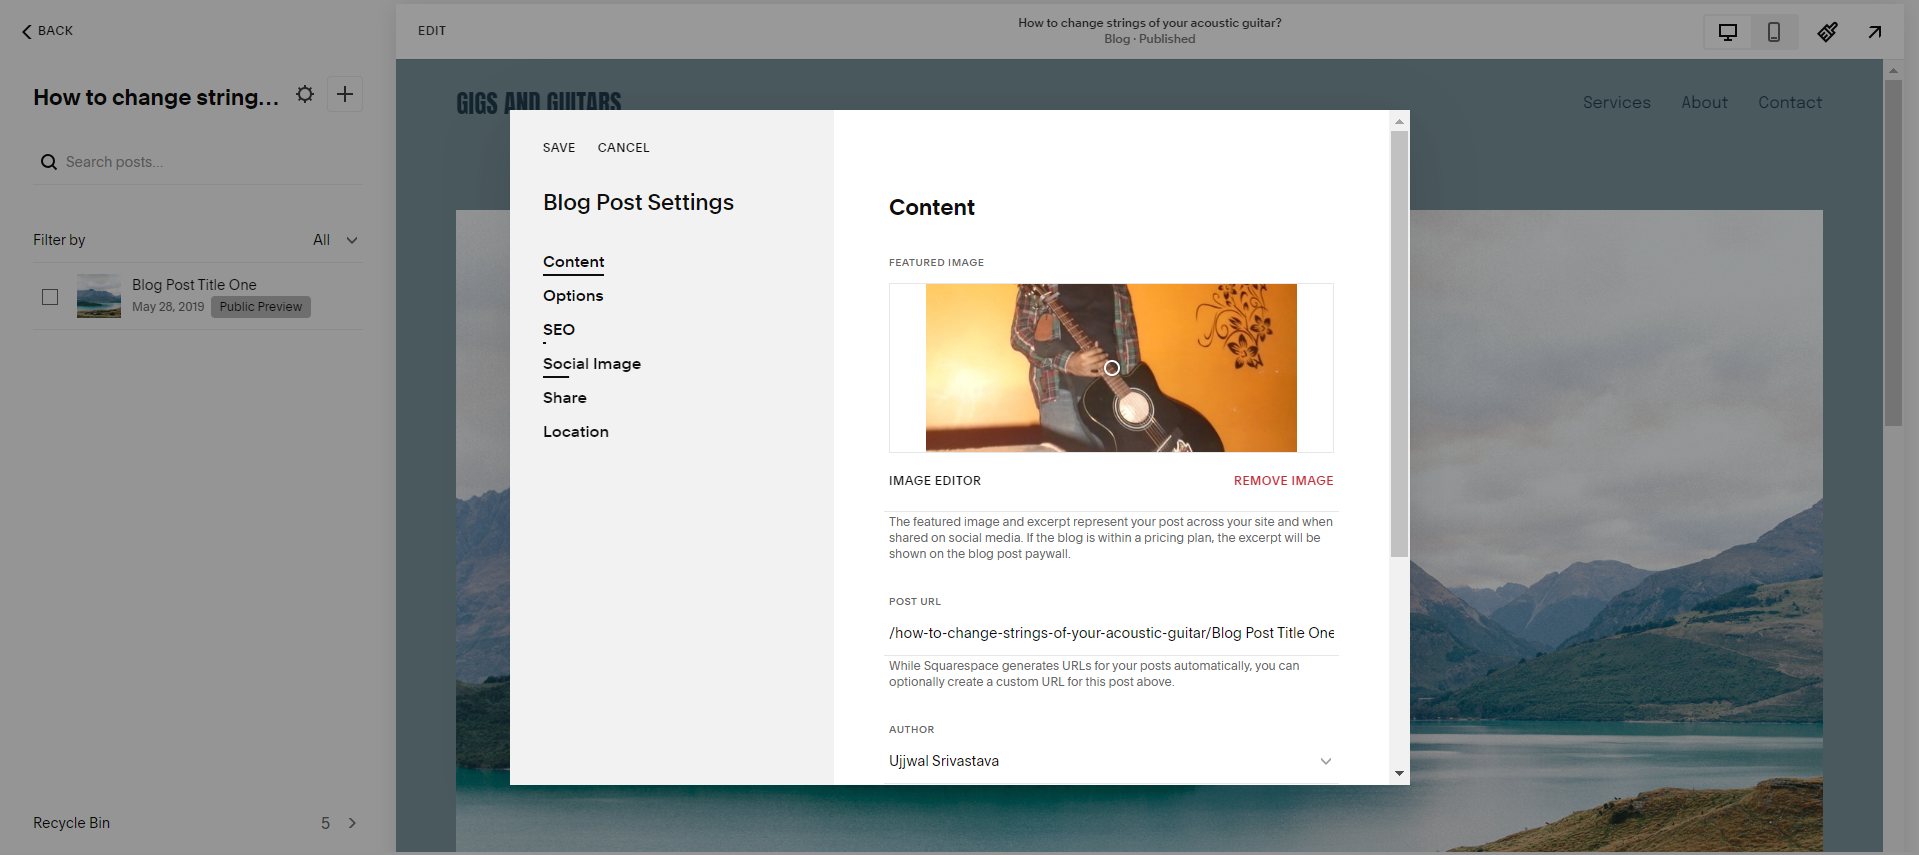
Note: You can change the post status from the Options section. It gives 4 options: Draft, Needs Review, Published, and Scheduled. However, if you're ready to publish, just hit "Publish" and voilà — your first blog post is live.
Building a blog on Squarespace: Verdict
Using Squarespace to create a blog site was a breeze. Its builder is intuitive, and all you have to do is think about how you want to use the tools to personalize your site. Customizing and publishing a sample blog post was just as straightforward as setting up the site. If you're still unsure, simply follow the above steps and try building your blog using Squarespace's free trial. This will give you a good sense of Squarespace’s user-friendly interface, customization options, content editor, and more.
Pawan Singh is a tech writer at TechRadar Pro, where he contributes fresh how-to guides, product reviews, and buying guides within the tech industry. Apart from his writing duties, Pawan offers editorial assistance across various projects, ensuring content clarity and impact. Outside the world of tech, he enjoys playing basketball and going on solo trips.
- Owain WilliamsB2B Editor, Website Builders & CRM
