Why you can trust TechRadar
Performance
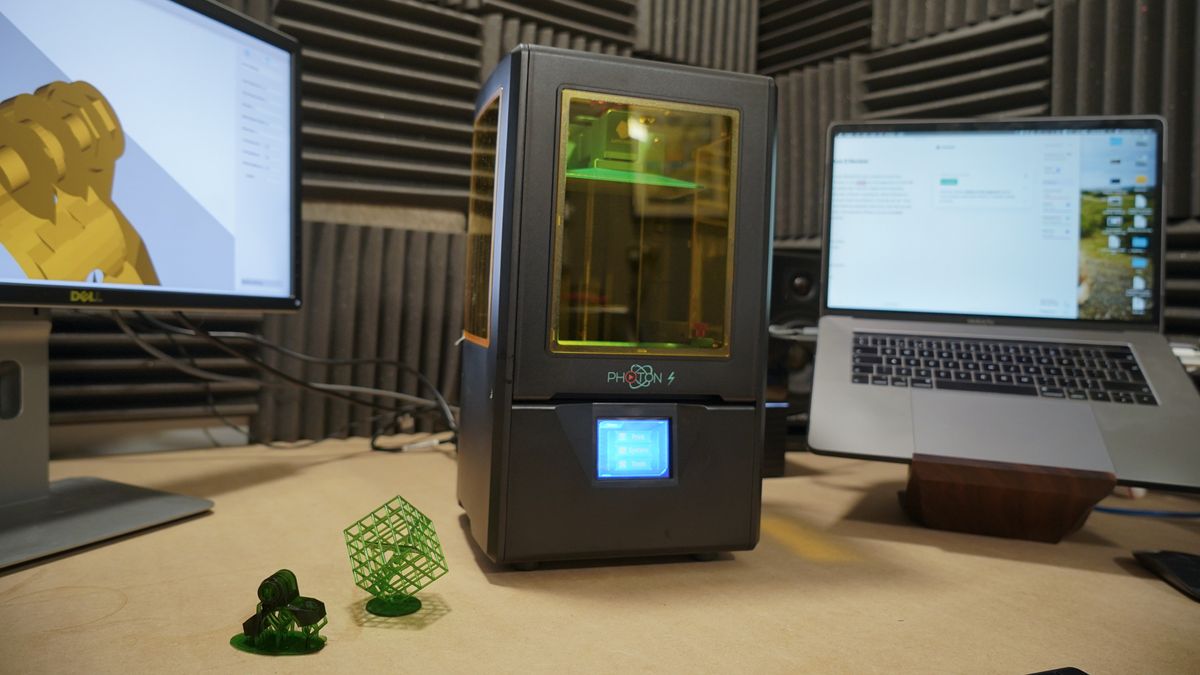
The AnyCubic Photo software is simple to understand and if you haven't used a DLP printer before the positioning of models is a bit of a steep learning curve.
Once the print has been laid out and sliced in can then be copied directly from the software to the supplied 8GB USB key. This is then put directly into the side of the Photon S, and the model can then be selected through the UI.
Running the test print to start is seamless, select the model hit print and that's it, sit back and wait just over four hours and the print appears.
Donning the gloves and a pair of protective glasses, it's time to check out the print quality. Looking over the model that's still firmly attached to the print platform and it looks excellent.
Checking the model over quickly and it looks to be high resolution with intricate detail and little sign of layering.
With resin still dripping for the print, this is where the most significant difference between FDM and DLP printing becomes apparent. There's now a lengthy cleaning and curing process.
To help out with this stage, I have an Original PRUSA CW1, essentially a washing and curing tank. It saves time and a considerable amount of faff.
The model is essentially popped into a bath of isopropyl alcohol and then swilled around until any excess resin is removed. Then washed in water before being cured under a UV light.
A washing tank is not essential; you can just pop the chemicals into a bowl and then leave the print to cure on a window sill.
For the next few prints, I went through a back catalogue of designs and functional parts that I've created and throughout the quality was excellent.
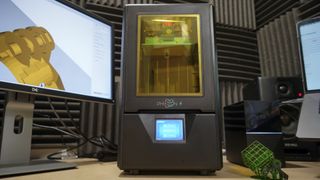
The first couple of prints I tried failed; this was not due to the printer, more the user. To get a successful print, you need to make sure that once the model is positioned, at an angle, a platform and then supports are applied.
If this process is followed, then I had a high print success rate. But, getting the 3D file prepared correctly was just the start.
More than other printers, I found that process was key to success. Follow the instructions and everything is fine, rush it and very quickly things will go wrong.
AnyCubic supply a selection of filter for you to use to filter through the resin between prints. This just makes sure that there are no fragments of hardened resin in the tank when the next prints start.
If you just decide to skip this step and go straight into the next print after finishing the first, then you may be OK, but then again you may not.
Once you get a failed print, you then need to extract the bits from the PEI sheet, refilter the resin and start again. It's not a huge issue, but one that is entirely avoidable as long as you stick to the correct processes.
Unlike other printers, there are fewer sensors, so if the conditions in the workshop are too hot or in my case cold, the printer doesn't warn you. This can lead to print issues, a good rule of thumb is that if you feel comfortable in a T-Shirt working in the workshop, then so will the printer.
Print quality
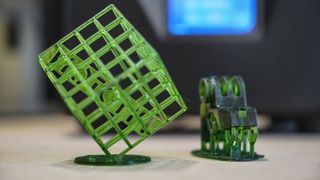
It's hard to believe that a printer of this price can produce a print of such quality. The 2K LCD screen resolves enough detail to output fine detail and intricate prints consistently.
Put a print from this DLP 3D printer next to the highest resolution from an FDM 3D printer, and you can see the difference in quality with the DLP having the edge. Layering is fine, and while it can be seen, it's only apparent under scrutiny. Issues with bridging and overhang don't exist.
Checking carefully over the surface of the print and you can start to see some imperfections, they're very slight and only really picked up if you're looking for them.
The edge sharpness at some points wasn't as defined as I've seen with the same print on other SLA printers, and this could be due to the limits of the 2K resolution.
The main issues that I faced were getting the supports in the right position, or more accurately ensuring that the model was positioned in the Photon S software for the supports to adhere correctly.
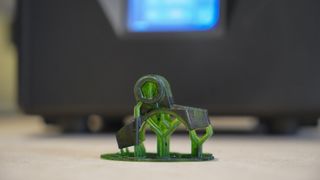
On a few models such as the GoPro bike mount, this positioning took a couple of attempts, and while the print looked fine, there was some warping.
Adjuting the model position and the issue was resolved. Like any form of 3D printing, there's always a little trial and error to get the best results.
The Photon S software is relatively simple, and it doesn't take long to get to grips with all the features. One issue I did have was once you move the model you then need to regenerate the supports, I also found adding a platform of 1 to 2mm depending on the model seemed to help with print quality for small to medium-sized prints.
Overall and after countless prints, the success rate was incredibly high with good quality all-round.
Final verdict
There's no doubt that the AnyCubic Photon S is a cheap DLP printer, you can feel that in the build quality of the casing. But for your money, you get an incredible machine that is capable of outputting excellent quality prints.
The big question is, why is it so cheap compared with other SLA printers?
As I got into the test, many of the features that I've come to expect from this type of machine are absent. Most noticeably any kind of mechanism to stir the resin to ensure that nothing is sticking or floating where it shouldn't be.
This means that you do have to be hyper-vigilant with the handling and condition of the resin.
There are few sensors, so if the temperature dips below the resins optimum temperature, there's no warning.
Like the bare bone, FDM 3D printers the Photon S is a barebone DLP. All this means is that you have to put in more work before and after the print process to ensure decent prints.
Other savings to the cost are made through the quality of the parts, the 2K LCD is good, but it's not the highest resolution screen on the market. There's no WiFi and the on printer interface, while usable is basic.
Then there's the build quality; again, it's functional without pushing the boundaries. It looks pretty decent, and again while the plastic door does the job, it's relatively thin and cheap feeling.
- We've also highlighted the best 3D printers
Ali Jennings is the imaging lab manager for Future Publishing's Photography portfolio. Using Imatest Master and DxO Analyser he produces the image quality tests for all new cameras and lenses review in TechRadar's cameras channel. Ali has been shooting digital since the early nineties and joined Future's Photography portfolio back in 2003.
Testing Samsung's new AI-powered vacuum taught me that I don't really need my vac to be know the difference between every single surface
I’ve used a lot of power banks, but the Baseus Blade Pro is the only one slim enough for my laptop sleeve
This is the world's first Thunderbolt 5 LTO tape drive and I can't understand why it exists in the first place
