Why you can trust TechRadar
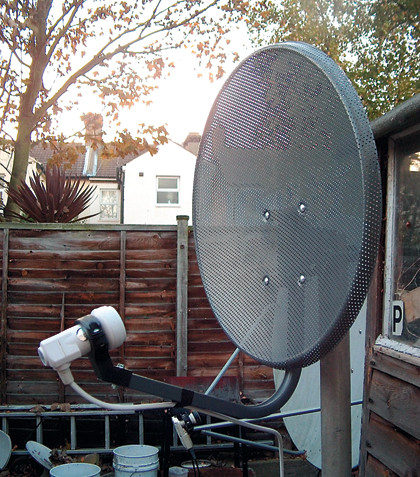
Assembling the dish is fairly straightforward. Note that no rim tape is supplied with the reflector, the perforated edges of which are cardigan-snagging sharp.
The LNB boom bolts to the back of the reflector, courtesy of a handful of bolts. The az-el bracket is also attached to the boom, slots cut into the bracket enabling the assembly to be tilted forward and back until it's aimed at the satellite.
The bracket is stamped with an elevation scale, which – certainly in the case of the test sample – was barely visible. The LNB bracket attaches to the boom's front protrusion, which had started to rust courtesy of some unprofessional paintwork (unique to our dish, one hopes). The az-el bracket also loses its paint with surprising ease.
Another drawback is there's nothing to stop the nuts that secure the lower half of the holder to the upper half from dropping off . You're advised to attach the LNB to the dish before taking it up a ladder.
A wall bracket is supplied with the dish. However, it will clamp onto any existing pole (up to 50mm diameter) you may have. It's then a case of installing the LNB, attaching the 'F' plugs, running the cable from dish to receiver and aligning the dish.

The compass can help you to determine North, and from simple calculation you'll be able to determine where the dish should be pointed (there are no alignment tables, but such information is readily available on the internet).
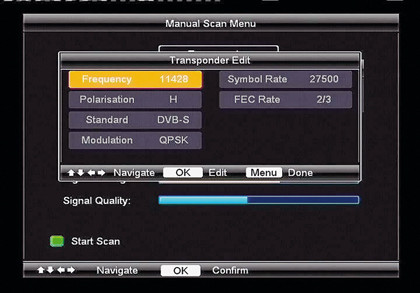
From then on, a bit of tweaking will allow you to 'peak' the dish. Signal strength and quality meters are available in the receiver's 'manual scan' mode. From here, you can select one of the preset transponders as a 'target'. But they're not very helpful during initial signal-finding and will only register when the dish is reasonably well aligned.
Annoyingly, the manual scan mode exits automatically after a minute or so if no signal is present. Subsequently, we discovered a setting ('Menu Timeout', in the 'OSD Setting Menu') that enables you to increase this period to a more useful 10 minutes. It's a pity a basic strength meter isn't supplied.

The good news is that the dish is free of play and so easy to adjust. It's also remarkably stable once locked in position.
Once your dish is aligned you can choose the 'Freesat scan' mode. Enter your postcode and the receiver will hunt down all available signals. It asks for a postcode so that you get the correct regional variations – these can be changed later if need be with an 'edit customised channel' menu.
If new transponders come along you can edit existing ones (as opposed to adding new ones) in the manual scan menu.
Changeable parameters are symbol rate, standard (DVB-S or S2), modulation, frequency, polarity and FEC. Unfortunately, DiSEqC is not currently supported. The receiver is said to be compatible with version 1.1 of the standard, but the manual scan menu's LNB select option is 'greyed out'. We hope this will be fixed in future.
