TechRadar Verdict
Avid Media Composer is a powerful cross-platform video editing application, giving the professional editor the flexibility they need to work the way they want to. Its latest updates make sure it remains ahead of the curve and the industry standard for a while to come.
Pros
- +
Multiplatform
- +
Fully customisable
- +
Industry standard
- +
Amazing high-end tools
Cons
- -
Complex software
- -
Needs a powerful computer to run it well
- -
Steep learning curve
Why you can trust TechRadar
When we last looked at Avid Media Composer back in January 2019, we were pretty impressed (hard not to be to be honest - this software has been around practically for ever, and is regarded as an industry standard).
Although an increasing number of films are cut on Adobe Premiere, Final Cut Pro or DaVinci Resolve, chances are high that if you’re going to be working in a professional environment, this is what you’ll be sitting in front of day after day.
- Want to try Avid Media Composer Ultimate? Check out the website here
Media Composer Ultimate is Avid’s take on the best video editing software for Windows and Mac, and it is not for the fainthearted. Although the interface is immediately recognisable to anyone who’s used any other type of video editing software, its customisability will please those who are into creating the work environment that suits them perfectly.
The interface
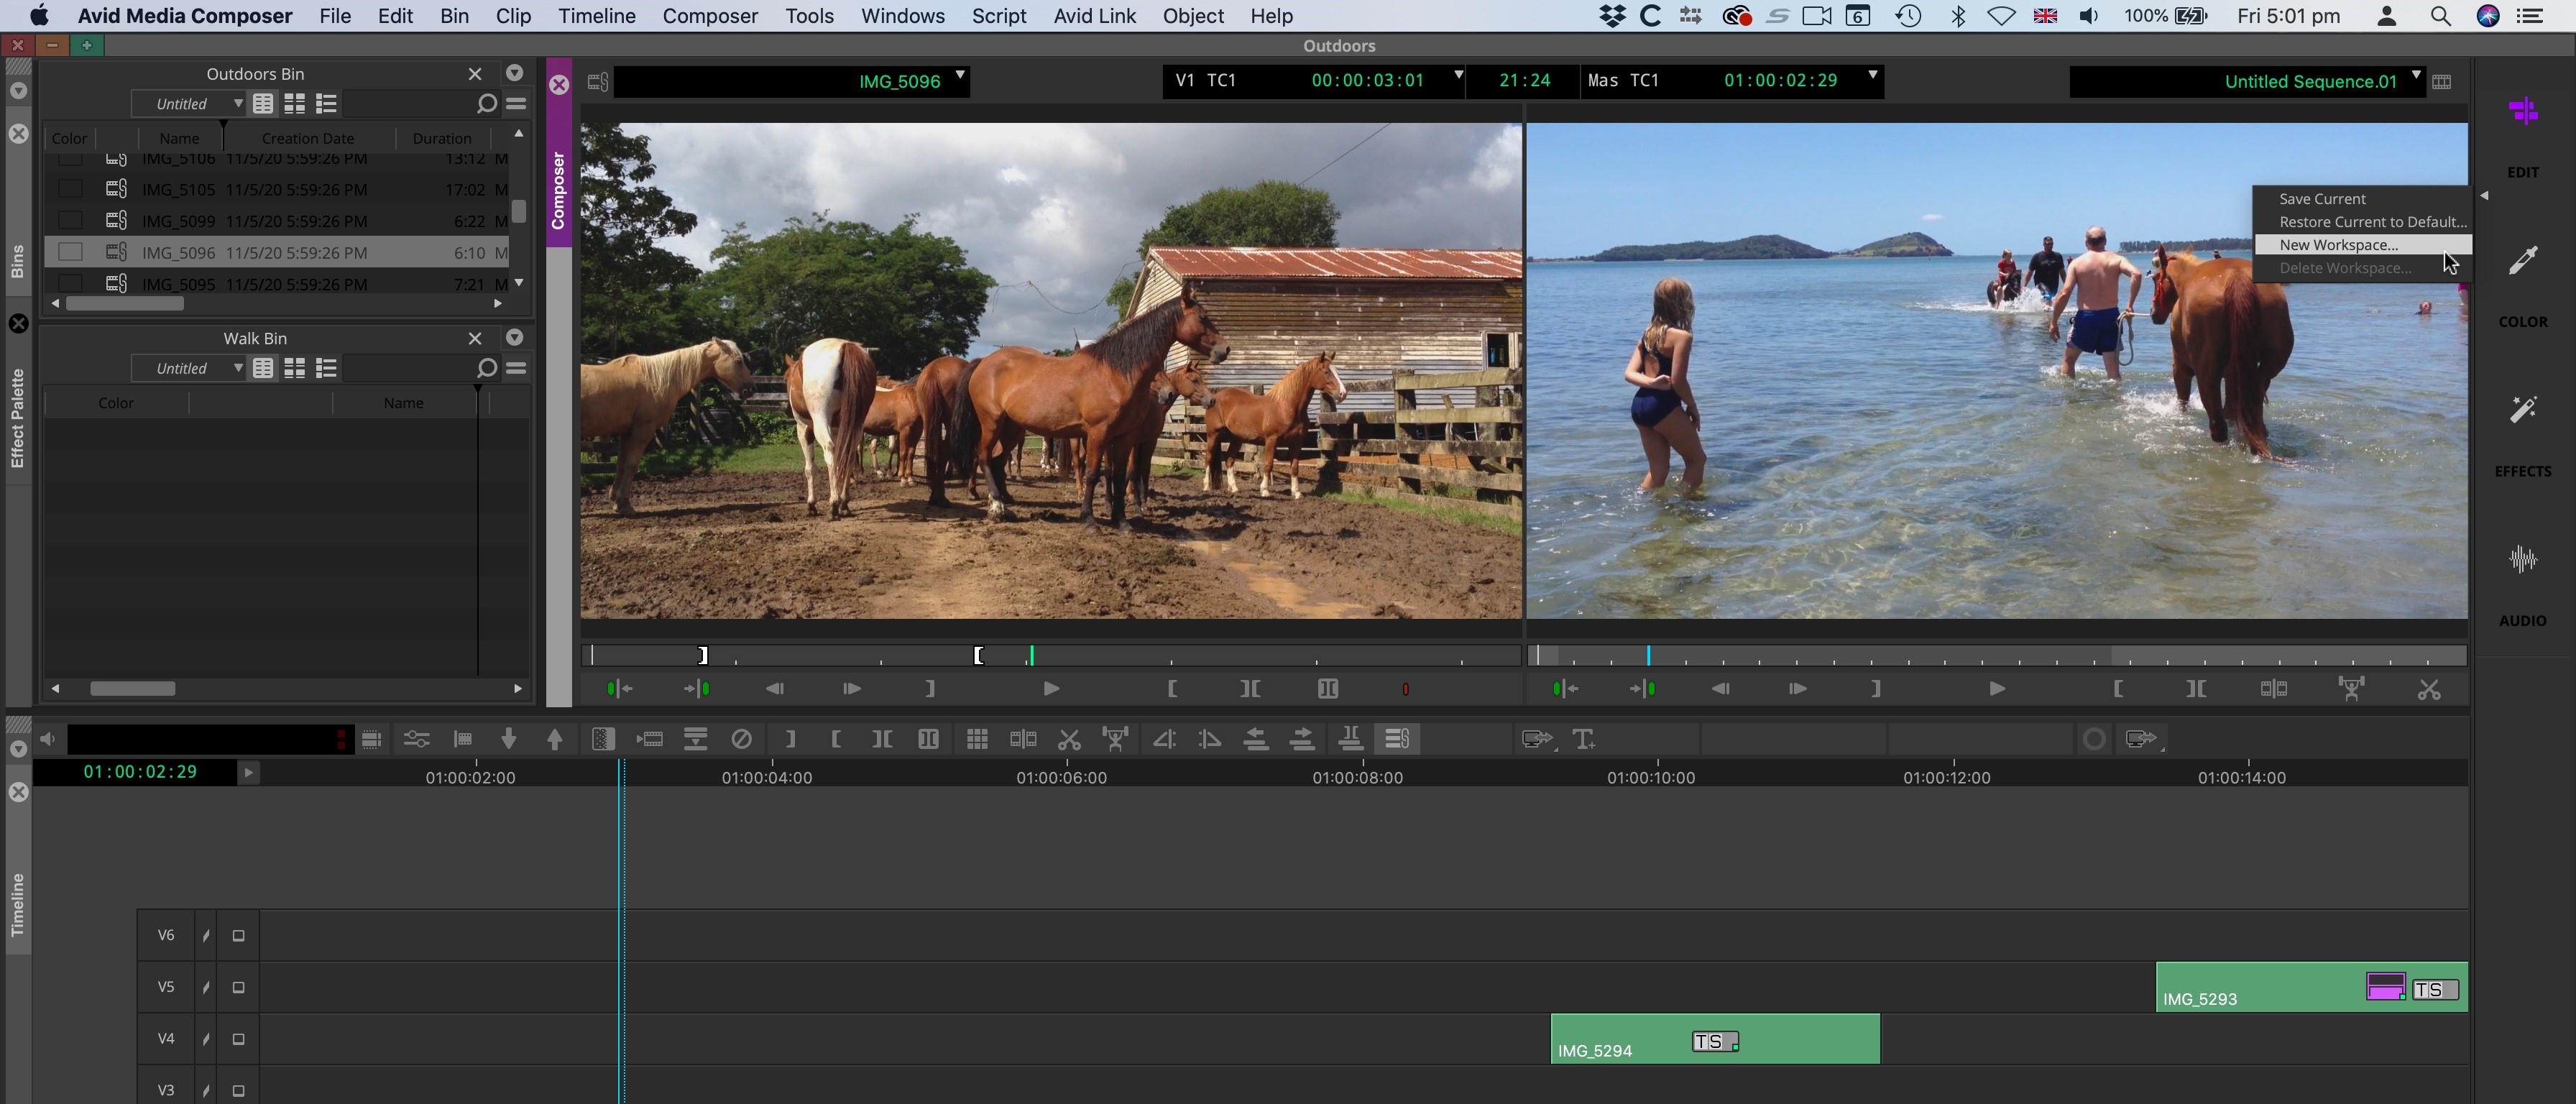
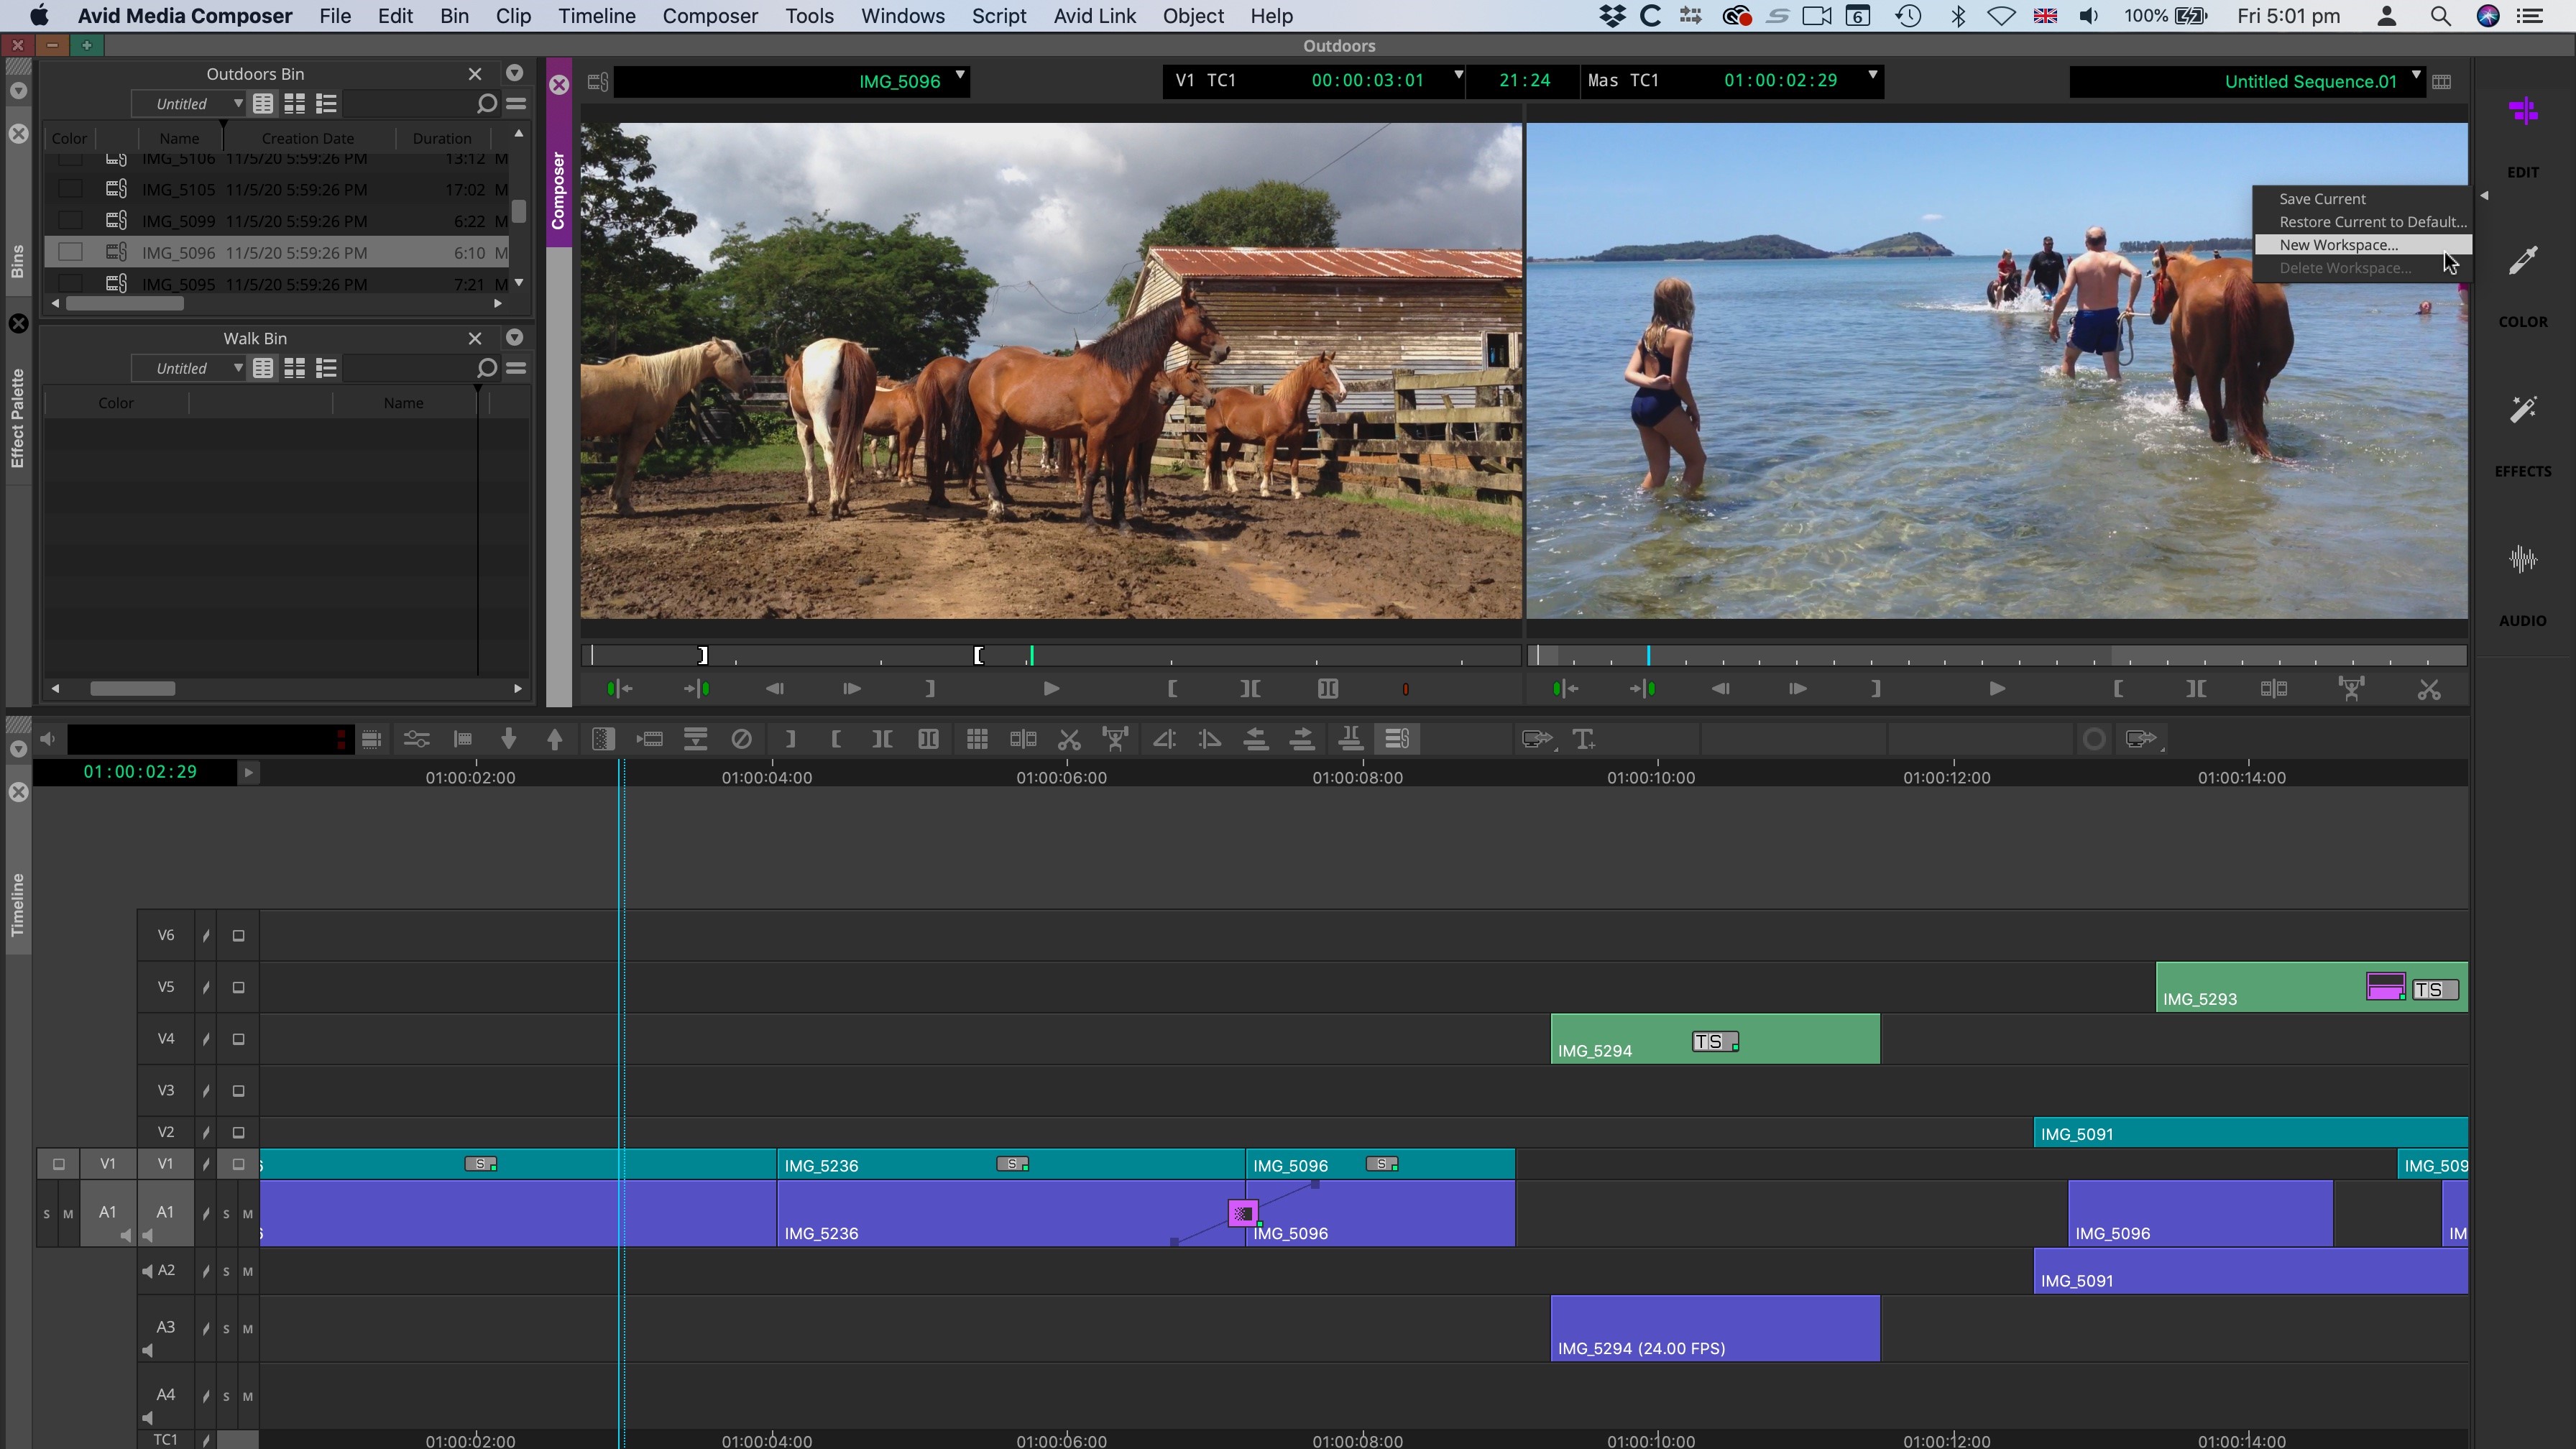
The entire interface has actually been completely redesigned. No longer is every part a floating window. The idea was to make it feel familiar to editors who have been used to Premiere’s or Final Cut’s interface.
You’ll find Task-specific workspaces on the right hand side - in previous versions these were more hidden from view. Now that they’re prominent, it encourages editors, especially novice ones, not to restrict themselves to a single configuration but to use the one that works best for the job at hand, be it Editing, Colour correction, applying Effects, or working with Audio.
When panes are turned into floating windows, they can be placed on other screens to extend your workspace for instance (if you’re lucky enough to work with multiple screens).
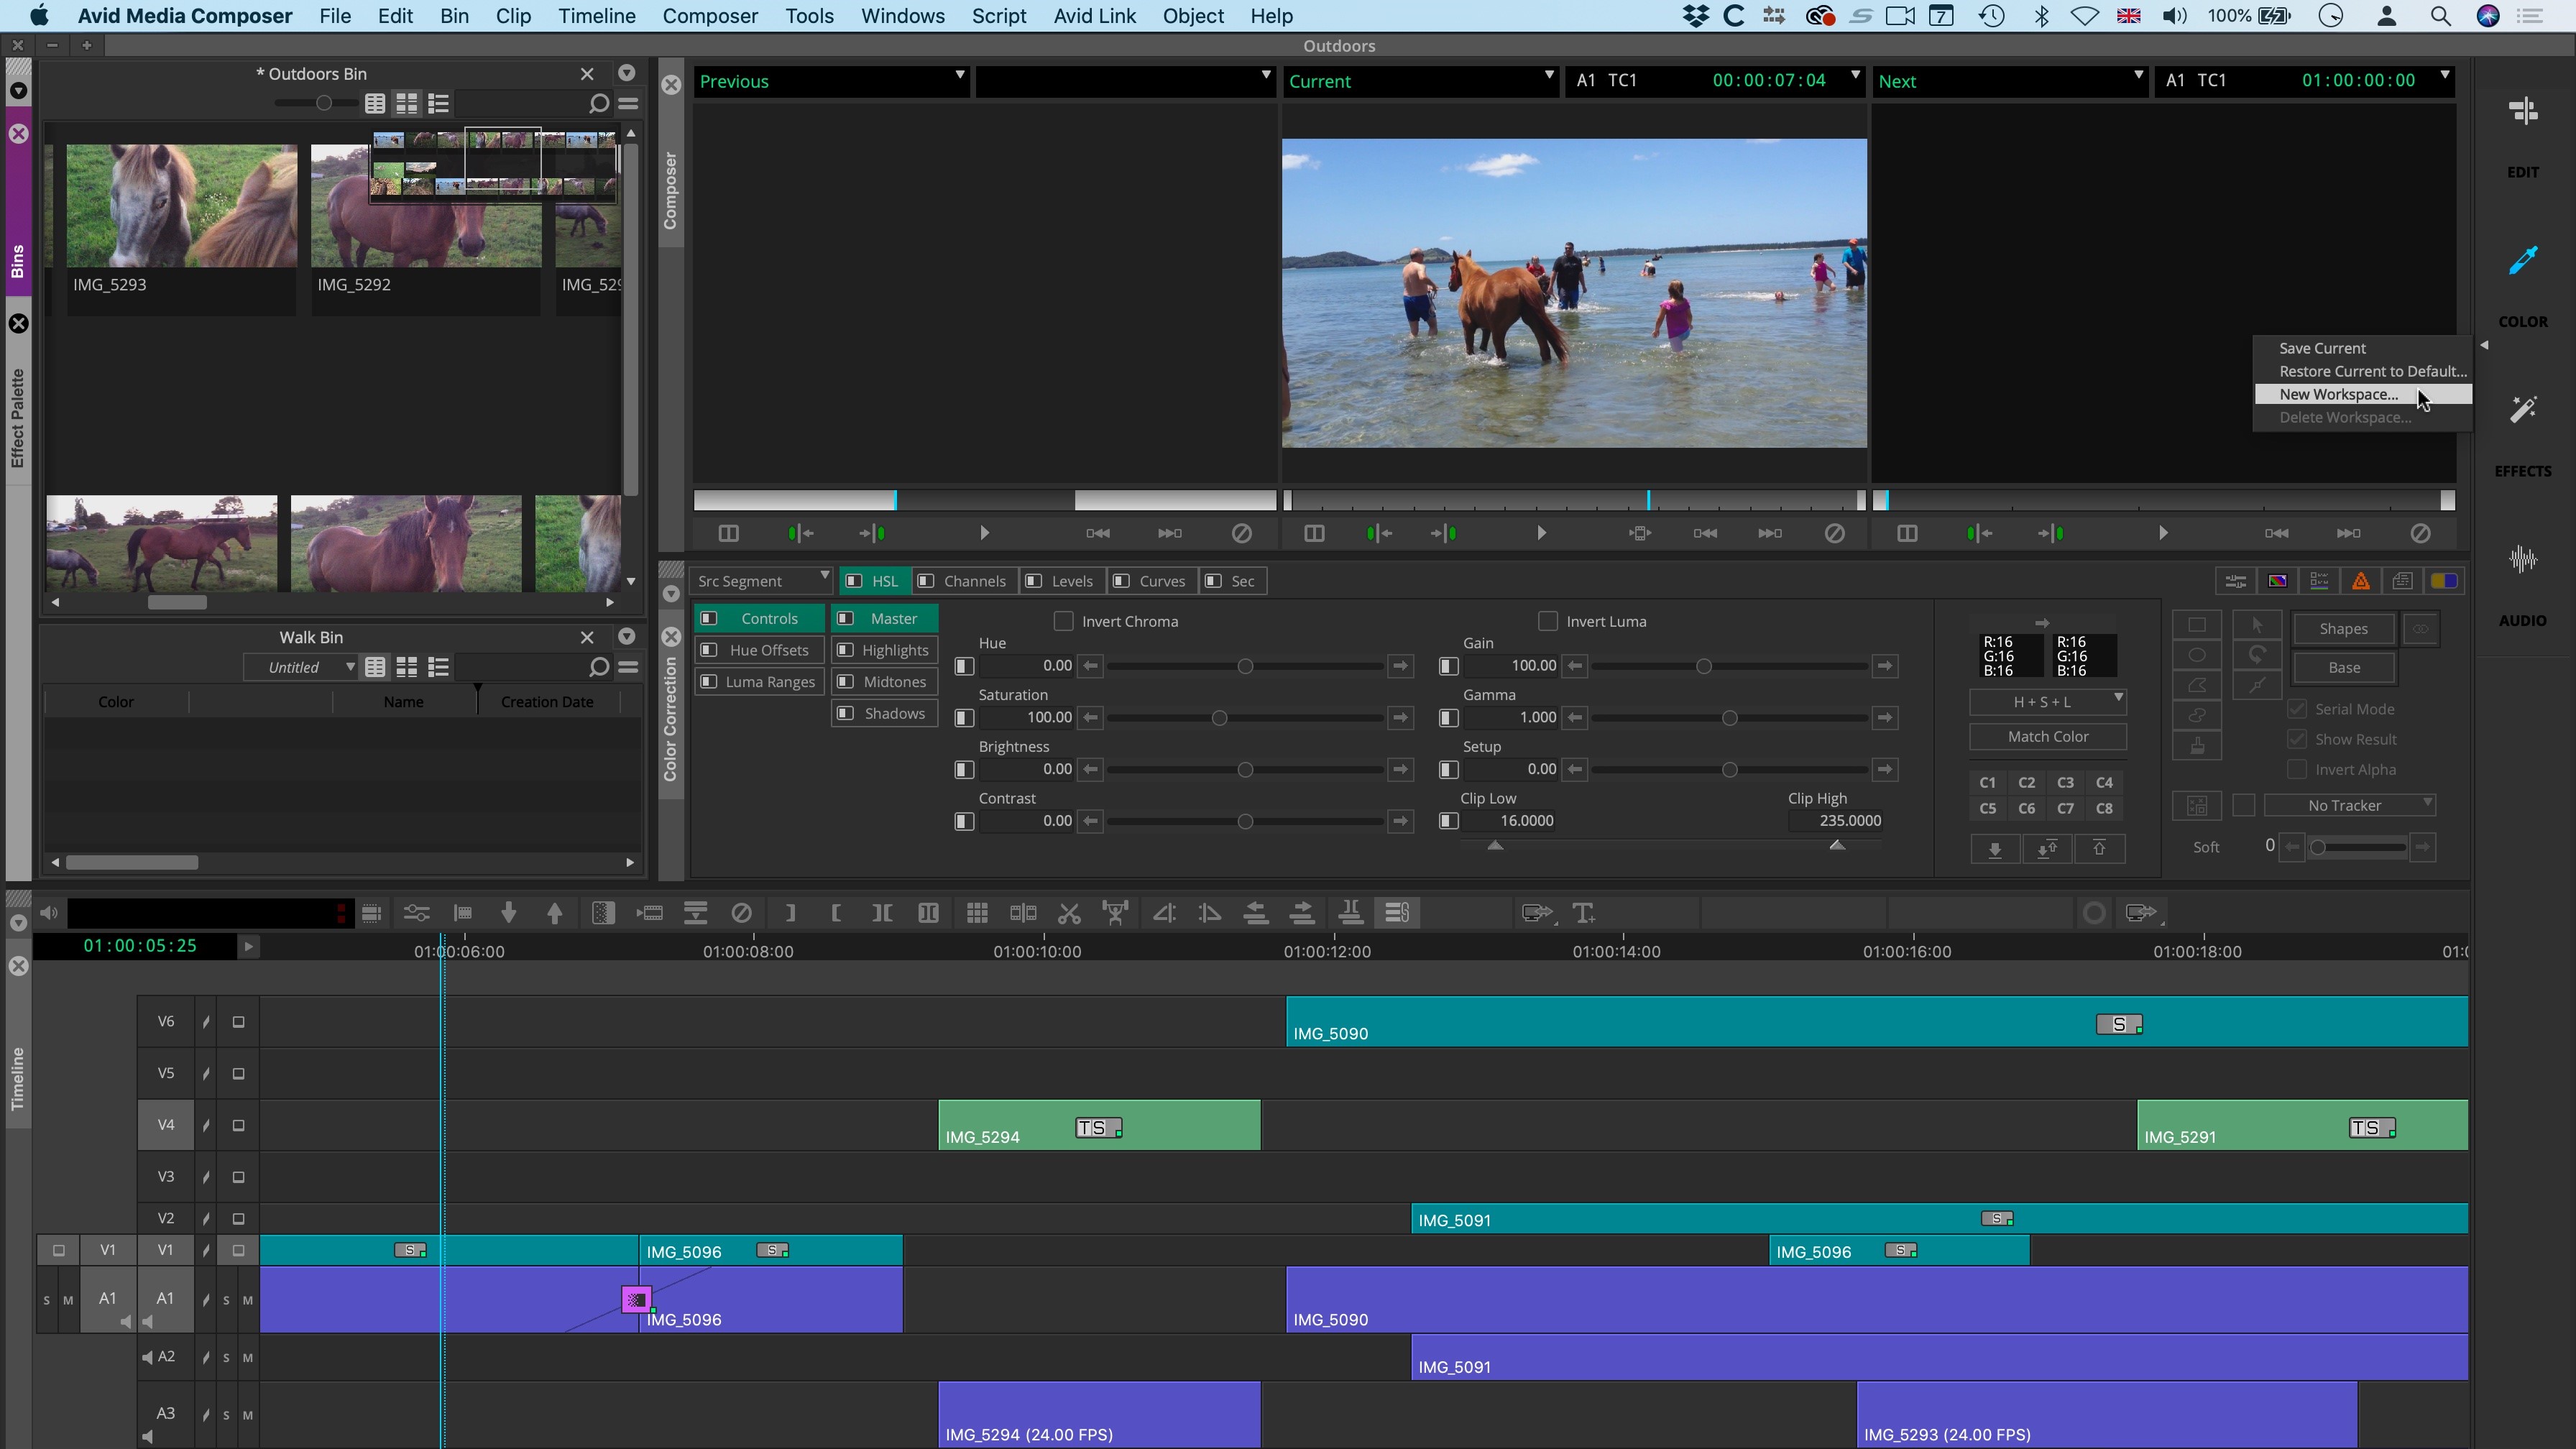
But Media composer didn’t lose its flexibility from when everything was a floating window: it possible to resize and reposition the panels to suit your needs. Even better, saving your custom configuration as a new preset, puts it on the right hand side, just beneath the default ones.
Sign up to the TechRadar Pro newsletter to get all the top news, opinion, features and guidance your business needs to succeed!
Importing
Before you start, you first need to set your project’s dimensions - create projects up to 16K, or with custom height and width, which is ideal if you’re looking to build web banners, or promos for expositions for instance.
It’s worth noting that when you launch the software, you’ll also notice a ‘What’s New’ section as a separate menu. This is where you can quickly check all the new features added with each update, from version 2019.6 onwards.
Importing media is done in a variety of ways. If you work with a tape deck, you just connect it to your computer and log and capture the footage. If your camera records to an internal hard drive, hook it up and use the Source Browser to import the footage. Add any media already stored on one of your drives to Media Composer in the same way, although you have the choice of either importing the footage or merely linking to it - the latter saves space but you need to make sure that drive is kept connected in order to edit with your chosen media.
Your imported footage is placed into bins, helping you organise yourself as you gather up the resources you need to create your project. From there, double-click on a clip to preview it, set in and out points and add your selection to the Timeline.
Editing
As you’d expect, all the tools you need to cut your movie are available to you, and the experience is similar to other professional video editing software. Media Composer grants you access to multiple video and audio tracks, enabling you to create quite complex sequences.
A lot of the navigation and editing seems to work better via the keyboard. So much so in fact that the keyboard itself is fully mappable and customisable. Should you prefer, editing predominantly with the mouse is of course possible, but if you take the time to familiarise yourself with the keyboard layout, you’ll appreciate the benefits in the long run.
Some of the new features added recently include the Bin Map. When activated, this little floating section gives you a birds eye view of the entire content of your bin, along with a highlight of which part of the bin the panel is currently on. Grab that highlight and drag is anywhere else within that map to jump to it instantly. This is highly useful to let you see how much content is in a bin, and if you’re familiar with its content, how to quickly get to the location you’re interested in.
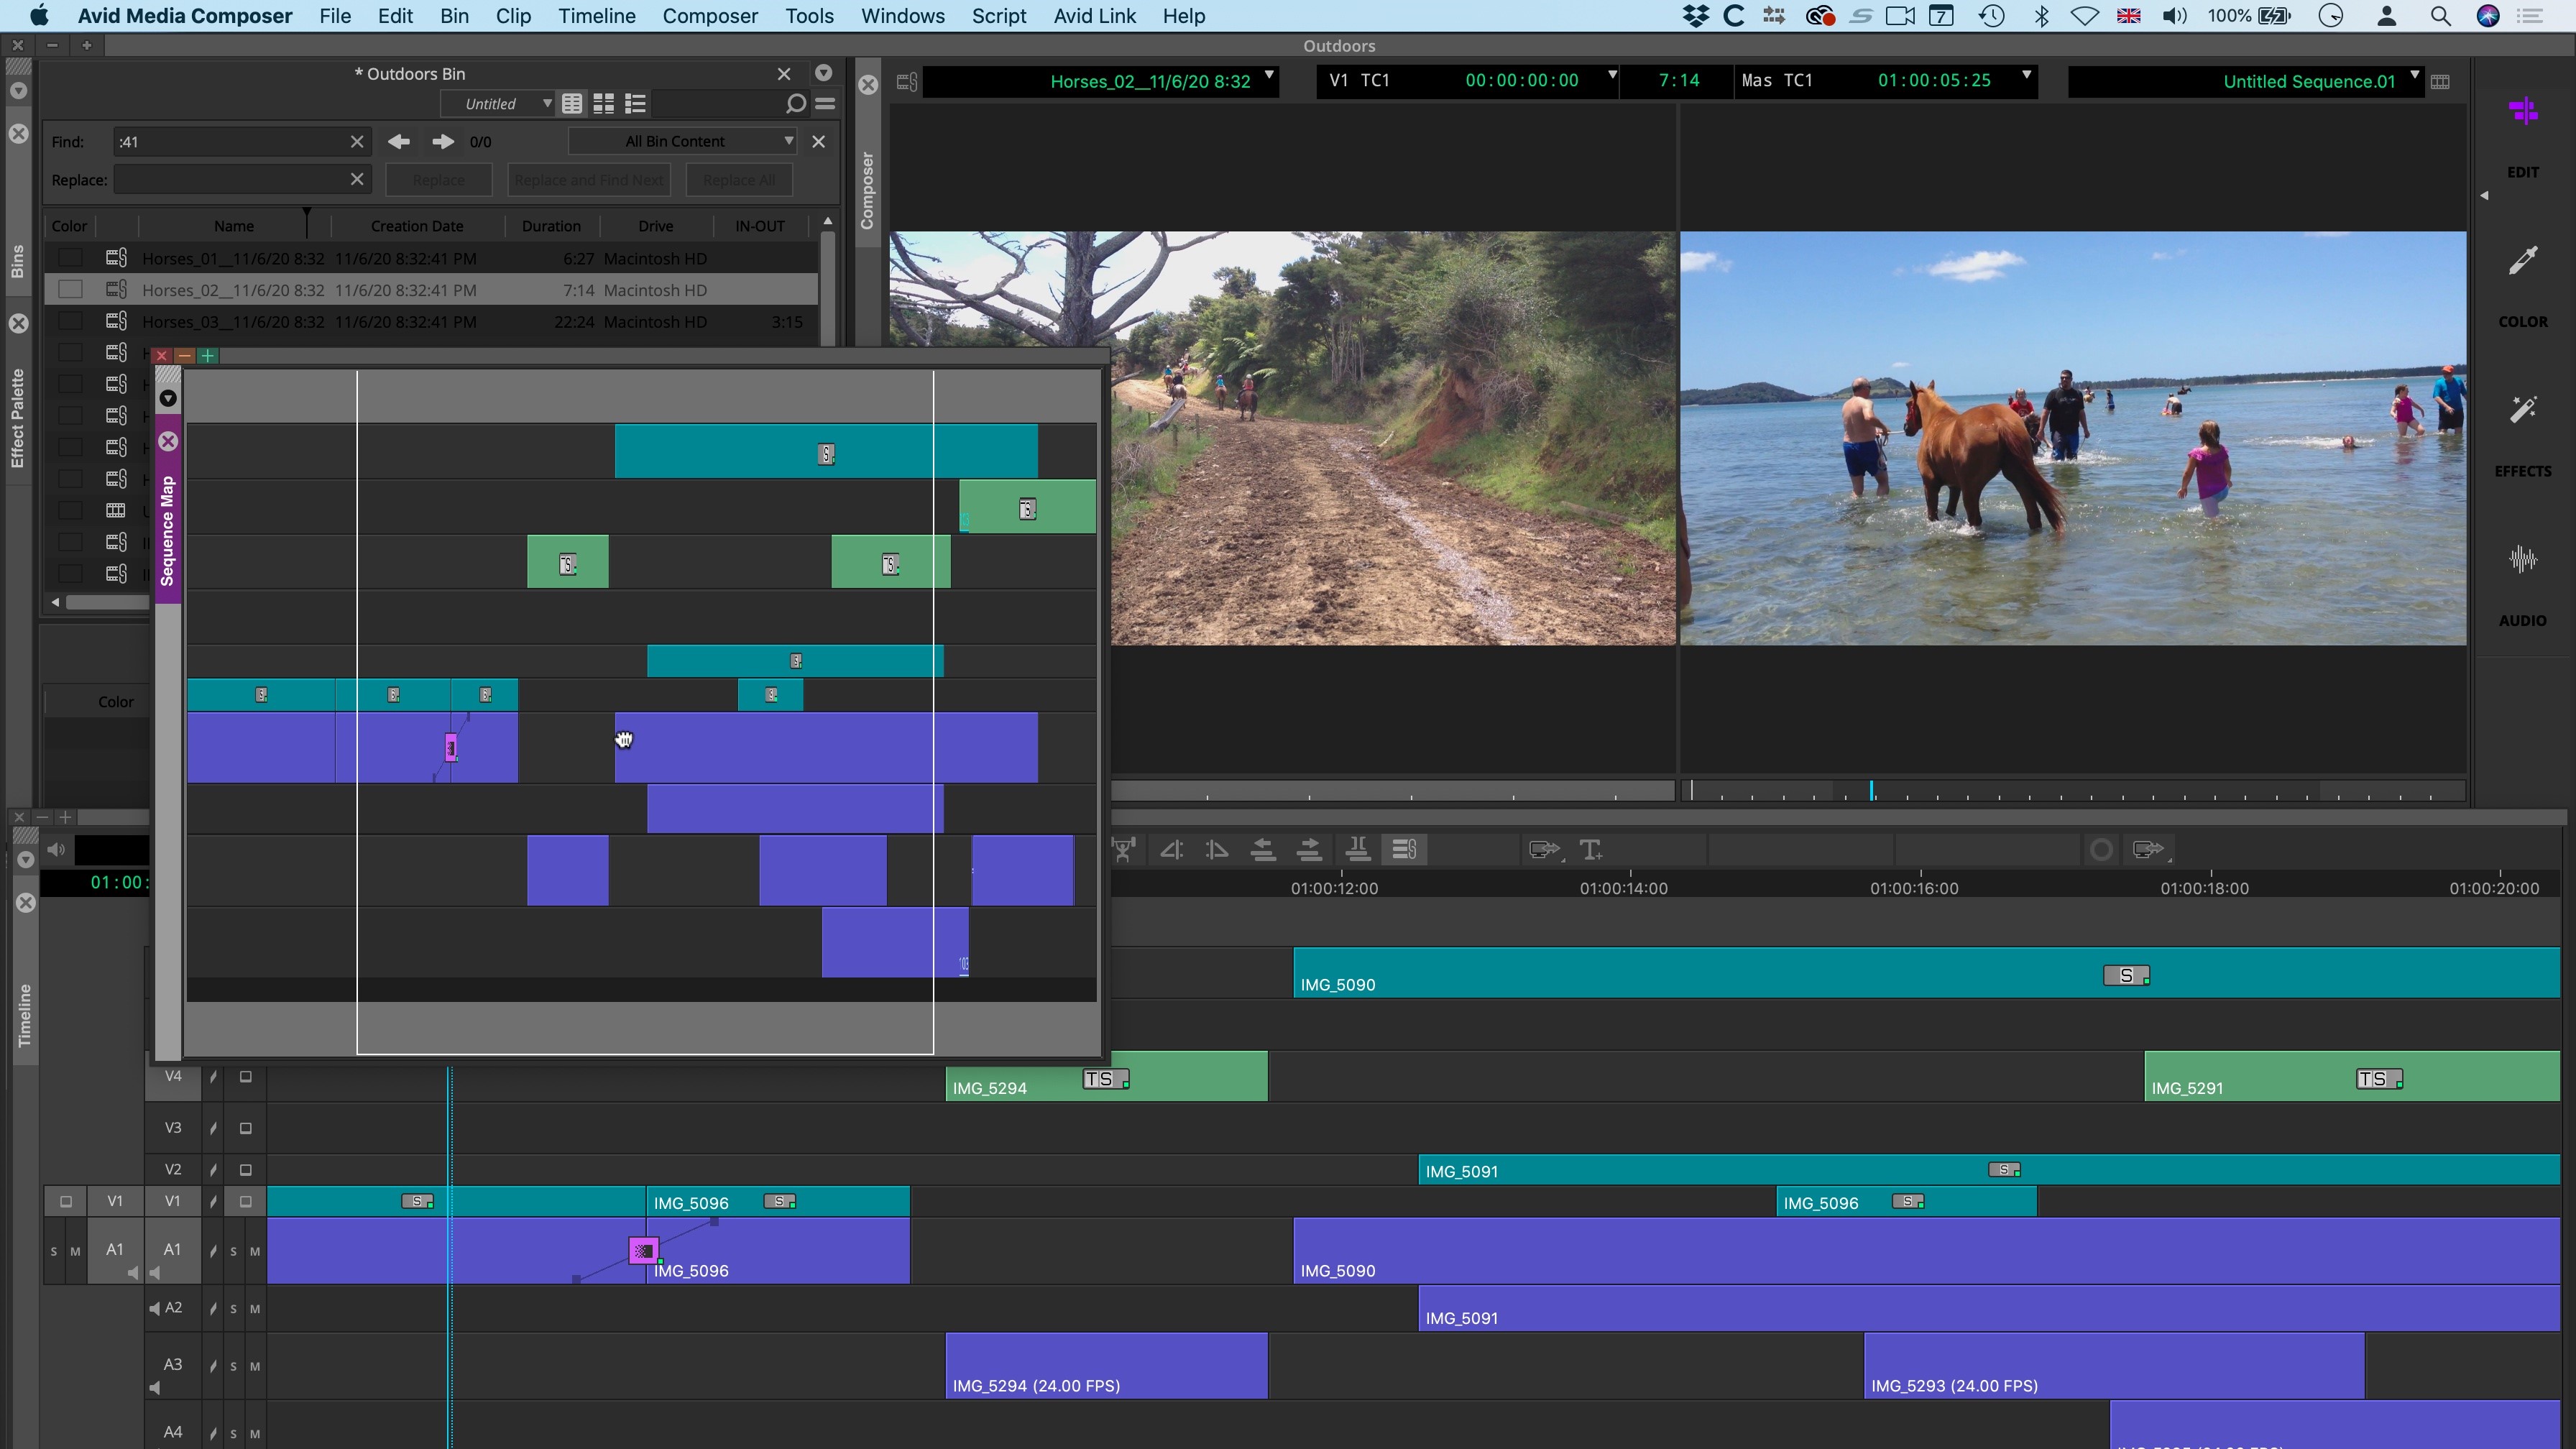
Interestingly, they also created a Sequence Map to enable you to do the same with your main timeline. It’s actually a better interpretation of the idea though, as it appears as a dedicated floating window which can be dragged anywhere on the screen, and, as it’s a window, it’s possible to dock it back into the main interface should you prefer.
Sorting media
Editing isn’t solely about cutting a movie. A big bulk of the work often involves sorting and organising media, and that’s where a new feature comes in extremely handing and could save hours of work.
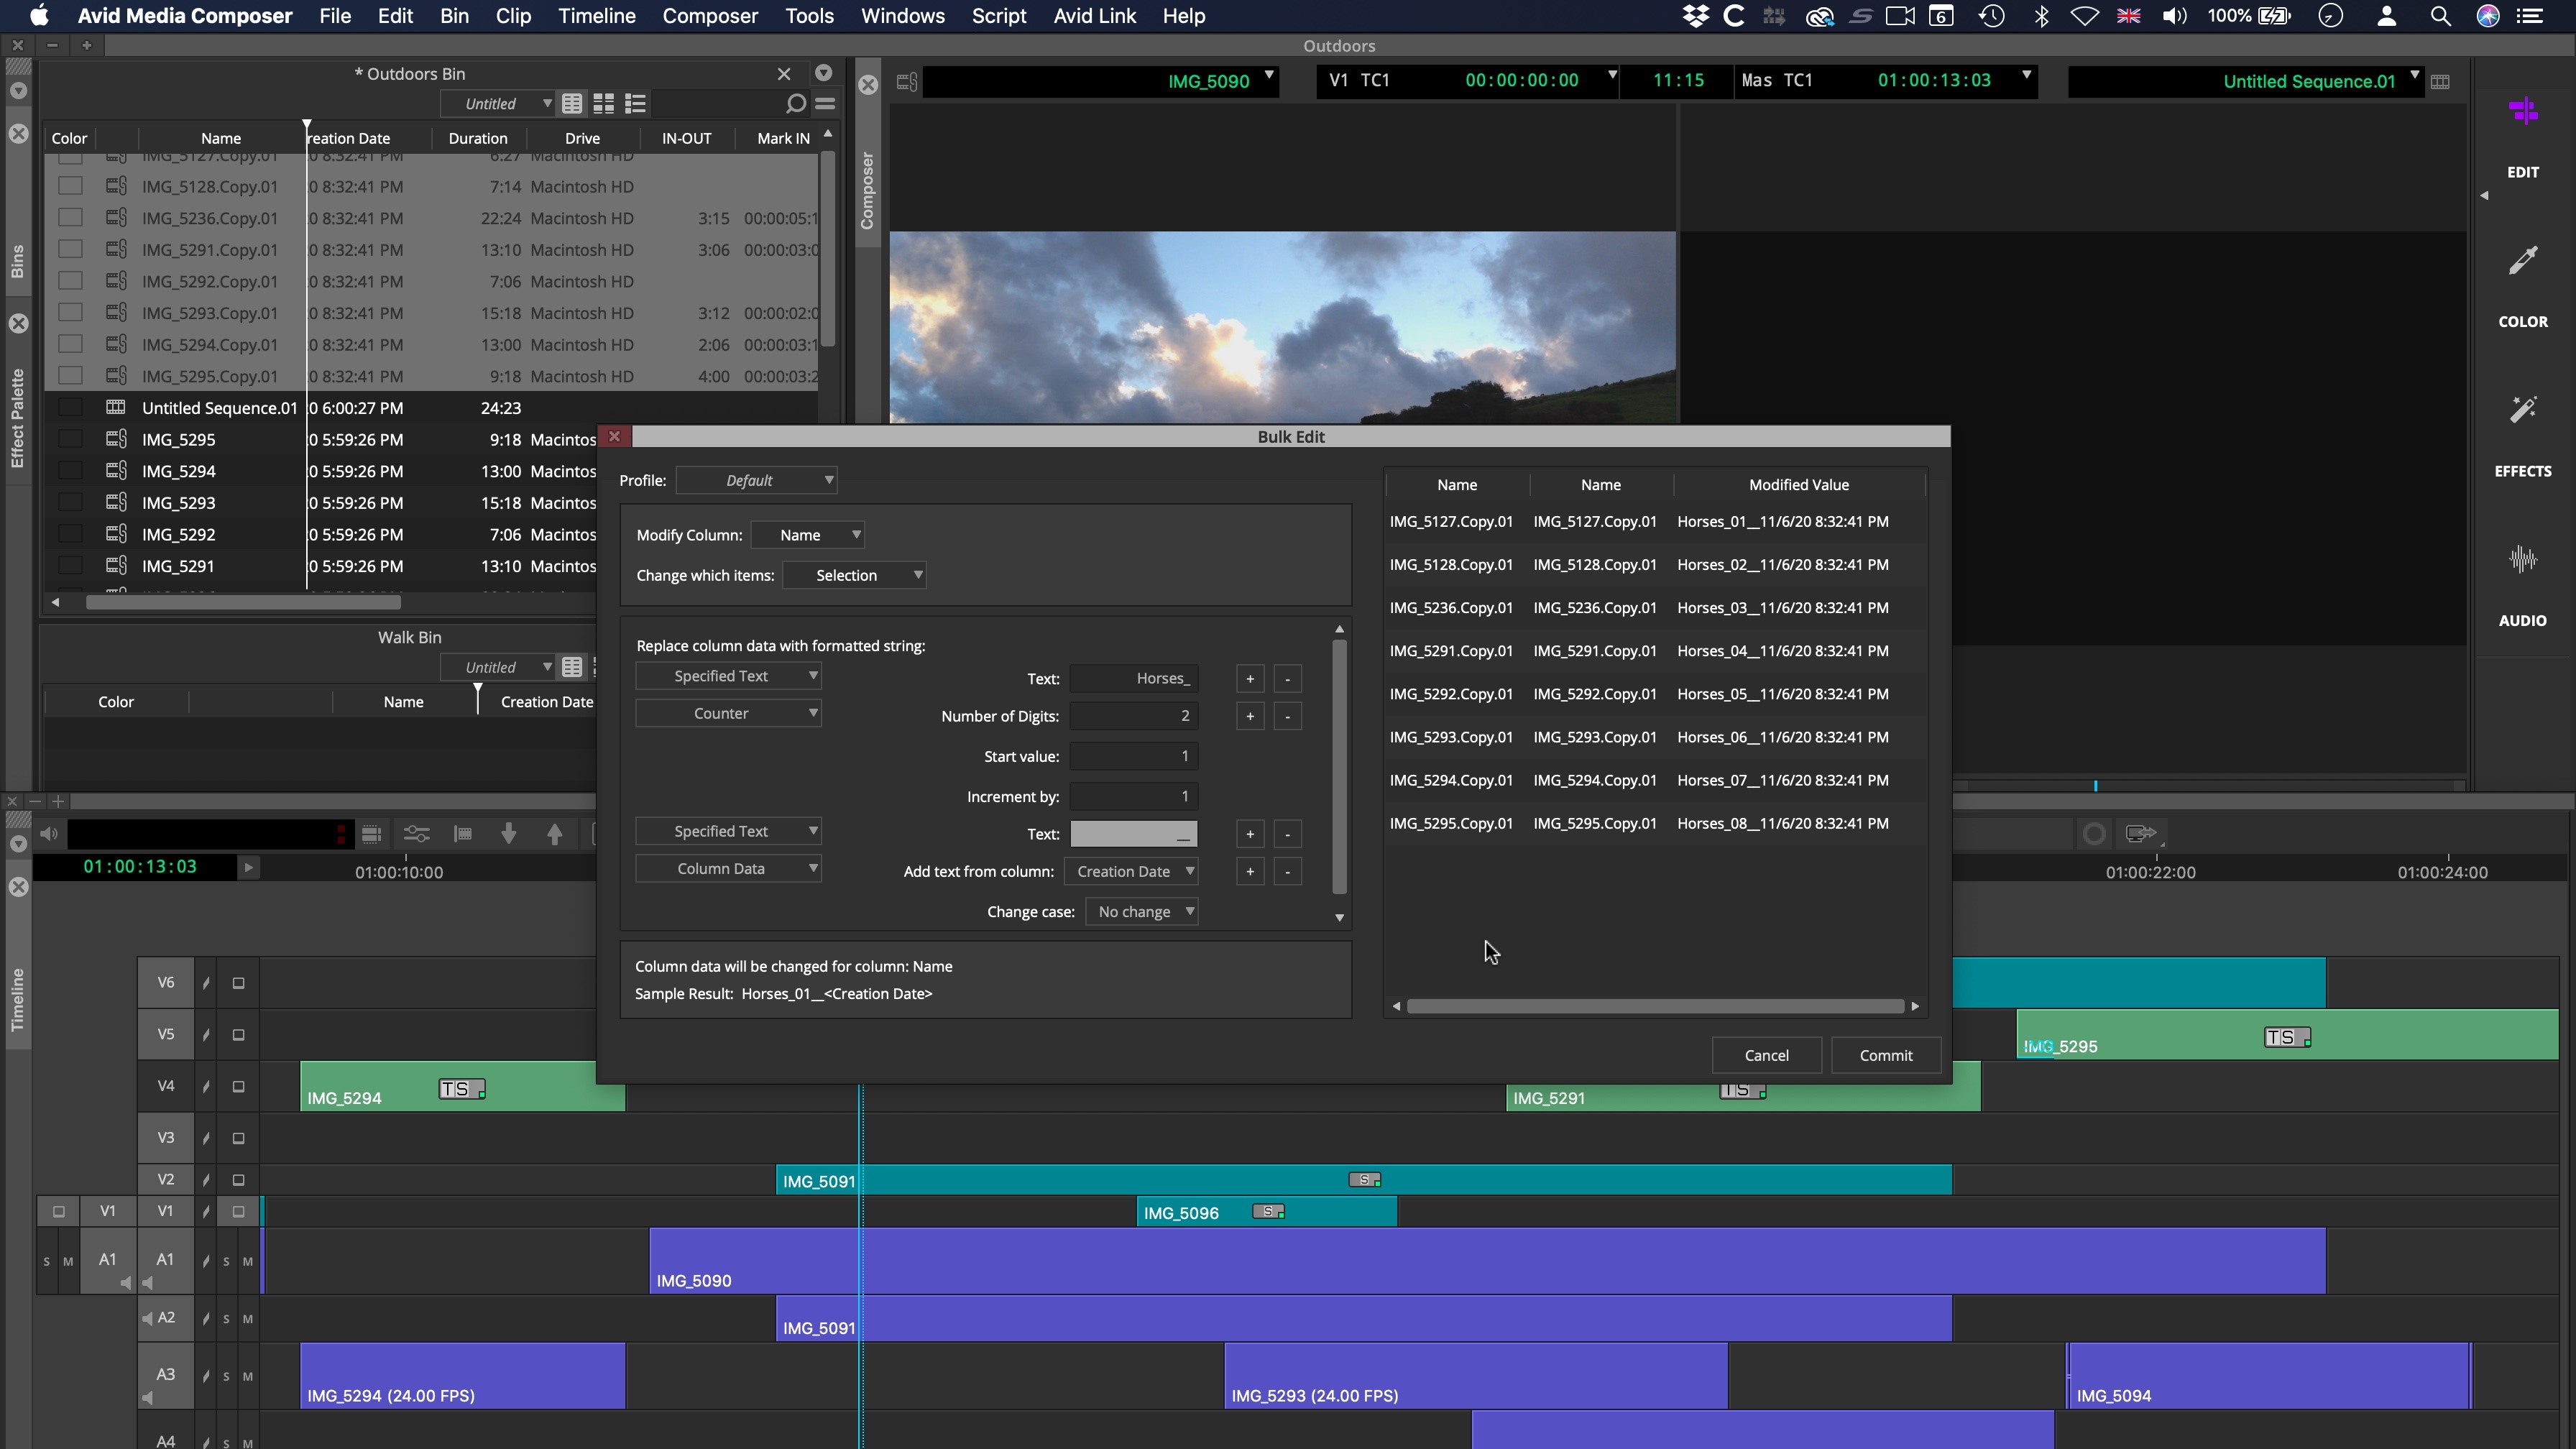
This is known as Bulk Edit, and it allows you to rename a series of selected clips in seconds. The interface is also extremely easy to understand. You have the ability to add additional text, a counter, or even data from the file’s metadata (such as its creation date for instance).
As you build your new names, the information appears to the right. Nothing is applied until you confirm the selection, and when you do ‘Commit’, those changes are applied instantly.
Even better if you make similar changes regularly, you have the ability to save them as a preset.
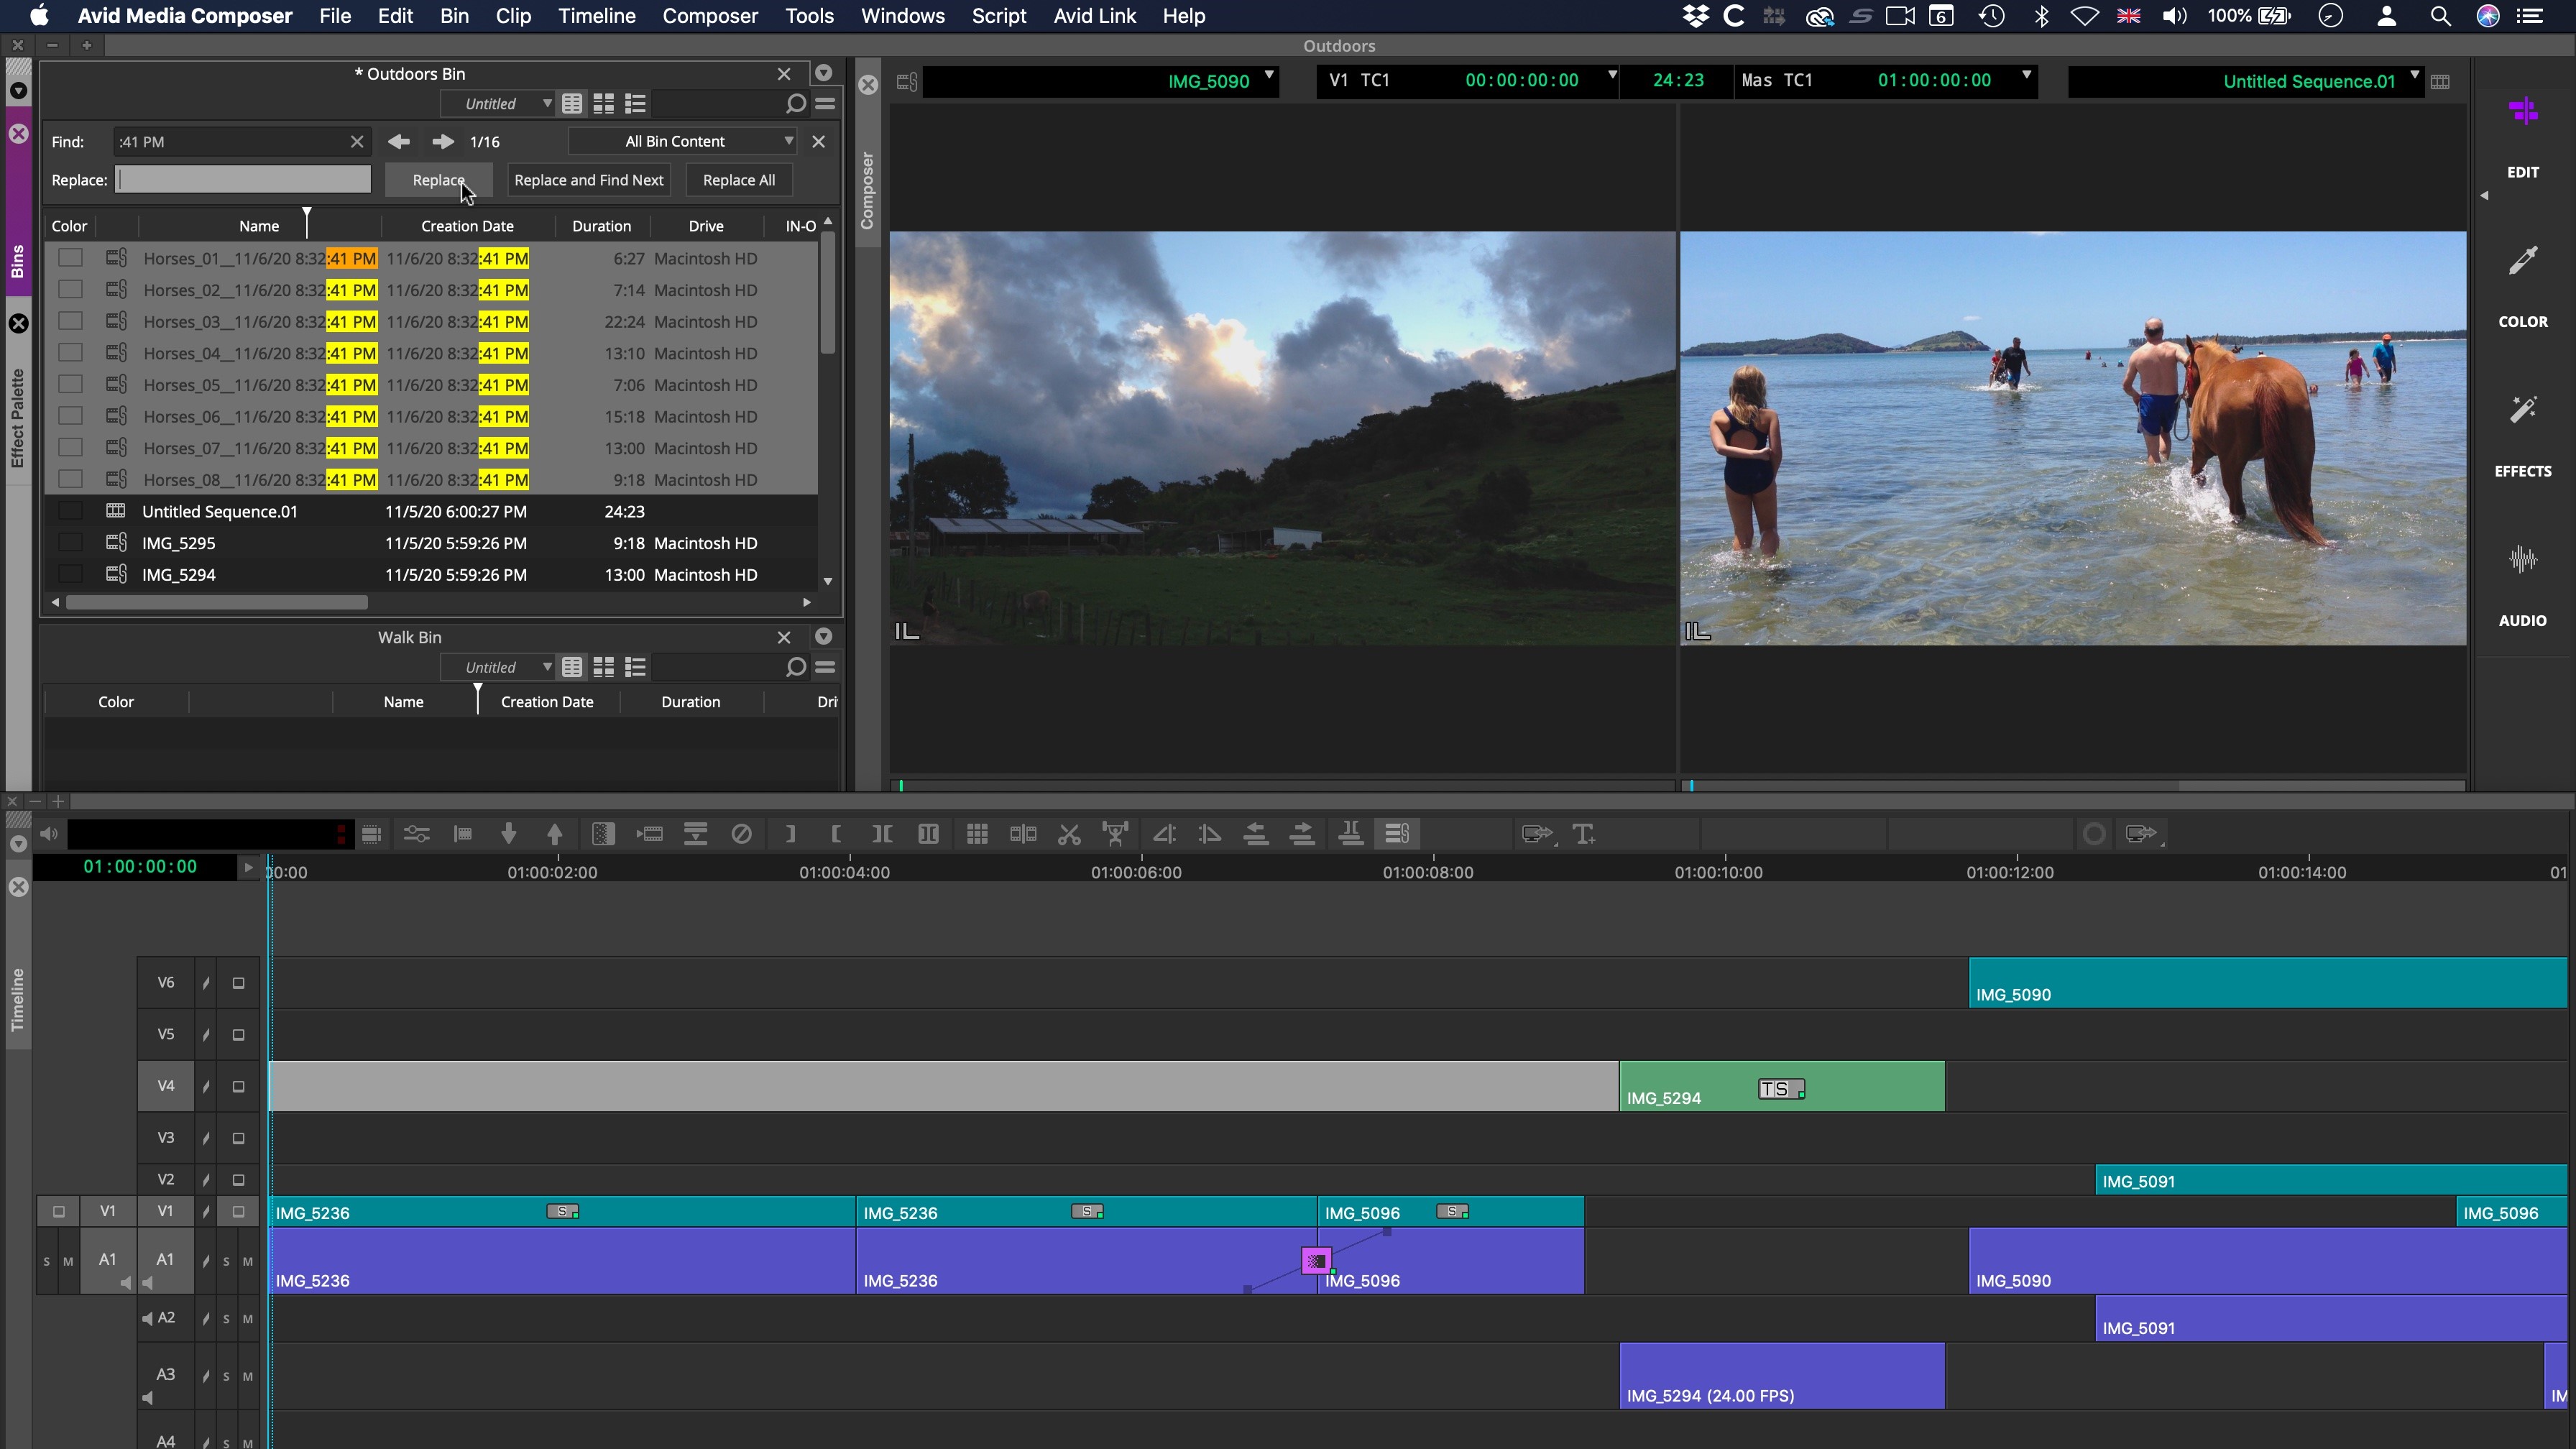
You can’t use this method to remove or change letters or words within a clip’s name. Instead you’ve got Find and Replace to do just that. Type in the string you want to alter, type in what you want to replace it with, and job done - for all clips containing that information.
Both of these tools are bound to save you hours of work.
Effects and transitions
Of course, no editing application would be worth its salt without including effects to improve the quality of your audio and video. Media Composer comes with a wealth of these, from audio ducking, punch-in tools, and the ability to alter the sample rate, to video effects including colour correction, timewarp and stabilisation technology. You obviously have a good selection of transitions to choose from, and also titles through a couple of title software packages included with Media Composer.
A new feature which many may find useful is known as Masked Margin. This allows you to cut a project to a different format, such as 1:1 for Instagram. Select the mask in your project’s settings, and when you then choose either Open EXR, MOV or MP4 as your export format, you’ve given the option to “Crop to Masked Margin”, and the process is done automatically for you.
Ultimate advantage
Media Composer comes in various flavours.
Media Composer First is free and is a fantastic way to get started and learning your way around how Avid works. Its main limitation is when it comes to exporting your work: HD is your best option.
Media Composer would cost you $24 per month on a one-year contract, $209 upfront for one year, or $35 on a month by month basis. A perpetual license is also available for $1,500.
And Media Composer Ultimate would set you back $50 per month on a one-year contract, $500 upfront for a year, or £75 on a month by month basis.
There are also special prices for students.
Some of the advantages of Ultimate include shared bins and projects, MediaCentral workflow integration, NEXIS shared media workflow, Distributed Processing and Cloud VM, and a lot of features that would only be present with the Media Composer Perpetual licence version (for some reason the subscription version of Media Composer lacks features Perpetual has).
A big pull for the Ultimate version is exclusive software, the latest of which include Phrase Find and ScriptSync, and we must admit being highly impressed by both of them.
Phrase Find is a phonetics search of your project, and all clips added to your bins. Use Command-F to bring up the search interface, type in a word or series of words you’re looking for, and click on “phrase find”… Media Composer will analyse your files and bring up a list of where within those clips it thinks those words are spoken.
We tried it a few times, and as you’d expect, it’s not perfect, but damn, does it function well, and would save an obscene amount of time looking for specific recorded sections.
It works with multiple languages too, although only English is installed by default.
ScriptSync’s concept is somewhat similar. The idea being that you upload your script for Media Composer will look through your dialogue and mark where in the selected media those lines are said. You can then listen to each take, exactly where a specific line is spoken, compare different takes, and even effortlessly build a rough edit while choosing the best takes and angles.
Just imagine how much time this could save you.
Final verdict
Media Composer is a powerful bit of kit, designed to work in conjunction with hardware add-ons, but you’re entirely free to edit with it as a standalone piece of software. If you’re serious about editing, this is likely the way to go, although it’s not a cheap option. If you’re on the fence, download Media Composer First, the free - but limited - version, to get a feel for the software. Some of the exclusive tools in the Ultimate version are truly groundbreaking.
Making movies? We've tested out all the best free video editing software and the best video editing apps for mobile content creation.
Steve has been writing about technology since 2003. Starting with Digital Creative Arts, he's since added his tech expertise at titles such as iCreate, MacFormat, MacWorld, MacLife, and TechRadar. His focus is on the creative arts, like website builders, image manipulation, and filmmaking software, but he hasn’t shied away from more business-oriented software either. He uses many of the apps he writes about in his personal and professional life. Steve loves how computers have enabled everyone to delve into creative possibilities, and is always delighted to share his knowledge, expertise, and experience with readers.
