TechRadar Verdict
Dual extrusion, PEI build platform, wireless, scalable these are all desirable 3D printer features and are all part of the formidable RoboxPro. Aimed at the commercial market, this large scale FFF printer balances quality, ease of use and value like no other.
Pros
- +
Dual Extruder
- +
Ease of use
- +
Large material support
Cons
- -
Large footprint
- -
Can be fiddly to load filament
Why you can trust TechRadar
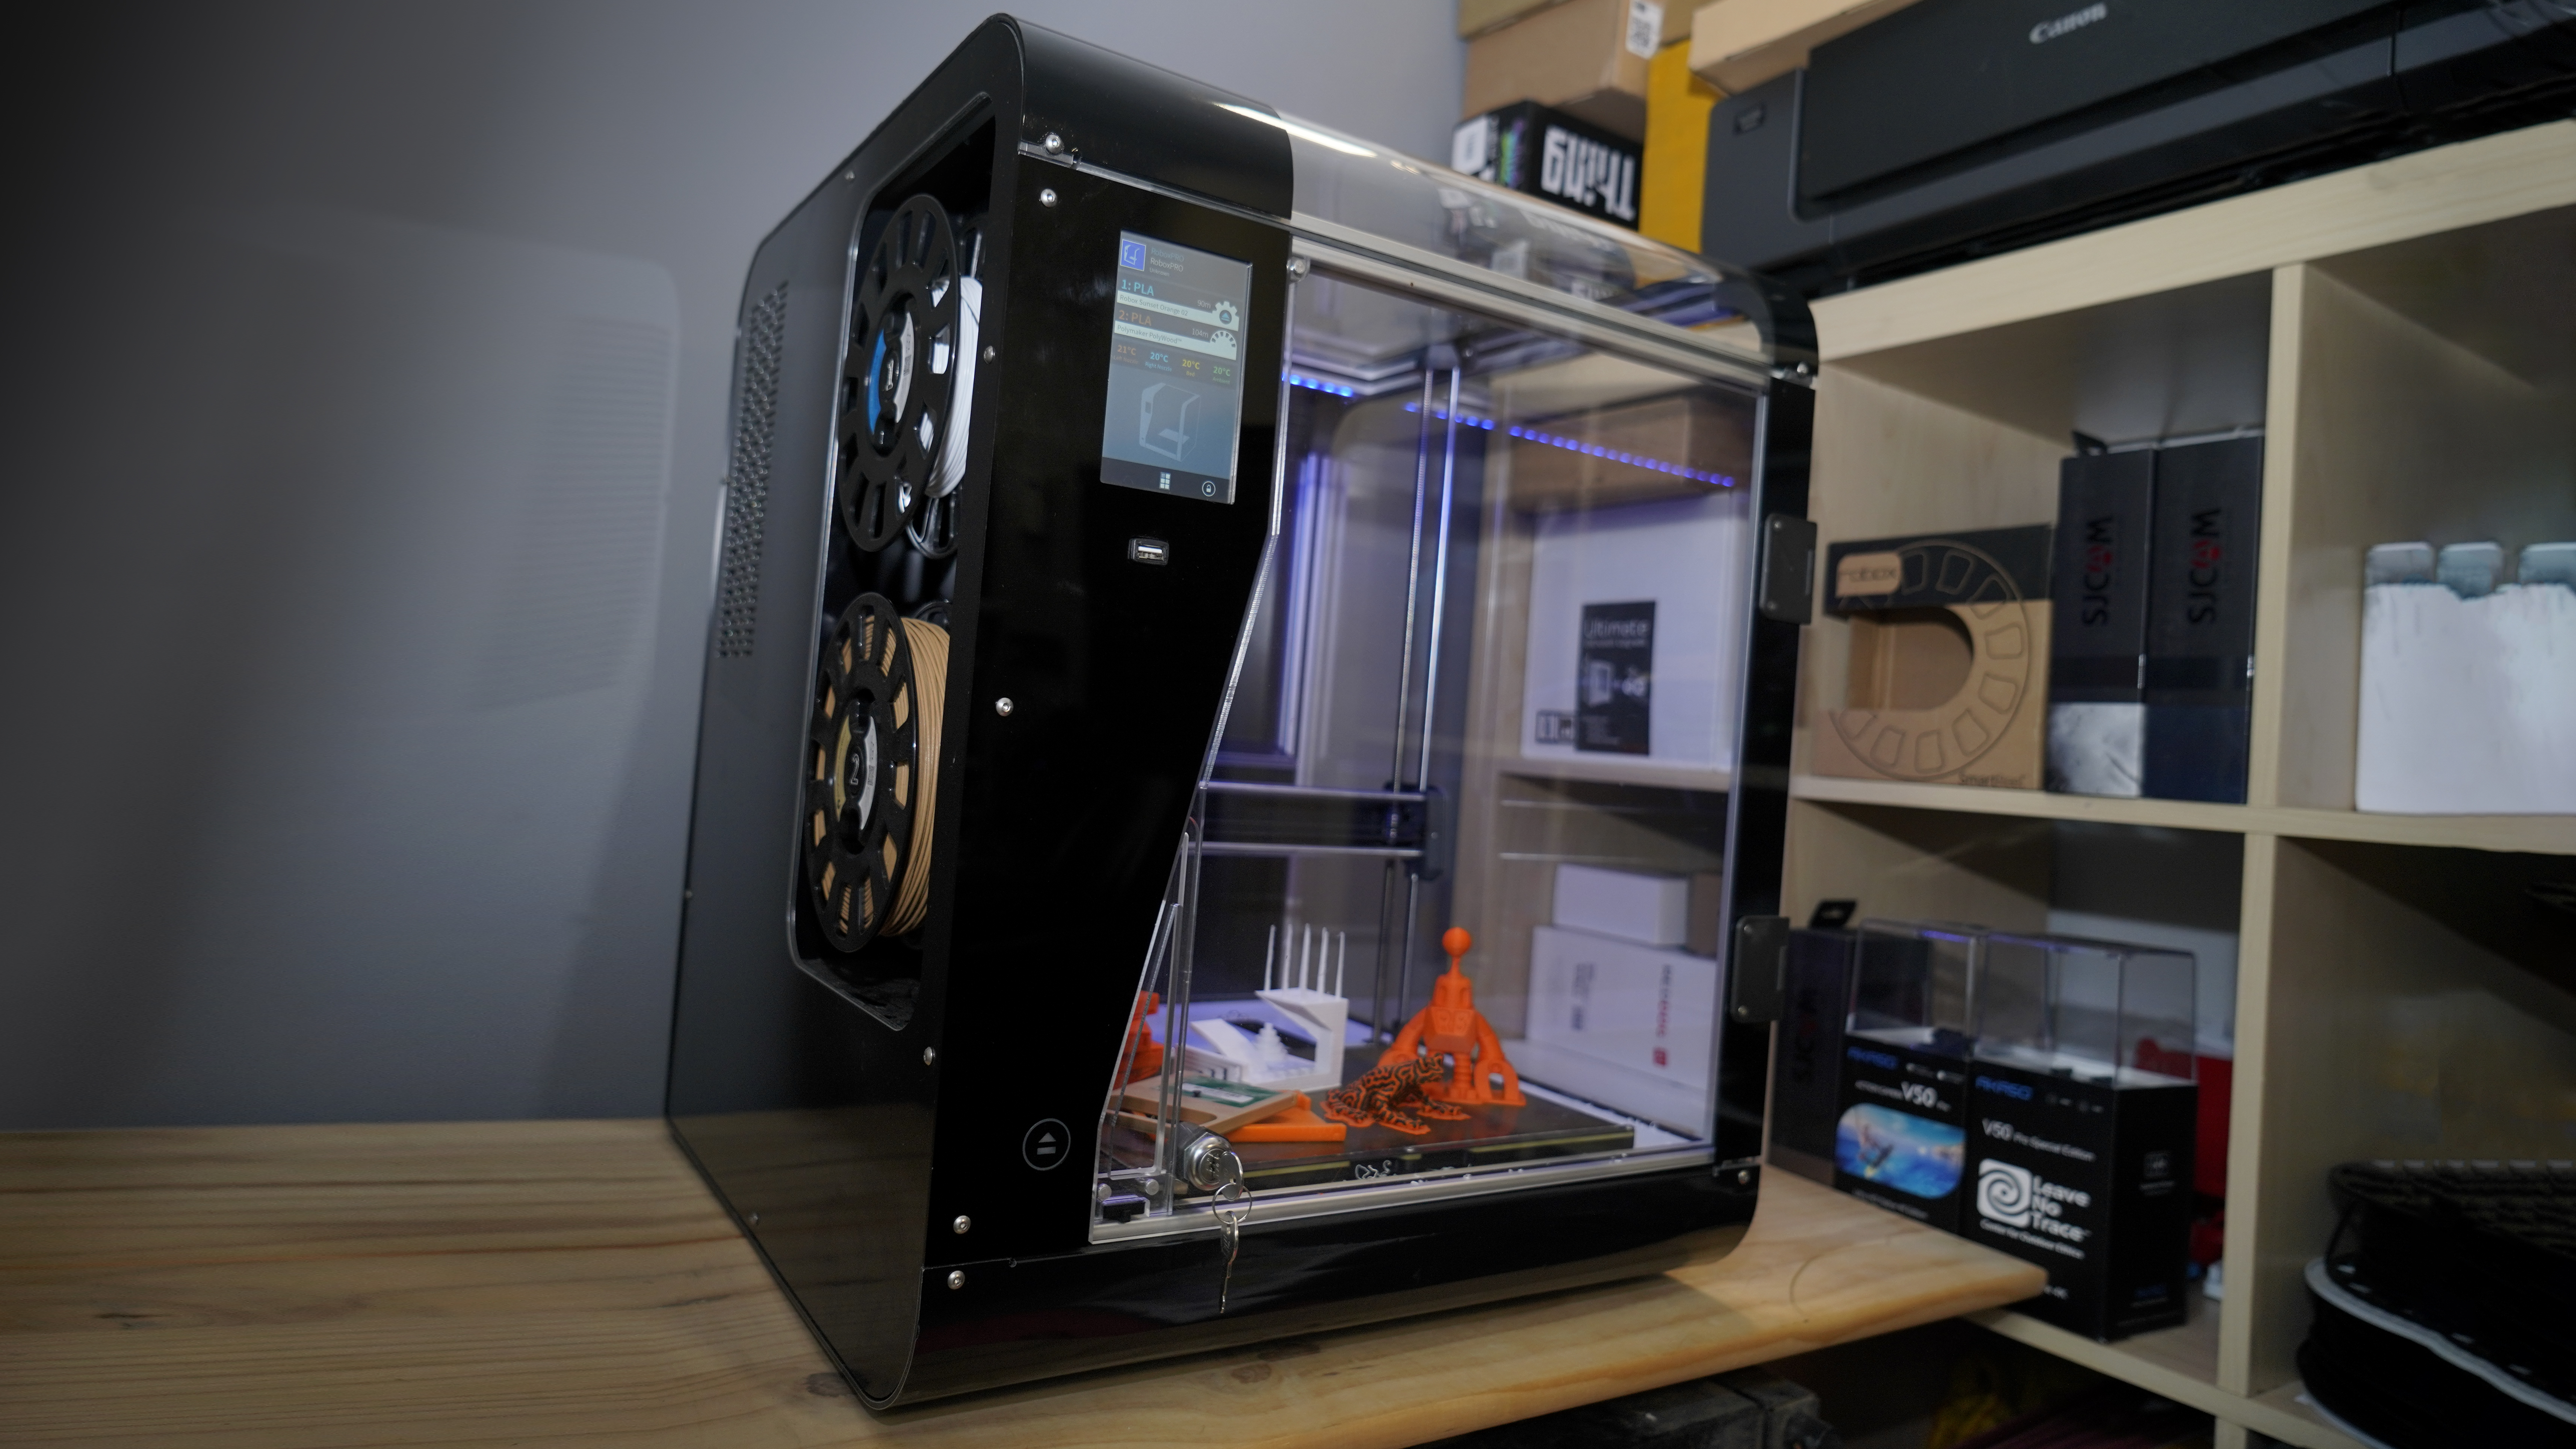
3D printers aren't known for being discrete, but some do at least try to blend in, like the compact RoboxDual. However, others are on another scale and can't help but stand out, like the formidable CEL-UK RoboxPro.
The printer was created to fulfil the demand from professional users, who liked the features of the RoboxDual but wanted an upscaled version for larger prints.
While the RoboxPro reflects many of the features of the RoboxDual, it's been fine-tuned for the commercial market and incorporates additions that better enable the machine to integrate with the workplace directly out of the box.
Networking, touch screen control and three interchangeable print heads come as standard, and as with the RoboxDual, you get a host of features designed to make life easier.
Quick change HeadLocks, magnetic print platform, intelligent filament reels and comprehensive software means that the RoboxPro looks set to offer the complete package.
While many of the features will appeal to the home market, the company is aiming this 3D printer at the commercial sector. This is a machine that is designed to be used as a workhorse in any workshop or product design studio.
CEL-UK has established itself as a manufacturer of compact and expandable 3D printers, where it excels. However, are those points that excel with the convenient RoboxDual in homes and schools going to be quite so successful on a larger scale, and appeal to a commercial user base?
Design
If you're familiar with the RoboxDual, then you'll know it's a machine with high-quality production values. It's a true product with none of the usual 3D printed parts that show homage to the open-source 3D print community.
In stark contrast, the RoboxPro is a little more grassroots showing 3D printed door hinges and parts alongside precision cut CNC panels. 3D printed parts are quite common in production 3D printers and it is great to see these manufacturers leading the way by trusting their own output carbon filled parts.
The RoboxPro is a British made machine, with a large quantity of the parts and manufacture all carried out in the Portishead factory.
While the styling and manufacture of the two machines are quite different, there's no doubting the cross over between the two models. Quality and innovation are at its heart, with the same programmable filament reels, print heads and software being used.
Features
The latest range of printers has taken an enormous leap forward in ease of use and specifications, but many of these innovative features were first seen on the RoboxDual.
The RoboxPro mirrors many of these innovations and adds and improves on them.
Again there's auto bed levelling, tapless PEI and enclosed print platform, interchangeable heads, programmable filament reels, automatic material recognition, fast heating, vast material compatibility, choice of WiFi or ethernet networking and a touch screen display.
So let's take a look at the specifications in depth.
Specifications
Build Volume: 210 x 300 x 400mm
Memory: Built-in up to 32GB (For internal use only)
Nozzle size: DualMaterial dual 0.4mm / QuickFill 0.3mm and 0.8mm / SingleX 0.6mm
Layer Height: 50 - 500 Microns
Bed: Auto levelling Z-Axis
Print Surface: Heated Polyetherimide (PEI)
Software: AutoMaker
Materials: Extensive material support
Included Material: N / A
Power: AC 100-250V~, 50/60Hz, 3A max
First and foremost the RoboxPro is an FFF machine and takes 1.75mm filament reels. These reels can either be the SmartReels which feedback detailed information about the filament being used, or you can use third-party filaments.
The RoboxPro is all about scale and has a build area of 210 x 300 x 400mm this compares to the Ultimaker S5 at 330 x 240 x 300mm, a machine that cost over a $1000 more.
The print platform is a removable magnetic spring steel sheet laminated with the excellent Robox PEI ThermoSurface print platform, so no glue or adhesive is needed. This surface releases prints as the platform cools. This platform features AutoLevel which is essentially a self-levelling platform.
Like the RoboxDual the Pro is a fully enclosed printer which means that it's better for advanced materials such as ABS, PC, PVOH and Nylon. When printing with PLA based materials, the door is left open.
The large print platform means that the size of the printer is considerably larger than it's smaller sibling at 513 x 508 x 605mm.
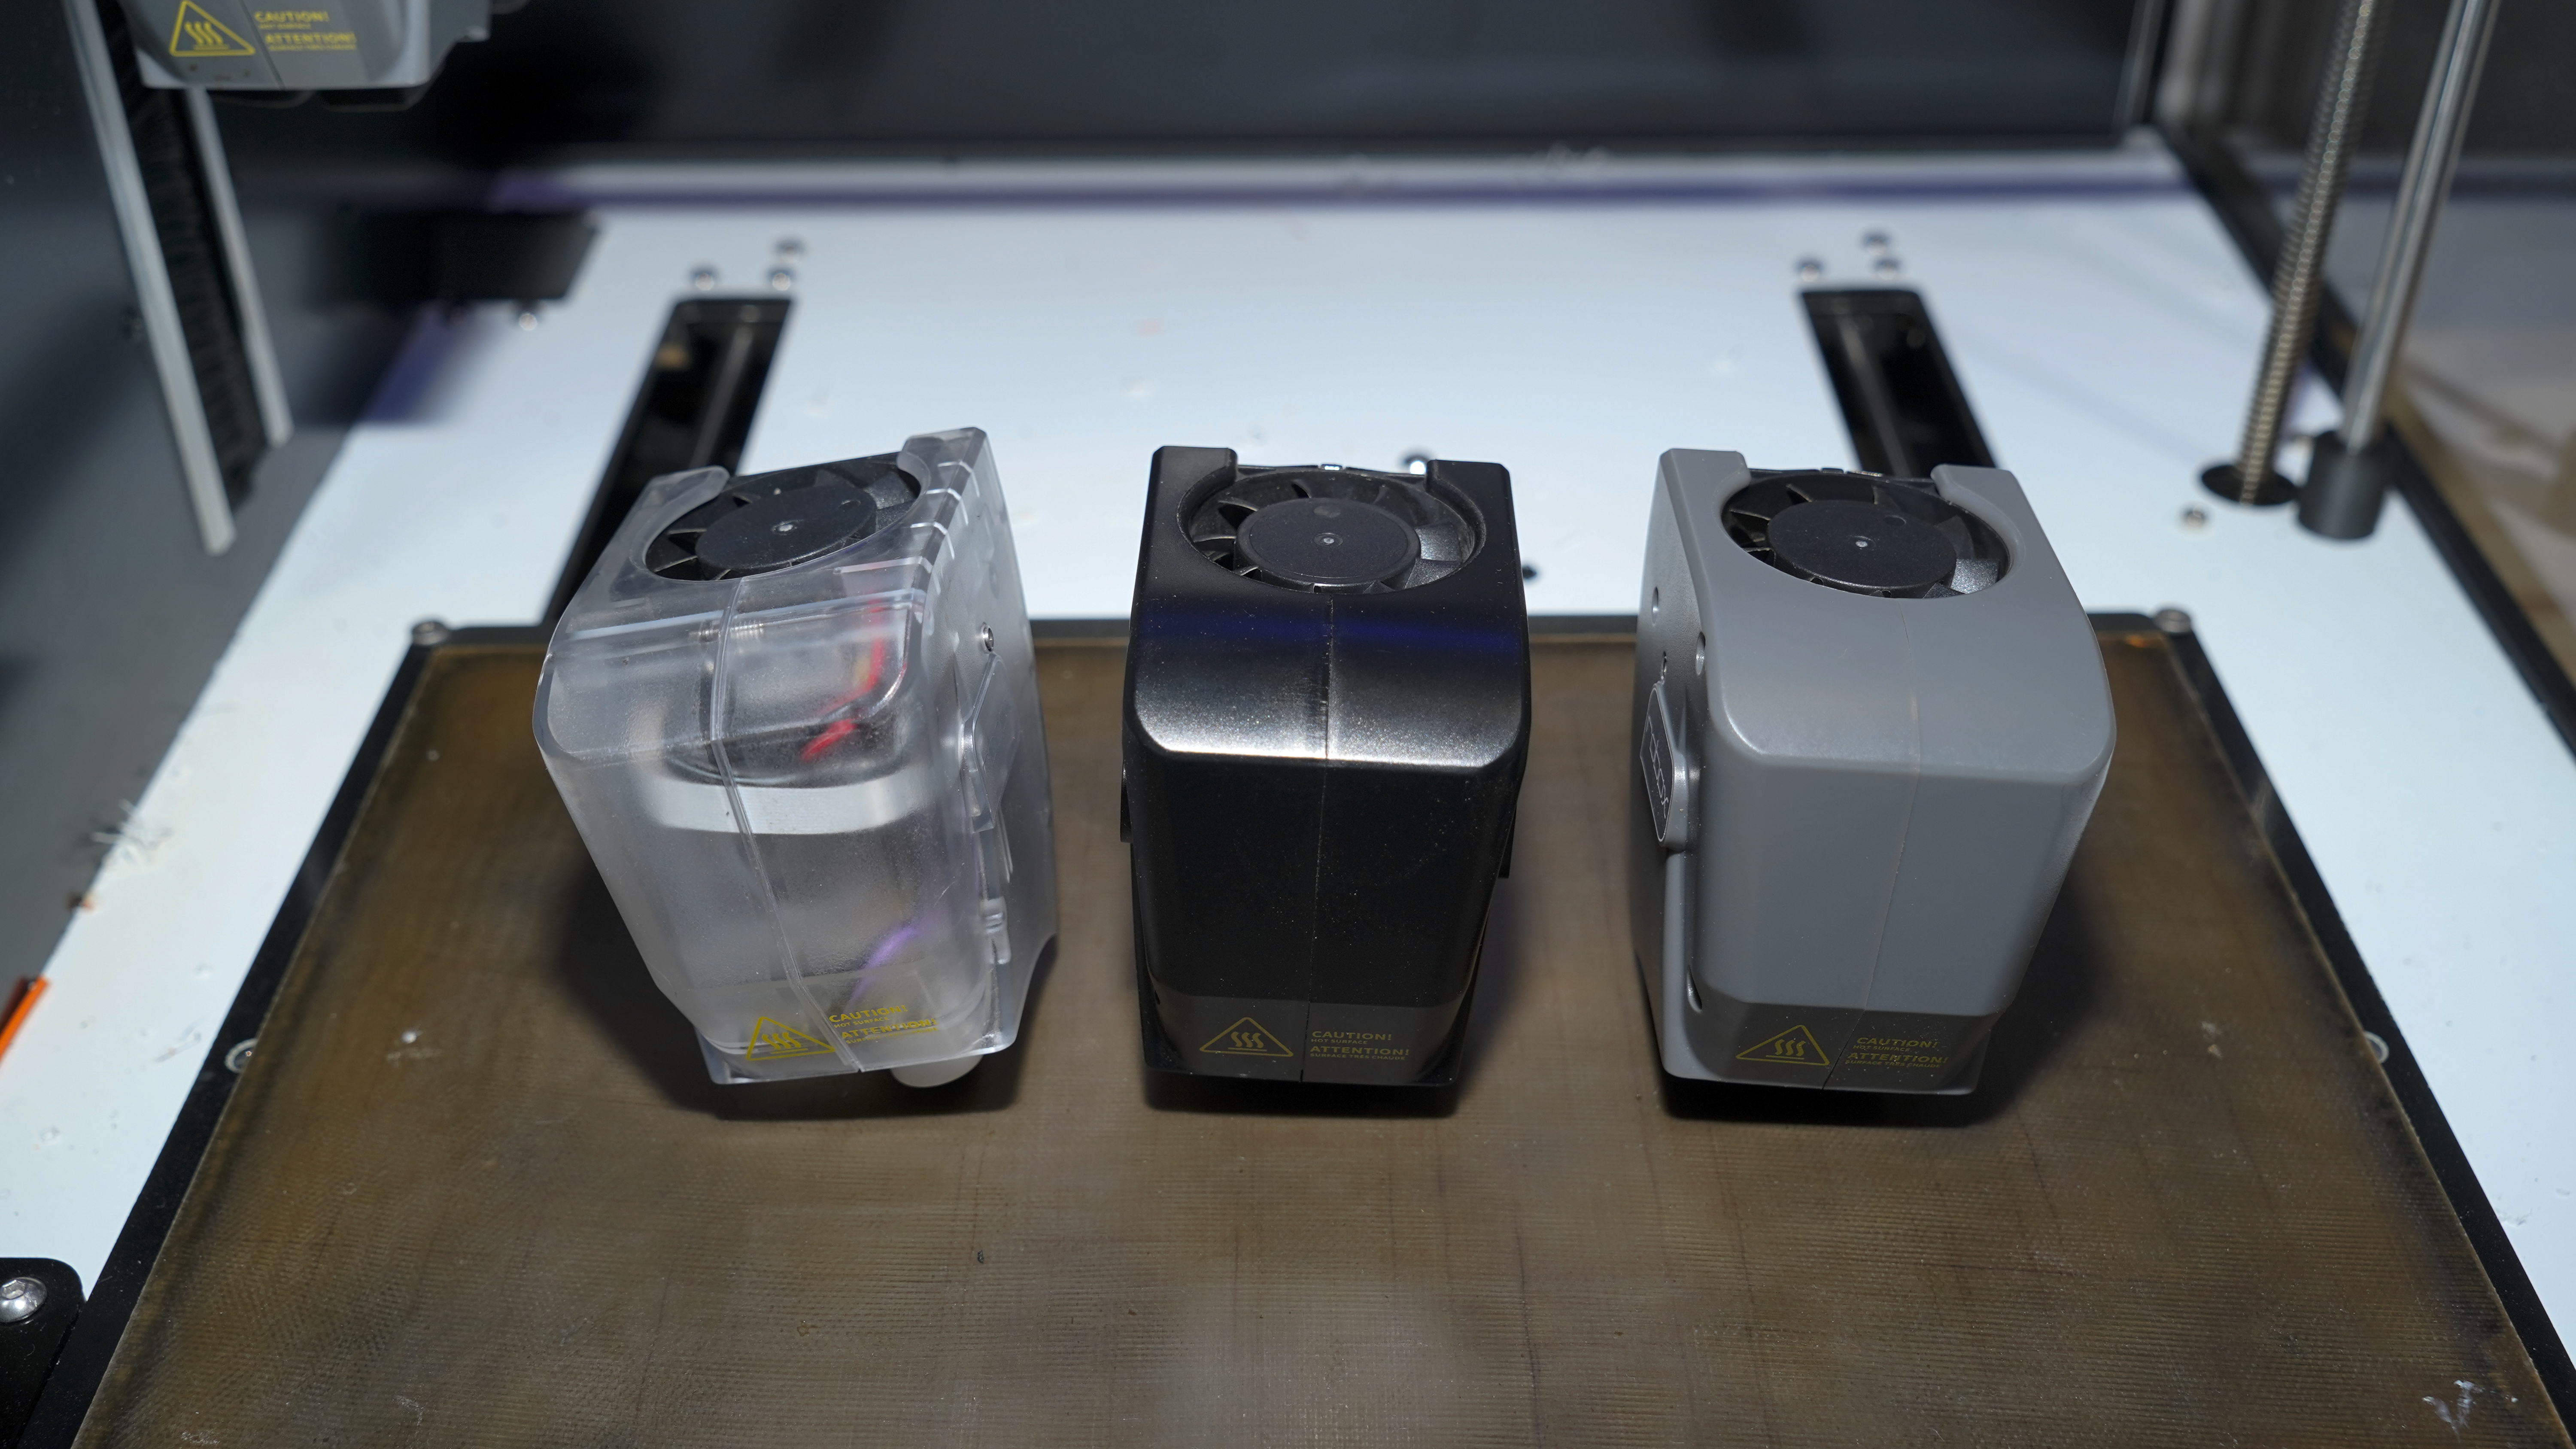
One of the unique features of the CEL-UK 3D printers is the quickly interchangeable print heads, HeadLocks, and all three options are included, this gives you the DualMaterial, QuickFill and SingleX.
The DualMaterial enables you to print dual filaments, so for either printing dual colour prints or more practically dual-material models. Using this head allows you to print complex models that would be impossible to print with a traditional standard material head. Dedicated support material can be used such as PVA, PVOH or peel away support. The DualMaterial head offers dual 0.4mm nozzles.
The QuickFill head is the single material option yet still utilises dual nozzles. The first is a 0.3mm for printing the fine detail and outer walls while the second is a 0.8mm for the infill.
This combination of nozzle sizes gives a balance between speed and quality.
The final head is SingleX and has been developed with an Olsson Ruby nozzle for use with specialist materials such as Carbon Fill. This type of material is abrasive and will cause damage to standard heads.
Each head has a maximum temperature of 300ºC well beyond the standard nozzle temperature.
CEL-UK has also developed the needle valve system which cuts off filament flow dead to help reduce stringing, a common issue with retraction systems.
These heads enable layer resolutions with a custom range of between 50 to 500 microns and 100,200 and 300 microns with the presets.
Flexible and specialist materials can be tricky to print with, but the inclusion of the SmartExtruder ensures precise extrusion whatever the material. Finally, there's FastHeatup which ensures fast heating times for the nozzle and ThermoSurface.
These features are all shared with the CEL-UK RoboxDual; however, the RoboxPro takes things further.
Designed for use in professional outfits, the Pro features extensive networking and scalability options.
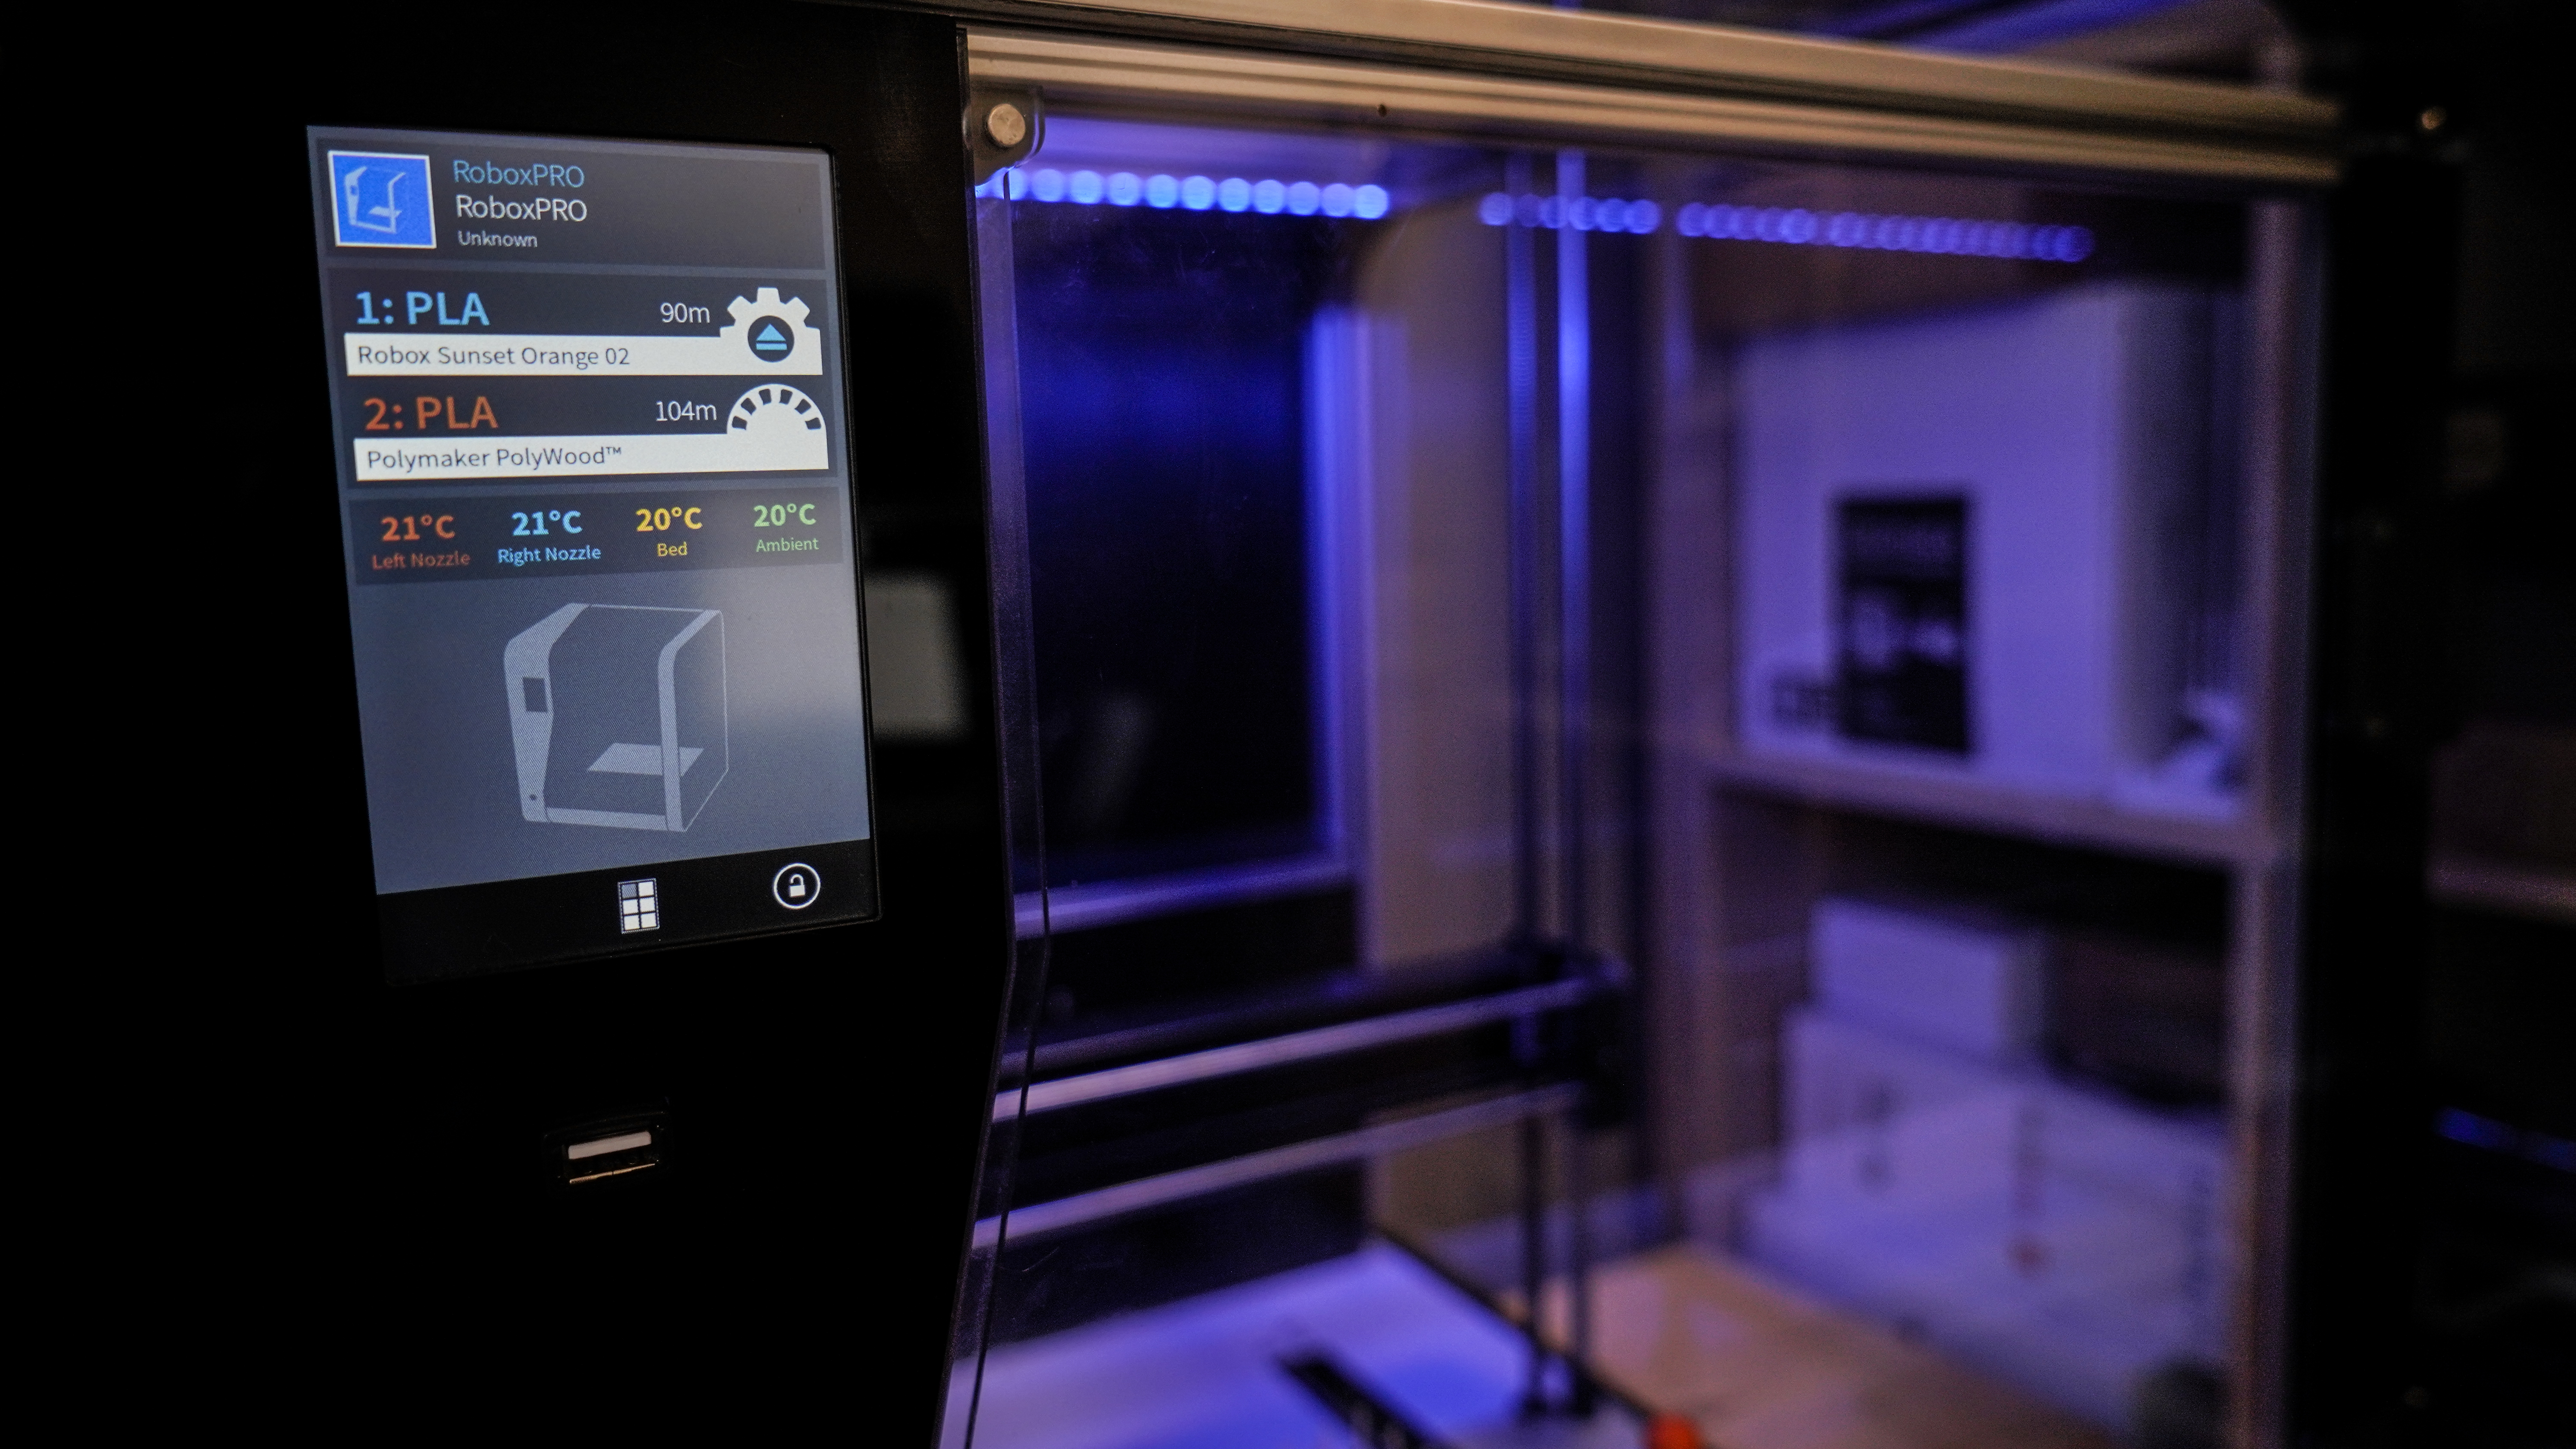
Built into the front of the machine is a sizable touch screen panel and this not only displays the current materials but can also be used to navigate settings and print directly from USB or other external drives.
Networking is an important feature and is available as wireless, or a hardwired network connection. Both enable the ability to use the AutoMaker software to connect and control multiple printers from one convenient interface.
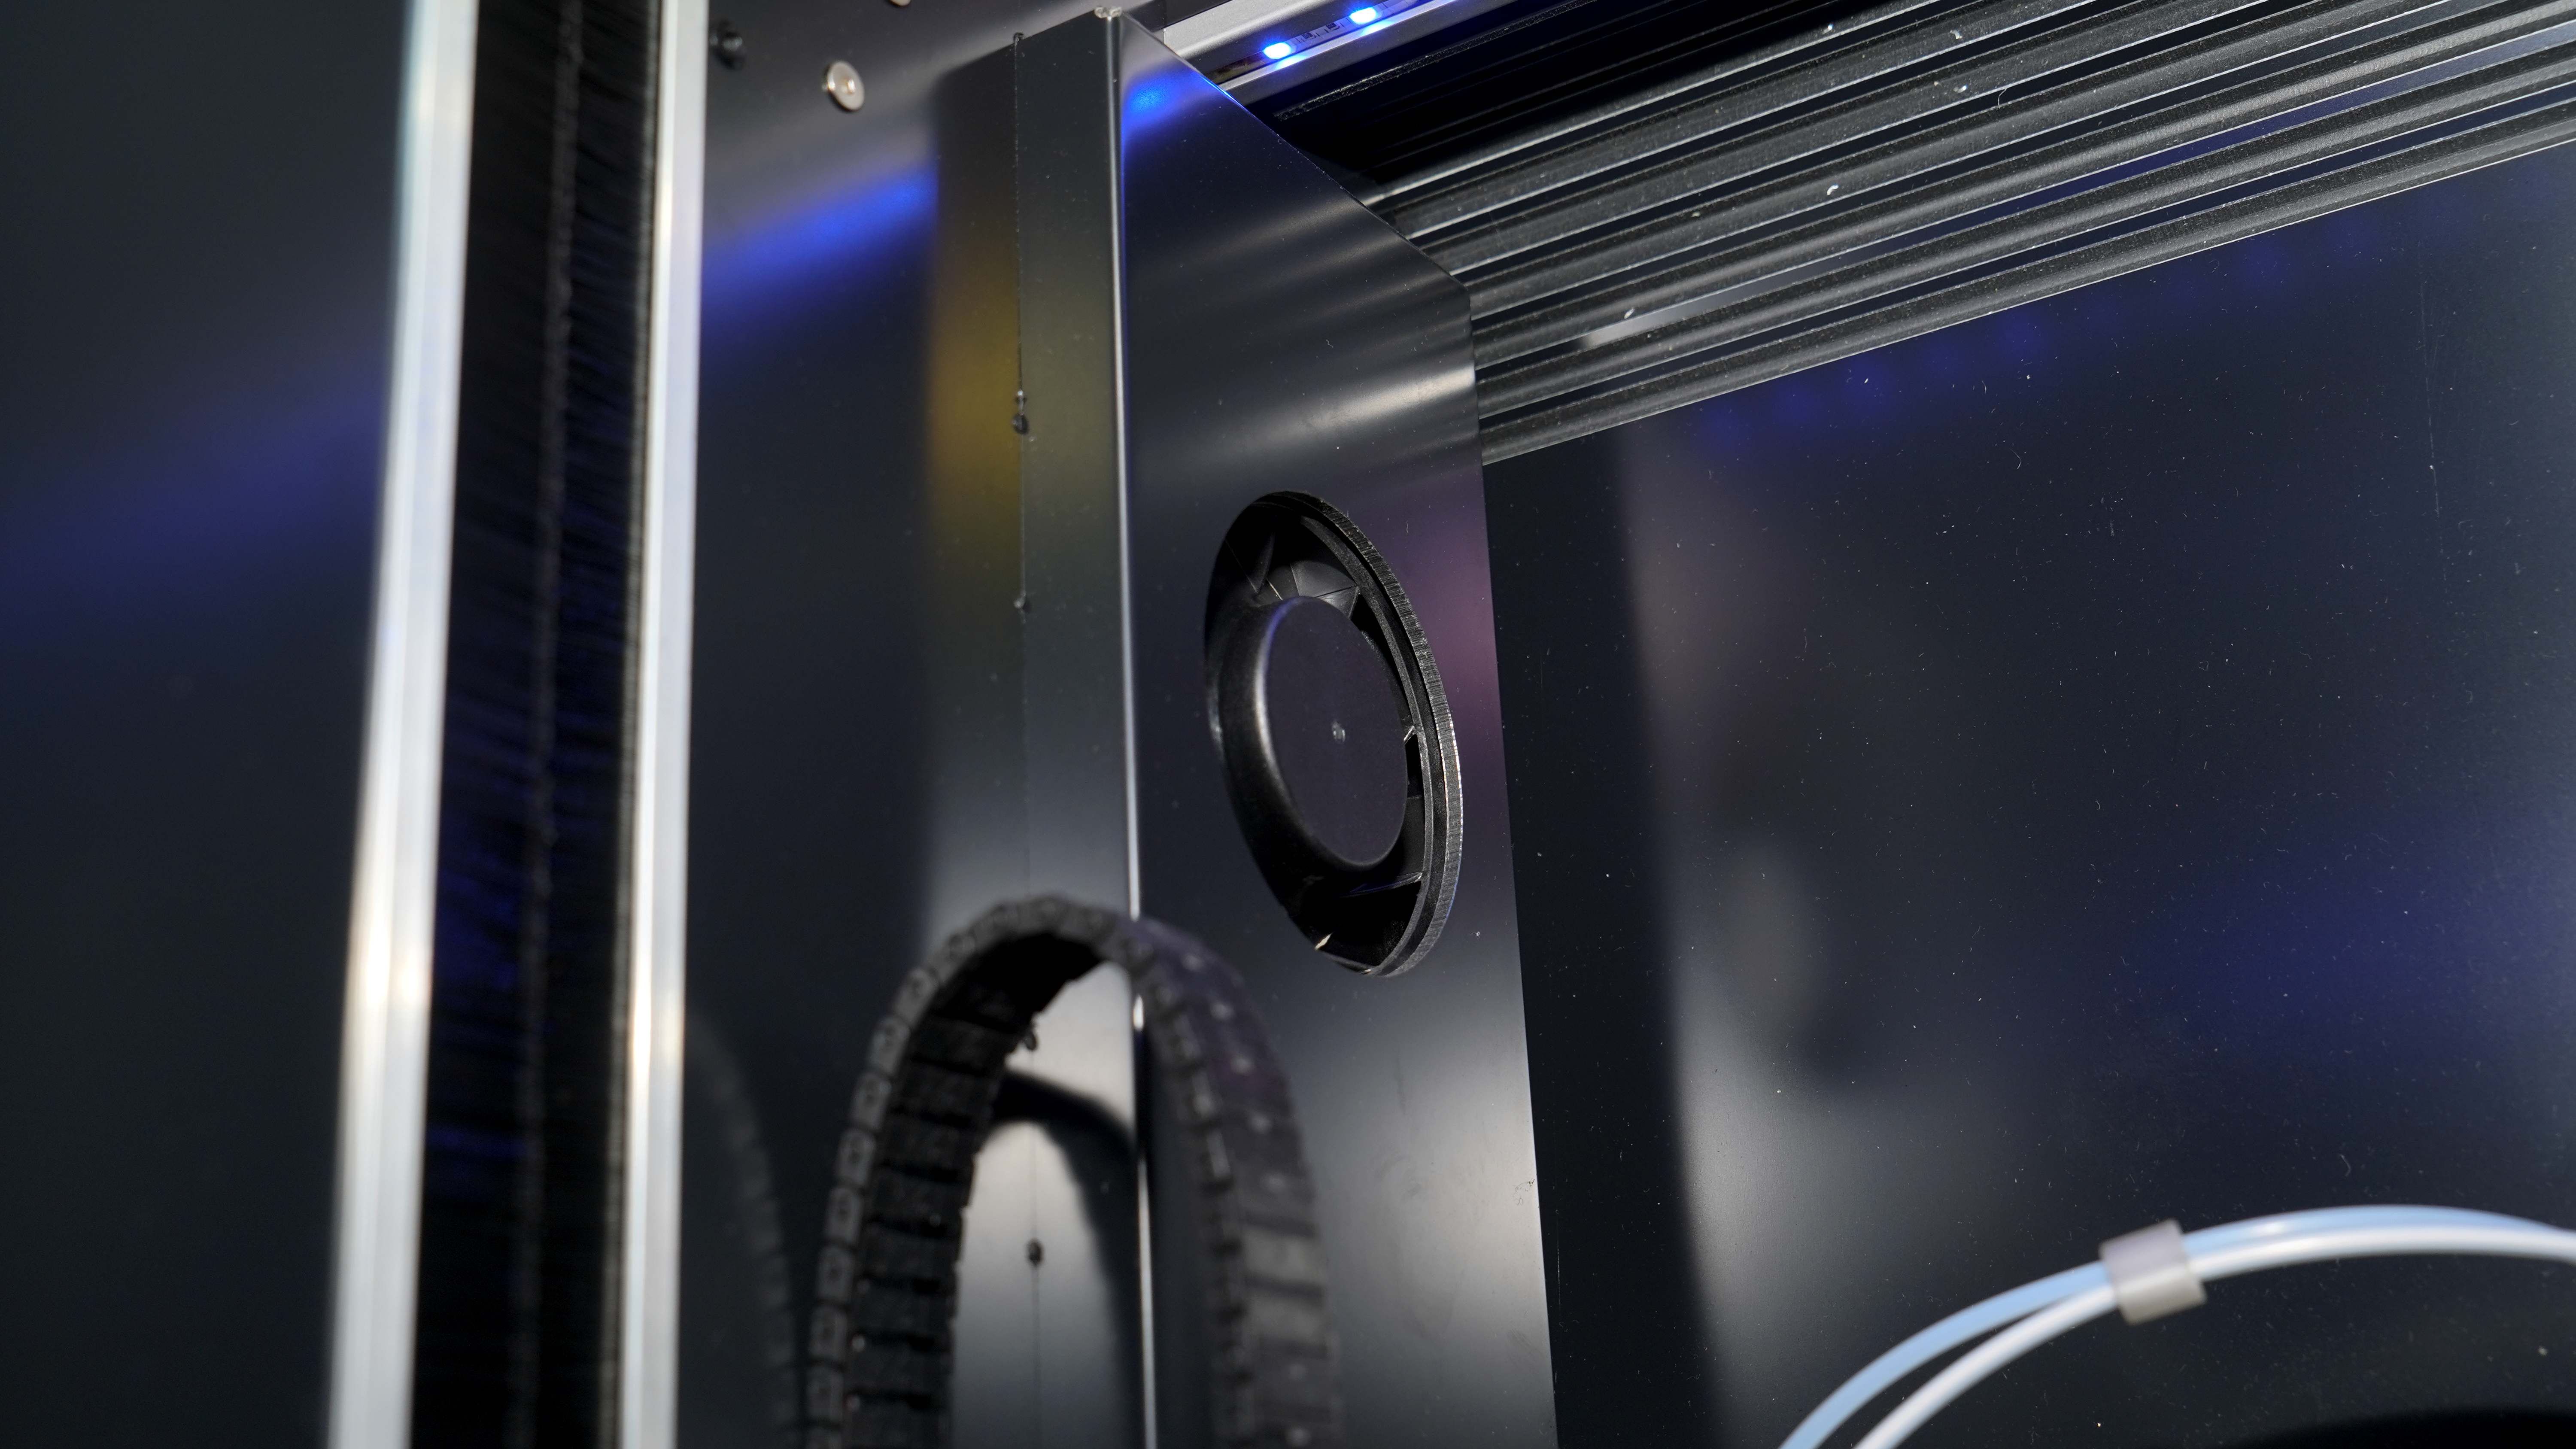
One other feature that the Pro has built-in is the HEPA filtration. These filters reduce the effect of smell and contamination to the work area when using specific materials. This meets the recommendations from a 2019 report produced by the Health and Safety Executive (HSE) for UK educational use of 3D printers.
Setup overview
When it comes to ease of setup, the RoboxPro is just about as easy as it gets. Unpack, plug in, install the head and feed through the filament and the printer itself is ready to go.
Installing the AutoMaker Software is equally straightforward and once in place, you can then connect to the Pro through a choice of network connections.
If you purchase the AutoMaker Pro upgrade, then you also have the ability for Offline printing through a USB key.
Once everything is powered up, loaded, installed and connected the RoboxPro is ready for its first print, the whole process takes no more than 20 minutes, and that's taking it at a leisurely pace.
Setup in detail
The RoboxPro arrives ready to go, and before you start, you need to choose which of the three heads you want to use and the materials.
I chose the DualMaterial head to start, bolted it in place with the screw on the back, plugged in and switched on the machine. A few flashing lights and about a minute later the RoboxPro had booted.
On the front of the machine, the touch screen panel shows the boot process until it reaches the home screen.
This screen displays the Reels attached and any info you need about the reels such as how much material is left.
It also shows the left and right nozzle, bed and ambient temperatures and when it comes to printing, it will also show details of the print along with any connection info if you're on a network.
At the base of the screen is the menu button, a quick tap, and you're through to the options. These include Control, Print, Calibration, Purge, Maintenance and console.
On pages such as console where you can directly input GCode a small touch screen keypad appears. I found this a little fiddly, but it was handy for shortcode snippets when needed. Anything longer and I found attaching a standard keyboard to the USB port on the front was far more convenient. Of course you can always enter these commands via the AutoMaker software on your computer.
After a quick check through the screens, it was time to load the filaments; I went for a black and red ABS. Essentially once I run through the set-up and calibrated, I'll replace one of the ABS filaments with PVOH support material. The PVOH is a water-soluble filament, and I've heard great things about this particular material so it seems like a good place to start.
Loading the filament involves feeding the end through a small funnel on the side of the machine and clipping the filament reel onto the side. Once a length of filament has been manually fed through the system, the extruder then grabs hold and automatically feeds through the rest.
The amount of material that's needed to feed through the system is just under a metre, so the initial manual feed does take a few moments and can be a little fiddly. Once the extruder grabs hold, the machine handles the rest.
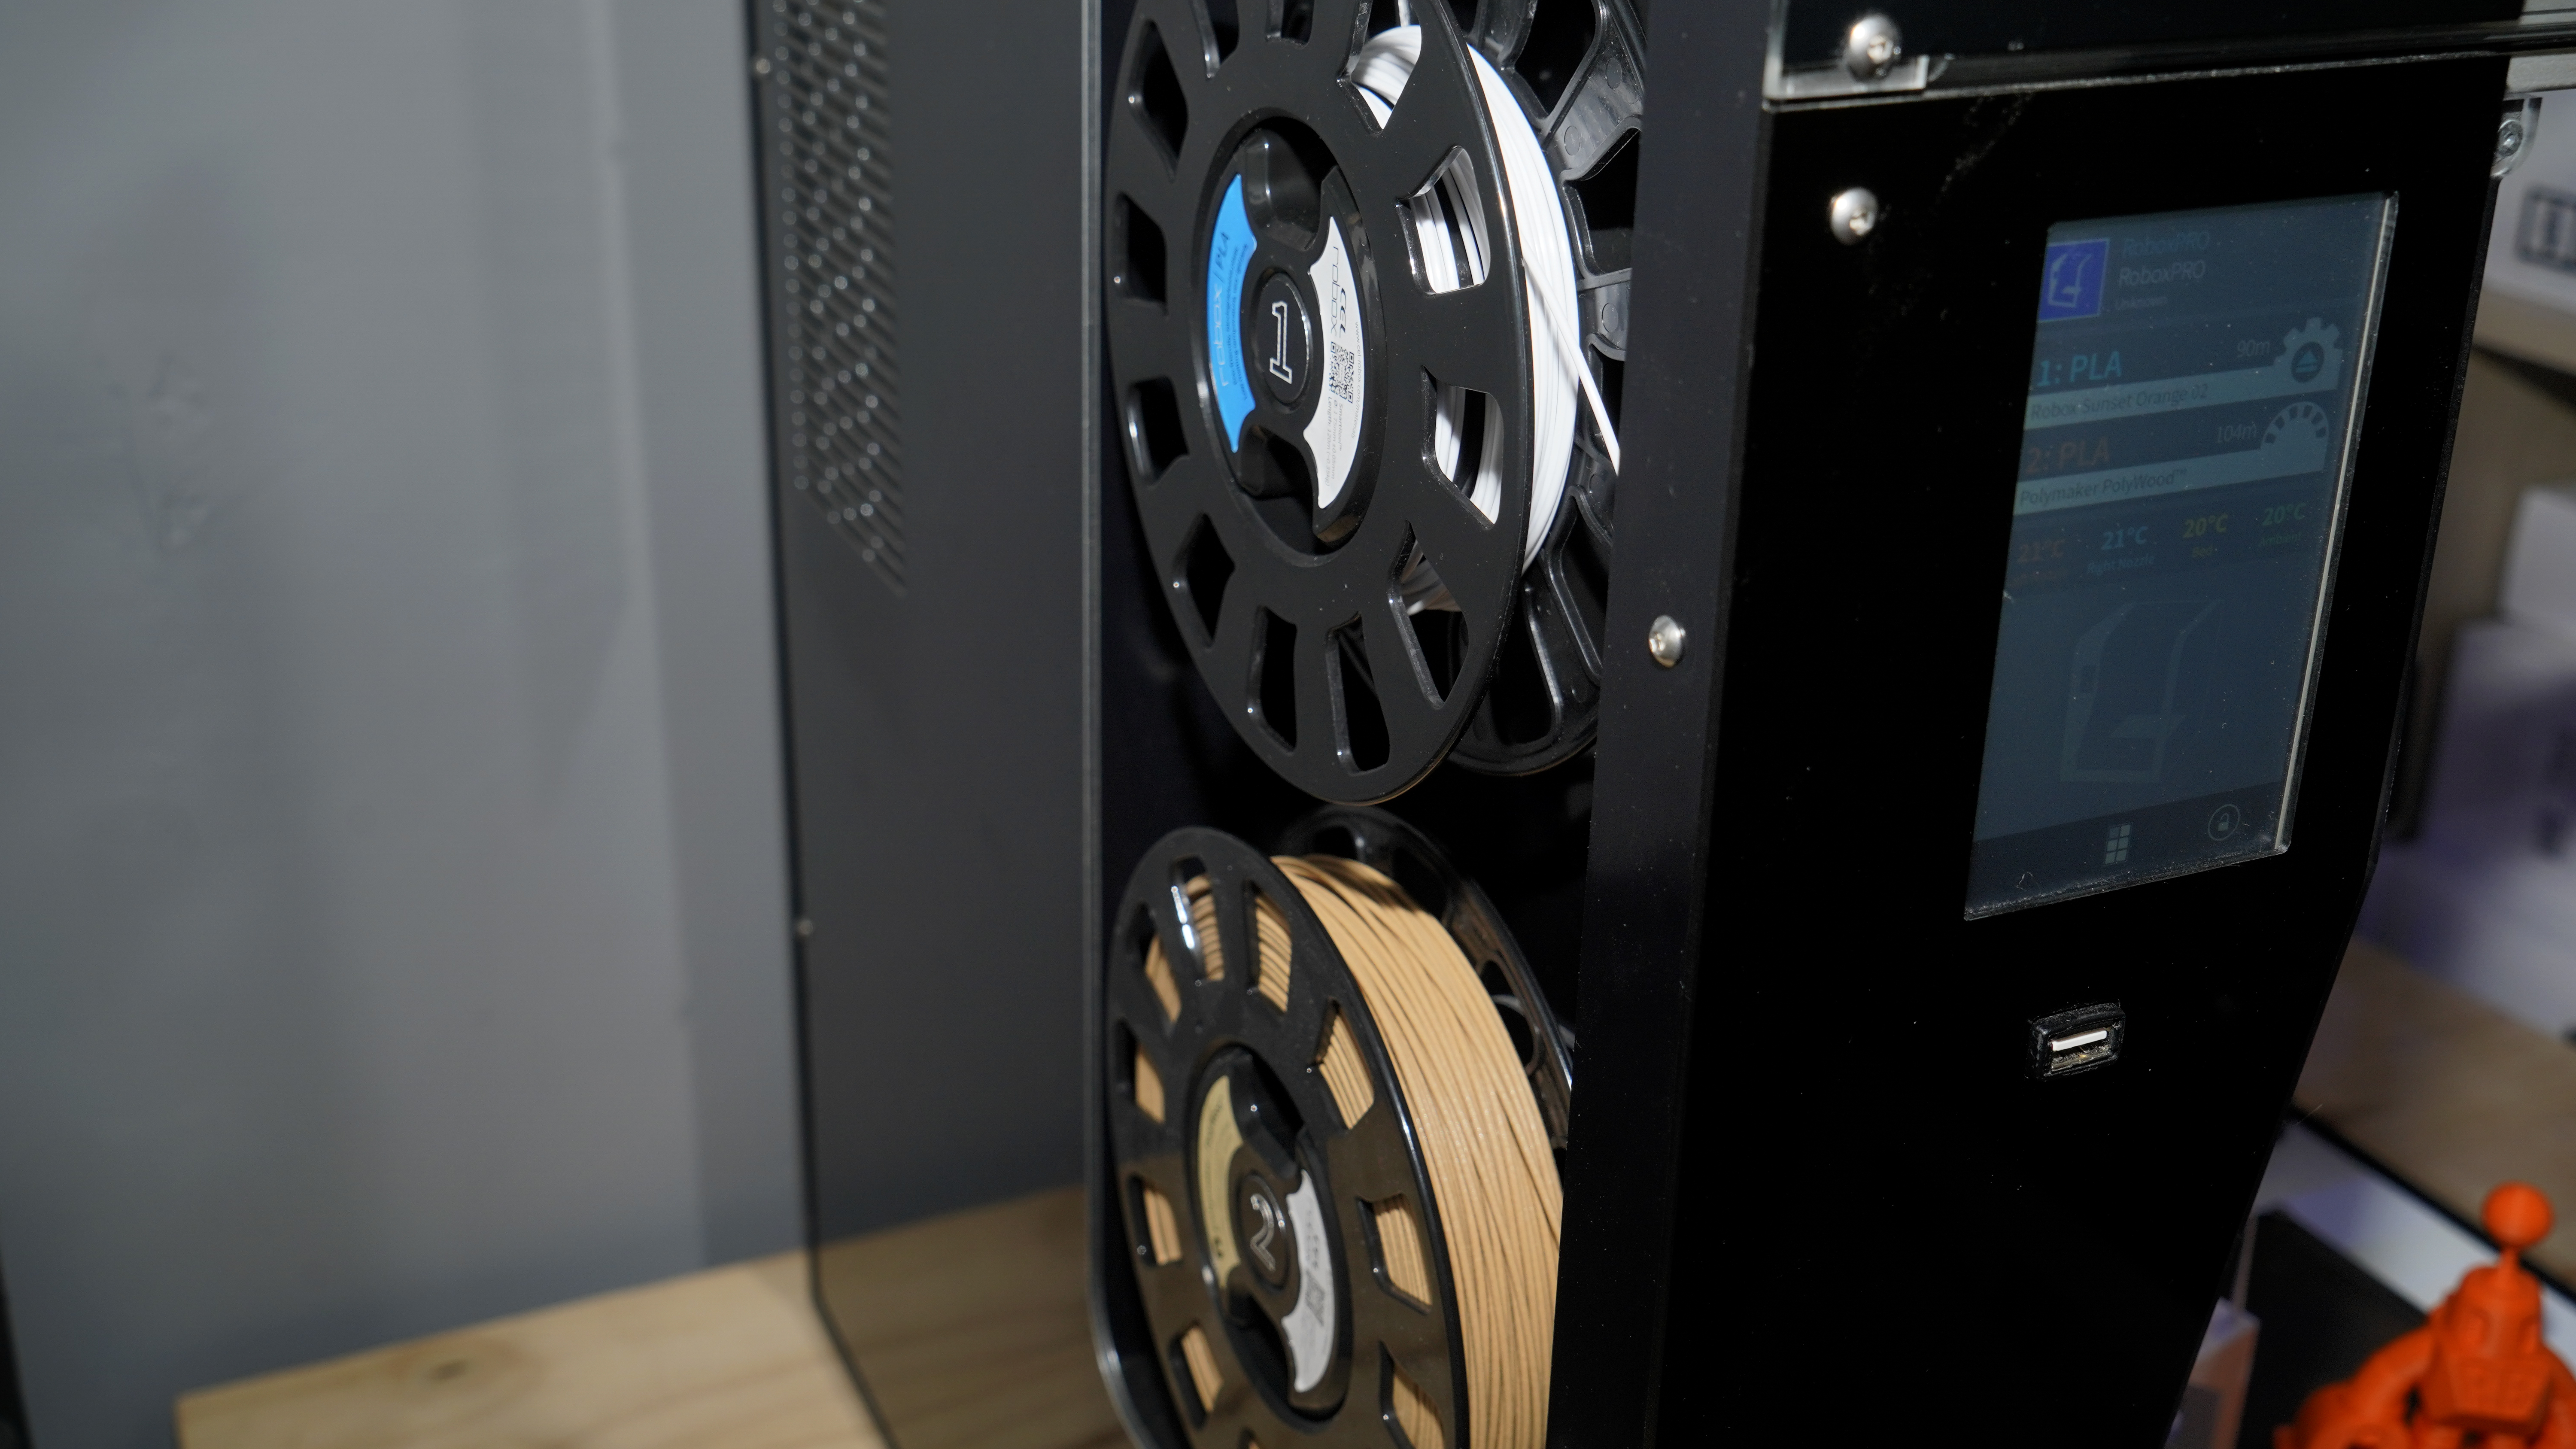
This is where the first part of CEL-UK's real innovation comes in. The SmartReels that hold the filament contain all the information about the material, so there's no need to select what materials you're using through the software before printing. This simple system means anyone can use the printer without needing to know about glass transition points or feed rates.
CEL-UK produce a range of good quality of materials through partnerships with some of the worlds leading filament manufacturers. The SmartReels are an innovative addition and along with the SmartExtruders take much of the hassle out of loading filament.
Third-party materials are compatible and can be spooled onto a spare SmartReel and programmed with the AutoMaker Software.
While the warranty won't cover damage to printer parts caused by third-party materials they are fully compatible and I ran quite a few through the system with no adverse effects.
In this test, I've used the Pro version of AutoMaker which costs an additional £59.90 annually and adds a few additional features such as offline printing.
The standard version of AutoMaker is free and for most people will suffice through a direct connection to the printer through Wifi or network cable.
With AutoMaker Pro installed it's just a case of connecting to the printer. I connected through a standard network cable as this seemed like the easiest solution.
With the cable in place, the IP of the machine appears on the front panel. In AutoMaker, you then click on the Preferences and select Network, type in the IP and click connect. You're then asked for the password; 1111, and that's it. Some networks will allow automatic detection of the available RoboxPro or Root, it depends on the router type.
Connecting through Wifi is equally easy, on the touch screen click the cogwheel, then Wireless Settings and enter the name of the network and password and click OK and you're done.
Once the IP shows on the RoboxPro panel type this into AutoMaker Pro and again click Connect.
If you're printing offline using AutoMaker Pro, then you can save the printable file to a USB stick and push it into the port on the print and use the Print menu to select.
Now with all the software installed and printer connected the final step before printing is to run through calibration sequences. This just ensures everything is working ok, especially seeing as how the printer had a lengthy journey by van and car.
Purge and calibrate
Before starting with the calibration it's advised you purge. This ensures that the system is clear of any previous filaments. This is a feature you don't usually see as a function on machines with the manufacturers simply suggesting you do this manually between each filament swap.
The process here is flawless and takes about five minutes. After the printer had successfully drawn a series of lines across the print platform it was time to run the height and alignment calibration.
The height calibration is especially useful as it ensures that your prints stick to the PEI print platform. The AutoMaker software runs you through the process step-by-step, and this takes around 5-10 minutes.
Through the process, you're asked to remove the PEI print platform which is held magnetically to the movable X-axis and in position by six screw heads.
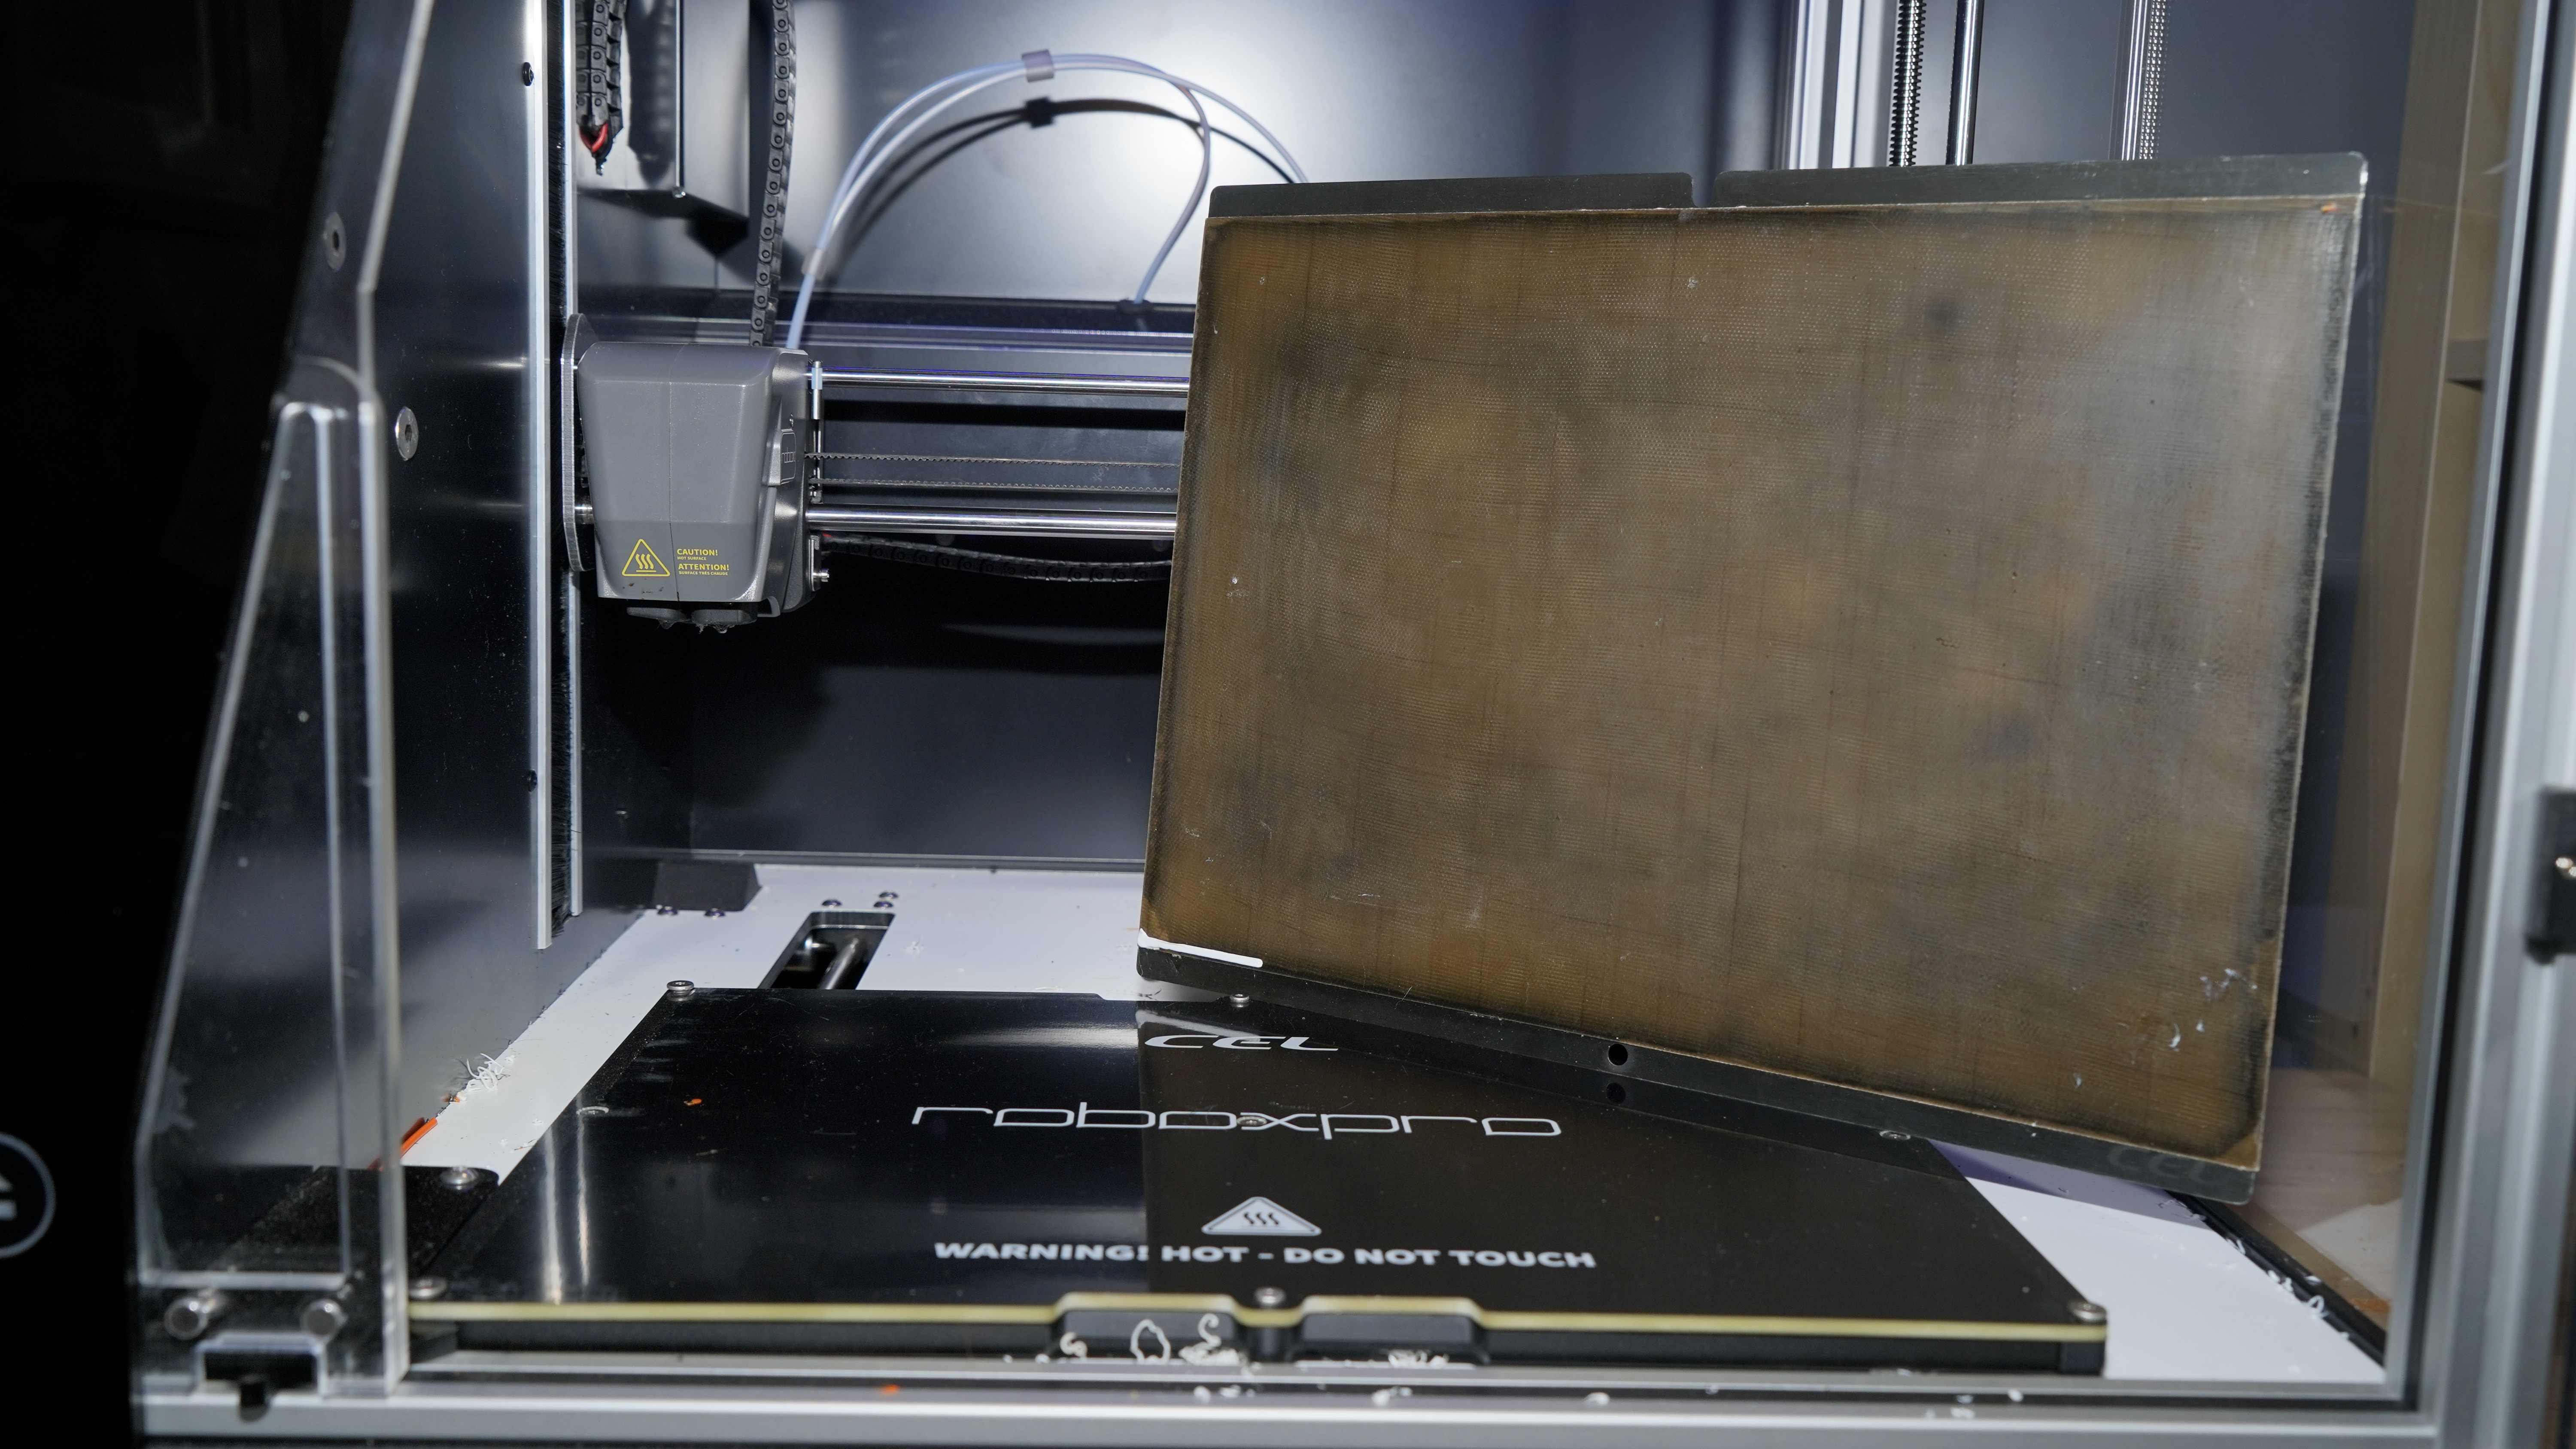
Removing the platform is easy enough despite the strong pull of the magnetics, but replacing takes a little careful positioning.
The screw head at the back and front help with the positioning but you need to make sure that the platform sits under the lip of the corner screw heads and not on top.
The alignment calibration is again all handled by the AutoMaker software, and after the calibration print has finished, you can dial in any corrections needed.
The entire set-up and calibration process is guided, and there is very little that can go wrong through the process.
With everything set and ready to print, I opted to print the CEL-UK Robot in Orange ABS. The print at medium quality takes about five hours, and the results are superb.
AutoMaker vs AutoMakerPro
The RoboxPro ships with the standard version of the AutoMaker software and to be honest, this is comprehensive and enables you to access almost all the features you could need for printing with the RoboxPro.
However, for an additional $73 (£59.90), and that's annually, there's the AutoMaker Pro software. This is a yearly licence and gives you access to a few more features, including access to the latest Cura4 slicing engine and offline printing.
This may seem like a lot to pay for a few seemingly small features but being able to use the G-Code Visualiser to preview the sliced code and print offline will appeal to those using the printer in a commercial setting.
Either version of the software enables the bulk of functions and features with the ability to load models, adjust print quality settings and print over a network to one or multiple printers.
Ali Jennings is the imaging lab manager for Future Publishing's Photography portfolio. Using Imatest Master and DxO Analyser he produces the image quality tests for all new cameras and lenses review in TechRadar's cameras channel. Ali has been shooting digital since the early nineties and joined Future's Photography portfolio back in 2003.
