


TechRadar Verdict
A good and versatile service with a great free option which allows you to design many complex projects for free, all from your browser. The HD photorealistic shots are stunning, and HomeByMe has now expanded into producing photorealistic videos of your projects as well - for a price.
Pros
- +
Vast choices, simple to use
- +
Can design an entire house for free
- +
Amazing photorealistic photos and videos
Cons
- -
3D pan can make some objects temporarily disappear
- -
Low-res photorealistic images take ages to render
- -
The sharing option doesn’t appear to work
Why you can trust TechRadar We spend hours testing every product or service we review, so you can be sure you're buying the best. Find out more about how we test.
Just like Floorplanner, HomeByMe is an online 3D home design tool. Based on the content of its homepage, the focus appears to be on photorealistic high resolution images of highly detailed 3D plans, and those on display sure are impressive. But is the wow factor merely skin deep or is this one of the best interior design software tools around? Let’s find out.
HomeByMe: Pricing and plans

- An impressive amount of choices, but it all starts with the selection of a subscription plan - even if you opt for the free one. Packs are like add-ons to grant you additional features, and if you want the HomeByMe team to work on your project for you, then explore their Services section
HomeByMe offers a vast array of tiers, which are divided into three categories: ‘Plans', ‘Packs’ and ‘Services’. The most easily recognisable ones are ‘Plans’, which includes the ‘Starter Pack’, ‘Premium’ and ‘Unlimited’.
The former is the most accessible, as it’s free, and is a great way to explore HomeByMe and see if it suits your needs. With it, you can create up to 5 projects, produce 3 high resolution images, 9 standard resolution ones and access to a vast catalog of 3D objects, among others.
Premium and Unlimited and subscription models. You can pay monthly or get the whole year upfront for a 15% discount. Premium would cost you $32 per month, or $329 for the year, gives you unlimited projects, and HD images, and offers you free packs for 4K and 360˚ images.
Unlimited adds unlimited 4K images to the bundle, allows you to remove the HomeByMe logo, gives your a pack of 360˚ images, lets you prevent your projects from being copied, and allows you to keep your models private, for $72 a month, or $704 for the year.
But what are ‘Packs’? Think of them as add-ons. You could for instance buy extra projects for your free Starter Pack (2 new projects would cost you $5.49), or 10 additional HD images (also for $5.49). You’ll also find video Packs, helping you turn your projects into virtual tours. 10 seconds of 720P video would cost you $1.10, or $16.50 if you opt for a 4K version. And as is the case for all these packs, the more you pay in one go, the cheaper each chosen item will get.
And as for ‘Services', you can commission HomeByMe to draw your plans for you (this service starts at $16.49), or get them to decorate your room on your behalf, starting at $75.90.
That’s a lot of options to be sure.
- Score: 4/5
HomeByMe: Getting started

- HomeByMe comes with a good number of tutorials, but the interface is so well designed, you shouldn’t need them to start experimenting with all available features, and you’ll start building your project in no time
Once you’ve created an account (which is free of course), you’ll be taken to your home page, where all your projects and custom furniture will be displayed. If you’ve just started, there won’t be much for you to see, although the ‘Get Started’ menu does offer a good number of video tutorials which go well beyond the basics.
To be honest, ‘the basics’ don’t really need a tutorial, as it’s incredibly easy to understand what you need to do, and how to do it, as you experiment with the service’s features, by building your first project.
The interface is pretty minimalist, with 6 menus top left of the window, and undo, share and save buttons top right. The former are where your building tools are located. Everything from adding a wall, an entire room, decorating your house and furnishing it, taking screenshots, adding annotations, and checking your measurements, it’s all done from there.
Adding anything to your project is pretty much done through clicking and dragging, and you’ll find that everything is fully customisable: you can alter the length of a wall, change the distance between it and others, break it up, extend it, etc. It is all pretty simple. Not quite as intuitive as Floorplanner, but pretty close, and you’ll be recreating your room, or even your entire dwelling virtually, in next to no time.
HomeByMe: Furnishings

- The amount of choice you have to furnish and customise your project is most impressive, from dozens of doors, to hundreds of brand names, you can truly decorate your project in a totally unique way
Adding walls is one thing, but what about doors, windows, and the rest? You’ll find the level of choice available is quite impressive. You can choose from dozens of doors, both internal and external, windows, staircases, garage doors, and so. Much more. All are available through the ‘Build’ submenu.
Everything is organised by category, and there’s a handy search field to quickly find what you’re looking for. The ‘Decorate’ sections lets you paint your walls and choose your flooring, and forget about generic colours: you have hundreds of styles to choose from.
As for furnishings, the sky’s pretty much the limit: thousands of photorealistic items are available, including the ability to browse through hundreds of brand names, although some only have a single item available. Still, the amount of choice and versatility is impressive.
Once you’ve found the item you’re after, click on it to select it, and it’ll appear in your project. Drag it around and rotate it until you’re happy with its position - you can even alter its elevation, although this is easier to do in 3D view. Some objects can be resized, so they fit your space exactly, although many cannot.
- Score: 4.5/5
HomeByMe: Views
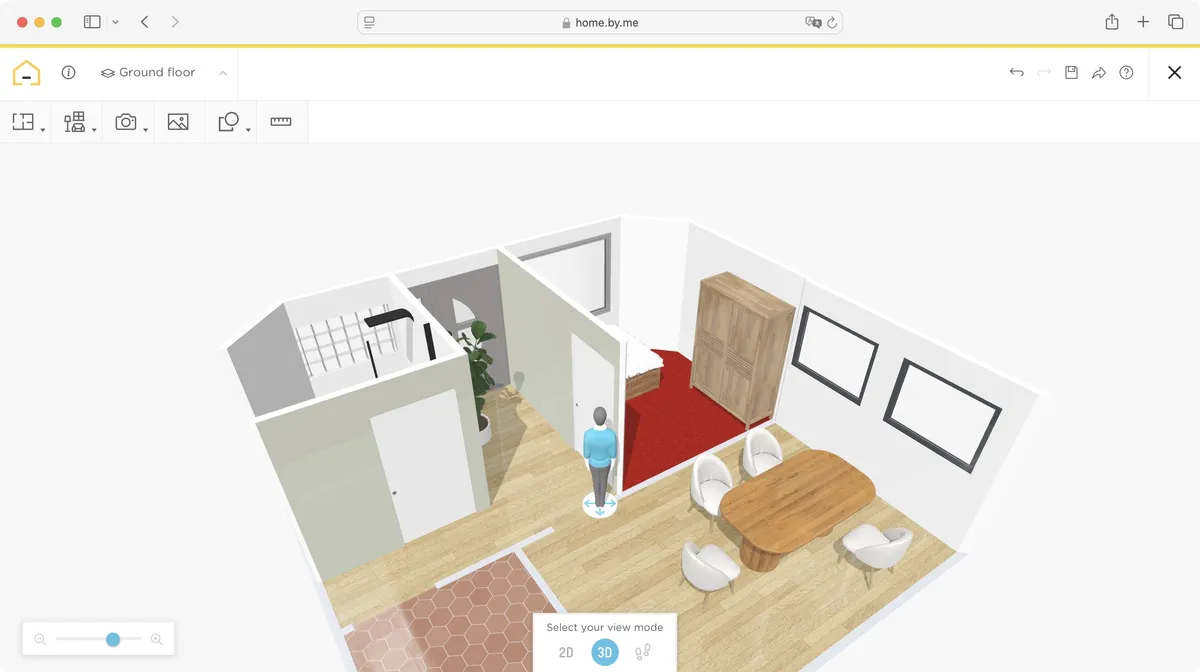
- You have three views to help you design and experience your project. All easy to switch between, and each have their own strengths and weaknesses
By default you’ll be working in 2D view, as if you’re drawing a floor plan. This is the only view you have to alter your walls: we couldn’t find a way to do that in 3D, but in 2D, it’s a simple matter of selecting your wall and dragging it. The same goes for windows and doors, as 2D lets you resize them right on the plan itself.
When working in 3D, you have some customisation options, but this has to be done through the edit button and altering the numerical values shown there - not as intuitive. Furniture and decoration doesn’t have such limitations and are easily done in either view.
The 3D view is very smooth and easy to operate. You have a figure you can move around. When you rotate your plan, everything will turn with that figure as its centre. You can zoom in and out of course, and if a wall or some furniture happens to get in the way, it’s automatically made transparent so it doesn’t obstruct your view.
Finally there’s ‘Walkthrough’. Having selected it, you can choose your preferred height, and then navigate through your project as if you were actually there… well almost, unless you’re able to walk through walls in the real world! Still it’s a fun way to experience your project as you’re building it.
- Score: 4/5
HomeByMe: Sharing

- A sharing option that doesn’t work, and unlimited shots which are no longer unlimited. That’s the downside. The results of these photorealistic shots are truly stunning, and if you’re on a budget, you’re able to take as many low res screenshots of your project as you wish
Being able to easily work on a project is crucially important for such a service, of course, but how about sharing your work with others? And what’s the deal with those photorealistic shots?
Let’s look at what’s available. While working on your project, you’ll find a Share button, right next to the Save icon. If offers to share your 3D project through social media or email. Sadly, we couldn’t get it to work. Everything we tried, returned an error that the page in question couldn’t be found. We even tested it on a project we’d created years ago - same difference.
So, not a good start.
What’s better are those realistic photos you can take. You have various options. All realistic shots now have to be paid for. There was a time when the ‘Starter Plan’ allowed you to take as many ‘standard definition’ (640x360) shots are you wanted, but that is sadly no longer the case. Just like the ‘high definition’ (1920x1080) ones, you have a set number before you need to purchase additional ones. Crazily enough, even though these shots are no longer free, they still take a huge amount of time to be processed - way longer than waiting for those high def ones. Despite this, the results of these shots are truly stunning, and it’s no surprise they’re prominently advertised on HomeByMe’s main page.
Other media options include being able to take a 360˚ photo, a top view of your project, or a photo realistic video. The quality for all of them is the same as the high definition photos. Obviously, you get what you pay for. If you’re on a tight budget, you have ‘Screenshot’ which does exactly what it says on the tin: takes a screenshot of what you currently see. It’s definitely not ‘photorealistic’ - it’s exactly as you see your project as you’re working on it - but at least it’s better than nothing.
- Score: 3/5
Should I buy HomeByMe?
Buy it if...
If you’re sold on the photorealistic renders, then getting a ‘Premium’ subscription is a must, unless you feel the various packs would offer you better value for money for what you’re after.
Don't buy it if...
If you feel you have more than enough options with the free Starter Plan, which offers you pretty much everything you need to start designing your project with ease, with a wealth of options and customisations. Why pay?
For more design apps, we've tested out the best landscape design software and the best architecture software.
