TechRadar Verdict
Apple doesn’t give you many customisation options, but what it offers is well polished and would suit most novice editors’ needs.
Pros
- +
Free
- +
Trailer templates help you create cool videos with no editing knowledge
- +
Polished selection of effects
Cons
- -
Mac-only
- -
Not many filters, transitions and titles
- -
Interface not customisable
Why you can trust TechRadar
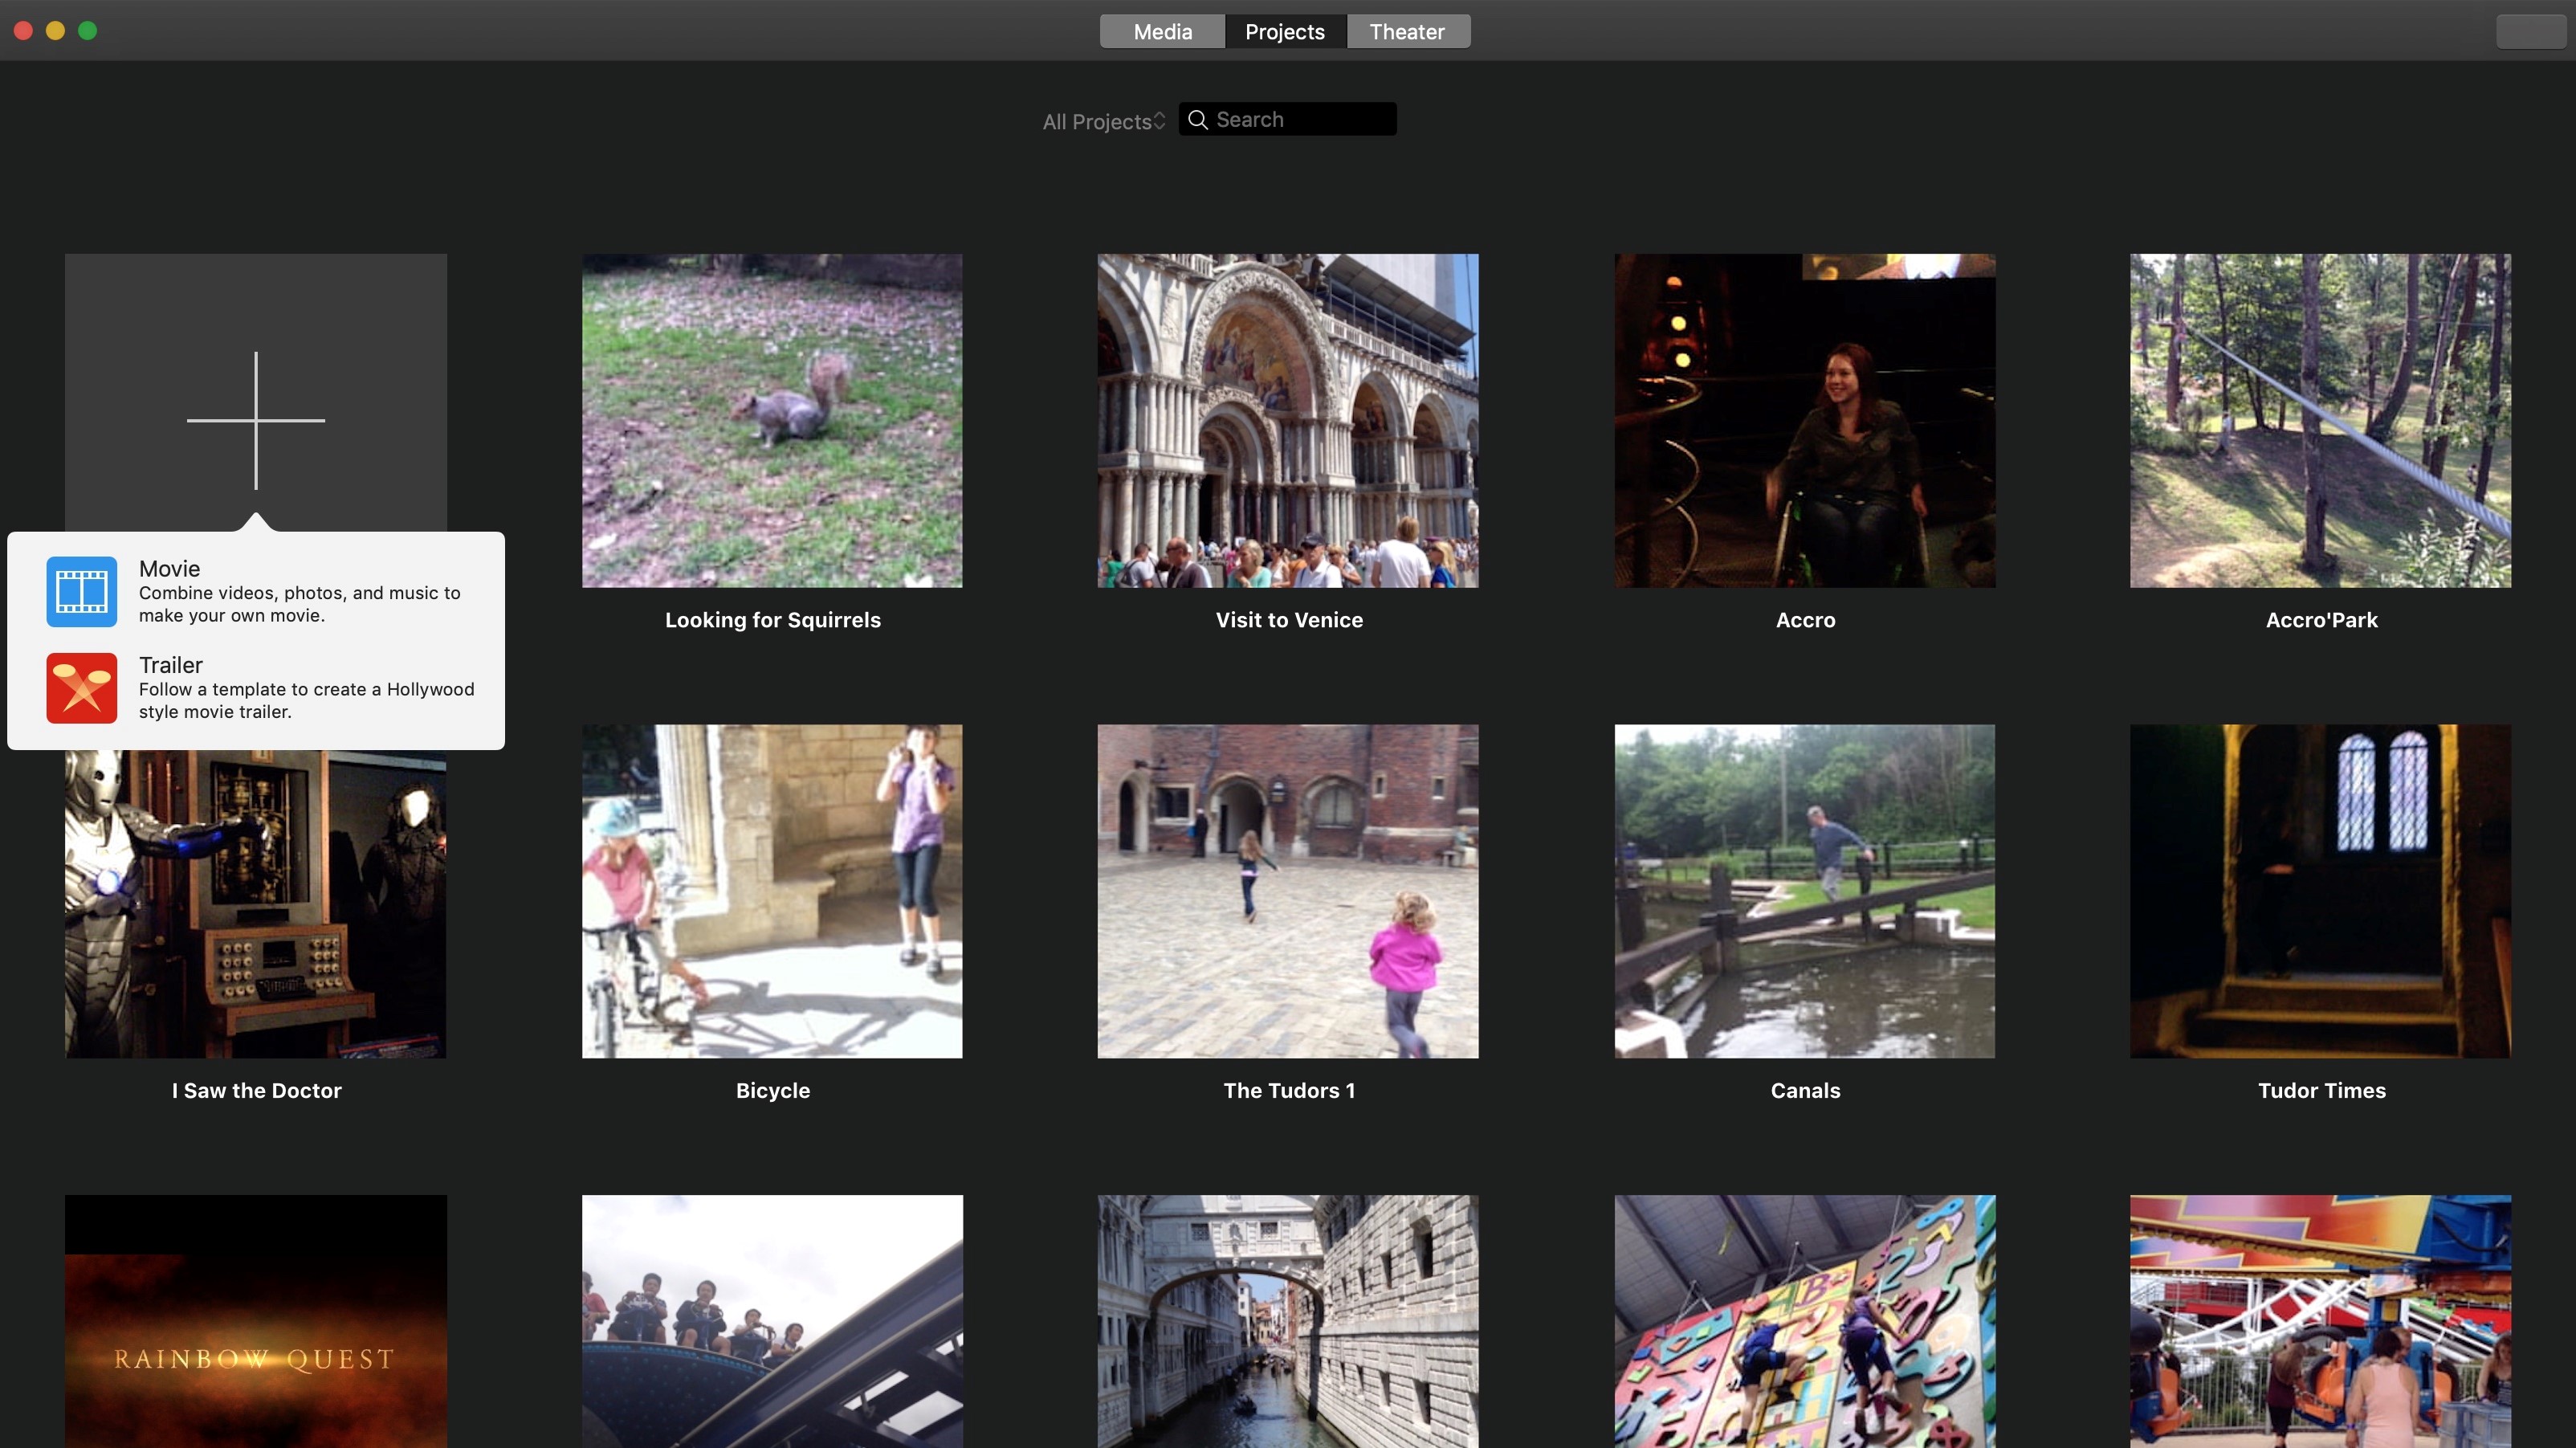
iMovie is Apple’s idea of a consumer-level video editing programme. It’s divided into various sections. Top of the interface are three options: Media, Projects and Theatre. The Media’s sidebar on the left is where any video clip you’ve already added to iMovie’s Library is stored. It also grants you access to photos and videos kept in your Photos Library.
The iMovie Media Library is further broken down into projects so you can organise your footage accordingly. It’s also possible to create multiple Libraries to keep your media even more segregated should you need to. For instance you wouldn’t want to mix your family shots with the clips you’re using for your office presentation, and having multiple Libraries allows you to keep these two separate.
Projects is where all the projects you’ve created are located. Clicking on one of them takes you into the editing process (more on which later).
And Theatre is where your finished videos can be stored (it’s by no means the sole repository for your work). That section does contain the option to send your work online to iCloud, where you can easily view it on other Apple devices such as your iPad or iPhone, or share it with friends or family.
Importing video or stills is incredibly straightforward. Select the project you wish to add it to (or create a new one) and click on the Import button (an icon with an arrow pointing down). From there you have access to any hard drive connected to your computer. Hook up a camera, and its clips will appear there too, ready for you to choose those you’d like to use.
Interface and editing
So how do you edit a movie in iMovie?
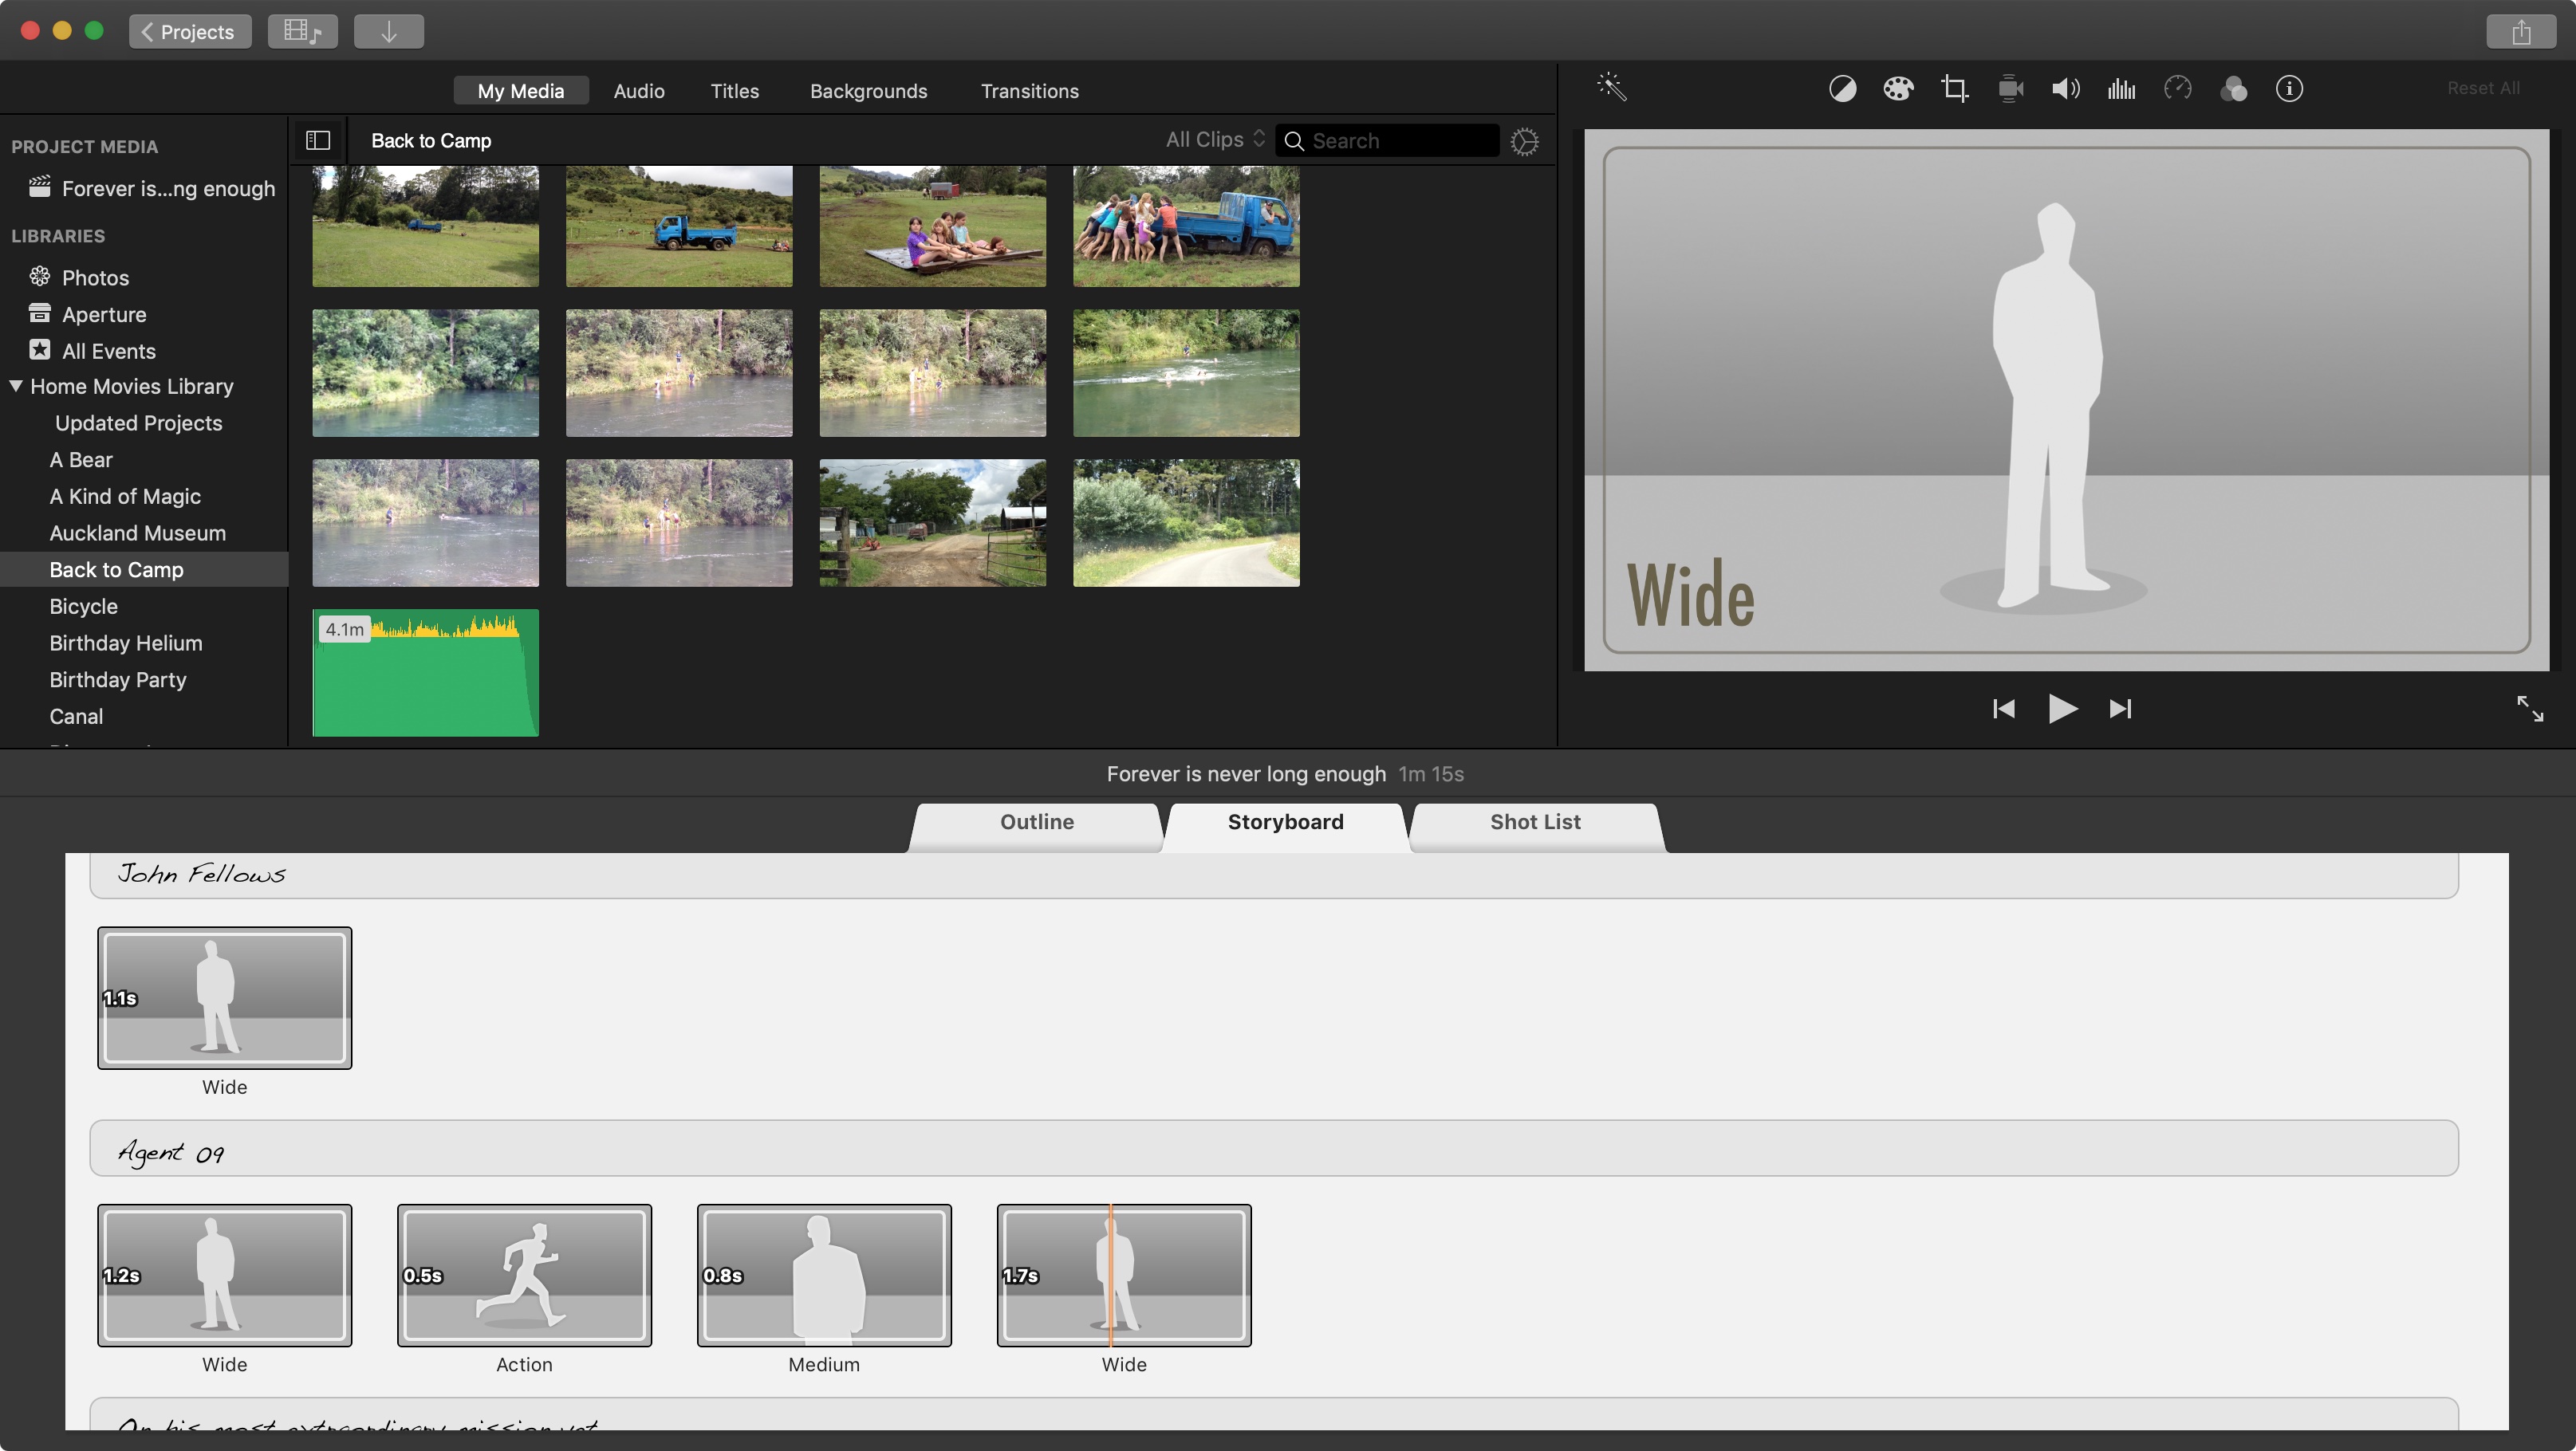
iMovie offers you two main options: a Movie or a Trailer (a third option, only available from the MenuBar, facilitates the creation of App Previews for developers). A movie gives you complete control over the edit. Conversely, a Trailer is a pre-designed construct, with ready-made titles and effects, and a series of placeholders. If you don’t know anything about video editing, this is the way forward: select one of the templates and the bottom half of the interface presents you with the Outline, Storyboard and Shot List.
The Outline is where all the titles are located. Replace the generic text with your own. The Storyboard and Shot List sections show you the types of clips this trailer needs, either in chronological order (Storyboard) or grouped by type (Shot List).
Drag your clips into those placeholders, fill in those titles, and you have in a matter of minutes a very effective trailer of your event. It’s pretty much the fastest way you can create an impressive looking and fun video, and Apple offers you 29 templates to play with to limit the repetitiveness of your videos.
If you’re a little bit more comfortable with video editing, then Movie is the better option to choose when creating a new project (you cannot swap between project types - if you change your mind, you’ll need to create a new one from scratch).
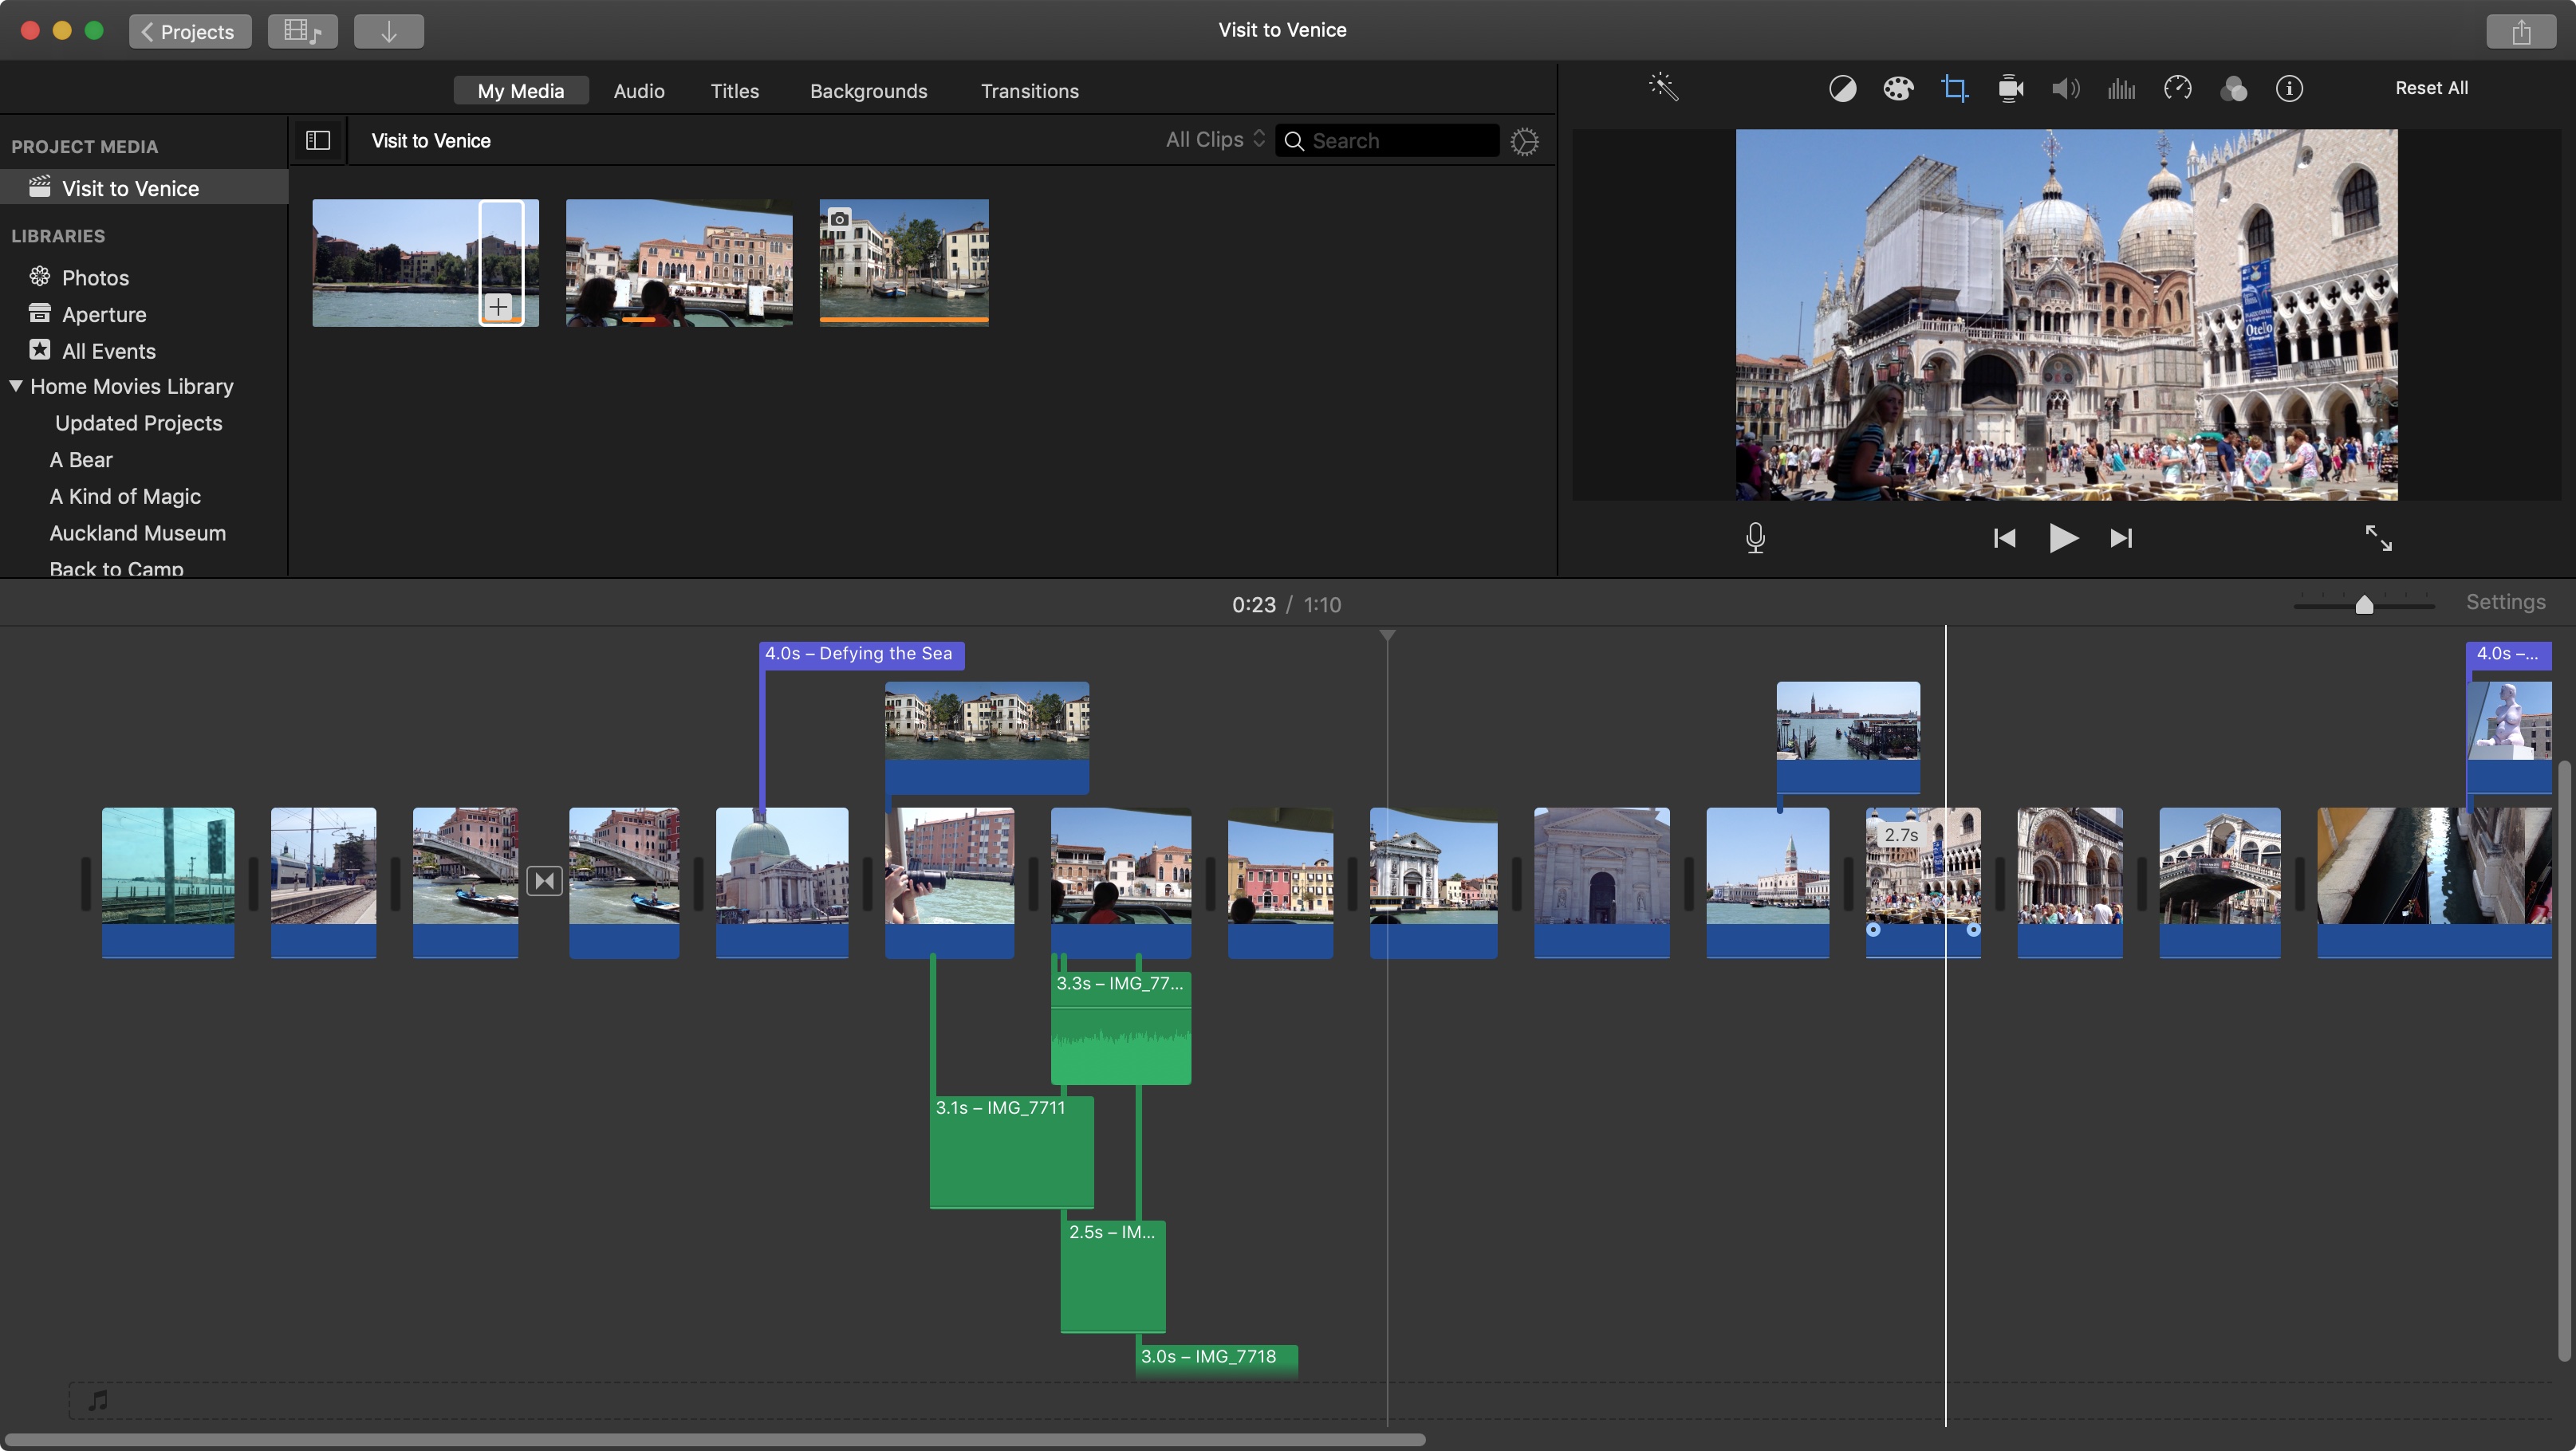
A Movie project’s interface is very similar to Final Cut Pro X, making it an easy pathway to Apple’s more advanced interface.
With that in mind, the timeline’s primary video layer works just like FCPX’s: magnetically. Take a clip out of your edit, and any footage to its right will automatically move to the left to make sure there are no gaps in your project. This also applies when you are expanding or contracting an existing clip, or moving footage around, and helps you create edits fast.
Although many other video editing apps offer you unlimited video layers to work with, iMovie restricts this to only two. But this should be enough for most of your initial needs. There doesn’t appear to be such restrictions applied to audio layers, and we were able to work with six separate such layers in our edit (the audio embedded in the primary video layer, four separate audio layers and an additional one for the score).
Graphics and effects
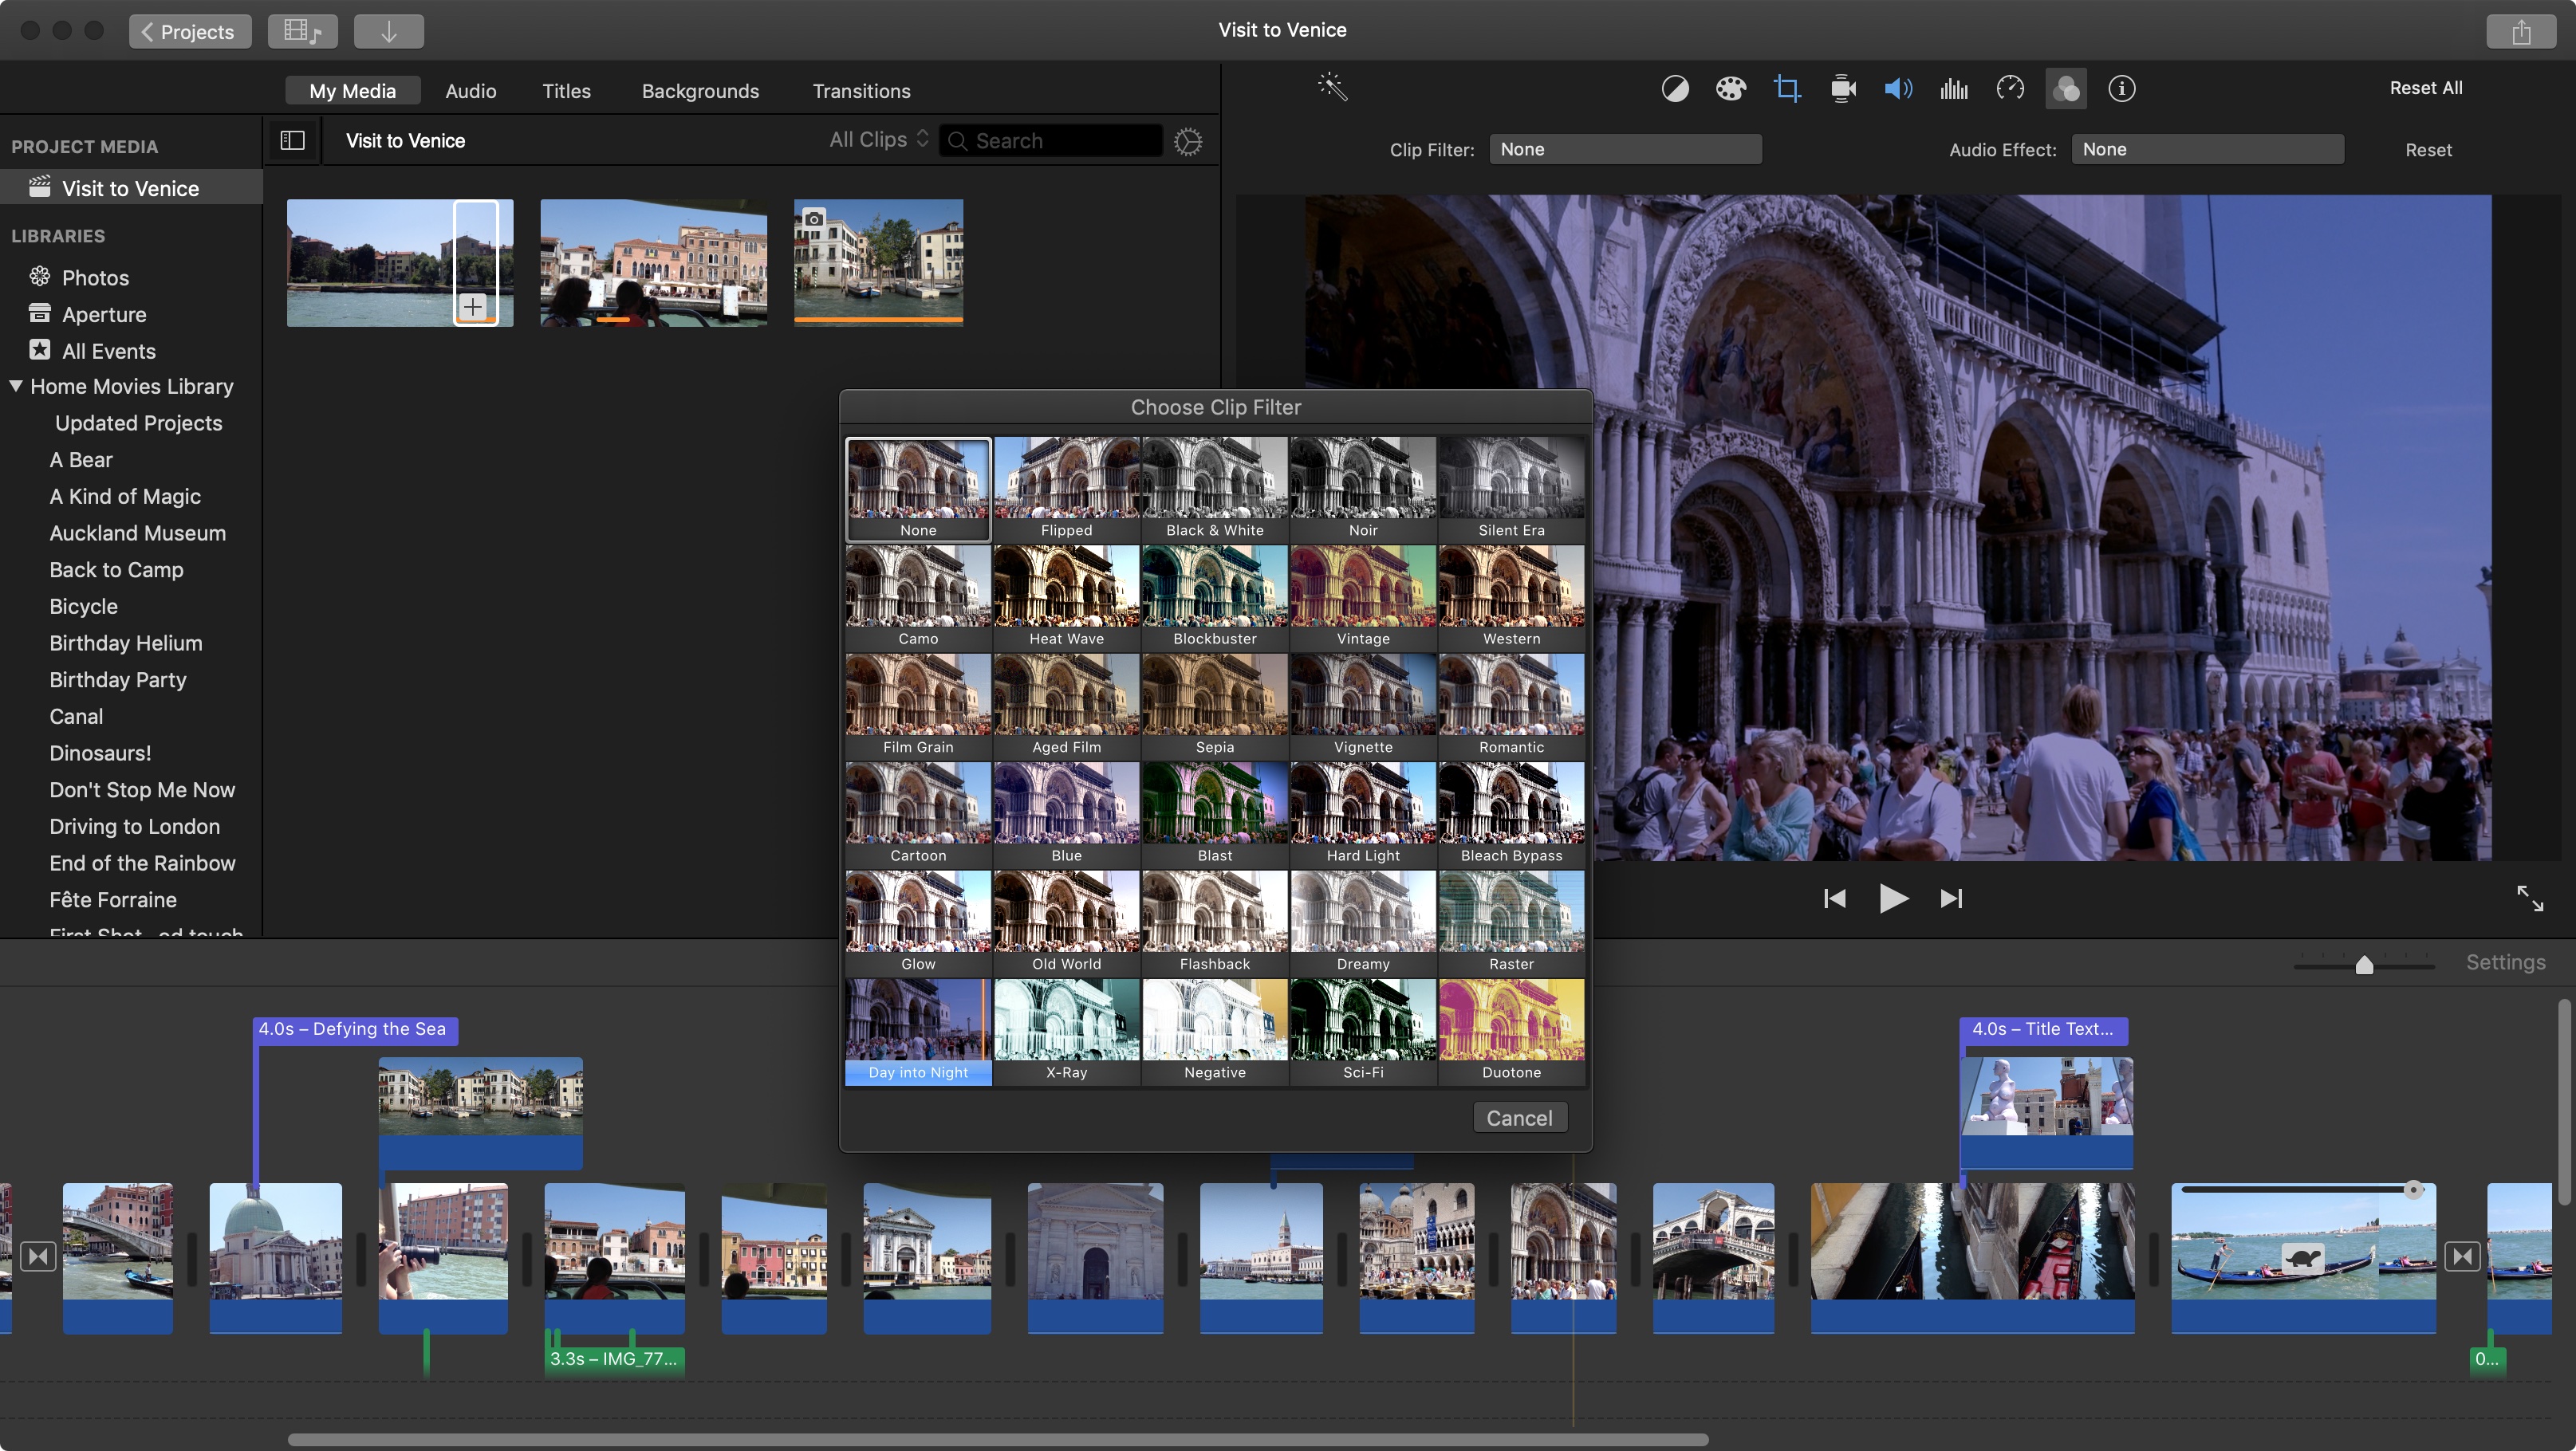
iMovie has a fair number of adjustments you can apply over your project, like a magic wand icon which you can use to automatically improve the visual or audio quality of your chosen clip. If you’d rather be more hands on, there are options for you too, like altering the contrast, saturation or temperature of the clip via some simple sliders. There’s a ‘Match Colour’ option to help make the look of your project more consistent, you can tweak the white balance, and make sure the skin tone are as you’d expect them to be.
Should you wish to get more creative, iMovie gives you access to 30 different video filters and 20 different audio filters which you can apply to your clips - but only one of each per clip. It’s also possible to alter the speed of your video.
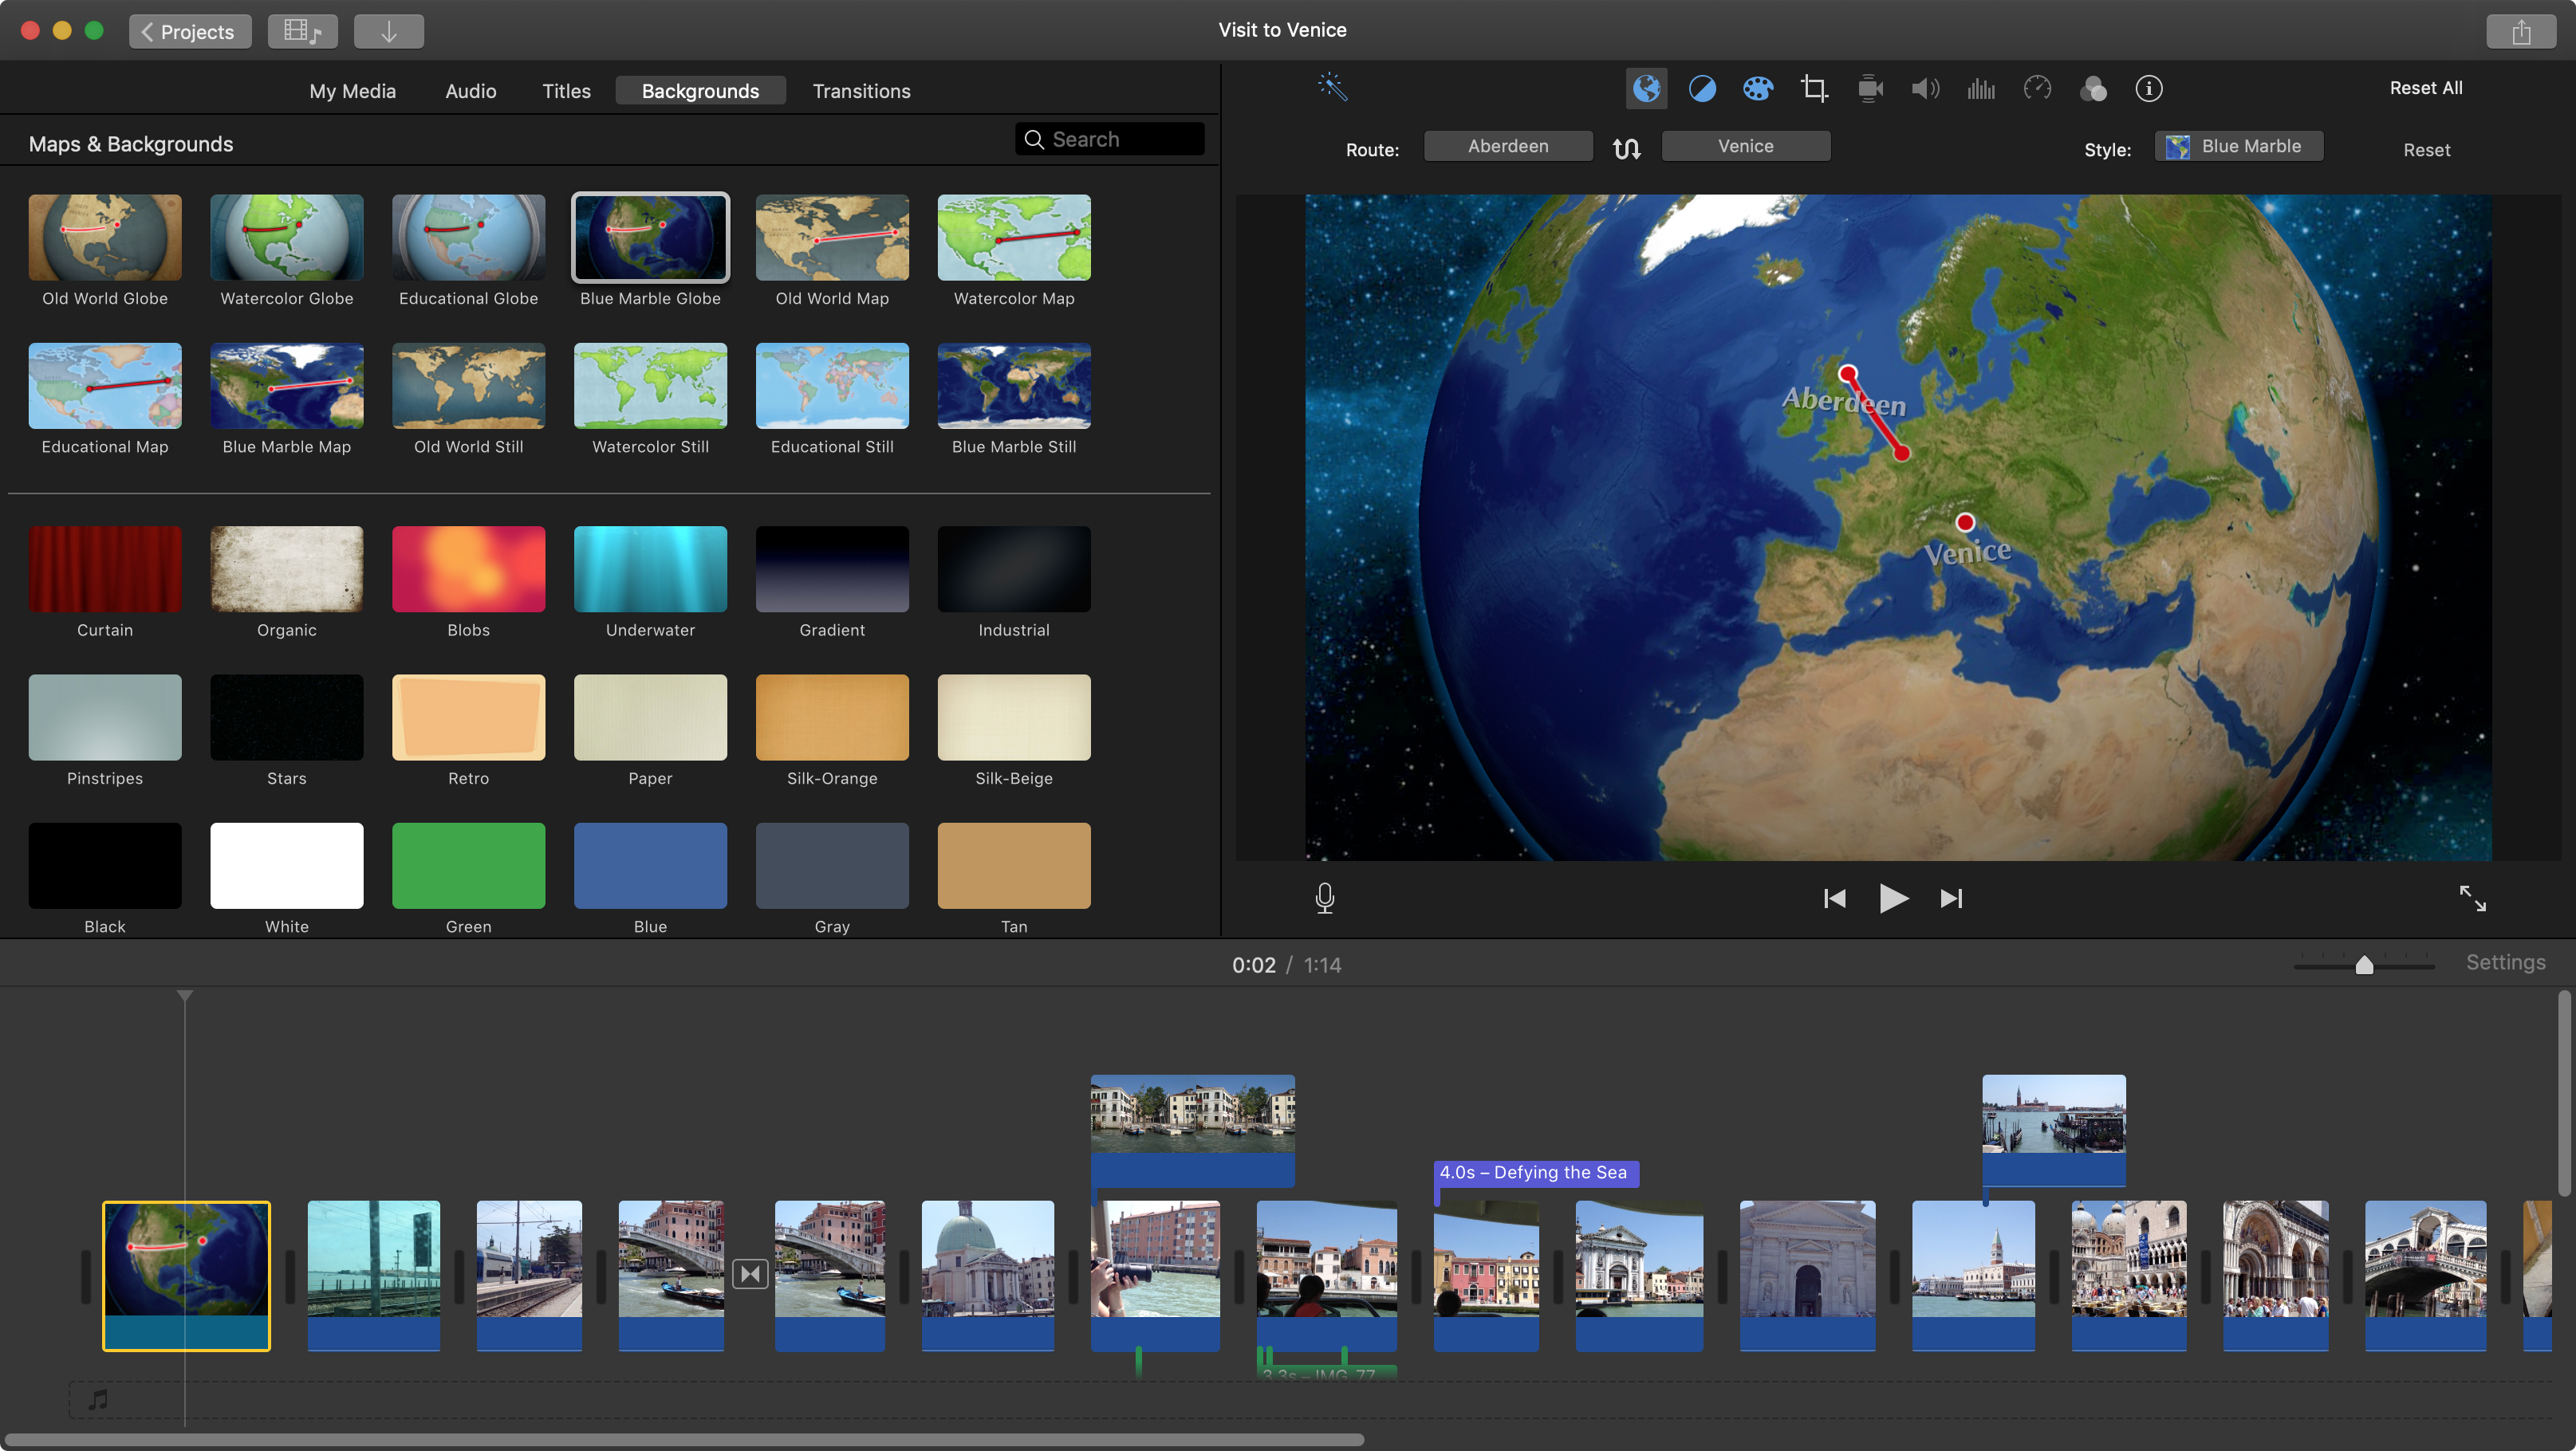
A handful of backgrounds are available, should you wish, for instance, to overlay text over a more neutral background. You could also resize clips on the second layer and place those over such a background for a more presentation feel. Some of these backgrounds are fun animated maps.

As you’d expect, you have a few polished transitions at your disposal along with editable titles. Apple allows you to import projects from iMovie for iOS, which enables you to shoot a movie on an iPhone, start editing it on your way home, and further polish your work when you get back to your computer.
Once you’re happy with your creation, click on the share button (the square icon with the arrow pointing up out of it), where you’re given a series of options, including sending it to the aforementioned Theatre, upload it to YouTube or Vimeo, or save it as a file on your Mac.
Final verdict
iMovie pretty much includes everything you need to create a short video. You don’t have many choices, but what’s available is sleek, polished and easy to use. Considering it comes bundled with every Mac, and you can update it via the Mac App Store for free, you get a lot of bang for no bucks at all.
- We've also highlighted the best video editing software
Steve has been writing about technology since 2003. Starting with Digital Creative Arts, he's since added his tech expertise at titles such as iCreate, MacFormat, MacWorld, MacLife, and TechRadar. His focus is on the creative arts, like website builders, image manipulation, and filmmaking software, but he hasn’t shied away from more business-oriented software either. He uses many of the apps he writes about in his personal and professional life. Steve loves how computers have enabled everyone to delve into creative possibilities, and is always delighted to share his knowledge, expertise, and experience with readers.
