TechRadar Verdict
A free (the subscription model is optional), yet powerful and versatile video editing app for your mobile device. If you’re a video editor on the go, you should take a serious look at KineMaster.
Pros
- +
Lots of powerful tools
- +
Easy interface to master
- +
Precision controls
- +
Free to use
Cons
- -
Subscription model can be expensive in the long run
- -
Sometimes difficult to select a clip you wantto move or edit
Why you can trust TechRadar
Editing on a computer is one thing, but the amazing versatility of our mobile devices means you could shoot some footage, edit it and upload it, all on a single device. There are many apps that offer this versatility to a lesser or larger degree, and we’ll be exploring where on this continuum KineMaster - one of the best video editing apps for Android and iOS stacks up.
- Want to try KineMaster? Check out the website here
The best photo editor overall is: Adobe Photoshop
If you're serious about photo editing, or are thinking about turning your hobby into a job, you can't beat industry standard software Adobe Photoshop. It's certainly not free like the photo editors below, but it's surprisingly good value with an Adobe Creative Cloud subscription.
For a mobile app that works on phones and tablets and that is essentially free, it packs quite a punch. Most mobile video editing apps - and even some of the best video editing software in general - attempt to simplify the creation process by limiting the number of available options. KineMaster seems to have successfully turned this expectation on its head, and has provided a simplified interface with quite a lot of advanced features crammed in.
- We've tested out the best video editing software for beginners
Sidestep subscription
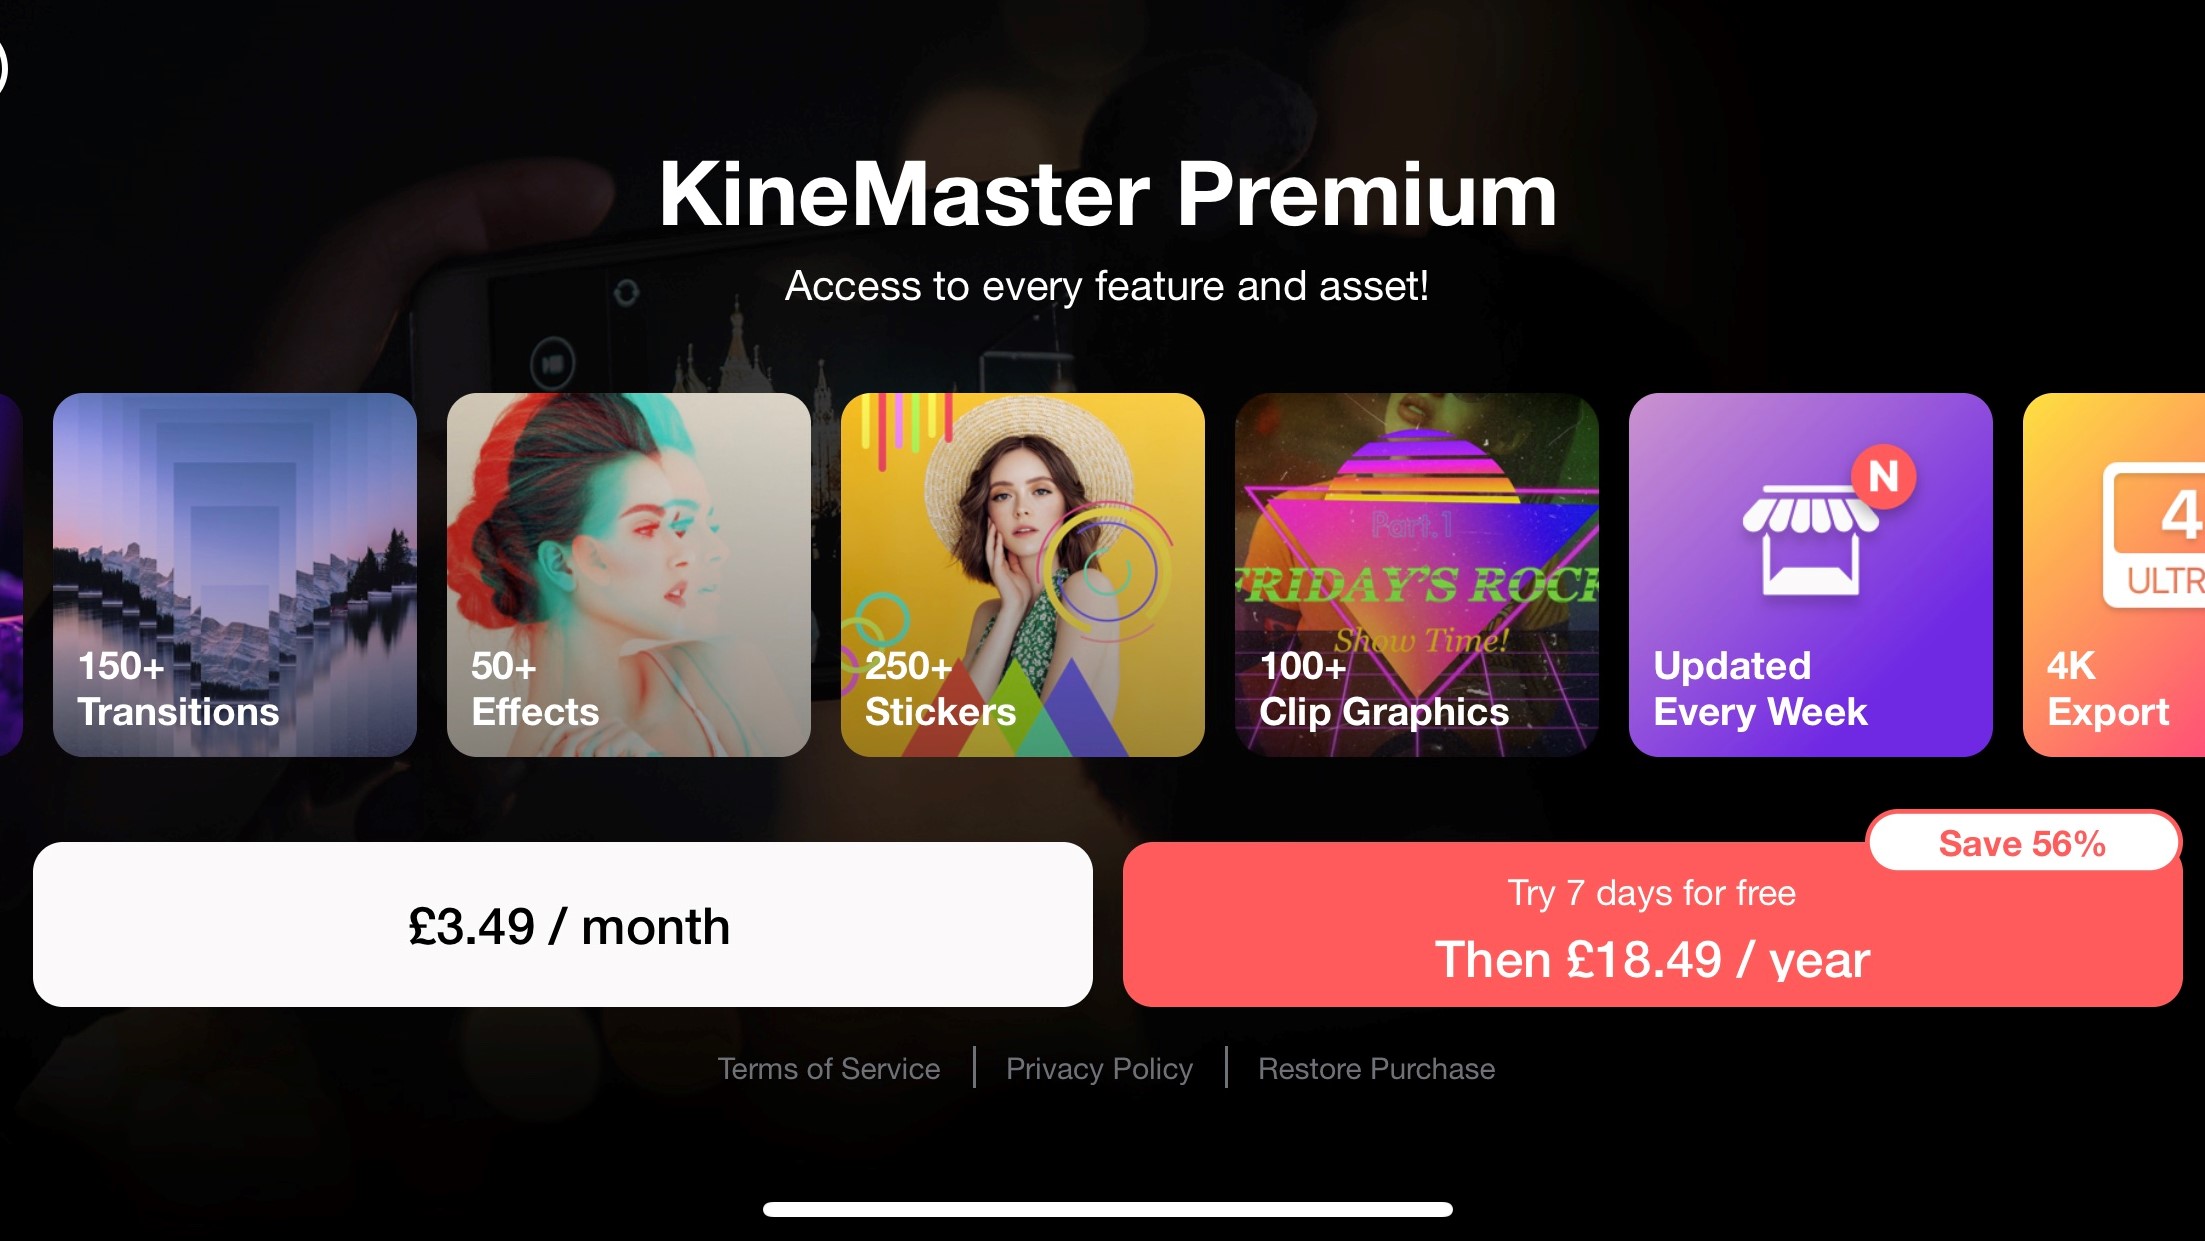
When you first launch KineMaster, you’re given a brief introduction to its available features, and an enticement to subscribe to its service to get new filters, effects, stickers, etc every week. You are given two options: $4.99 (£3.49) per month, or $39.99 (£18.49) per year (the latter also comes with a free 7-day trial).
Tempting though this might be, you can forgo the subscription model altogether by tapping on the ‘x’ top left of the screen.
Interface
You’re now in the main interface. To start a project, tap on the big red button with a clapper board inside it, where you’ll start by choosing one of three available screen formats: 16:9, 9:16 or 1:1.
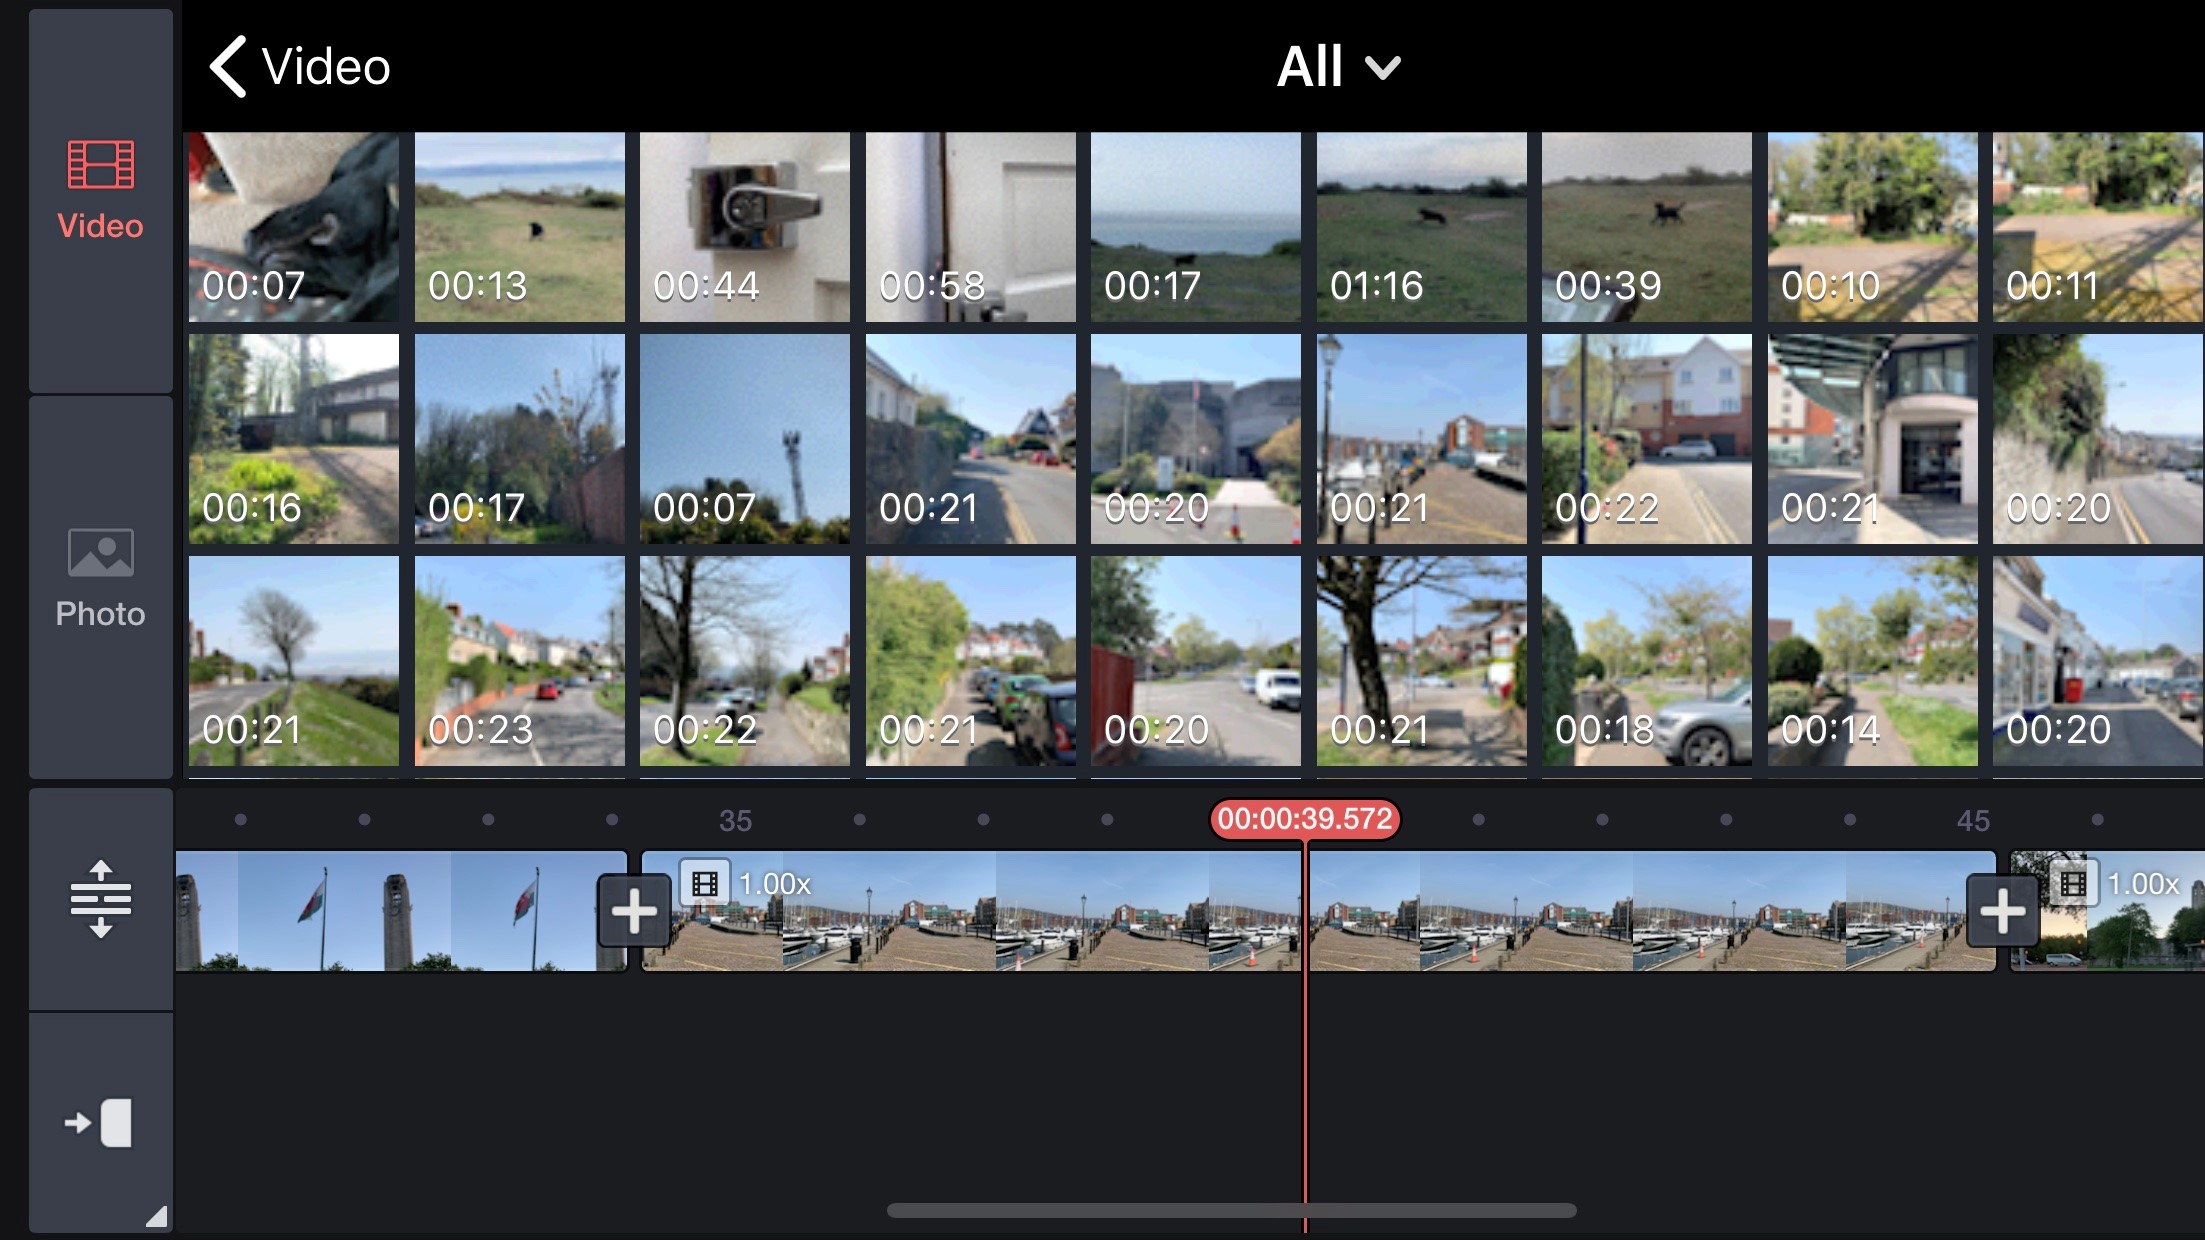
KineMaster doesn’t have a media section that lists a project’s available clips. Instead, it relies on your device’s camera roll. Scroll through your list of videos, and tap on one to add it to your project at the playhead’s location. You can add as many clips as you want in a single session. It’s also possible to reorder clips you’ve inserted, but once you tap on one in the timeline, this takes you out of the import process and back into editing mode.
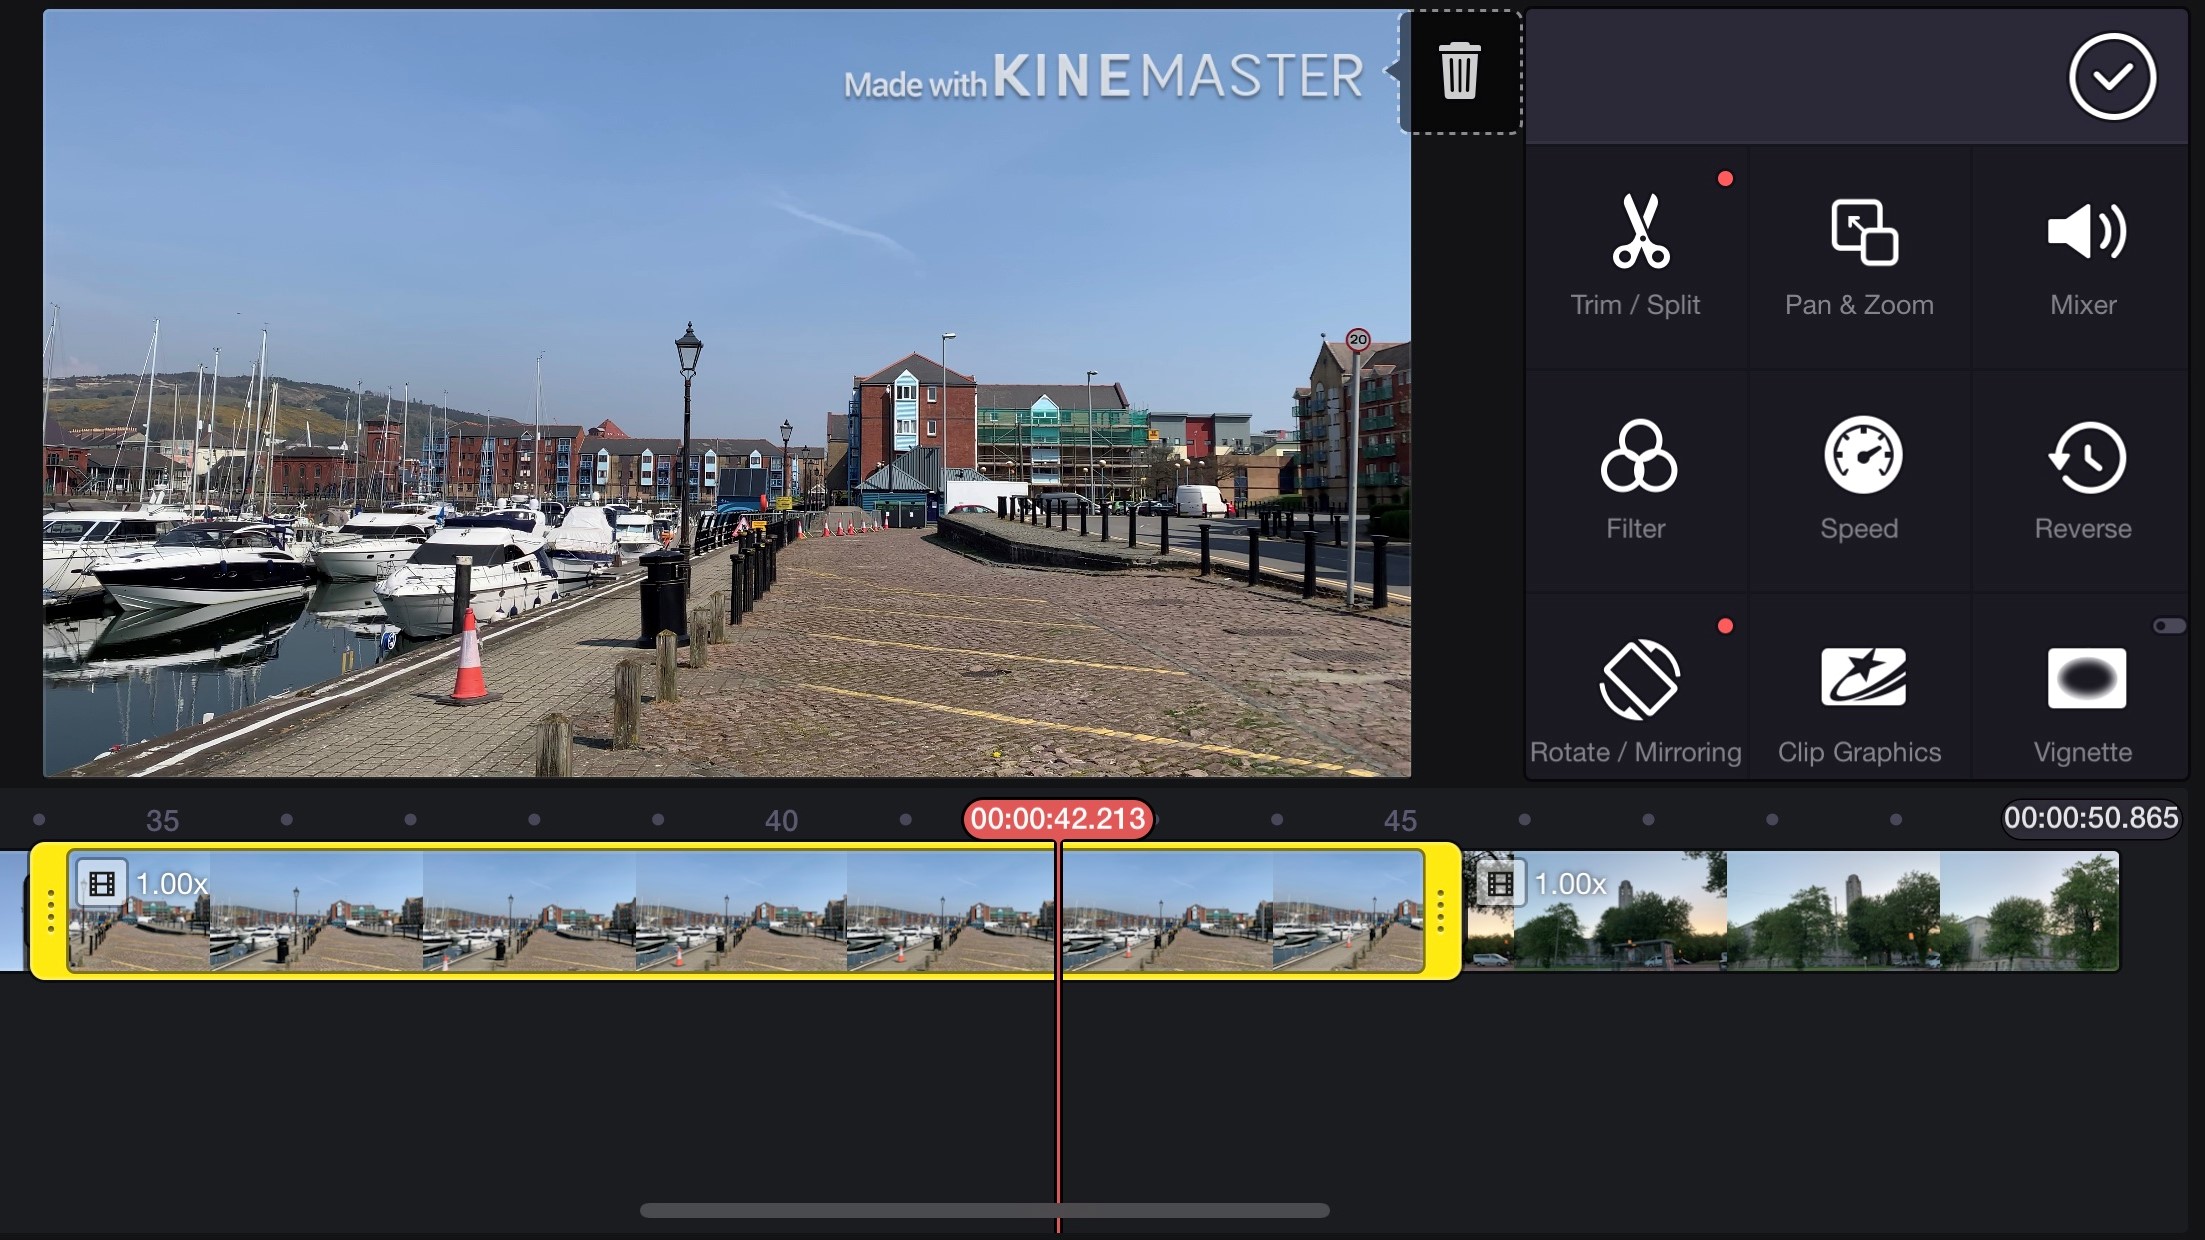
This is where you can trim the clips you’ve imported, and create your movie.
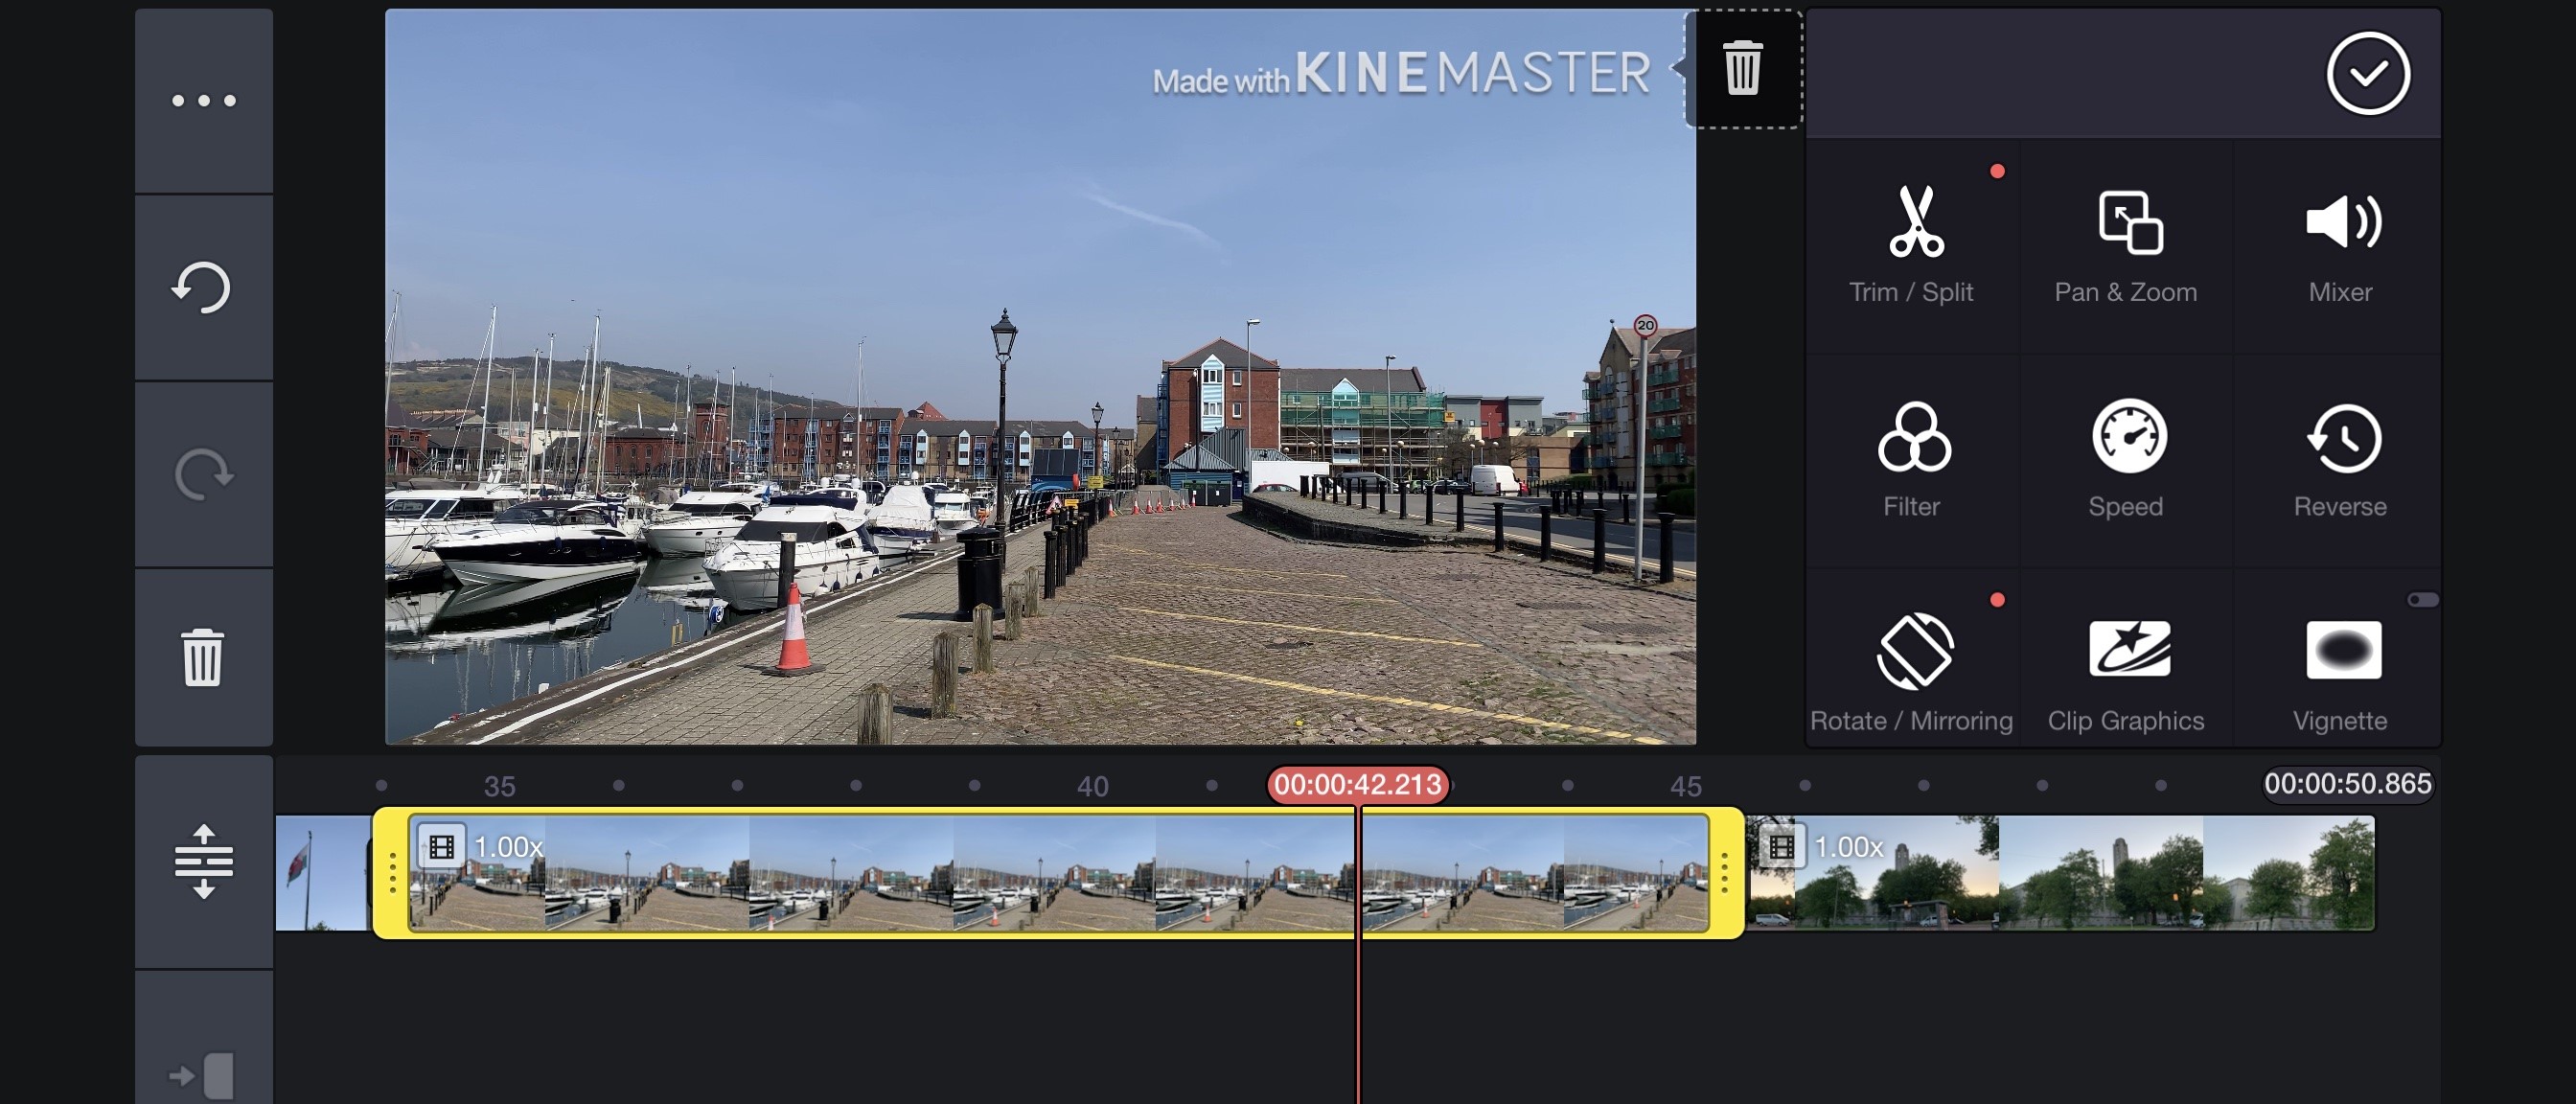
The working interface is cleverly designed. To the left is the Action Bar whose tools change depending on what’s selected in the Timeline.
The Timeline itself is at the bottom - although if you’re used to editing in other apps and on other platforms, be advised that the convention is reversed: a clip will overlap another if its placed under it, not above it.
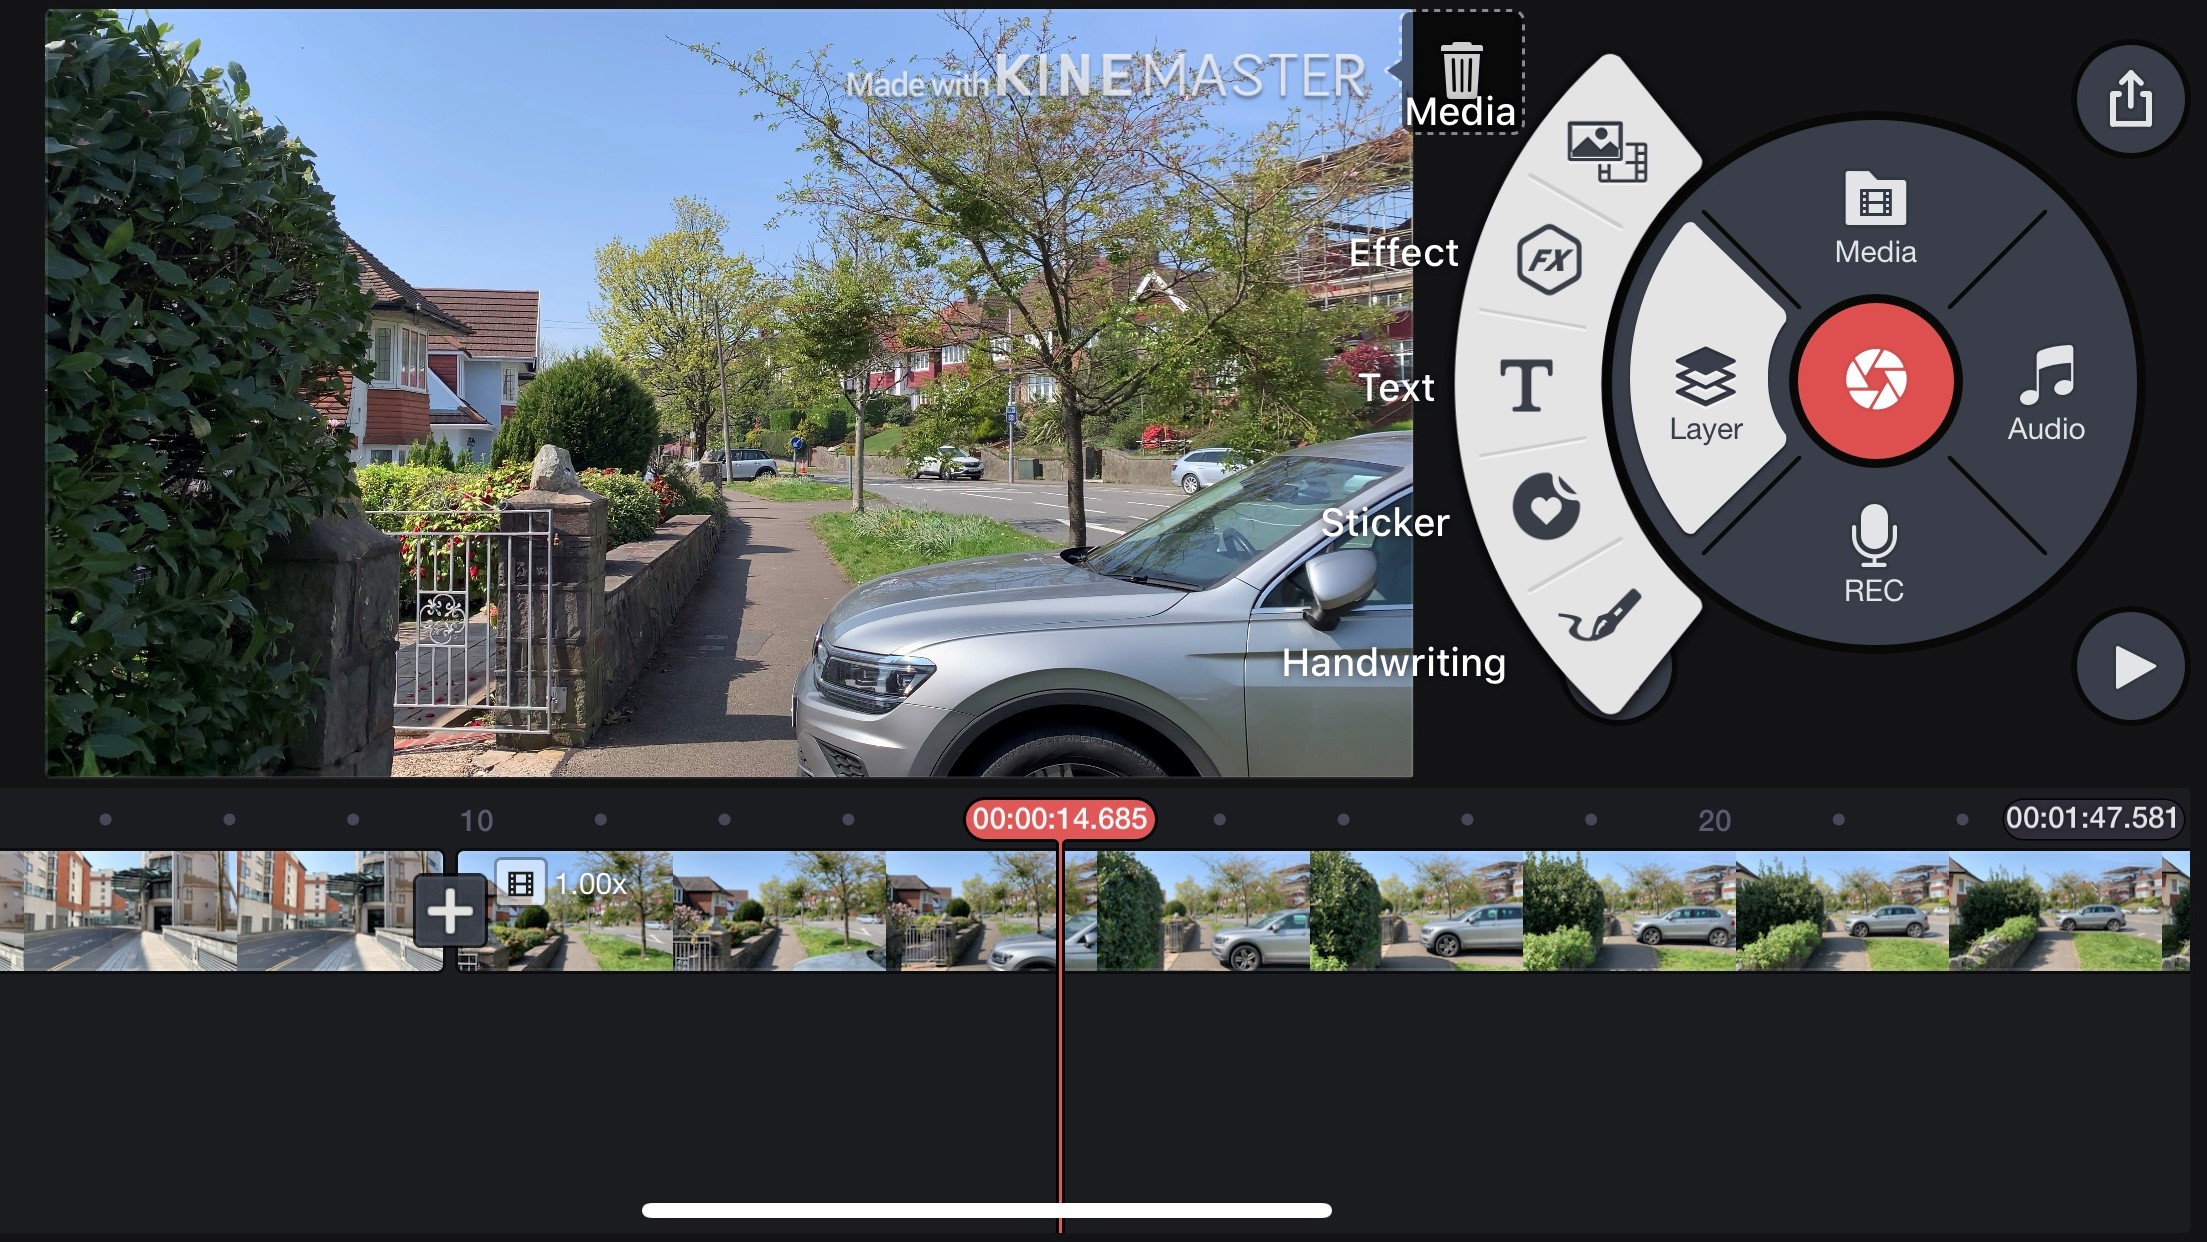
The Media Panel is the large circle to the right, where you can import media, record a voice over, gain access to you device’s camera, create new layers for various types of overlays, add music, or access the KineMaster Asset Store.
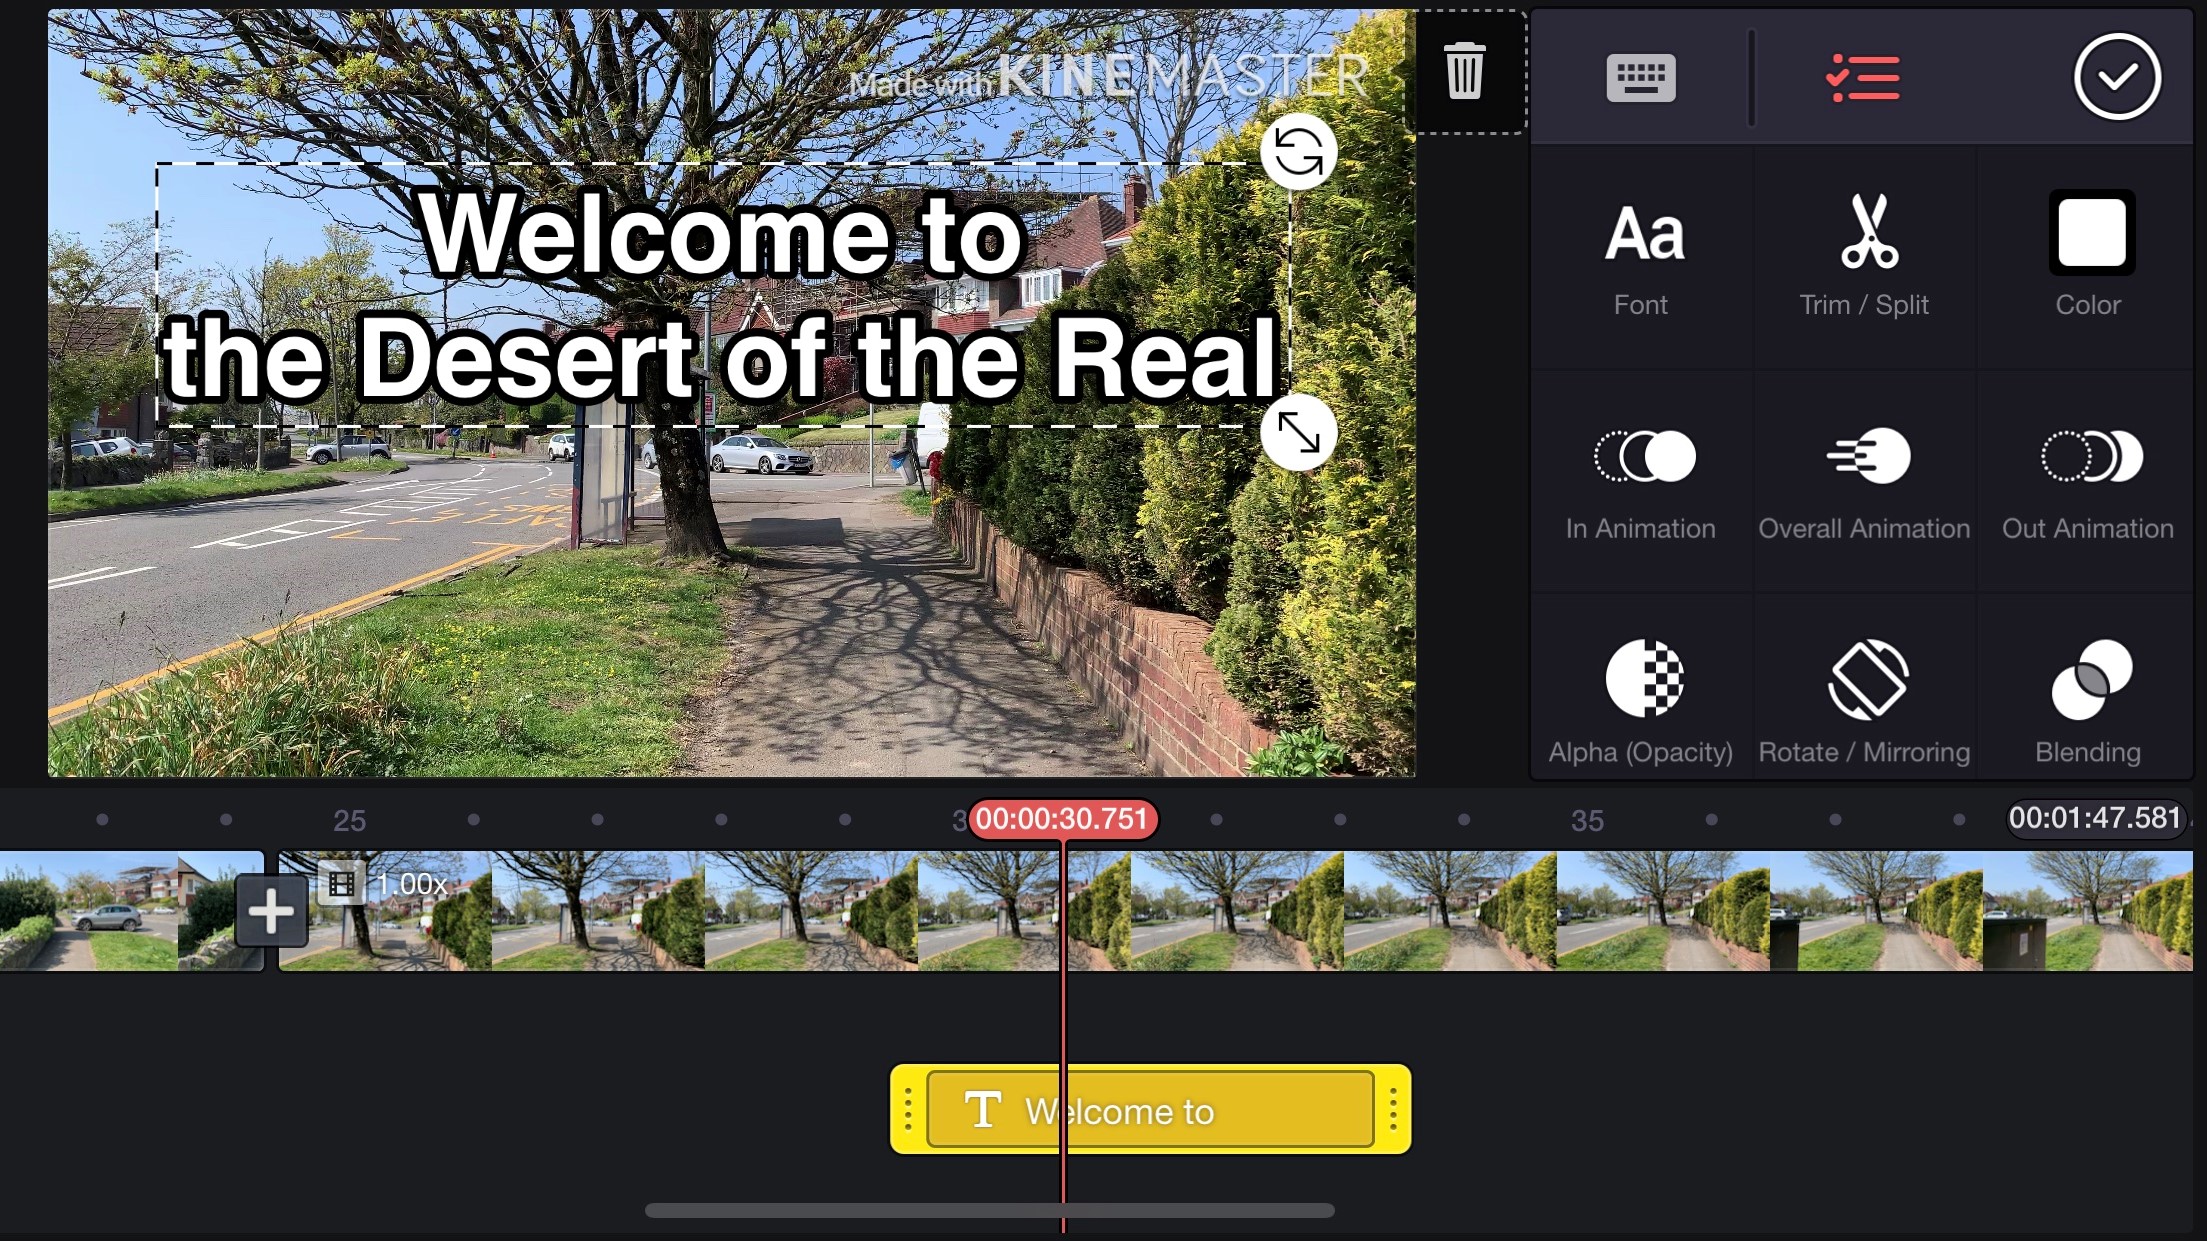
Selecting a clip not only alters the Action menu, it also replaces that Media Panel with contextual tools. For instance, tap on some video footage in your timeline to get editing tools, or choose a text layer to gain access to the font selection, colour and formatting tools. It’s a very intuitive process which allows you to pack a lot of power in the small phone screen.
Editing
Depending on the power of your video editing PC or video editing laptop, KineMaster allows you to work on multiple layers of video. Overlays (like text and stickers for instance) are less computationally intensive and KineMaster appears to let you have as many of those as you need.
The first layer is known as the Primary Timeline and KineMaster doesn’t allow gaps in it: delete one clip and any others to its right move to the left until they join with the rest of the edit. This is useful and allows you to build an edit fast. The Secondary Timelines don’t have this restriction and you can add anything there wherever you need it - as long as it’s over a Primary Timeline clip.
Do note that the Primary Timeline sets the project’s duration - playback will stop once the playhead reaches the end of the last clip on that layer irrespective of whether there is more footage on other layers beyond that.
You have access to a good number of tools, like colour filters, cropping, rotation, opacity, and there’s even a chroma key tool. You’ve got a slider to control the speed of any given clip.
Any clip not on the Primary Timeline can be altered with the use of keyframes. The creation of them is remarkably easy and you can tell the developers have worked hard on every facet of this editing application to offer powerful features in an intuitive and compact way.
Transitions and effects
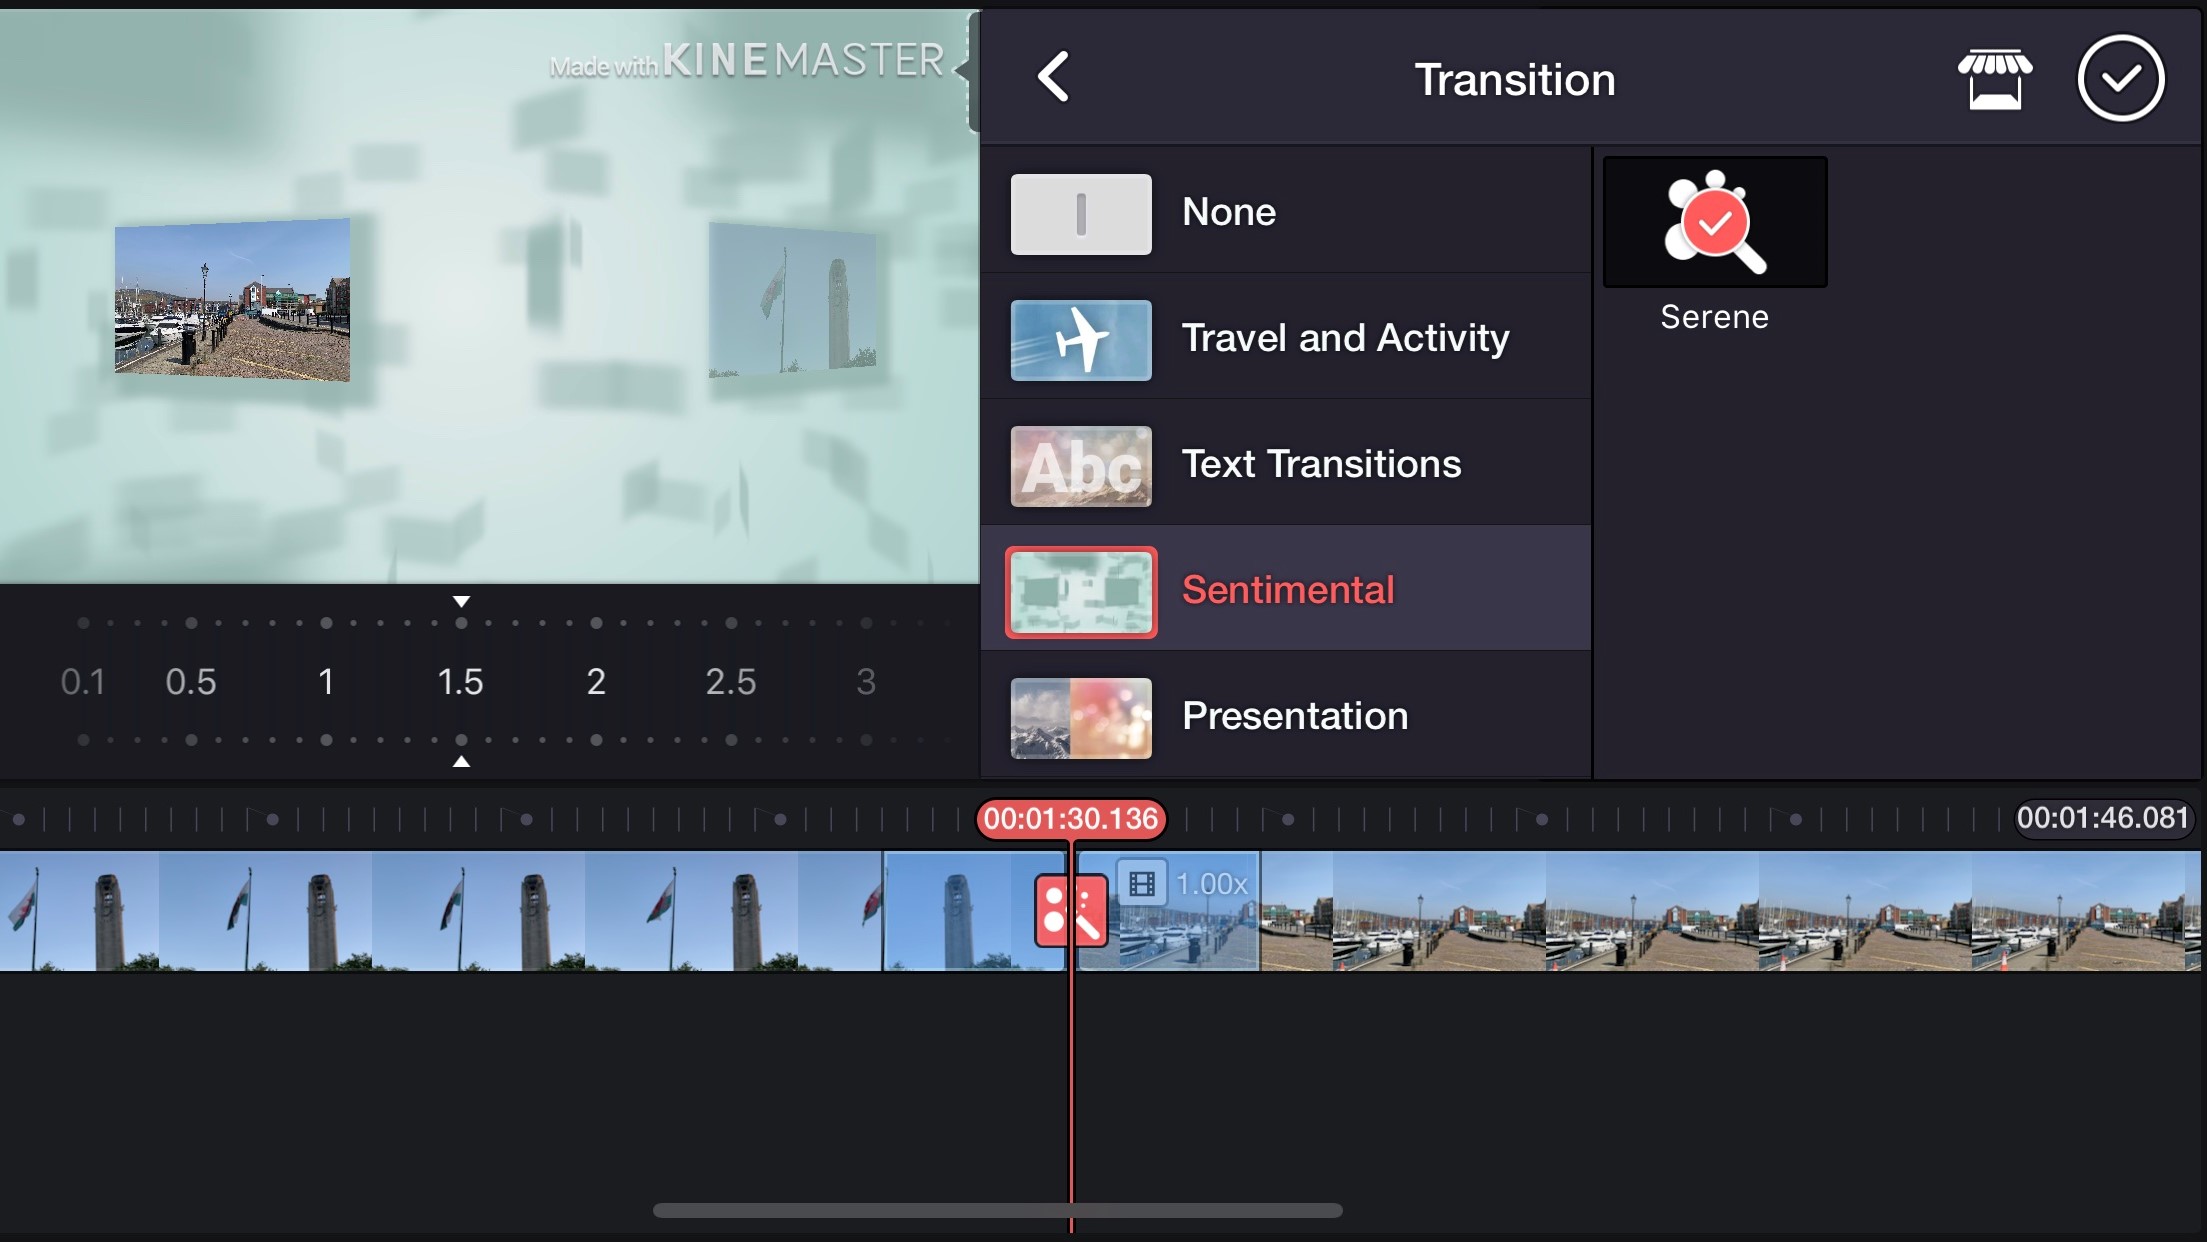
If you like transitions, adding them to your project is incredibly easy, although this can be done solely on the Primary Timeline. Once two clips are next to each other, a large ‘+’ appears where they join. Tap on it to reveal the list of available transitions, organised by categories. You don’t appear to be able to alter a transition’s duration however.
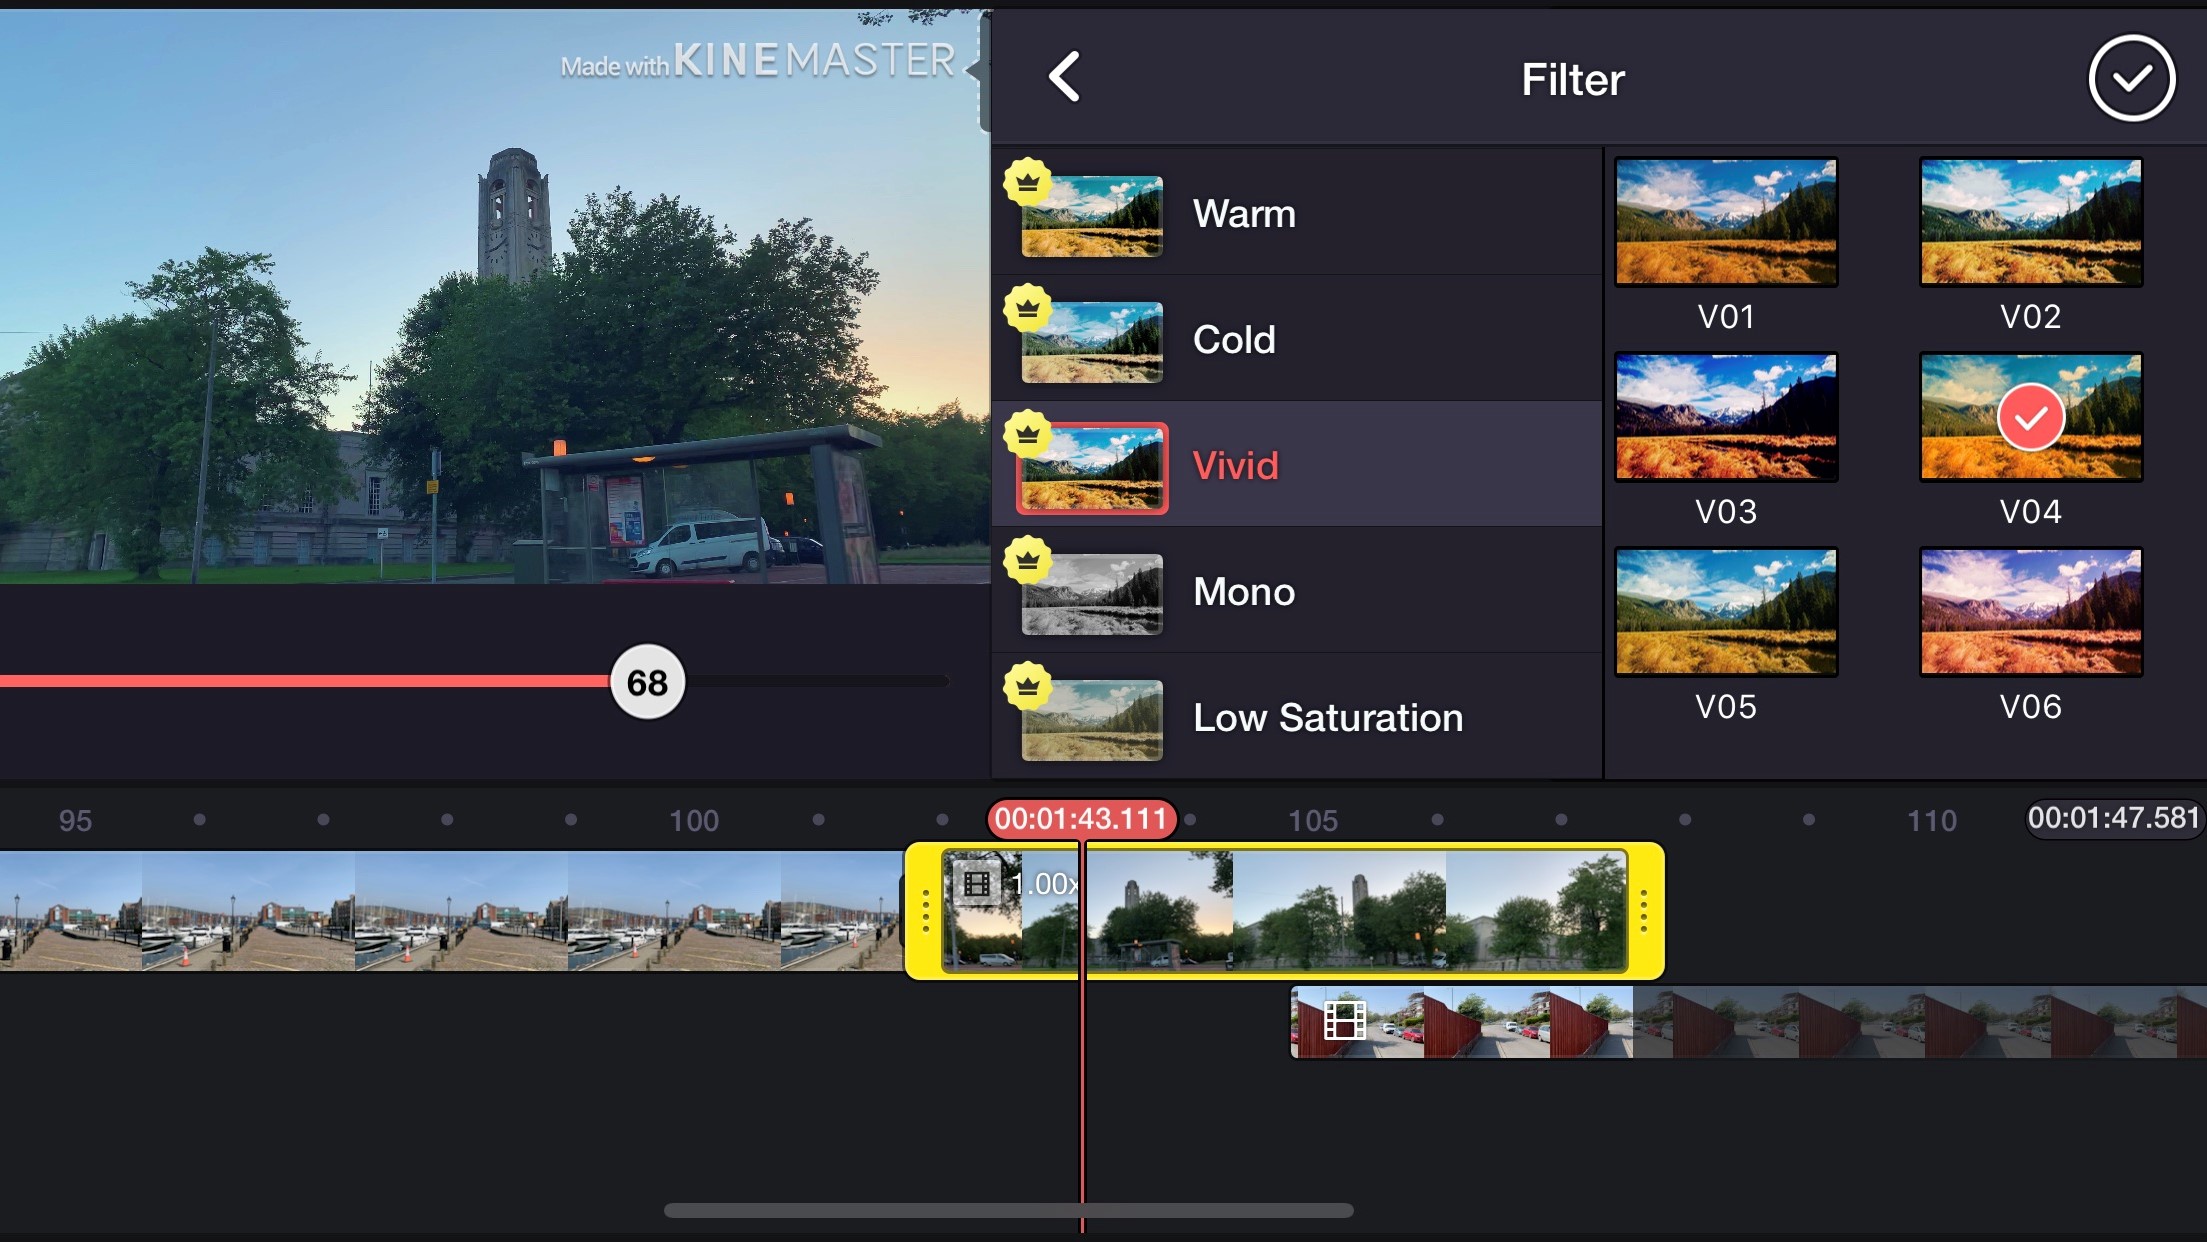
Effects (like mosaic and gaussian blur which are installed by default) are applied via the Media Panel and are placed under other layers in the Timeline. Should you be on the lookout for additional effects, you can find them through the KineMaster Asset Store.
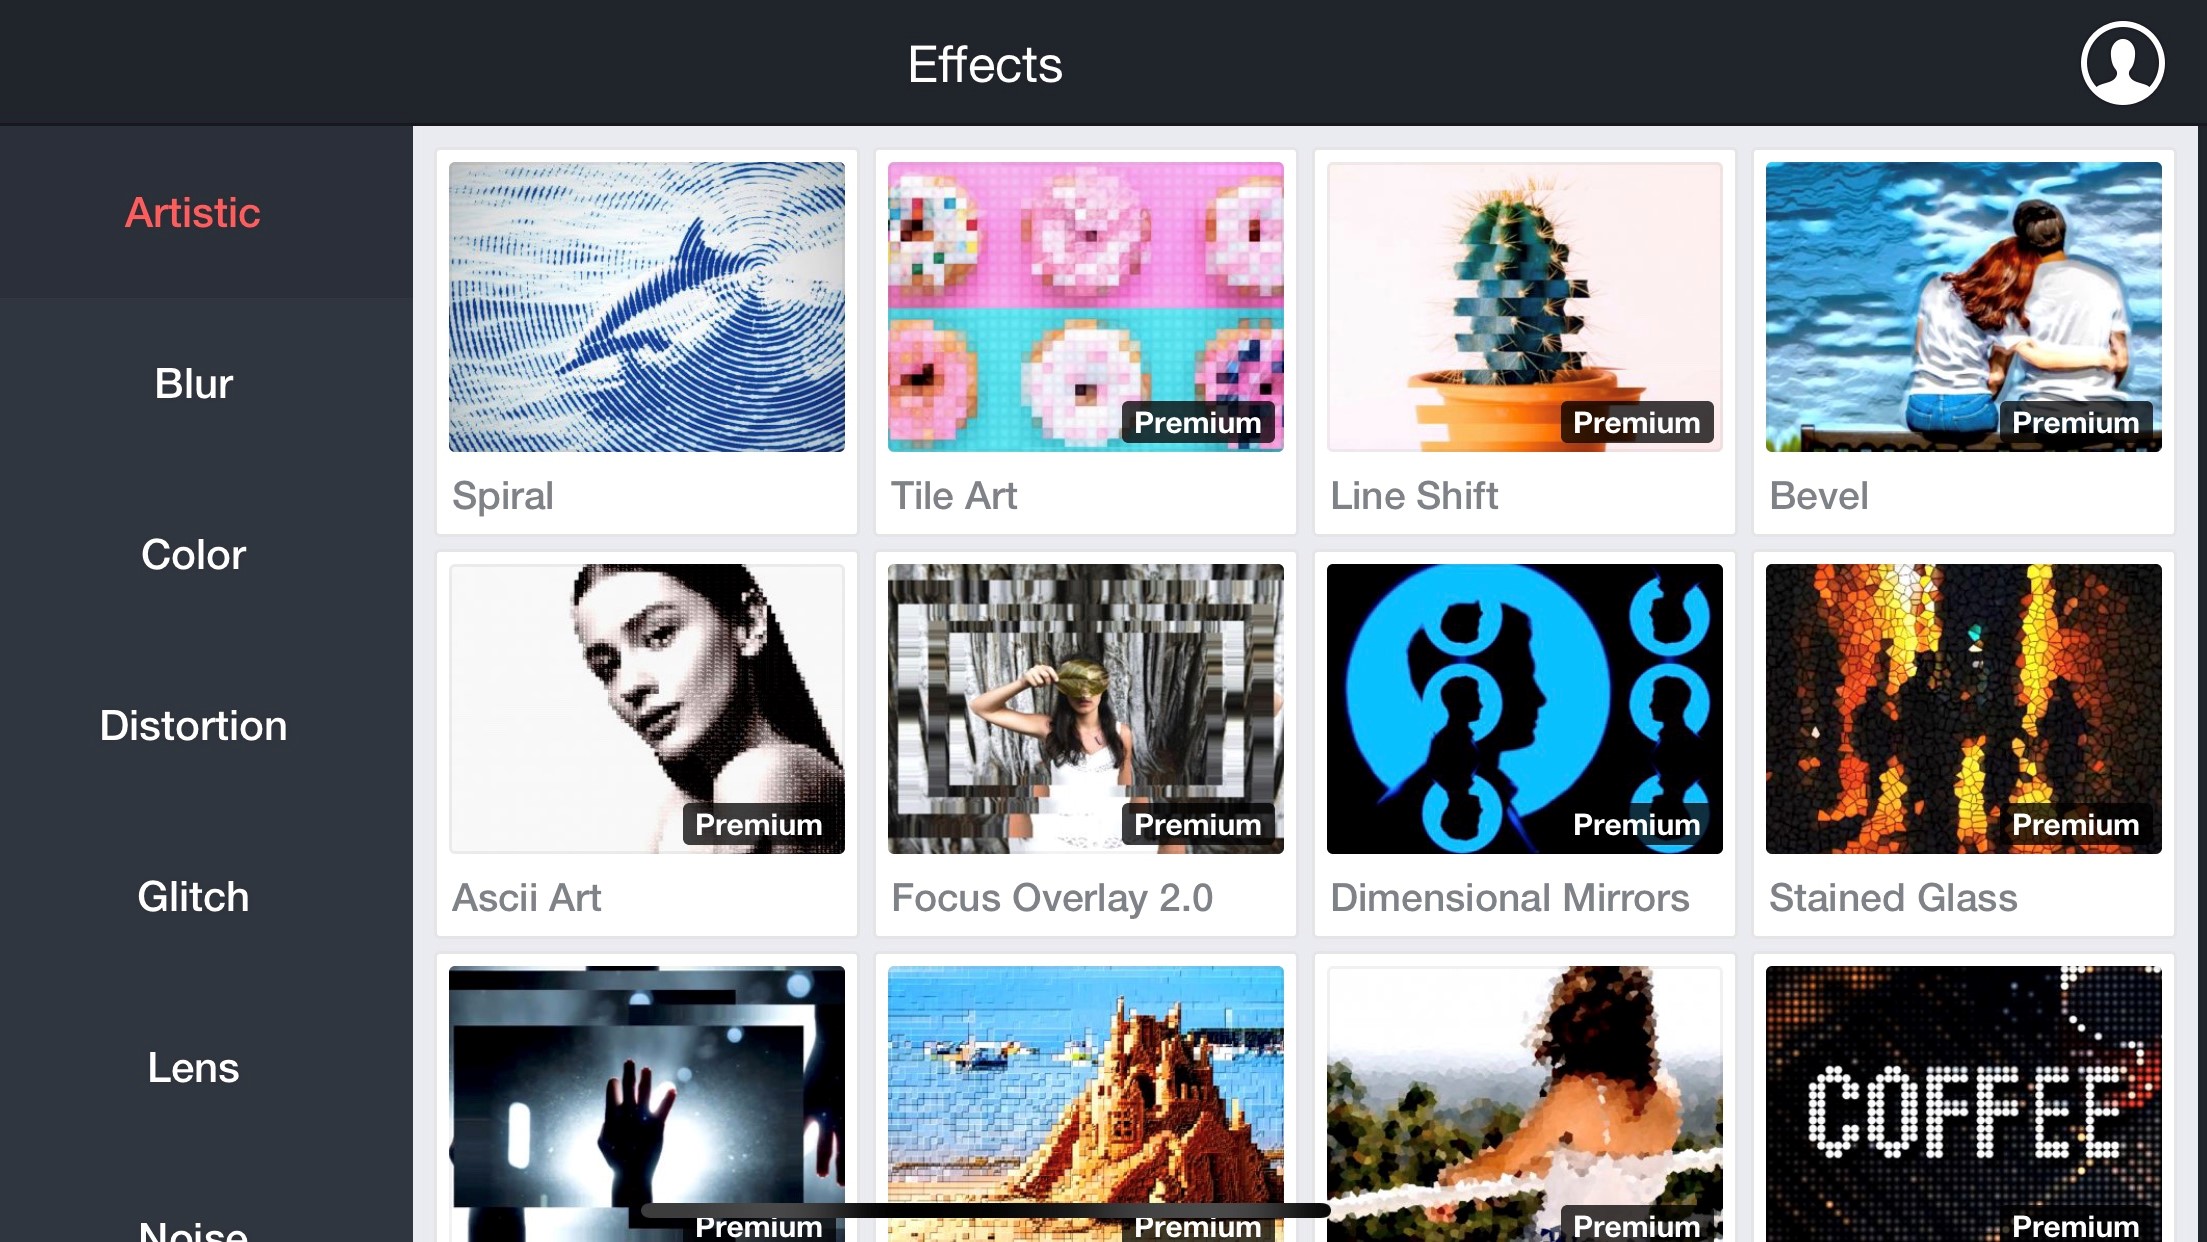
That store grants you access to additional effects. Many of them are free and you can simply tap on their download button to get them. A vast number of them are labelled premium and can be acquired through a subscription service. Before you shell out any money though, you can preview each effect to make sure it’s right for your project, and your wallet.
Subscriber's advantage
Once you’ve finished your project, it’s time to export it. KineMaster offers you a choice of resolutions from 360P to 4K (although 1080P and 4K are only accessible with a subscription). Set the Frame Rate and the Quality you’re after, and tap on Export. You’ll find that top right of your completed video features a small “Made with KINEMASTER” watermark. That’s the price you pay for having access to all these tools for free.
To get rid of that watermark, gain access to higher resolution exports, and a wealth of premium effects, you need to purchase a subscription.
Final verdict
KineMaster is a surprisingly powerful video editing app for your mobile device, which is well designed so all tools never feel out of reach. You can find yourself creating complex projects with ease. As it’s free (as long as you don’t mind the watermarking and lower resolution exports), it’s definitely worth checking out.
- We've also highlighted the best free video editing software
Steve has been writing about technology since 2003. Starting with Digital Creative Arts, he's since added his tech expertise at titles such as iCreate, MacFormat, MacWorld, MacLife, and TechRadar. His focus is on the creative arts, like website builders, image manipulation, and filmmaking software, but he hasn’t shied away from more business-oriented software either. He uses many of the apps he writes about in his personal and professional life. Steve loves how computers have enabled everyone to delve into creative possibilities, and is always delighted to share his knowledge, expertise, and experience with readers.
