TechRadar Verdict
The Spyder4 Elite offers advanced levels of calibration, speedy testing and straightfoward operation. While its in-depth results will provide you with everything you might want to know about a display, calibration newcomers looking to learn more will be left feeling cold.
Pros
- +
Easy to use
- +
Fast
- +
In-depth results
Cons
- -
Post-calibration guidance
Why you can trust TechRadar
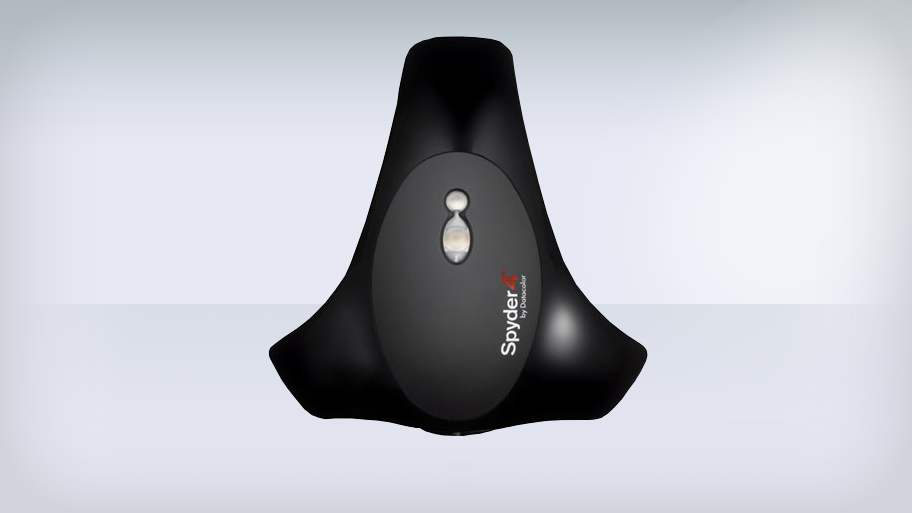
The Datacolor Spyder4 Elite is a colour calibration device that can be used to calibrate monitors, projectors, laptops, TVs, iPads and even smartphones using an easy-to-follow step-by-step based process.
Like the X-Rite ColorMunki Display, it works by by measuring a series of colours on a screen and creating a "profile" that can be saved and replicated on other devices. However, the two tools are different beasts in that the Spyder offers a much wider range of calibration tests beyond basic colour correction, making it a more serious option for photographers, video editors, web designers and other professionals who need to calibrate beyond colour accuracy.
The Spyder4 Elite is the most advanced (and expensive) of the three calibration calibration tools in Datacolor's Spyder range, with an RRP of £165, placing it above the mid-range Spyder4 Pro (£115) and low-end Spyder4 Express (£66).
Tangled web
An uncalibrated display can present a number of problems for multimedia professionals. Overly dark monitors, for example, can present shadows on images that aren't really there, and problems with colour accuracy can result in areas of a panel displaying overly warm (yellow) or cool (blue) areas. If you're a photographer, you'll want to make sure the sky is really blue in that set of lucrative client photographs, rather than an ominous shade of toxic green.
Setting up the device is simple. We were supplied with two driver CDs but opted to go straight to Datacolor's website where they can be downloaded. It's worth double checking that you've selected the correct drivers (rather than those for the Pro or Express versions), as you won't be notificed of your error until halfway through the installation process.

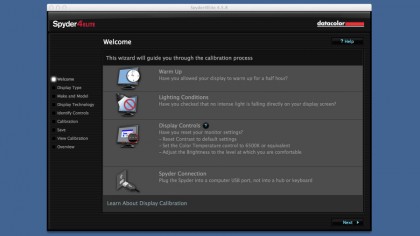
After firing up the software you're presented with the calibration wizard, which begins by checking that you've carried out a number of steps to help achieve optimal results. They include warming up the monitor for half an hour, checking lighting conditions and resetting displays to factory default settings.
It then asks what type of display you're calibrating, along with specific information that can aid the process - such as its make, model, contrast and brightness levels and kelvin presets (warmth levels). These aren't mandatory, and if you're not sure of them you're better off not chancing your hand as getting it wrong can negatively impact the end result.
As a final step, the wizard requires the calibrator to be inserted into its plastic holder in order to measure ambient light, as too much light shining on the display can skew results.
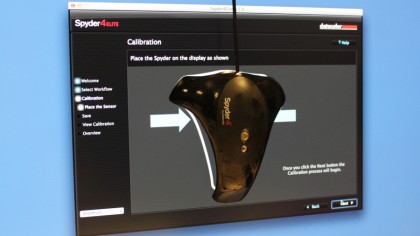
The calibration process begins once the device has been positioned over a marked area on the display, done by adjusting the device's weighted cord to fix it into position. The software then takes a series of measurements against a series of changing colours on the screen. The process takes around five minutes during which you may be asked to tweak brightness settings manually using the monitor's menu controls.

Advanced calibration
Once complete, a profile is created and saved in a default location on the machine. The results can be viewed and you have the opportunity to "SpyderProof" the results by tweaking them using a series of sliders and checking them against a set of stock images until satisifed. The results may be dramatic or subtle depending on the display's colour accuracy out of the box, and profiles can then be applied to different dispays to ensure a consistent look across devices.
Post-calibration you're given the opportunity to then carry out a series of advanced tests to check display aspects such as the gamut (colour saturation), tone response, brightness, contrast, black levels and screen uniformity. They can take anything from five to 15 minutes depending on the level of manual interaction involved. Checking screen uniformity, for example, is one of the lengtheir tests as it requires the calibrator to be moved to nine different sections of the screen by hand.
There's a deep level of depth when it comes to conducting the advanced tests, which are once again accompanied by clear and easy-to-follow instructions. However, aside from a standard help menu that provides an overview of each test, there's a distinct lack of help when it comes to analysis, leaving you to figure out what the results mean on your own. If you're familiar with deciphering aspects such as black levels, gamut and tone you won't run into any problems, but those looking to learn more about colour calibration and learn a thing or two along the way will be left feeling lost.
Verdict
The Spyder4 Elite is one of the most thorough colour calibration tools out there, but it's also one that tends to assume you're comfortable with deciphering its results at the more advanced end of the scale. That said, its picture-led, wizard-driven calibration process is accessible for novices and experts alike, and if you want to "future proof" any purchase of a calibration tool, there's nothing stopping you undertaking the simpler tests and moving onto the more advanced ones when you're ready.
On the other hand, if you only want to check and alter a display's colour accuracy, Datacolor's low-end Spyder4 Express and Spyder4 Pro (or X-Rite's ColourMunki Display) devices will do the job for a much lower price.
If you need the absolute maximum level of calibration available and are prepared to put in time to undergo the manual processes required for the advanced tests, the Spyder4 Pro provides an almost exhaustive level of analysis.

