TechRadar Verdict
Pros
- +
Quick and intuitive control over focus region position, size and feathering
- +
Advanced Spin and Twist controls for motion blur effects
- +
Nice-looking vignette effects
Cons
- -
Dull appearance
- -
Long list of technical-looking presets
- -
Expensive for what it does
- -
Lacks manual masking tool
Why you can trust TechRadar
Plug-in software publisher Alien Skin made its name long ago with its striking Eye Candy effects for illustrators and designers, but the company also publishes a range of photo enhancement tools, and Bokeh 2 is just one of those programs.
It aims to recreate the shallow depth of field effects you get from shooting in larger formats at wider lens apertures, and it can at the same time produce a range of vignette effects to help concentrate attention on your main subject.
You can try for a subtle background defocus that improves the picture's impact without being obvious, or go for a 'lo-fi' effect reminiscent of Holga or Lomo cameras, with strong vignetting and edge blur.
It's a direct rival to OnOne software's FocalPoint 2 plug-in, but it costs around twice as much, so the key questions are not just whether it's any good, but whether it's worth the money.
Ease of use

First impressions of Alien Skin Bokeh 2 are mixed. The interface looks a little old-fashioned, especially the plain text presets and settings in the control panel on the left side. It looks more like a shareware plug-in than a premium product.
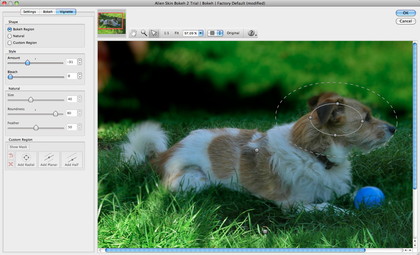
But then when you start to work with the controls, you realise it's both fast and efficient. You can enlarge the plug-in window to fill the screen and zoom in and out of the preview image at will. It updates quickly and in real time, too, so you don't have to render a finished version to see the effects of your blur settings.
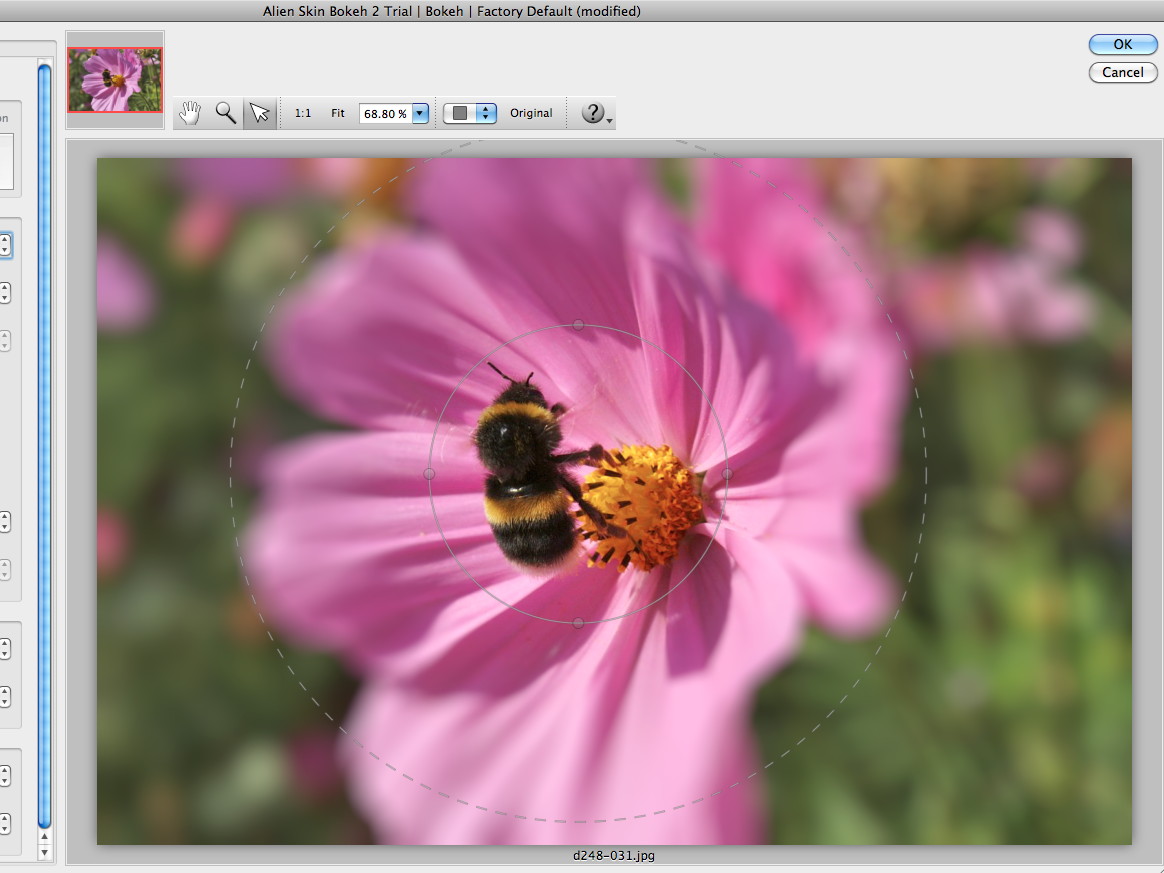
You start off with a single focus region. This is the area of the image that will be kept sharp, while the rest will be blurred. This region can be circular, elliptical or 'planar'.
Circular focus regions are ideal for concentrating focus on a specific part of the picture, perhaps with a vignette effect too, while planar regions are designed for creating realistic depth of field effects into the distance. For example, you'd use a planar region to create the miniature effect that makes real-world scenes look like models.
Compared to the 'Focus Bugs' in FocalPoint 2, these focus regions aren't much to look at. They're just an inner shape that defines the sharp area, and an outer dotted line showing how far outwards the blur effect is feathered, or blended in.
Actually, though, it's really simple to change the shape, size and position of the focus regions and the feathering. It's easy, too, to add new focus regions and, if you need a more precise selection, you can make it first in Photoshop, and Bokeh 2 will add it to the focus mask it creates.

Rod is an independent photographer and photography journalist with more than 30 years' experience. He's previously worked as Head of Testing for Future’s photography magazines, including Digital Camera, N-Photo, PhotoPlus, Professional Photography, Photography Week and Practical Photoshop, and as Reviews Editor on Digital Camera World.
