How to cancel Kindle Unlimited
Reduce your ebook library dramatically
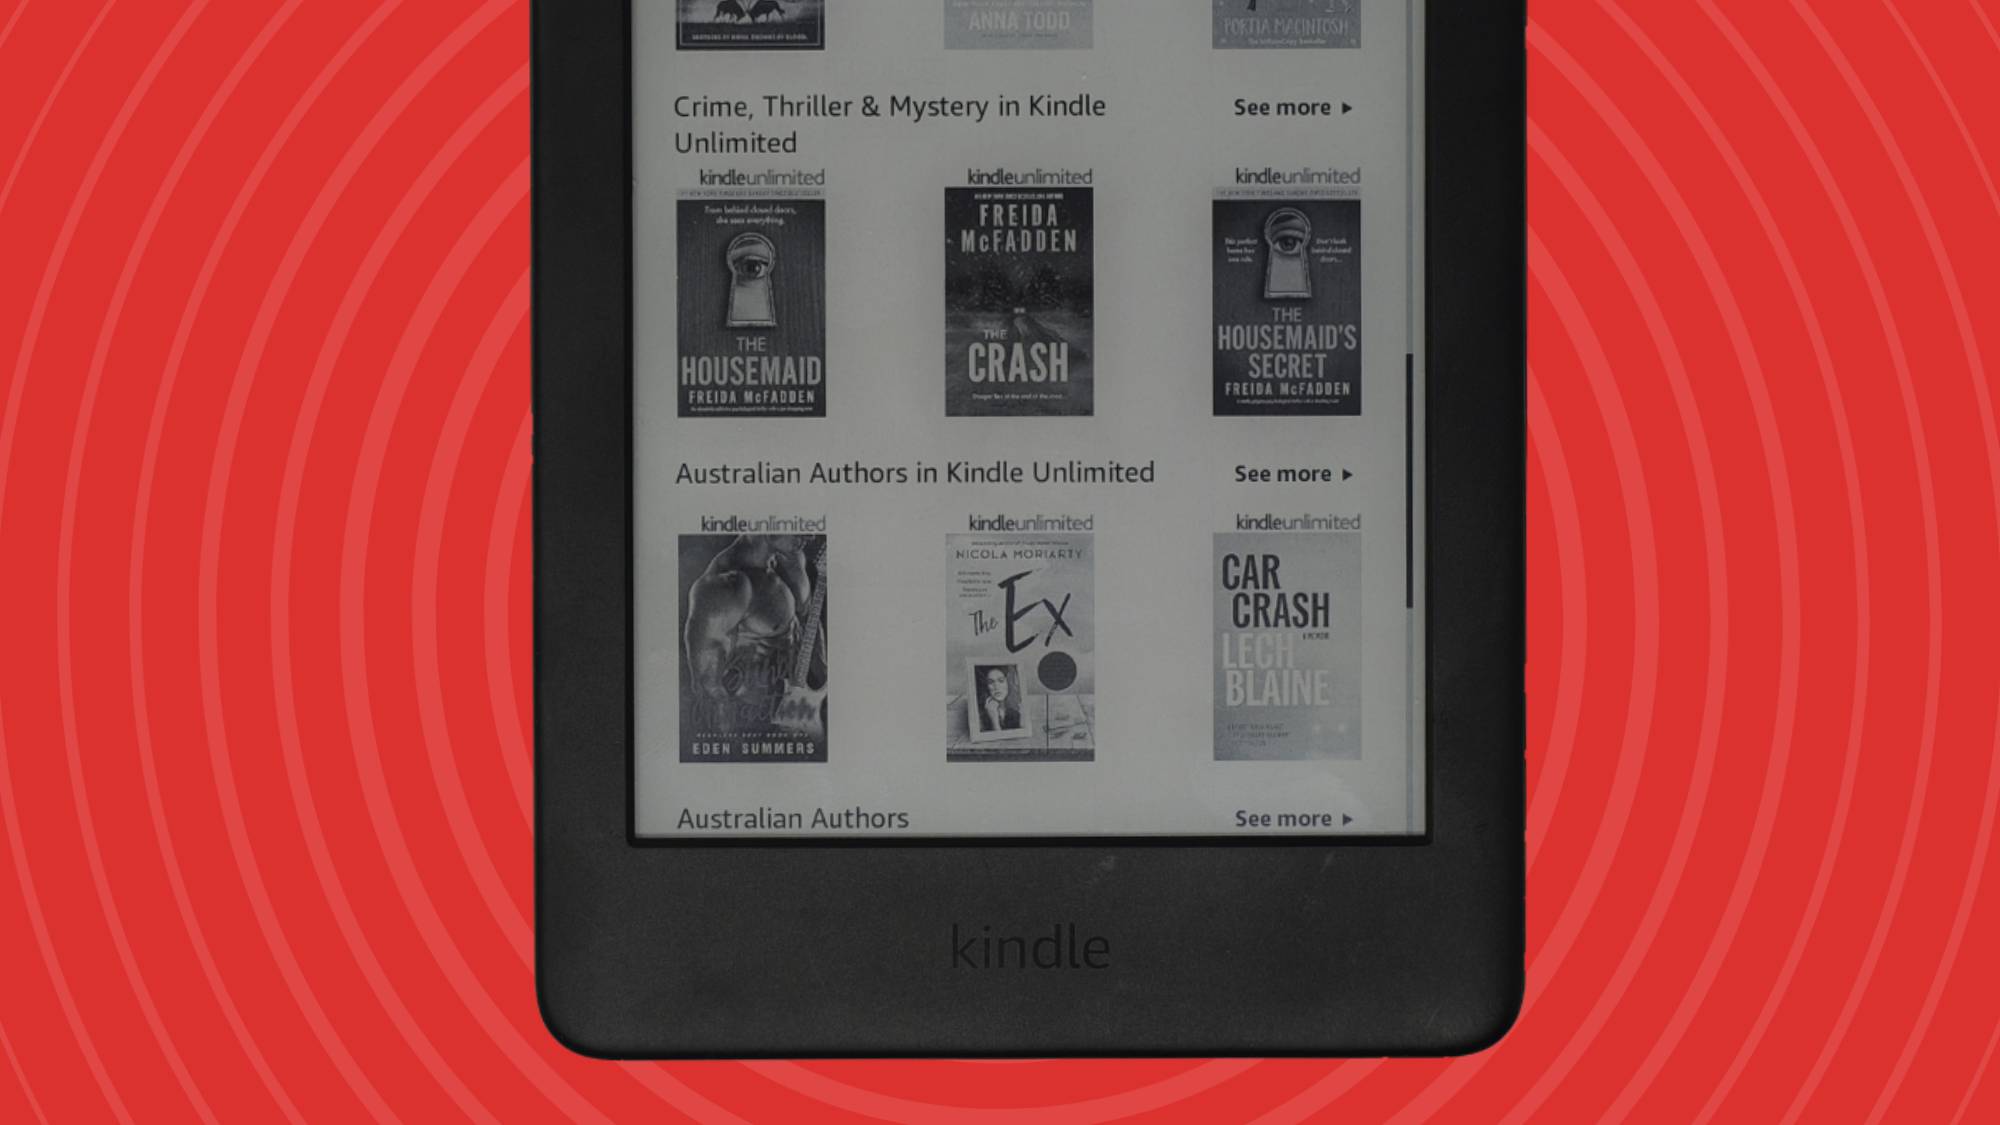
If you're constantly attached to your ereader, then you're probably subscribed to Kindle Unlimited, the all-you-can-read subscription service offered by Amazon.
Kindle Unlimited offers a library of over 4 million titles, including, depending on your region, magazines, audiobooks, and comic books. But if you're not happy with the library offered or simply don't think you're making the most of your subscription to justify the price, you might want to cancel Kindle Unlimited.
Like most aspects of the Kindle Unlimited subscription, you can cancel Unlimited on your ereader itself or on your computer, with the former generally more convenient if you're on the go but the latter quicker than an ereader's slow interface. In this guide, we'll run you through both options, so you'll leave knowing how to cancel Kindle Unlimited.
Tools and requirements
Here's what you'll need in order to cancel Kindle Unlimited. You either need your Kindle or your computer, not both.
- An Amazon account with Kindle Unlimited
- A Kindle ereader, connected to the internet (optional)
- A computer, signed into your Amazon account (optional)
Quick steps to cancel Kindle Unlimited
At a glance, here's how you can cancel Kindle Unlimited. Let's start with the process on Kindle:
- Go to the Kindle home page and find the Unlimited section
- Select Learn More to be taken to the Kindle Store
- Select Manage your membership at the top and scroll down
- Press Cancel membership twice
Now let's look at the steps if you're on computer:
- Go to Amazon’s website
- Go to Your Kindle Unlimited
- Select Cancel membership twice
Step-by-step guide for how to cancel Kindle Unlimited on Kindle
Let's start by looking at how to cancel Kindle Unlimited on a Kindle.
Get daily insight, inspiration and deals in your inbox
Sign up for breaking news, reviews, opinion, top tech deals, and more.
1. Find the option
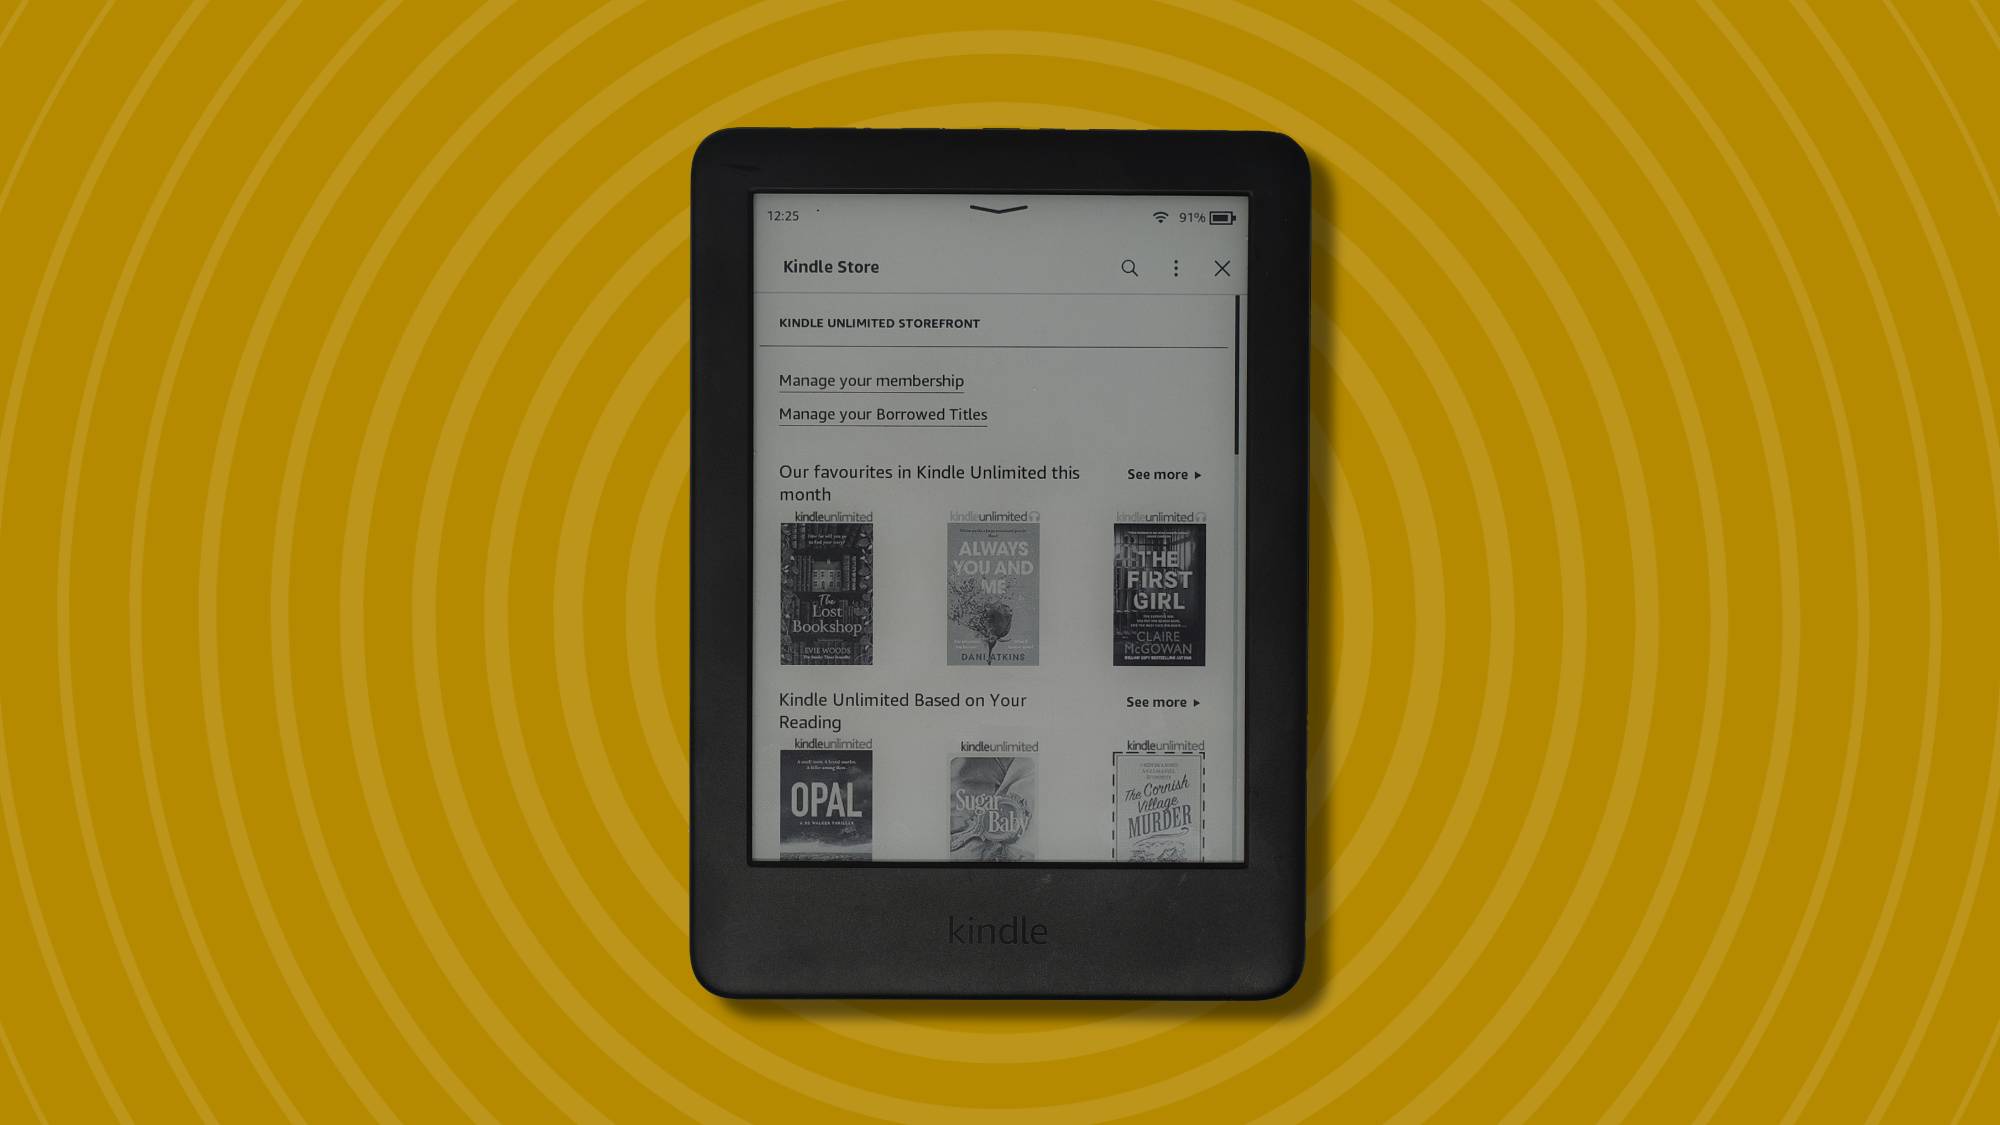
Want to cancel Kindle Unlimited on your Kindle? Make sure it’s connected to the internet before you begin. The first thing you’ll want to do is head to the Kindle’s home page, which doubles as the store home page (as opposed to the library tab).
Somewhere on this list, you’ll find a section entitled ‘Try Unlimited Reading & Listening’ (yes, it even has that title if you are trying Unlimited). You’ll have to scroll down through the home page to find this option among book suggestions.
When you find it, press the black Learn More button. This will take you to a webpage for the Kindle Store, which is dedicated to Kindle Unlimited titles, and is the easiest way to find recommended books.
2. Manage membership
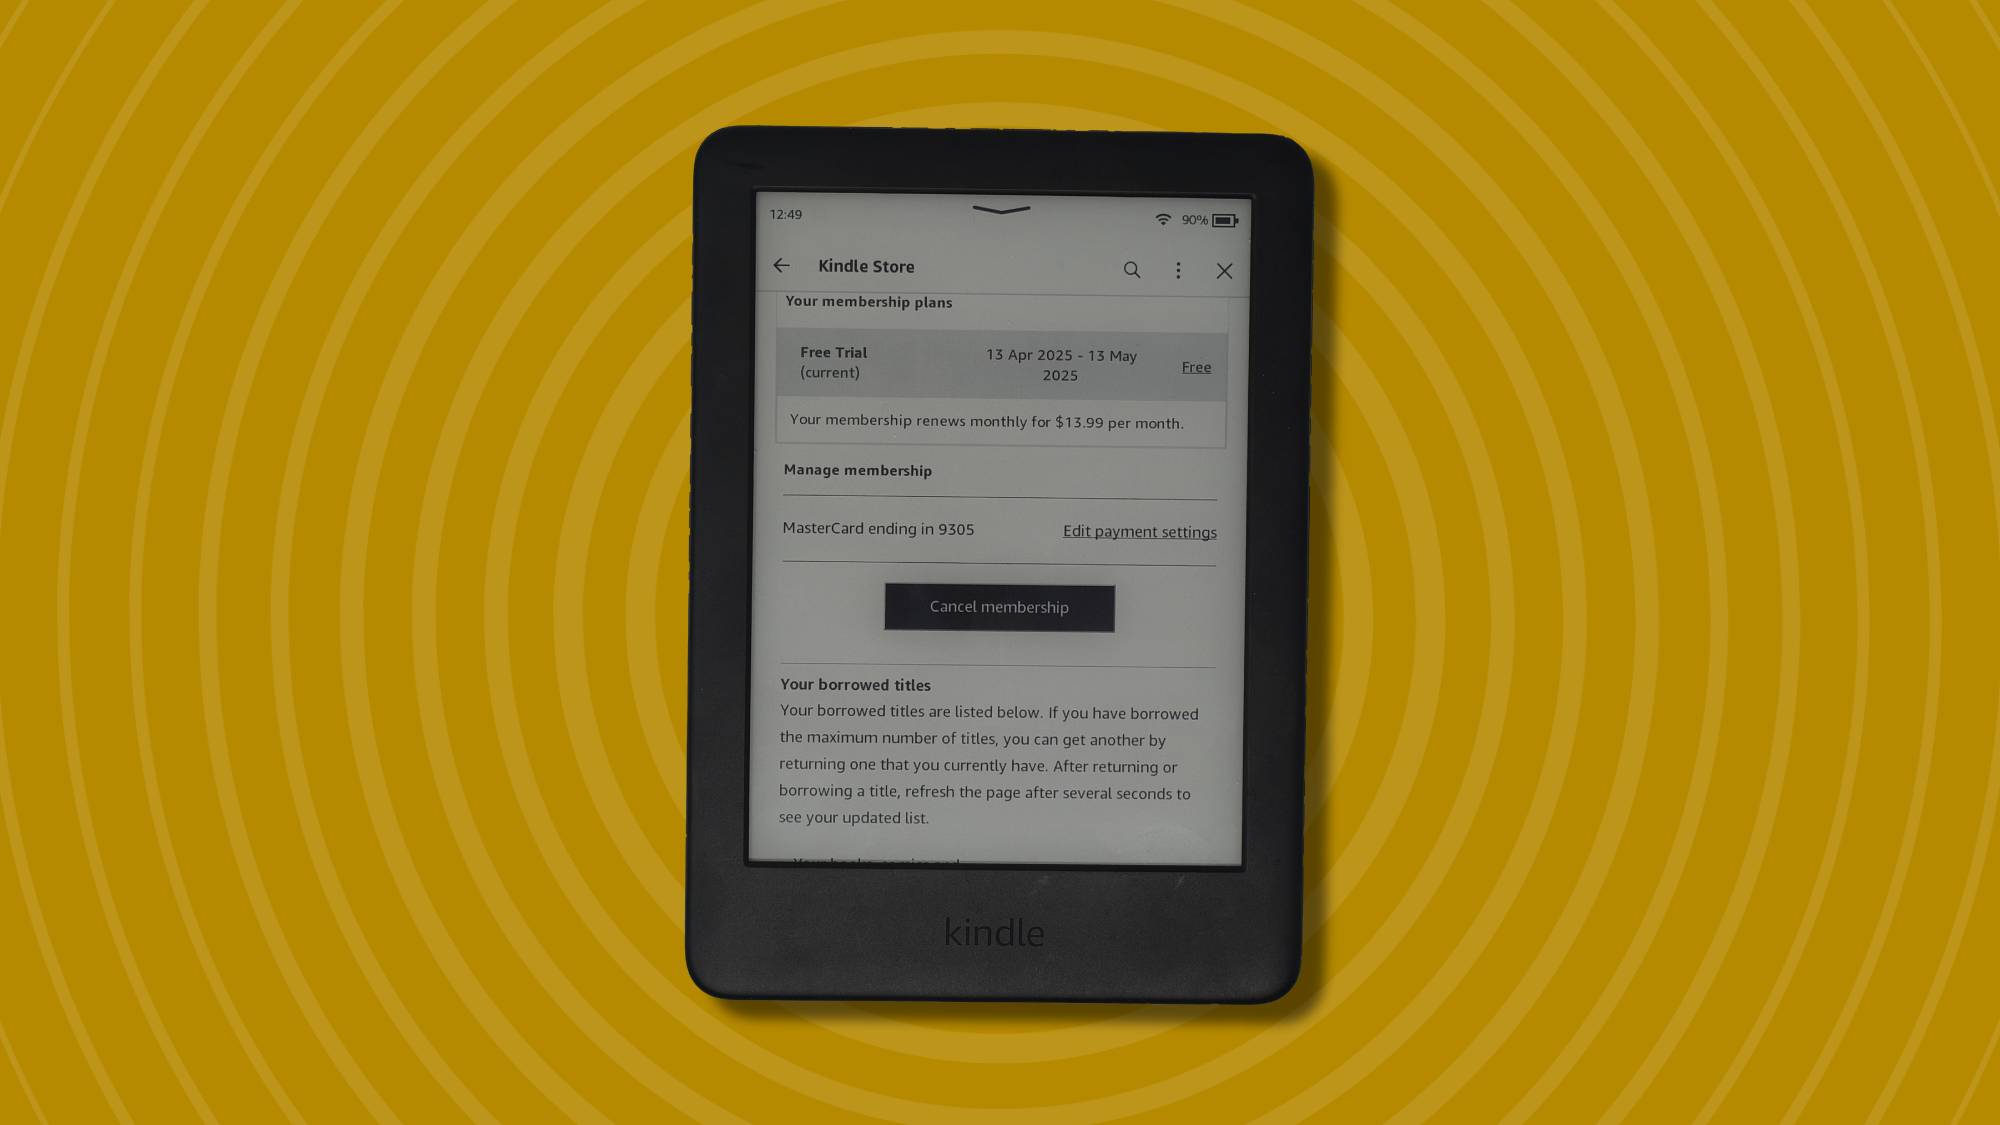
At the top of this page, you’ll see a section entitled Manage your membership, which you’ll have to select. Now you’ll see a page all about your membership, and you’ll need to scroll down slightly.
Eventually, you’ll see a black Cancel membership button. Press this.
3. Confirm cancellation
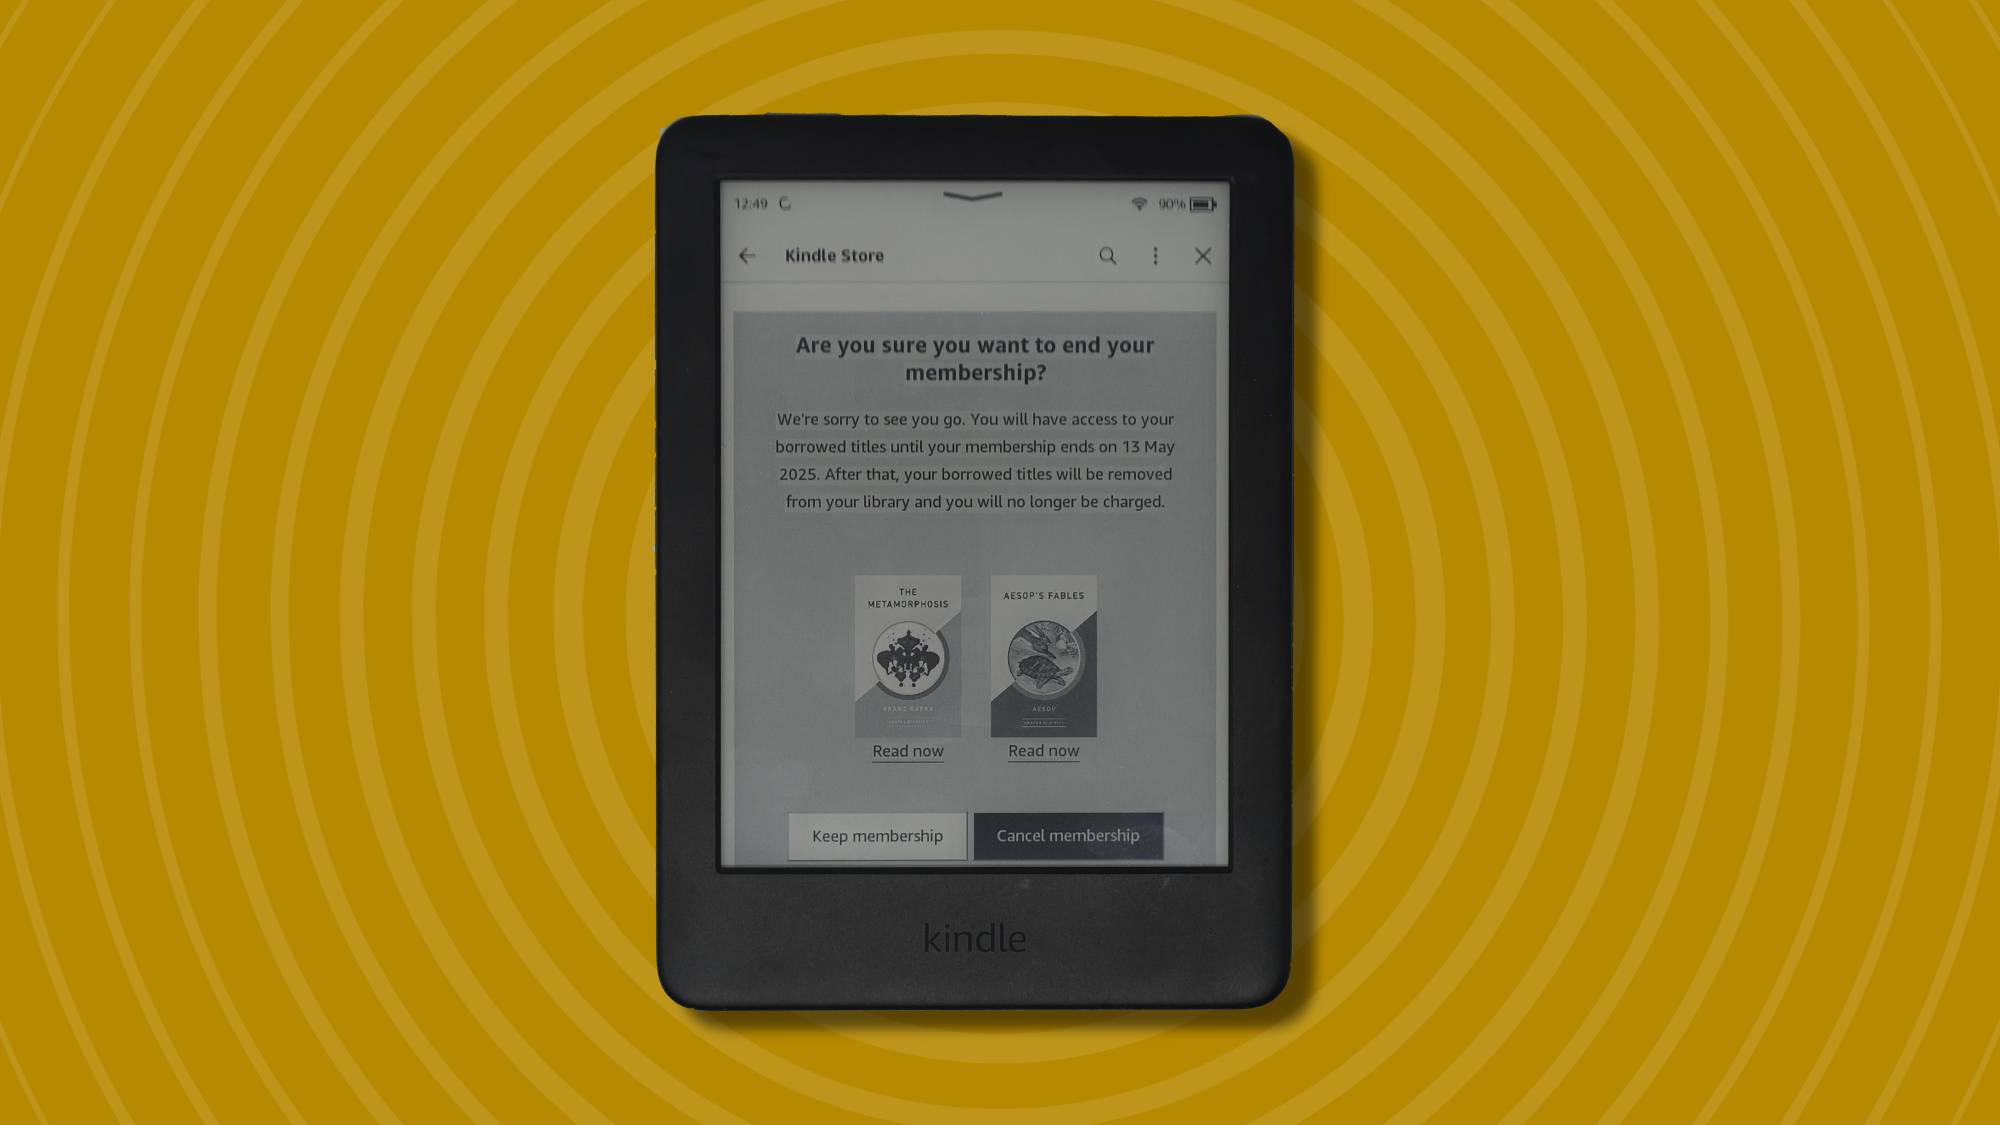
You’ll see a new page double-checking if you’re certain you want to do this, and if you’re sure, press Cancel membership once again. Congratulations, you’ve cancelled Kindle Unlimited, and you have until the subscription end date (mentioned on the last page) to read as much as you’d like.
Step-by-step guide for how to cancel Kindle Unlimited on computer
Now let's go through the steps for how to cancel Kindle Unlimited on a computer.
1. Head over to Amazon
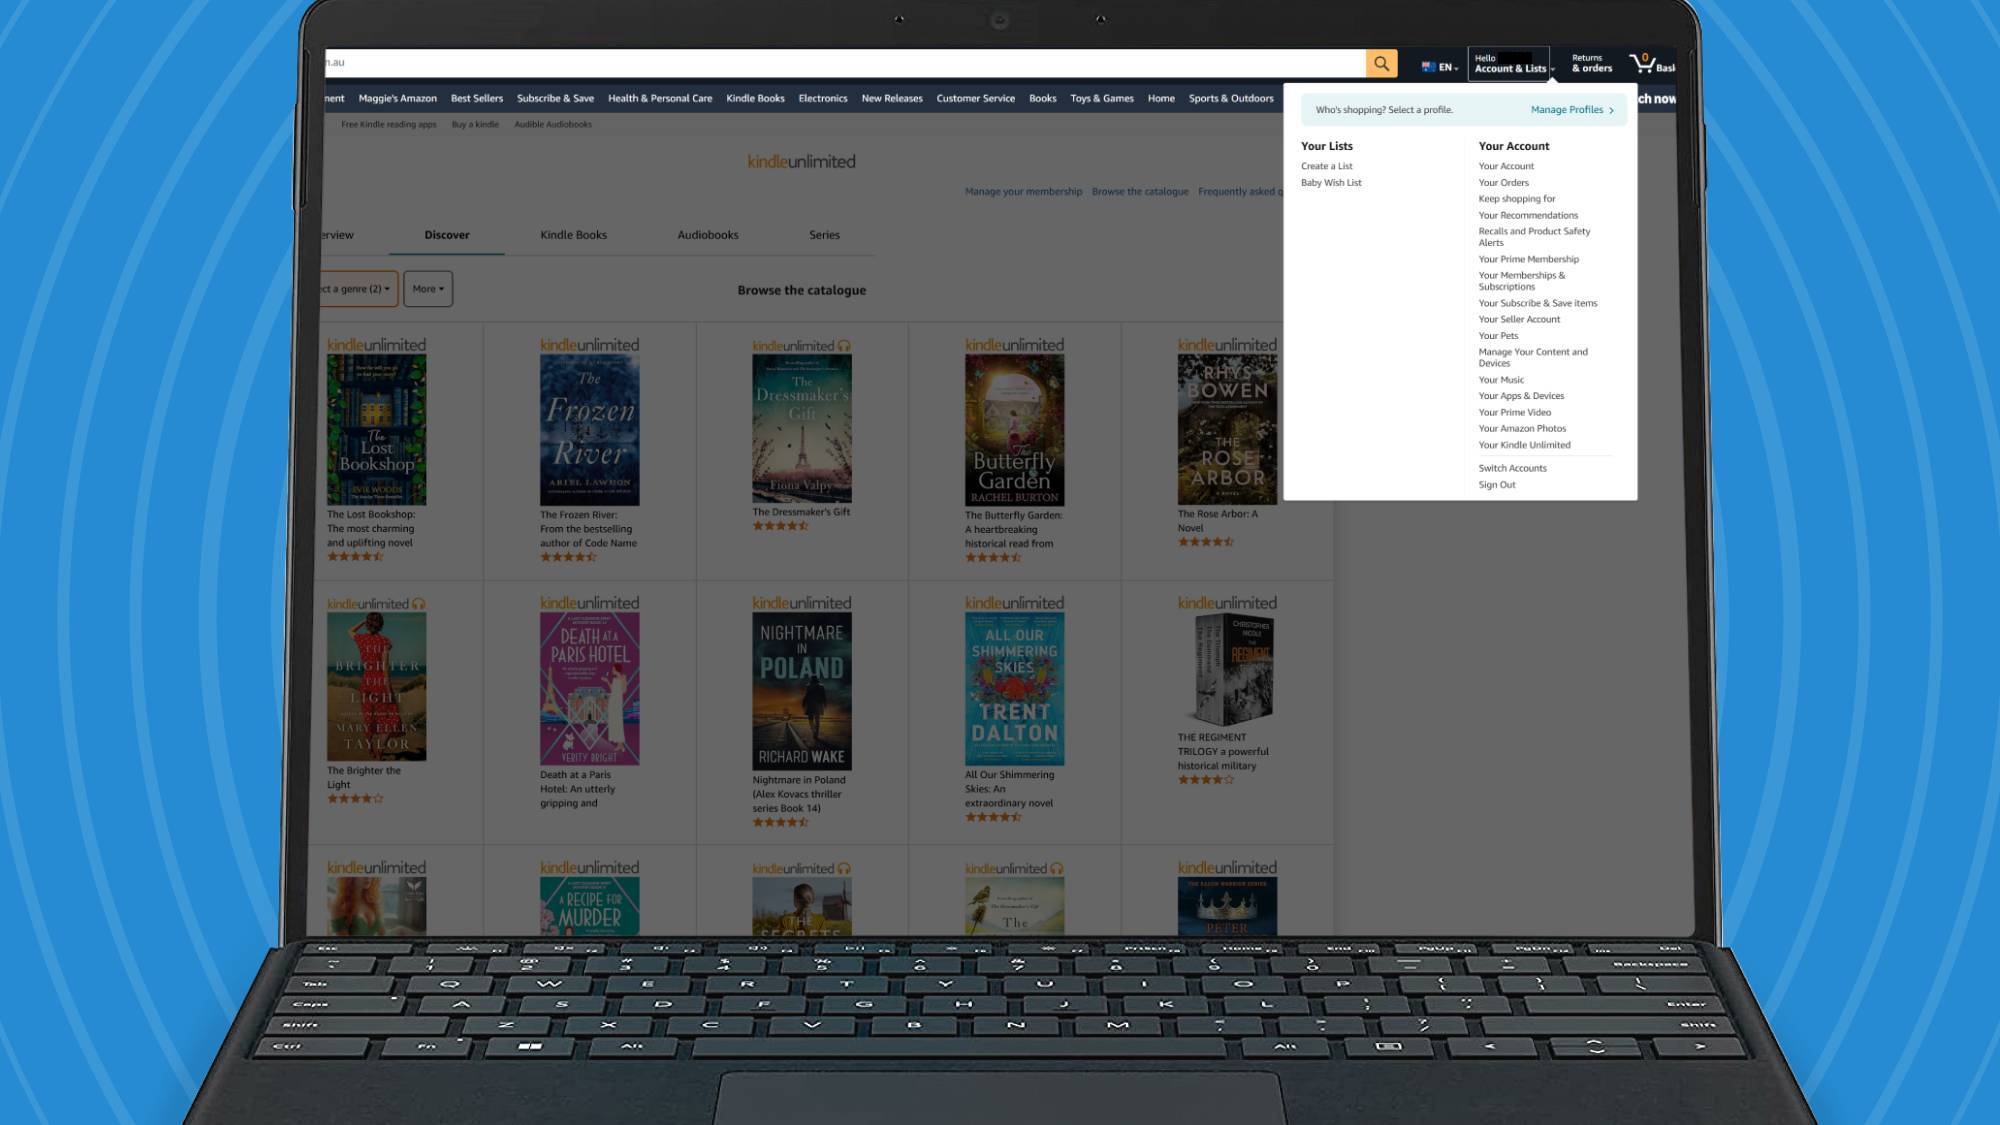
If you want to cancel Kindle Unlimited via your computer, you’ll need to head over to Amazon’s website. Make sure you’re signed into the account that is subscribed to Kindle Unlimited.
Next, mouse over the Account & Lists bar in the top-right, and when the drop-down menu appears, select Your Kindle Unlimited. This is one of the last options above the sign-out button, right at the bottom.
2. Manage your subscription
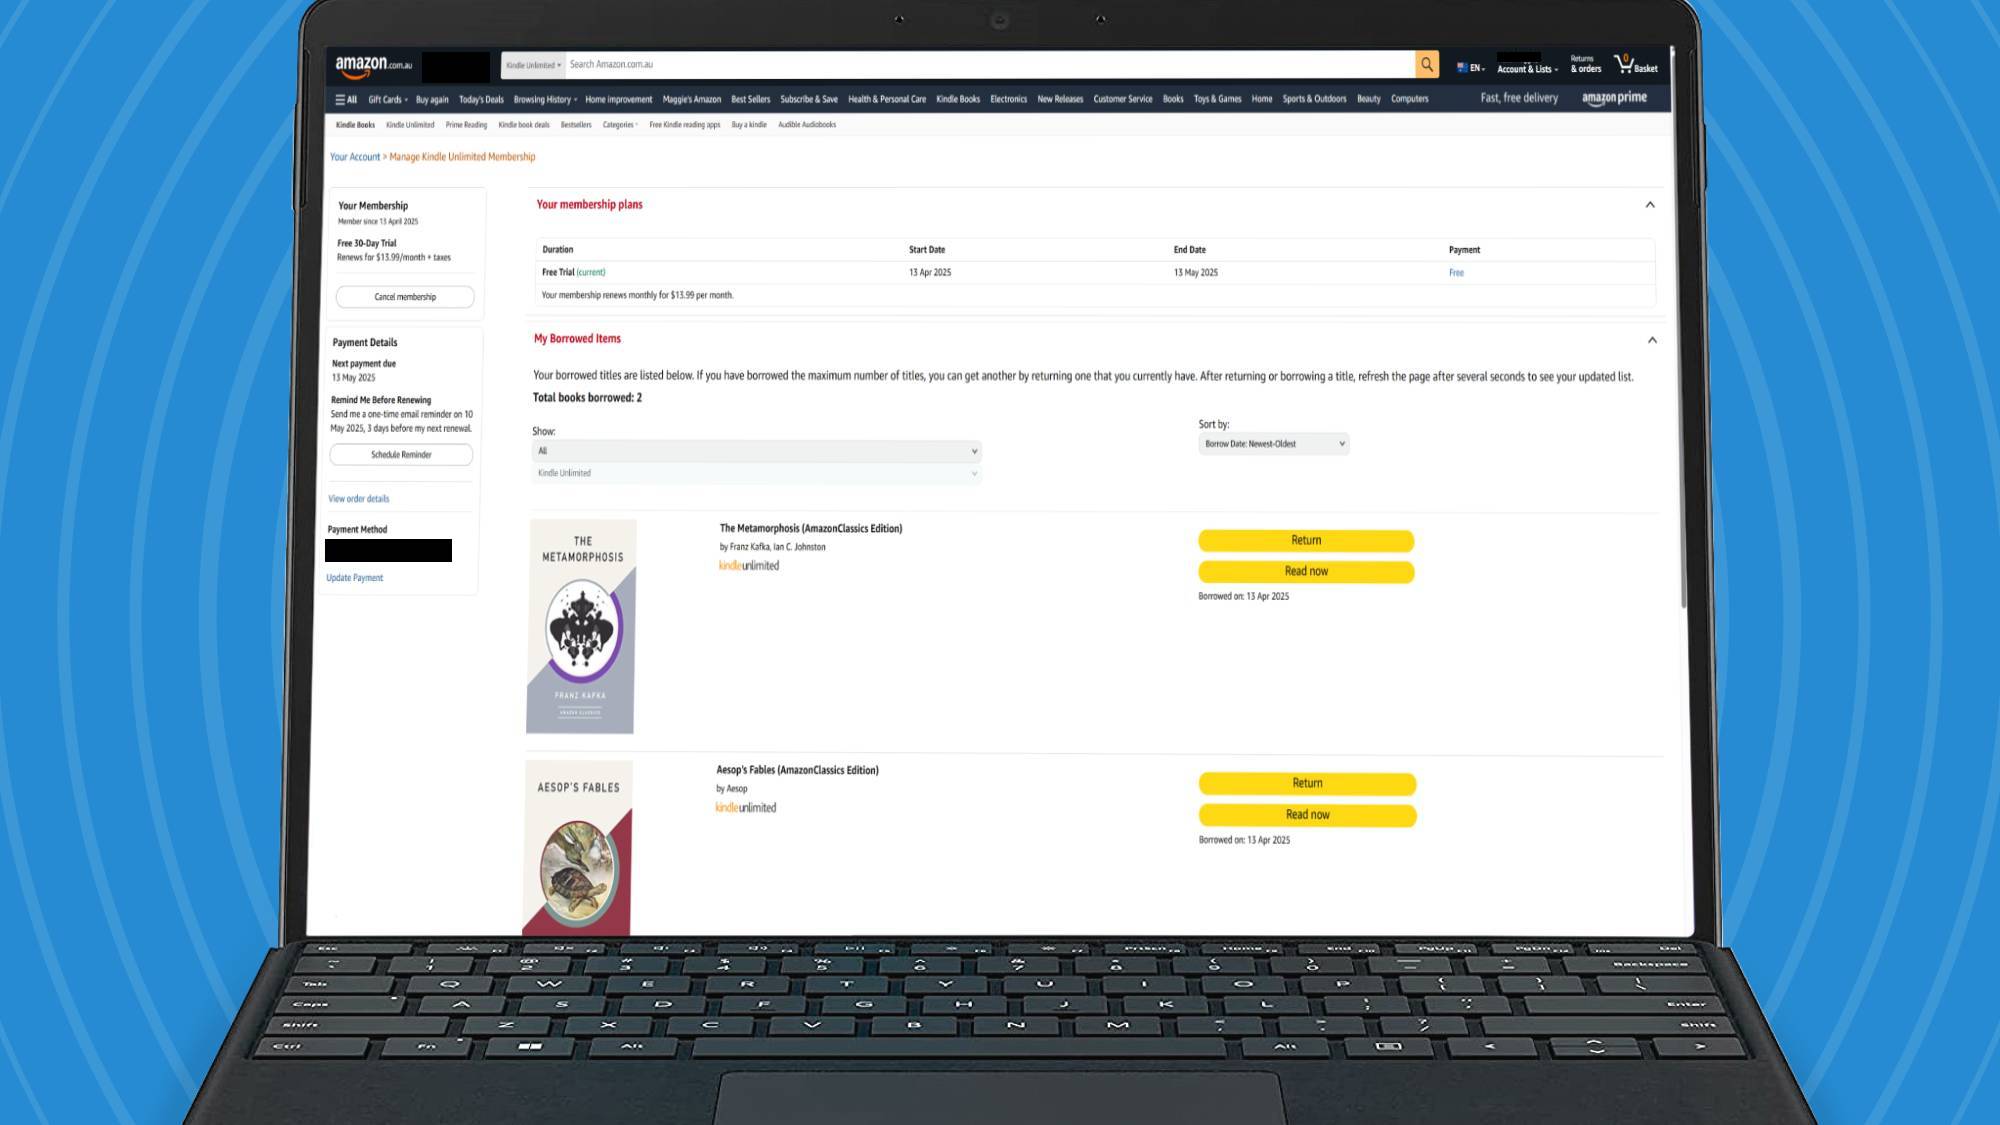
You’ll be taken to the management page showing you which subscription plan you’re on, how much you pay, and which books you currently have downloaded via Kindle Unlimited. What you’re looking for, though, is the Cancel membership icon in the left bar.
3. Confirm cancellation
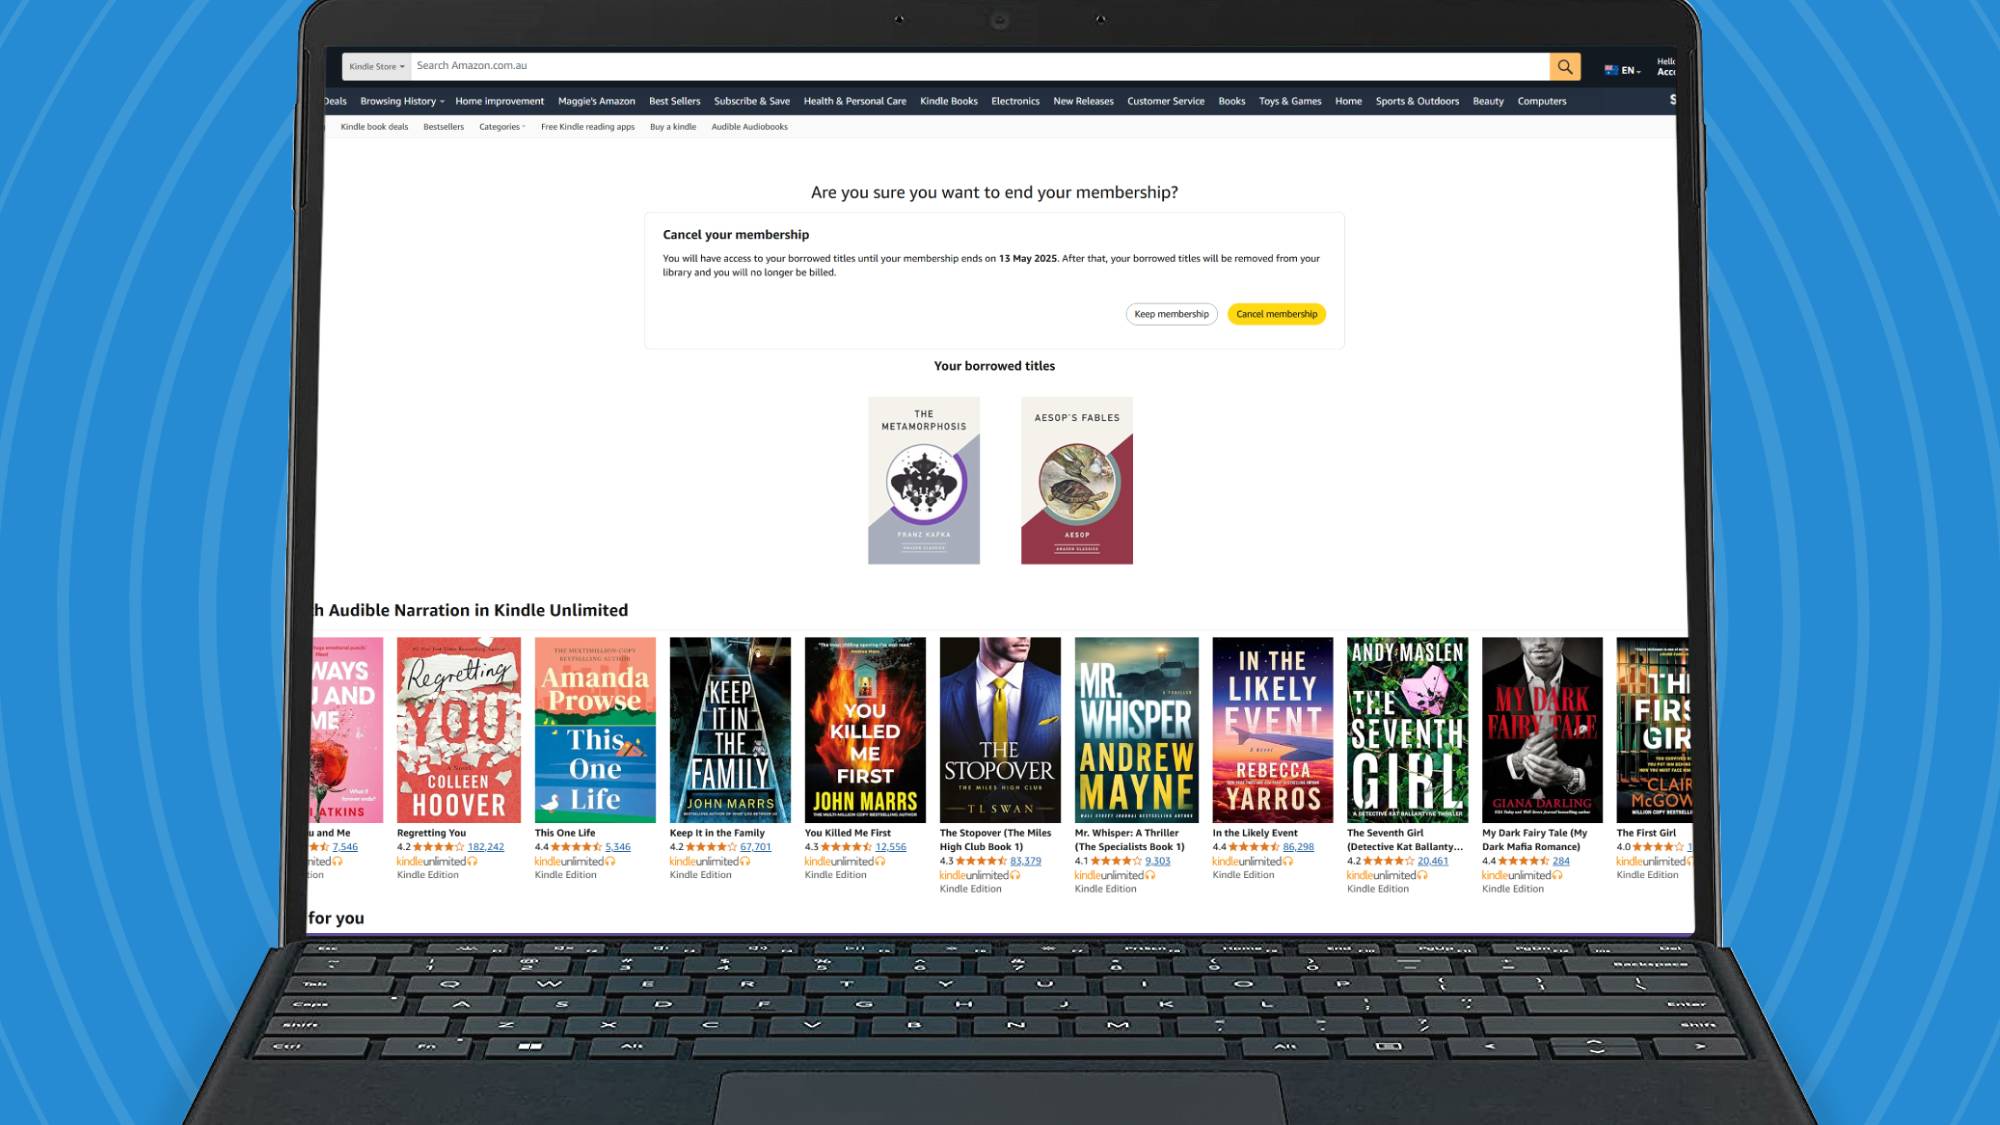
Select Cancel membership, and you’ll be brought to a new page double-checking that you’re certain you want to cancel Kindle Unlimited. If you are, press the yellow Cancel membership button, and now you’re done! You’ll still have access until your subscription plan runs out; after that, you won’t be able to download or read Kindle Unlimited books (unless you’ve decided to buy them).
Troubleshooting
Do I stop being a Kindle Unlimited subscriber straight away?
Once you click 'cancel' for Kindle Unlimited, nothing about your membership changes straight away.
Instead, you'll stay subscribed until your billing period is up, which will generally be one month since the last time you paid. You'll be told when your billing period ends when you cancel Kindle Unlimited.
Until the membership ends, you can still use Kindle Unlimited as before, downloading and reading books to your heart's content.
Will I lose all my Kindle books if I cancel Kindle Unlimited?
As stated before, you'll keep your books for a limited time when you cancel Kindle Unlimited. But once your membership ends, you'll lose some of the books.
The books from your Kindle or Kindle app that you downloaded as part of Kindle Unlimited will be lost; however, you'll keep ones that you bought yourself, got for free that weren't part of Kindle Unlimited, or that you have from another subscription service like Prime Reading.
When you cancel your Kindle Unlimited subscription, you'll be told which of your books are part of the subscription service.
You might also like

Tom Bedford joined TechRadar in early 2019 as a staff writer, and left the team as deputy phones editor in late 2022 to work for entertainment site (and TR sister-site) What To Watch. He continues to contribute on a freelance basis for several sections including phones, audio and fitness.
You must confirm your public display name before commenting
Please logout and then login again, you will then be prompted to enter your display name.