How to photograph architecture
Use these tips to boost your architecture shots

Fancy capturing great images of architectural details? Whether you're in a big city known for its built environment or somewhere completely different where you have to work a little harder to get inspired, you'll find that today's cameras make it easier than ever to get the images you want.
While the principles of capturing buildings and other structures remain the same as they always have, there's lots you can do in camera to get your shots looking their best without you needing to go anywhere near software. Here are a few things to consider as you shoot.
Don't always rely on wide angles...

There’s nothing wrong with taking more obvious wide-angle images of buildings and interiors, but if you always capture everything with a relatively wide-angle lens your images will end up looking like everyone else’s.
Discipline yourself into using something a little different to the norm to see how that affects your creativity. A telephoto lens, for example, can be used to home in on details from a distance, be that a ceiling captured from below or the exterior of a building captured from further away.
A fisheye lens can give striking results when used like a normal wide-angle lens, but consider using it close to the subject too, as you may end up getting something more interesting this way. Portrait lenses with moderate focal lengths, meanwhile, will typically be very well corrected for distortion, so they’re great for capturing details at a regular distance that may otherwise be distorted by a wide lens.
... and don't always use the default aspect ratio

It’s easy to capture everything at your camera’s default aspect ratio, be that 3:2, 4:3 or something else, but it’s yet another way in which your images can end up looking less unique. Particularly with mirrorless cameras and high end compacts, it’s easy to switch to a different aspect ratio and see exactly how your image will turn out as you compose it, whether you prefer to use the viewfinder or the LCD screen.
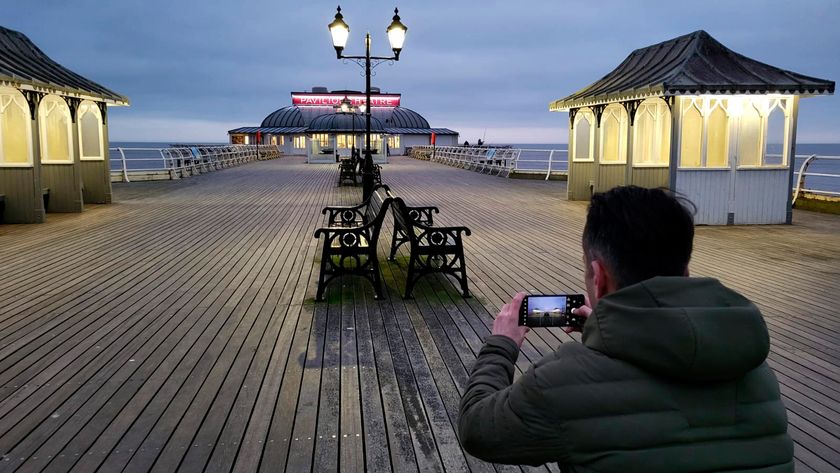
A 1:1 crop is great for a central subject surrounded by similar details on all sides, while a 16:9 crop is great for section of a wide building, such as in the example above. You may even want to consider capturing the same building with a variety of aspect ratios and presenting the results as a single series of images.
Get daily insight, inspiration and deals in your inbox
Sign up for breaking news, reviews, opinion, top tech deals, and more.
Turn on your lens corrections

Arguably the main lens aberration you’ll have to contend with when shooting architecture is curvilinear distortion. With wide-angle lenses, this can cause buildings and interiors take on a barrel-like shape, and it’s particularly noticeable here as there are typically many details that we know are straight in reality.
It’s a good idea to check whether your camera has lens aberration corrections, as these will help to iron these issues out as you shoot. If processing raw files, you may have a similar control available to you, either as a simple check box or a slider that allows you to specify the level of correction.
You may also be forced to use a wide aperture when shooting indoors, and this can lead to a darkening in the corners of the frame known as vignetting. Again, your camera may have a correction for this. If your subject stretches all the way to the edges of the frame, it’s also a good idea to turn on correction for chromatic aberration, which in one form shows as coloured lines along the edges of subjects, particularly towards the peripheries of the frame.
Know when to use your widest apertures

Wide apertures can be useful when capturing interiors, as you’ll typically have less light to work with than when working outdoors. That said, the same rules of depth of field apply indoors as they do outside, so you need to ensure your depth of field is sufficient to get everything at different distances sharp and focused.
If your subject is relatively flat and distant – a high ceiling, for example – you can generally get away with using wider apertures. If there are details leading up to your subject (such as in the image above), you'll need to pay closer attention to where you focus and the aperture you use. Consider using a tripod and a small aperture if possible.
Underexpose interiors

When capturing interiors, you may have window or another bright element along with the darker interior details such as walls or ceilings. Trying to balance both in a single exposure can be tricky, so it’s worth trying one of a handful of things to retain detail in both parts.
First, if you’re capturing raw files, consider underexposing your image with the intention of lifting up the shadow and mid-tone details later in post production. This will allow you to retain the brighter details in the scene while getting the right balance for the rest. This works particularly well with full-frame cameras and at lower sensitivities, where the effects of noise may be less obvious.
Alternatively, you may prefer to capture a series of images at different exposures and blend them together using software. This is a little more involved, and you’ll need a sturdy tripod to make sure you don’t move between frames, but you may end up getting a better result if you take time and care when you're shooting. Exposure bracketing, which captures a series of images at different exposures with every press of the shutter release button, is one way to achieve this.
Another alternative is to use the HDR feature that’s now standard on many modern cameras. This performs the above action all at once, and creates the final blended result in camera. While convenient, some cameras may create a very unrealistic result, and you’ll be limited to the JPEG created in camera by this process, which limits the potential for further processing later on. If your camera allows this, however, it’s worth experimenting with this on a modest setting.
Finally, activating your camera’s dynamic range compensation feature should also help to balance the image better for highlight and shadow detail. Be aware that this may prevent you from using the lowest ISO setting on your camera.
Use your levels

Many modern cameras come equipped with digital levels, and these can be activated and deactivated where necessary. You may not be aware your camera has these if they’re not on at default, but they’re particularly useful when capturing architecture as any slanted straight lines and edges will be noticeable if you're not completely level against the subject.
If your camera doesn’t have these, you may be able to activate a grid on your LCD screen or in the viewfinder (or both). This is a good alternative as you can use it to frame your subject with precision by superimposing one of the lines of the grid against any linear details in the scene.
Stand back – or don't

If you want to capture a building without it appearing to be toppling over, it’s a good idea to stand back as far away from it as you can and to zoom in to the right composition, rather than to get up close with a zoom lens.
The reason for this is because you’re naturally closer to the bottom of a building than to the top, so the magnification between the two areas will be very different. As you move further away, the difference diminishes, and the result will be a building that’s more upright.
Some cameras feature correction in camera for this effect, but for the benefit of image quality it's always good to start with the image as close to the final result as you can. Of course, if you want to exaggerate this effect (such as in the image above) then do the opposite and get close.
Experiment with white balance

Many cameras now have auto white balance settings that allow you to specify whether to retain the warmth of ambient lighting. This is great when shooting indoors, as some cameras can take out too much of the ambience and leave the image cold.
If you need a stronger injection of warmth, consider switching to a cloudy white balance. This is particularly good when capturing churches or anywhere else where there may be a number of warm lighting sources present. If the effect is too strong, or you want more control, use the colour temperature scale as an alternative to the auto and preset options.
Compose with care

It’s possible that you’ll want to apply various corrections as you edit your images, and these may force some of the peripheries of the frame to be lost. Adjusting perspective to make a building appear more upright, for example or correcting distortion can affect what's in the edges of the frame. For this reason, consider standing back a little, or zooming out a touch if using a zoom lens, so that this extra detail can be used as insurance for any adjustments you make later on.
Most Popular


