How to use MSI Afterburner: from FPS monitoring to overclocking
Get acquainted with one of the best overclocking tools in the business
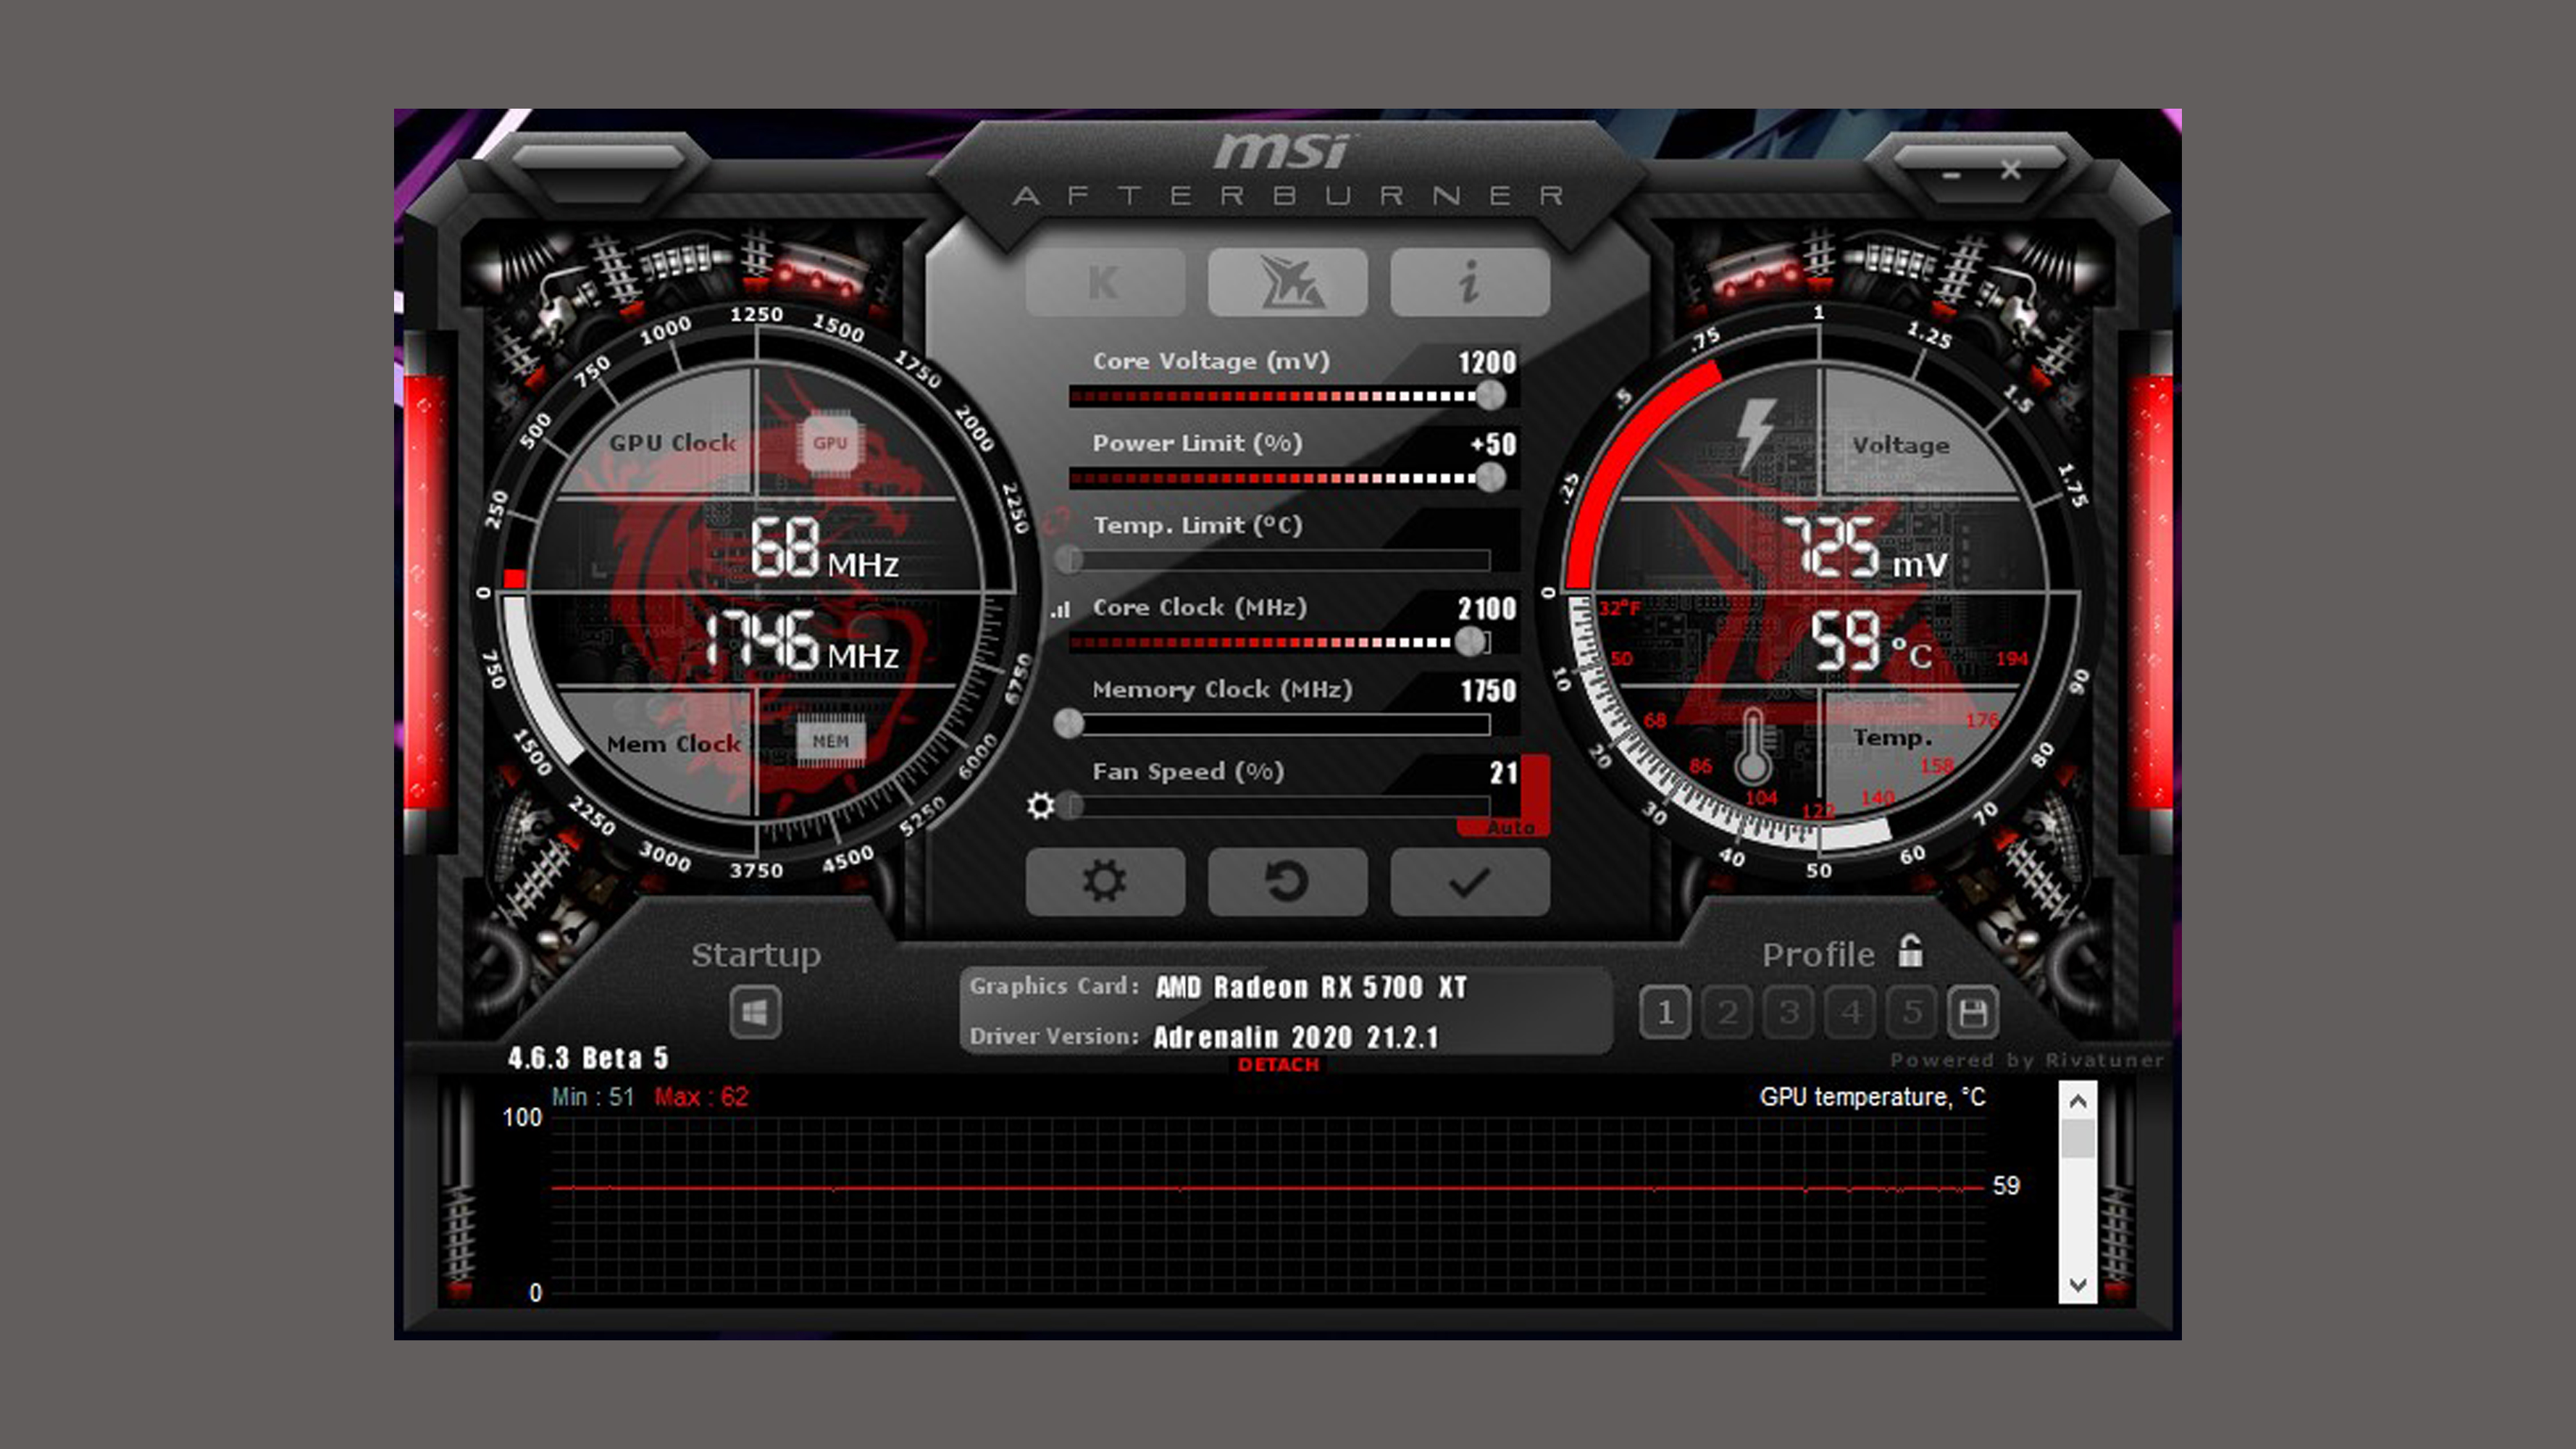
In this guide we'll show you how to use MSI Afterburner. If you put a good bit of money into buying or building a modern PC, then you want to make sure it lasts you a while. A vital part of that is keeping track of the temperatures and performance of your machine.
Similarly, overclocking doesn’t need to be a process that blows your PC up in a blaze of searing frame rates and fried circuitry - it can be perfectly safe with the right tool, and that tool is MSI Afterburner.
For years, Afterburner has been many gamers’ tool of choice for monitoring frame rates and temperatures in games, overclocking, fan control and myriad other things. Here we’re going to show you all the key things you can do with MSI Afterburner.
Setup
First you’ll need to download and install MSI Afterburner. It’s pretty self-explanatory, but one thing that you need to do is install RivaTuner Statistics Server (RTSS) when the option pops up.
RTSS isn’t required for Afterburner to work, but with it you can create a customisable on-screen display (OSD) containing important live information. It’s super-handy, so don’t skip over it.
Once Afterburner is installed, open it, go to Settings by clicking the cog icon and check the ‘Unlock voltage control’ and ‘Unlock voltage monitoring’ boxes.
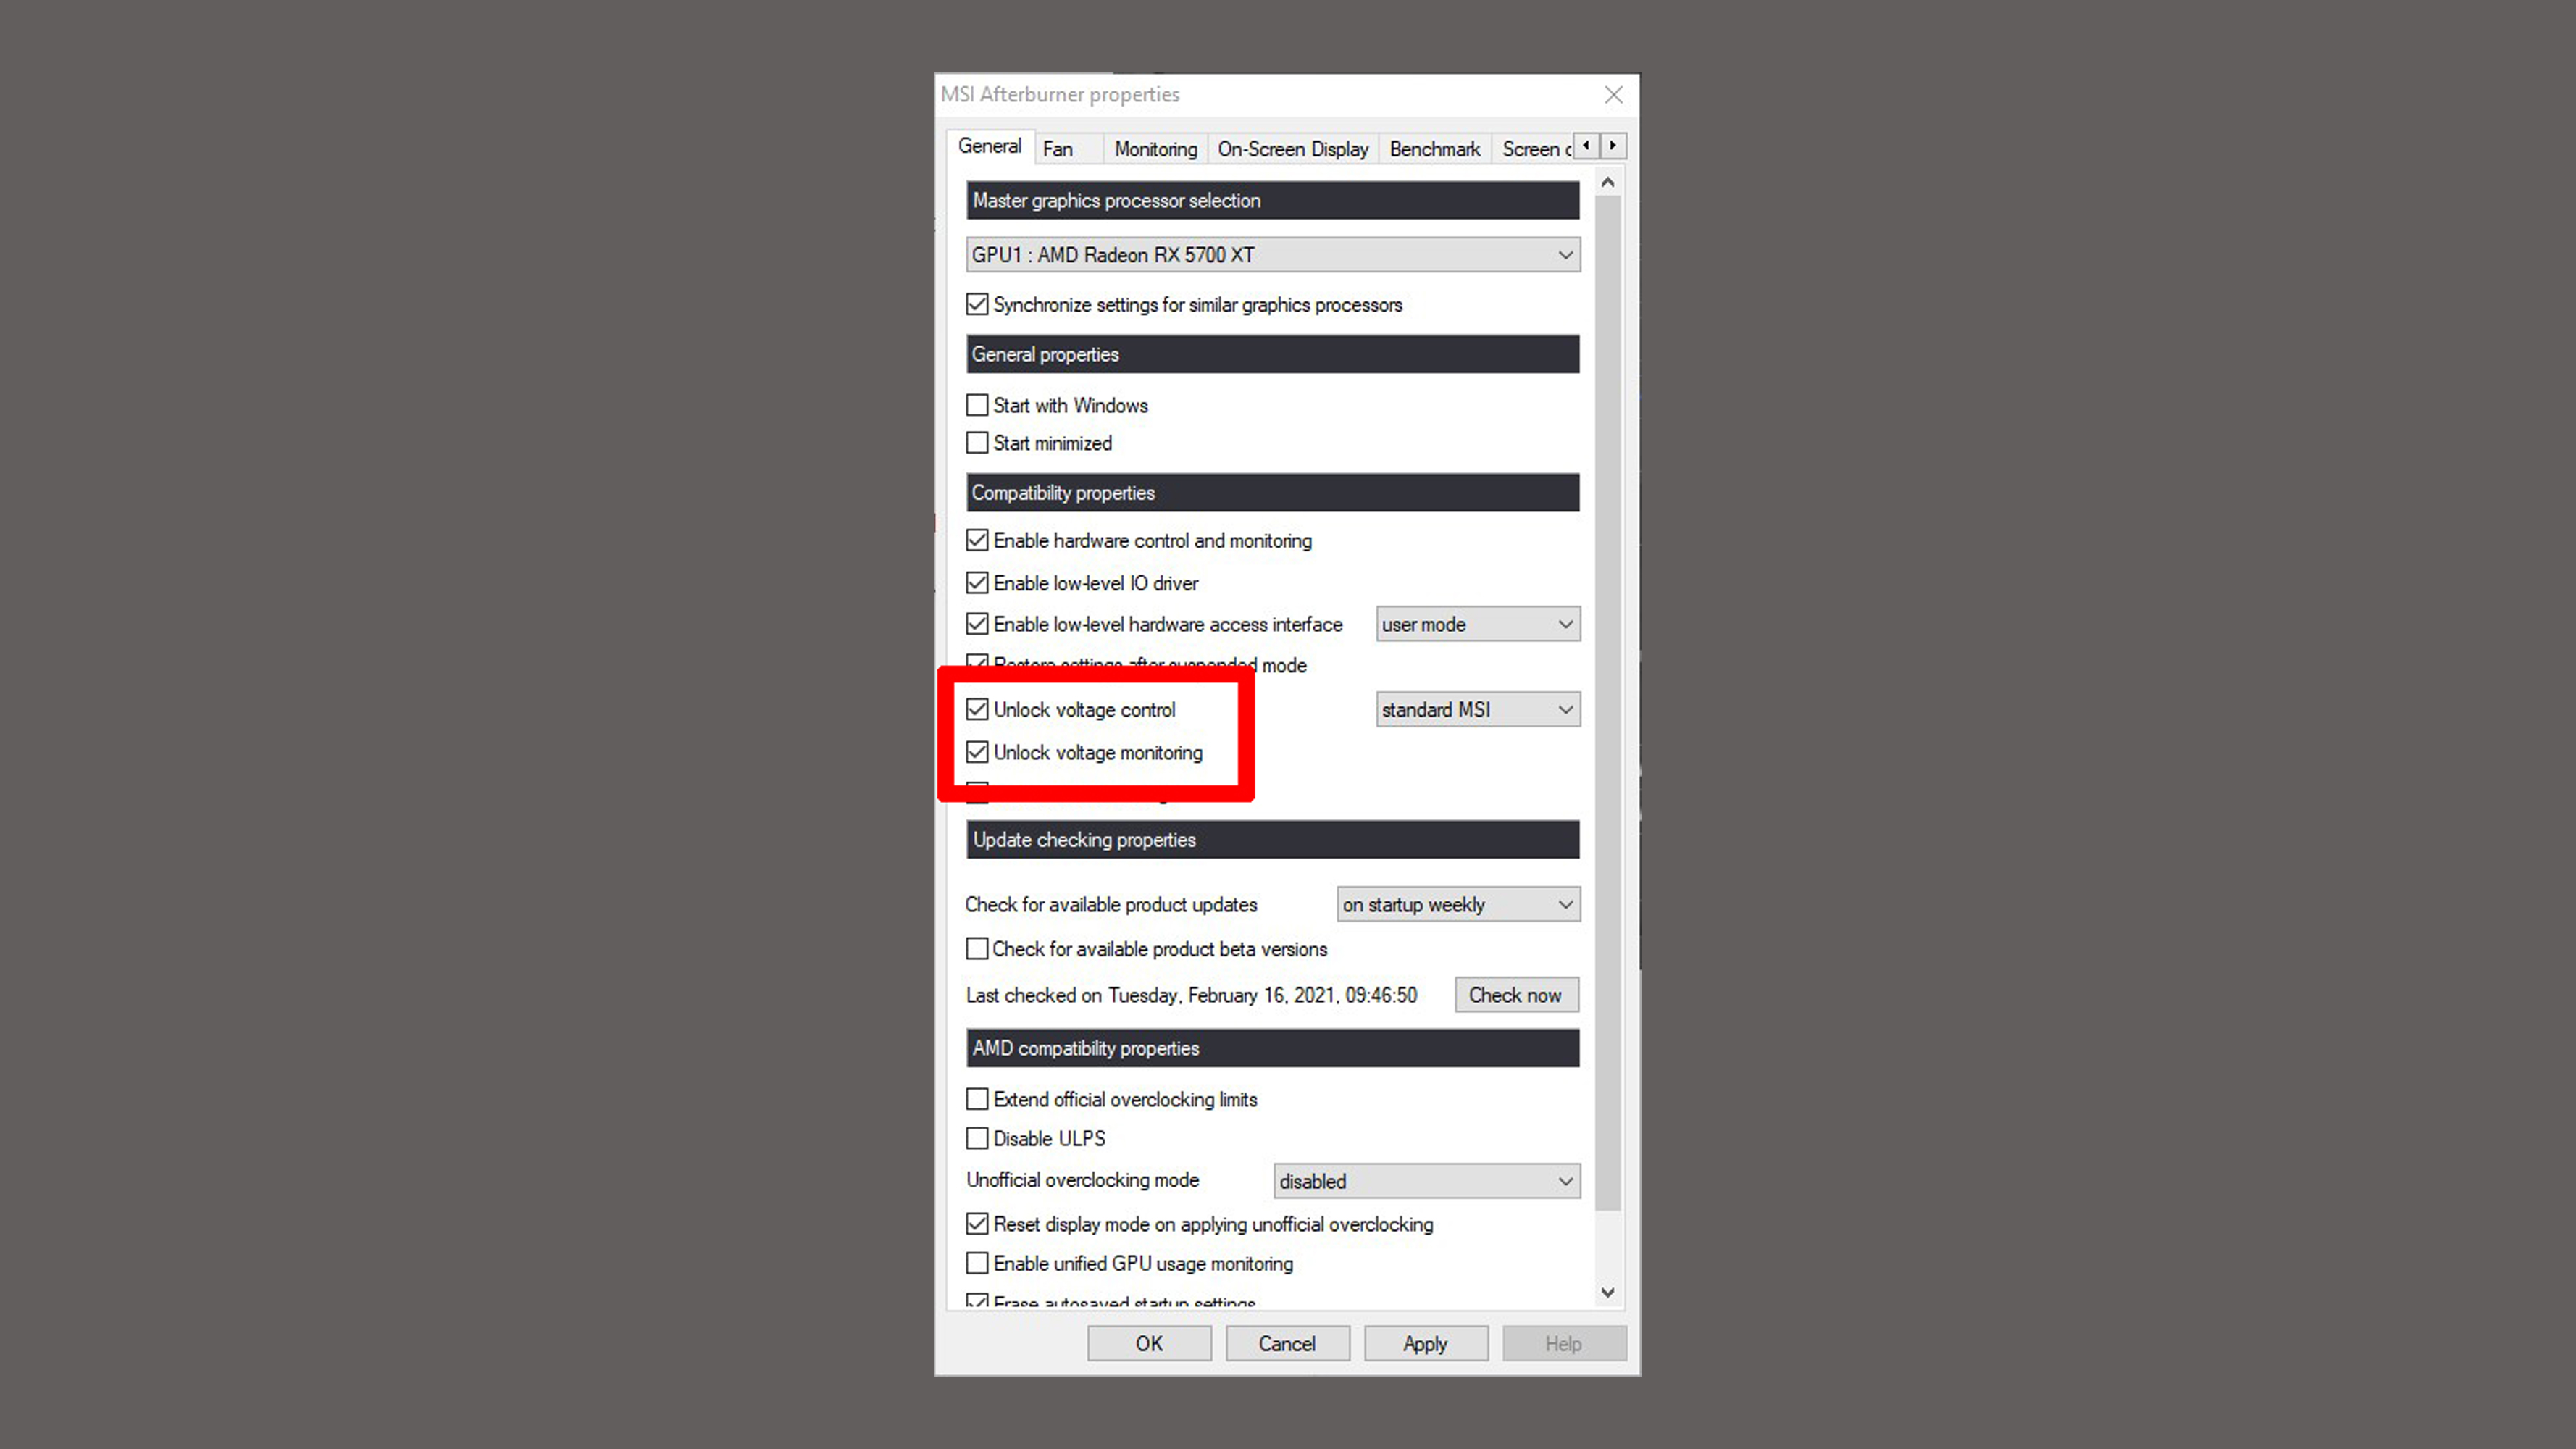
The default MSI Afterburner UI is a bit of an eyesore and you can change it under the User Interface tab, but for the purposes of this guide we’ll stick with the default MSI ‘Cyborg’ theme.
Get daily insight, inspiration and deals in your inbox
Sign up for breaking news, reviews, opinion, top tech deals, and more.
Create a Custom On-Screen Display

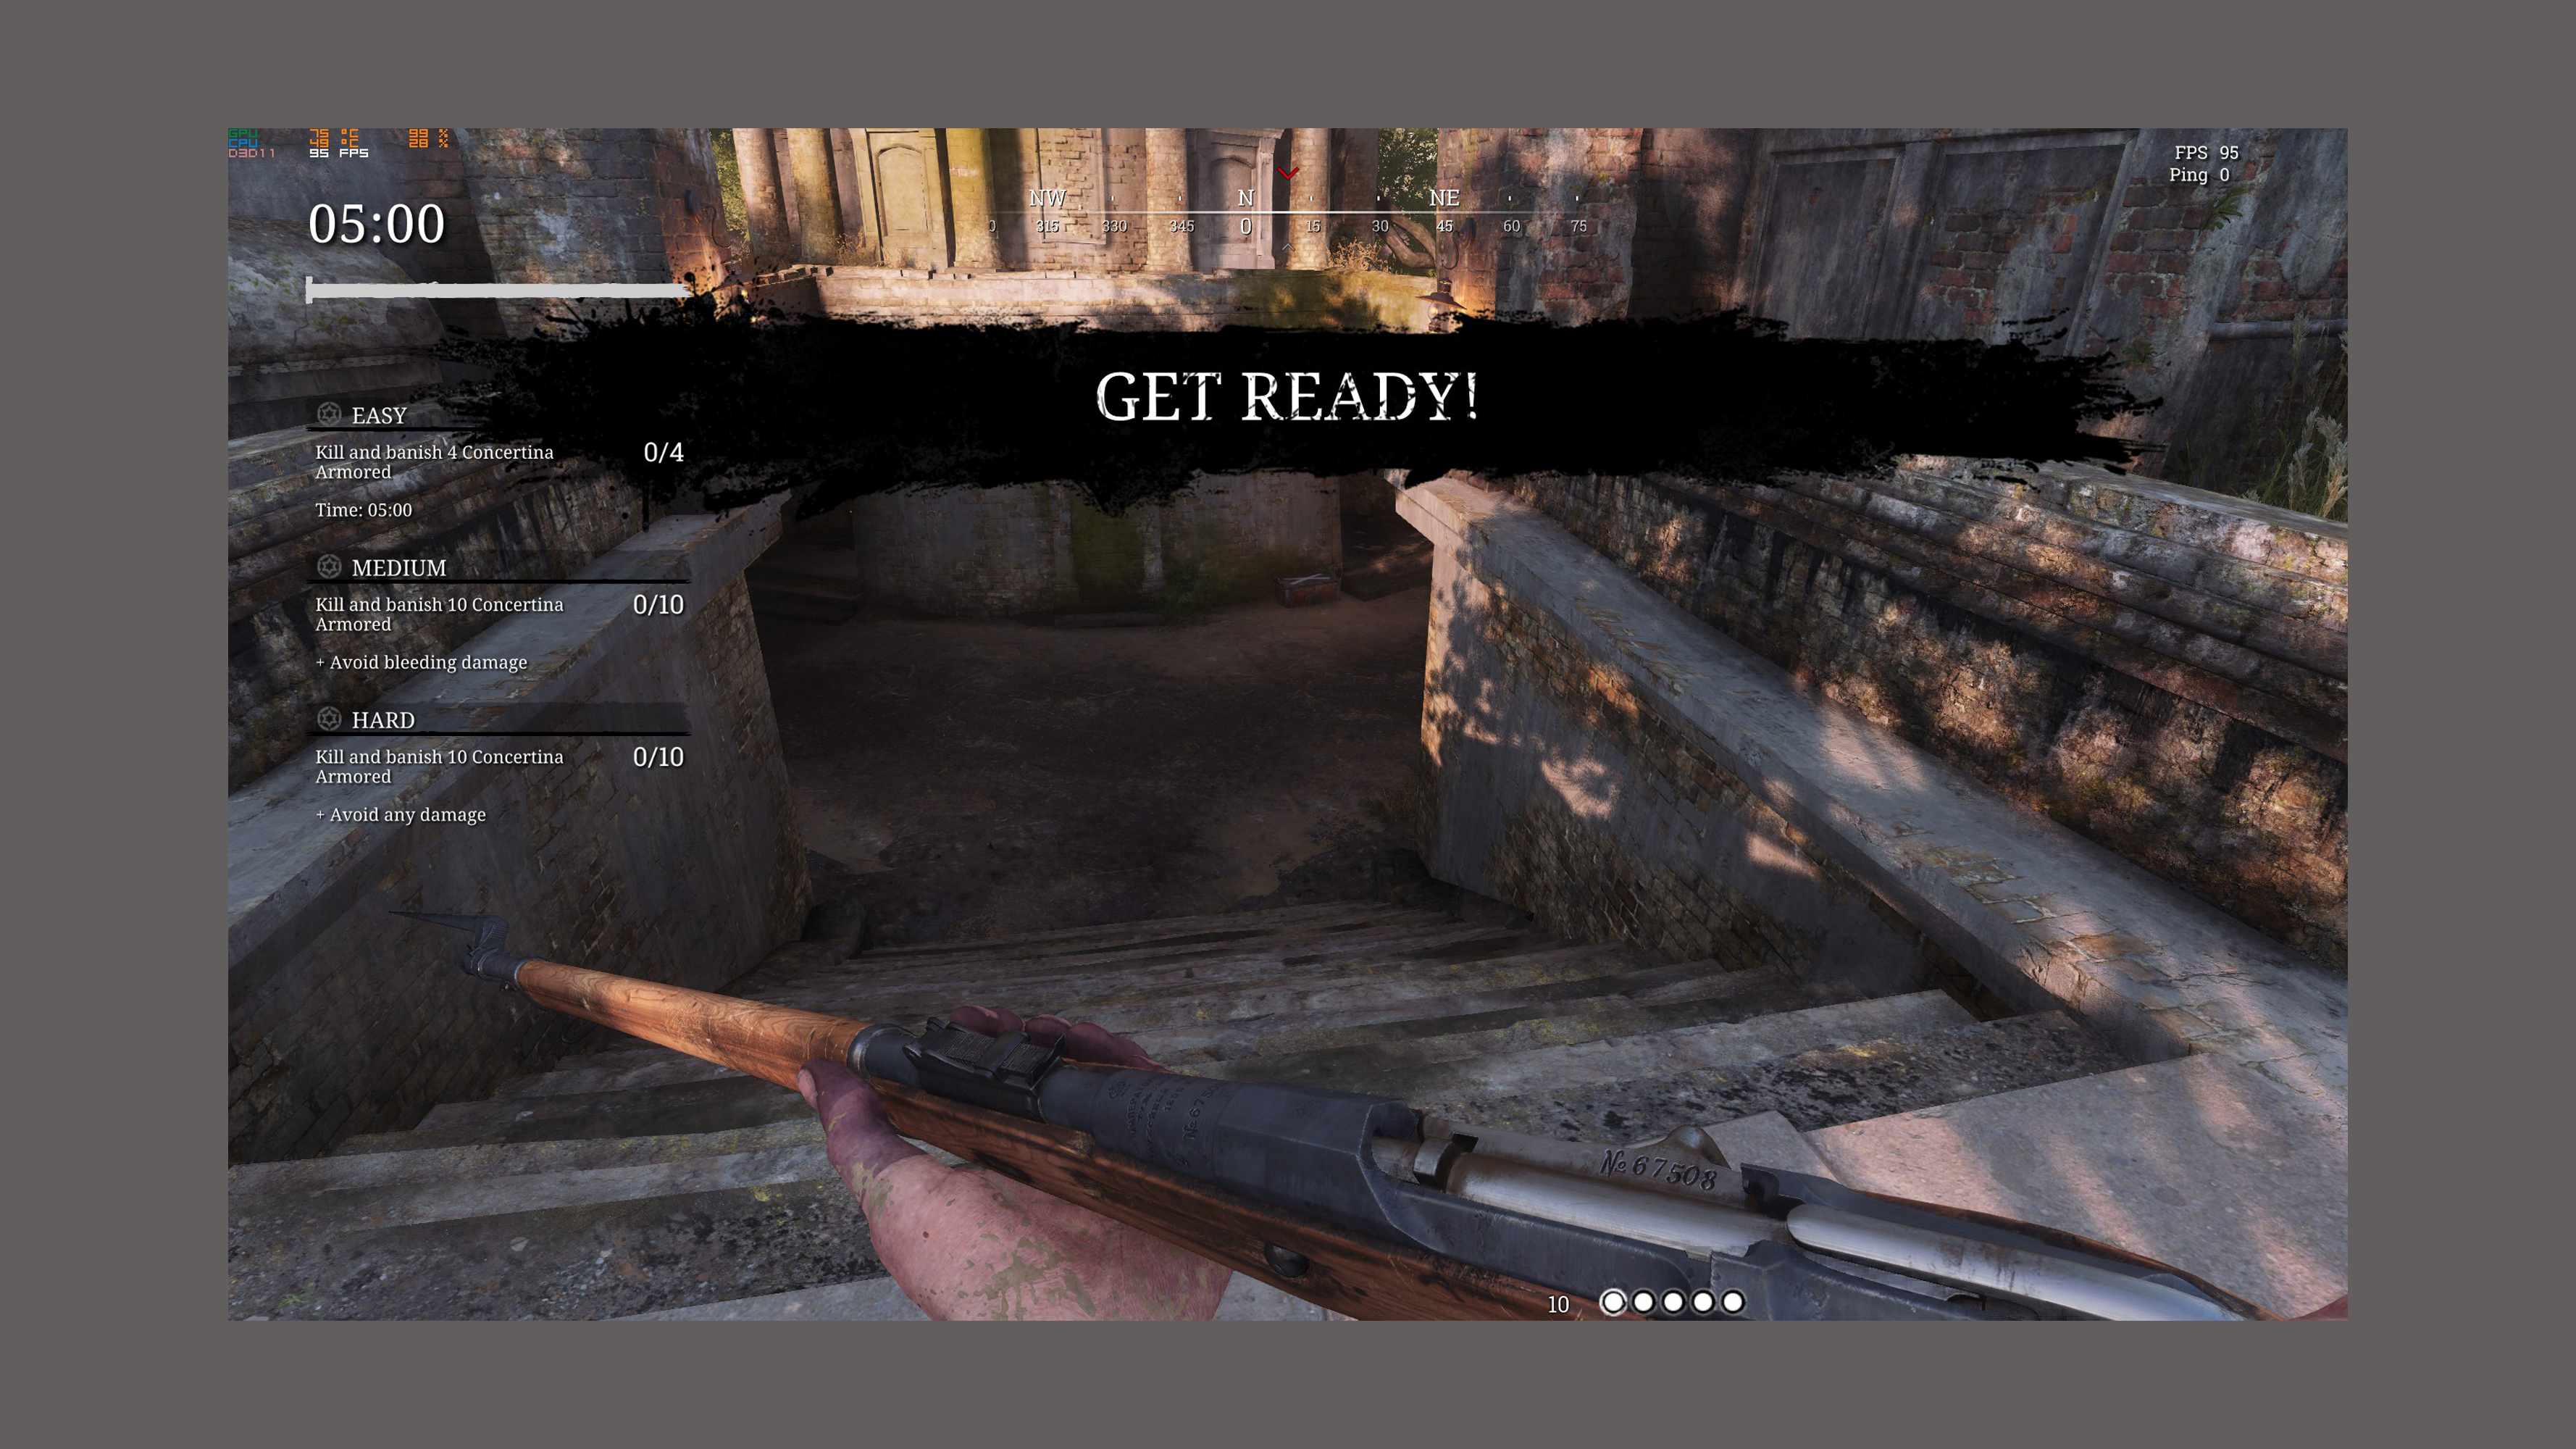
Perhaps the most universal use for MSI Afterburner is the OSD (which you unlock by installing RTSS with Afterburner). This lets you bring up vital information in the corner of your screen about frame rates, GPU temperatures, CPU temperatures, and other key fluctuating numbers on your PC with the press of a button.
To create an OSD, go to Settings -> Monitoring. Click each graph in the list that you want displayed in the OSD, then for each one check the ‘Show in On-Screen Display’ box.
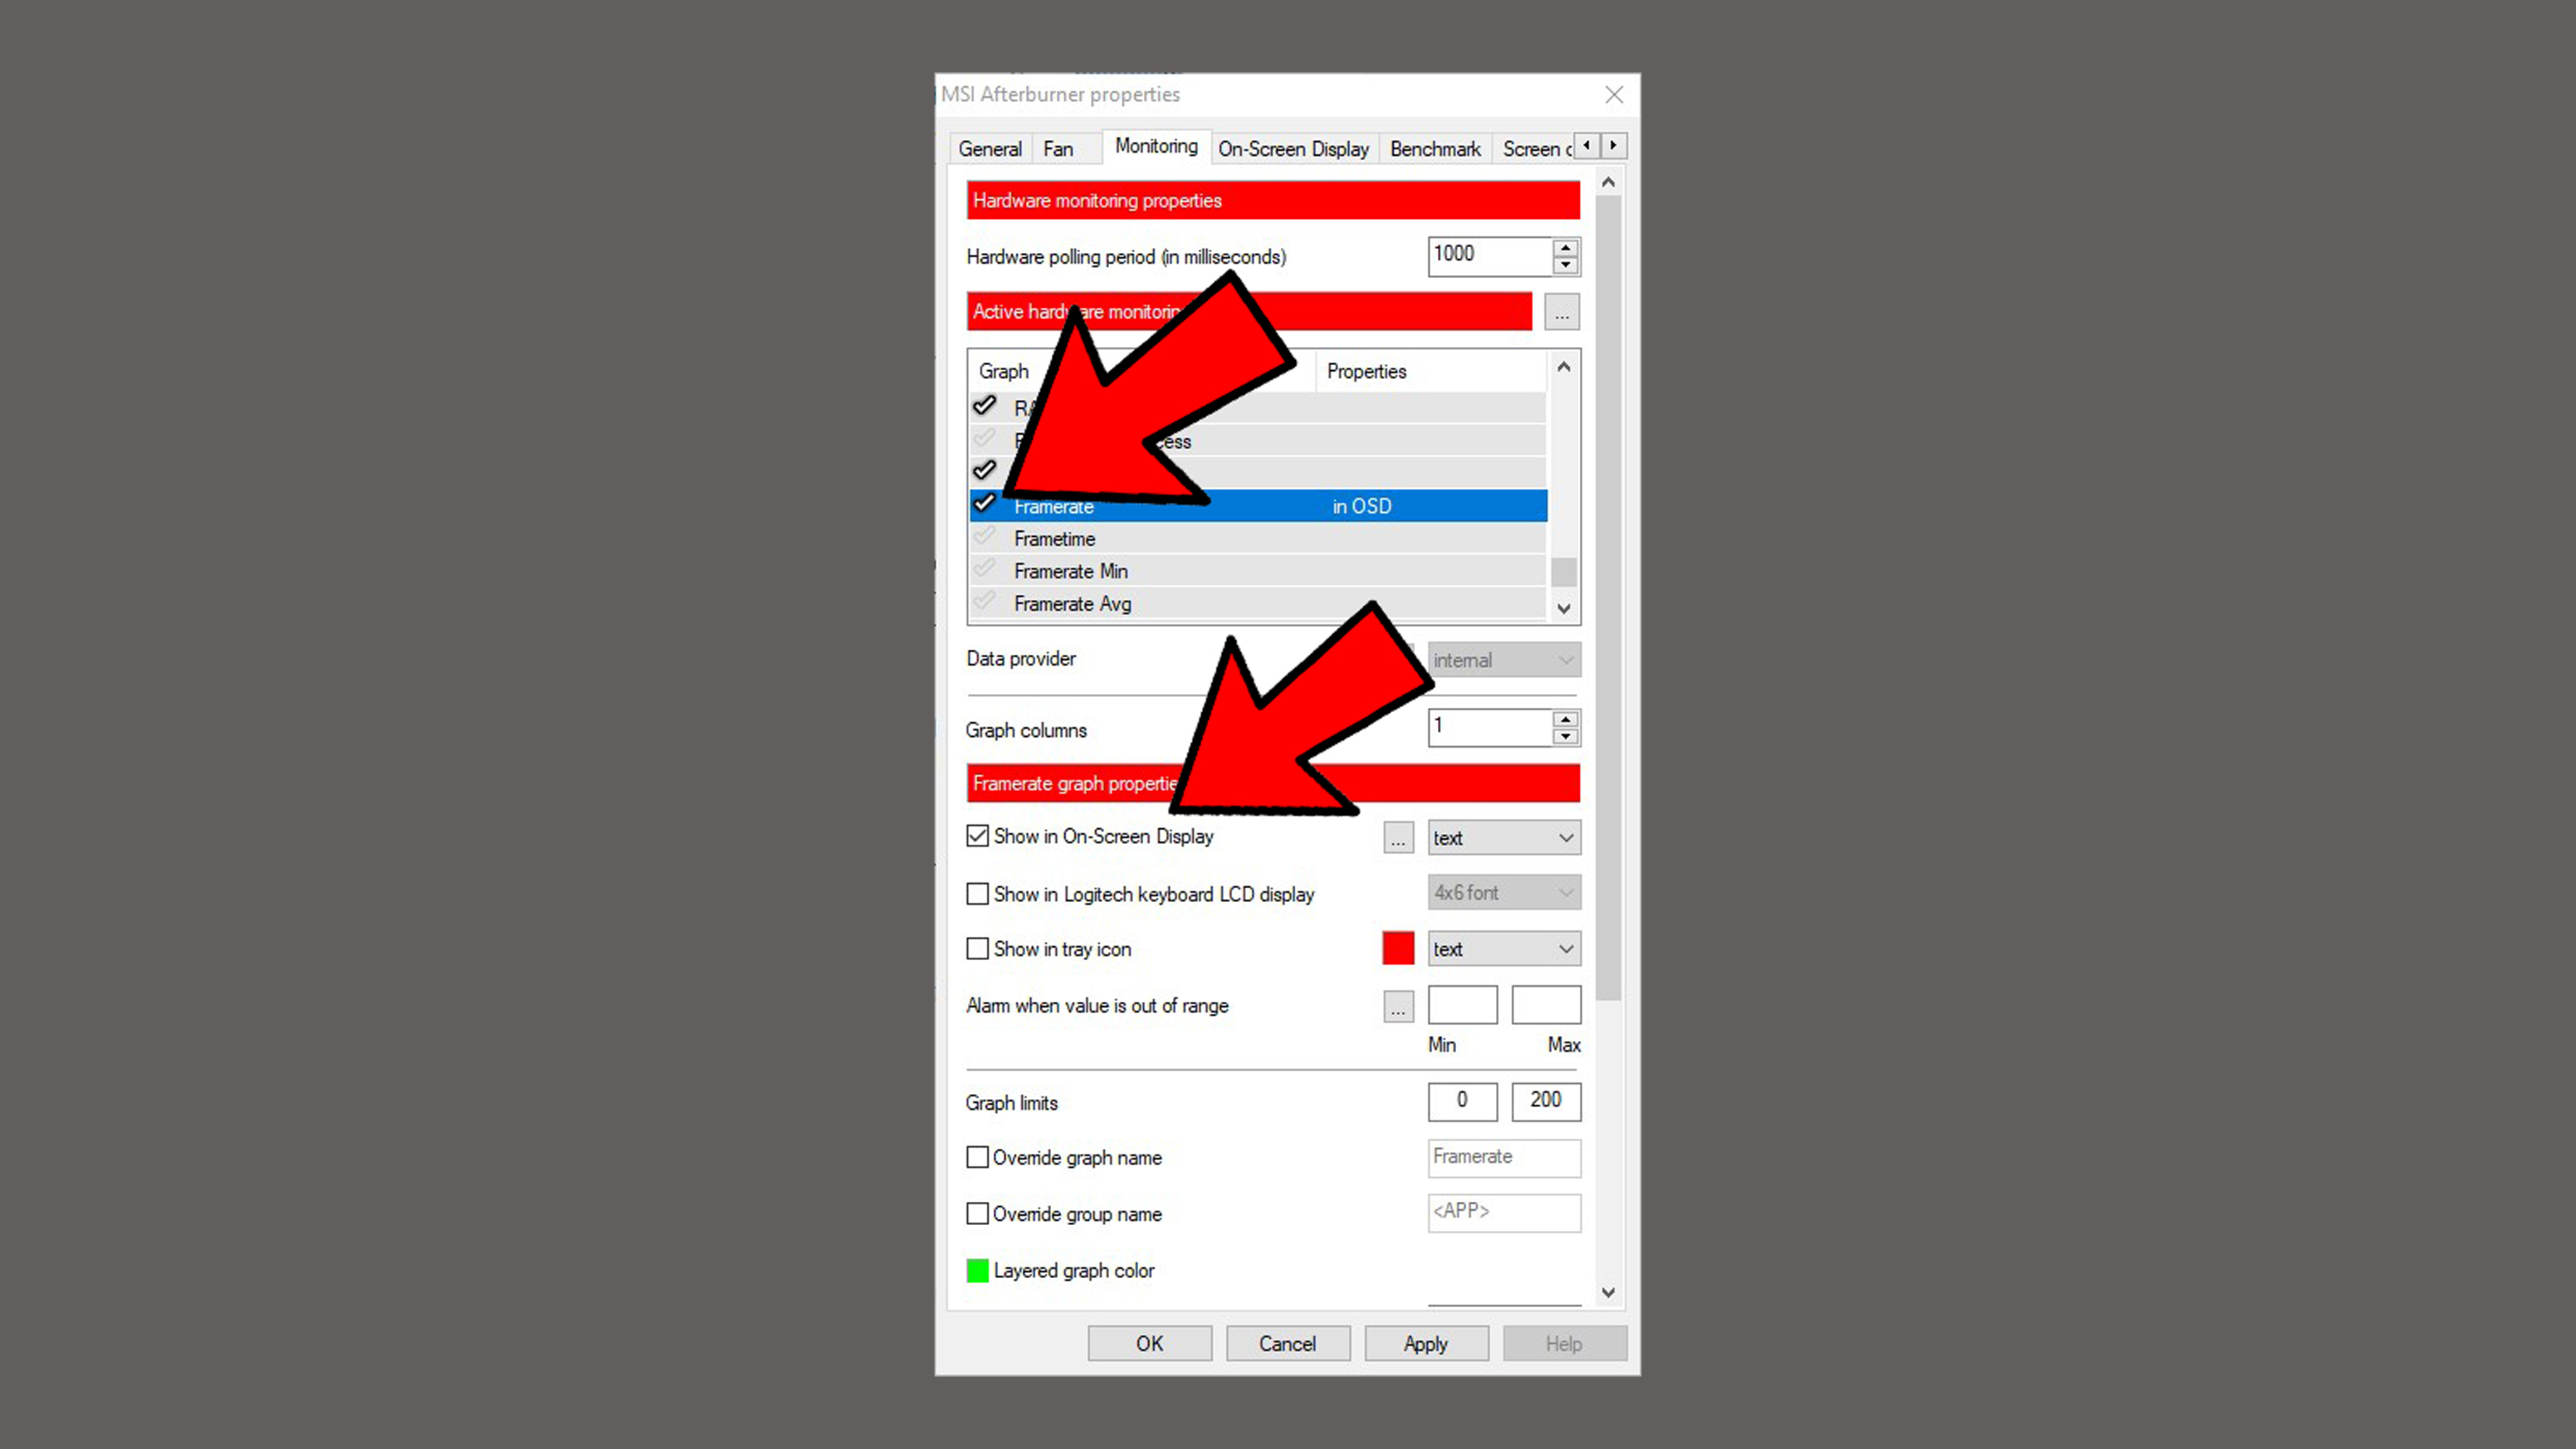
If the checkbox is greyed out, you may need to first click the tick next to the entry in the list so that MSI Afterburner generates a graph for that variable.
For us, frame rate, GPU temperature, GPU usage, CPU temperature and CPU usage are the most important things to monitor, so we picked all those to show in the OSD.
Next, click the On-Screen Display tab and set a hotkey in the Toggle On-Screen Display box.
If you want more granular control over your OSD, click 'More' at the bottom of the tab to bring up the RTSS options. Here you can change OSD settings by app, change the OSD’s placement on your screen, and other finer details.
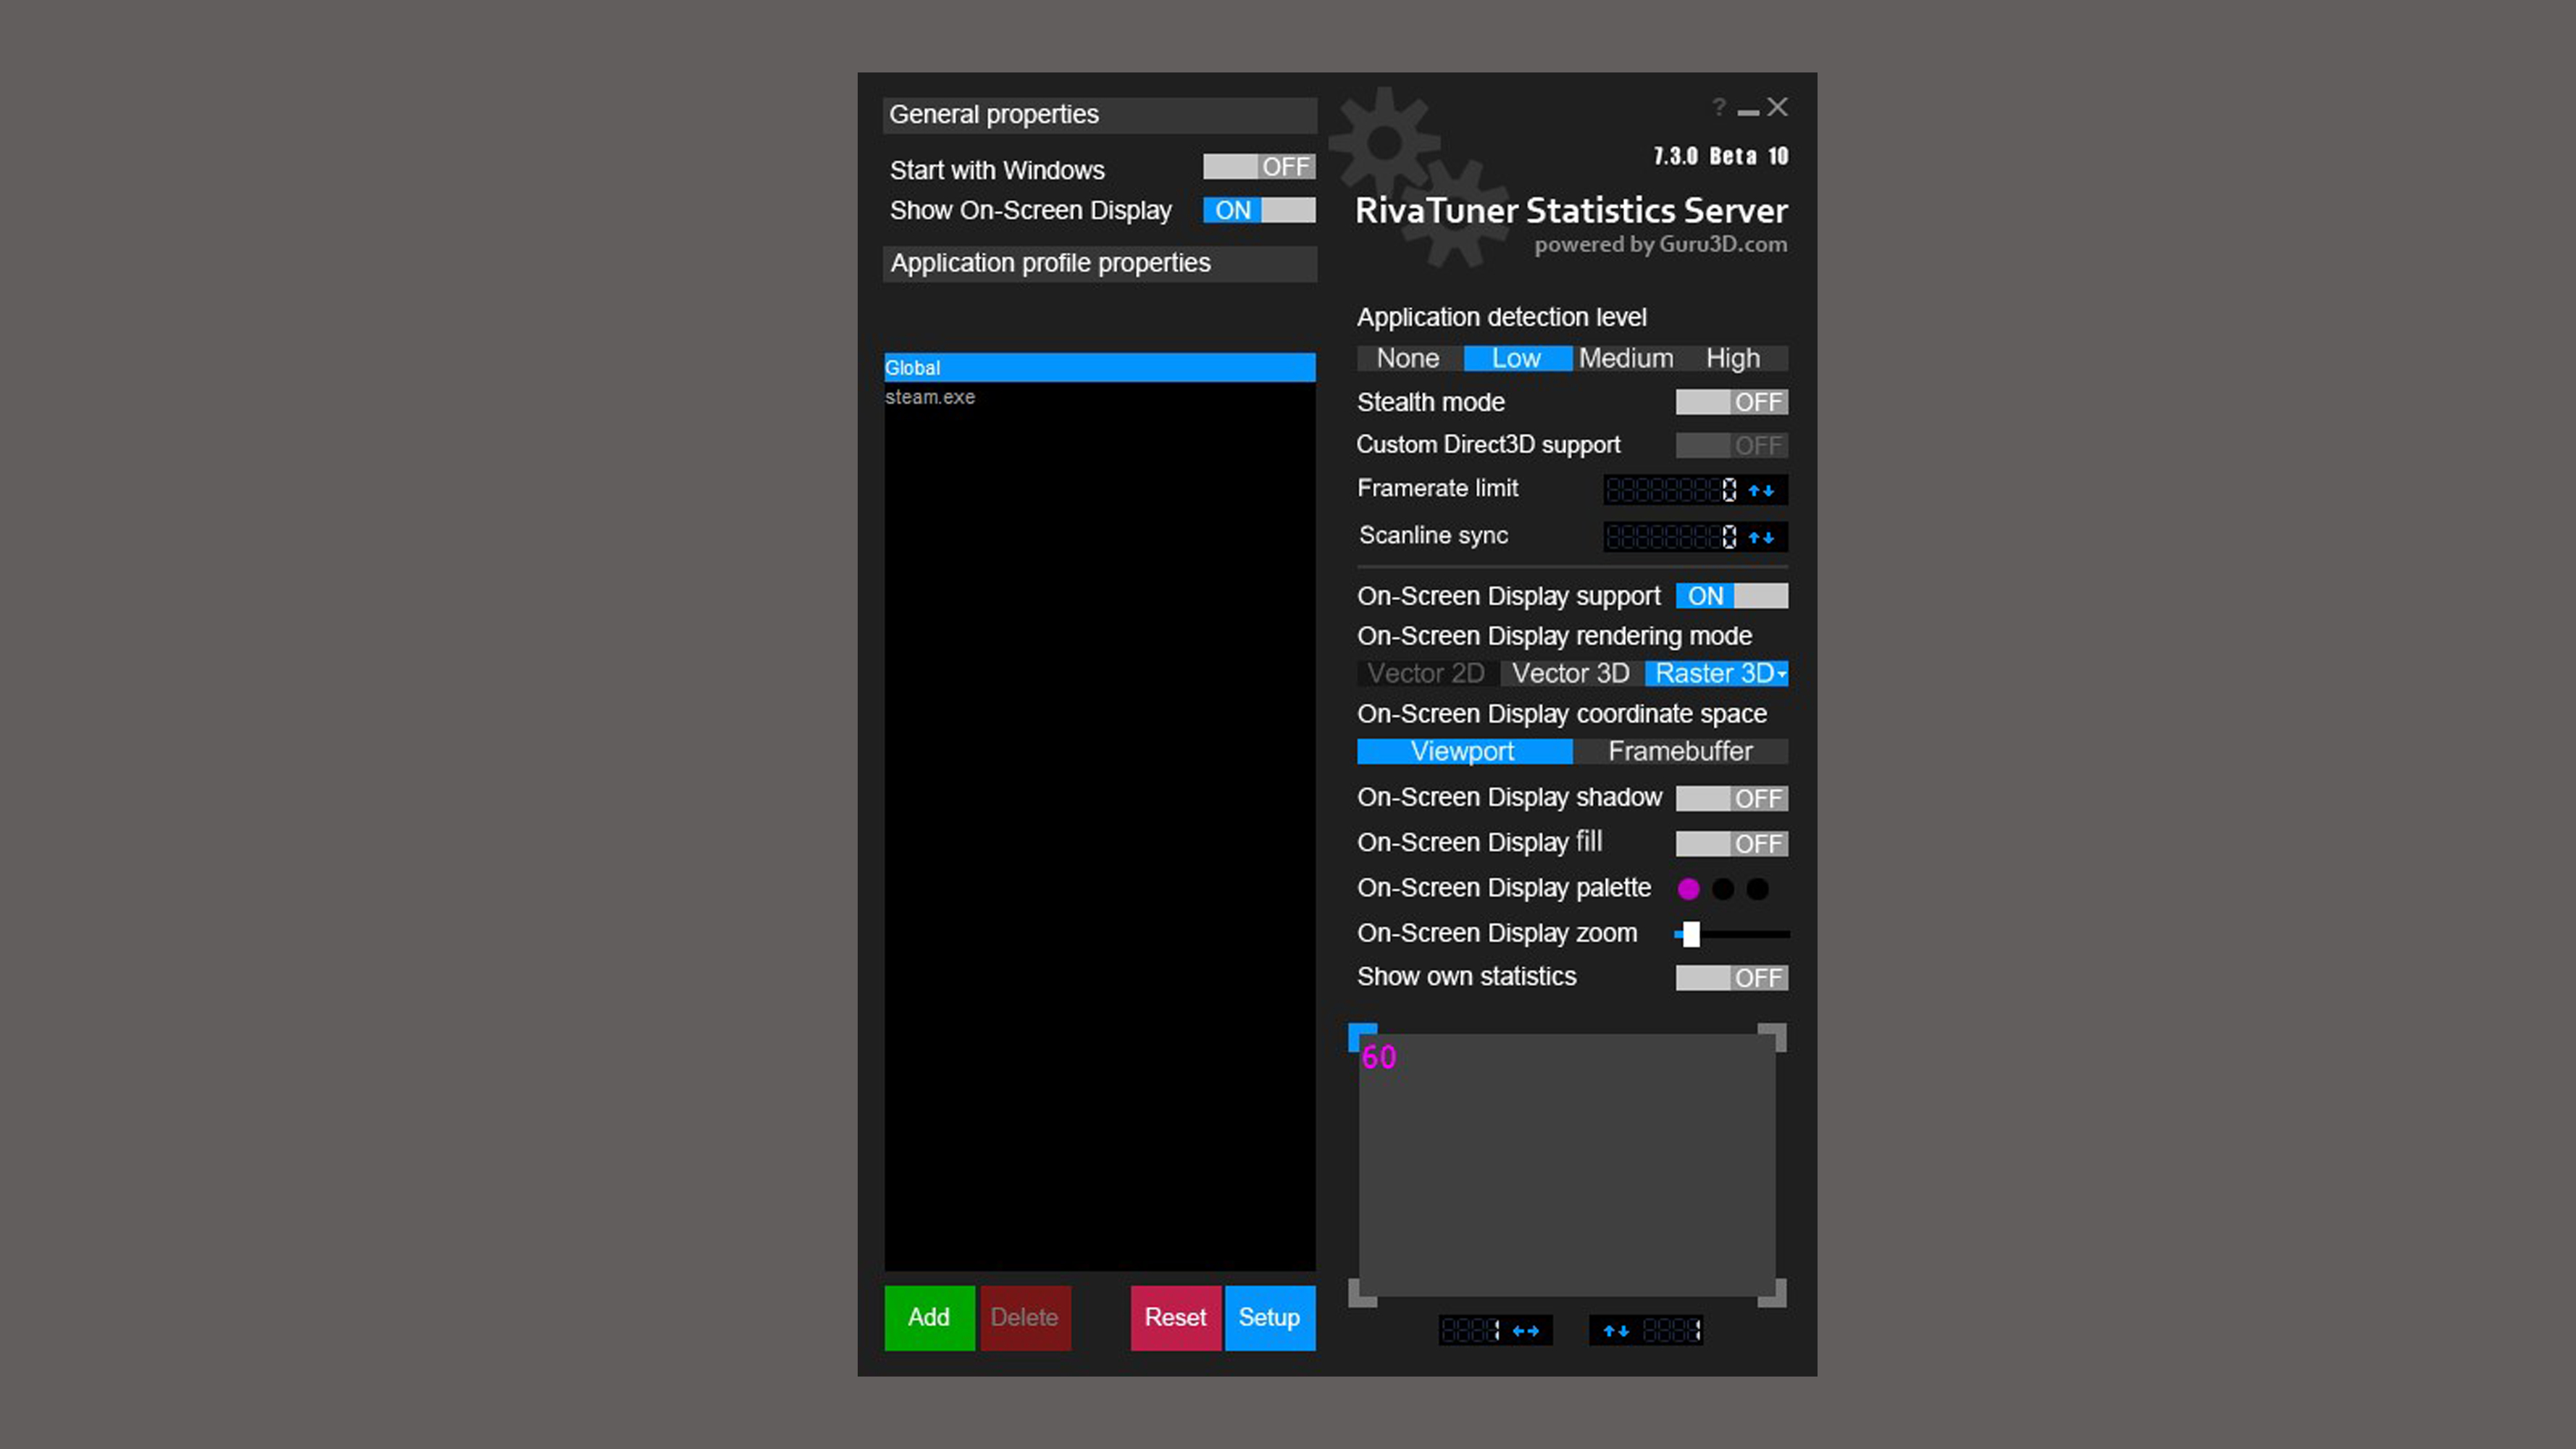
Click 'OK' to apply all your changes, then run a game and press your hotkey to bring up the OSD in-game.
Manual Overclocking
The good thing about overclocking with MSI Afterburner is that all the information you need is right there in the main window.
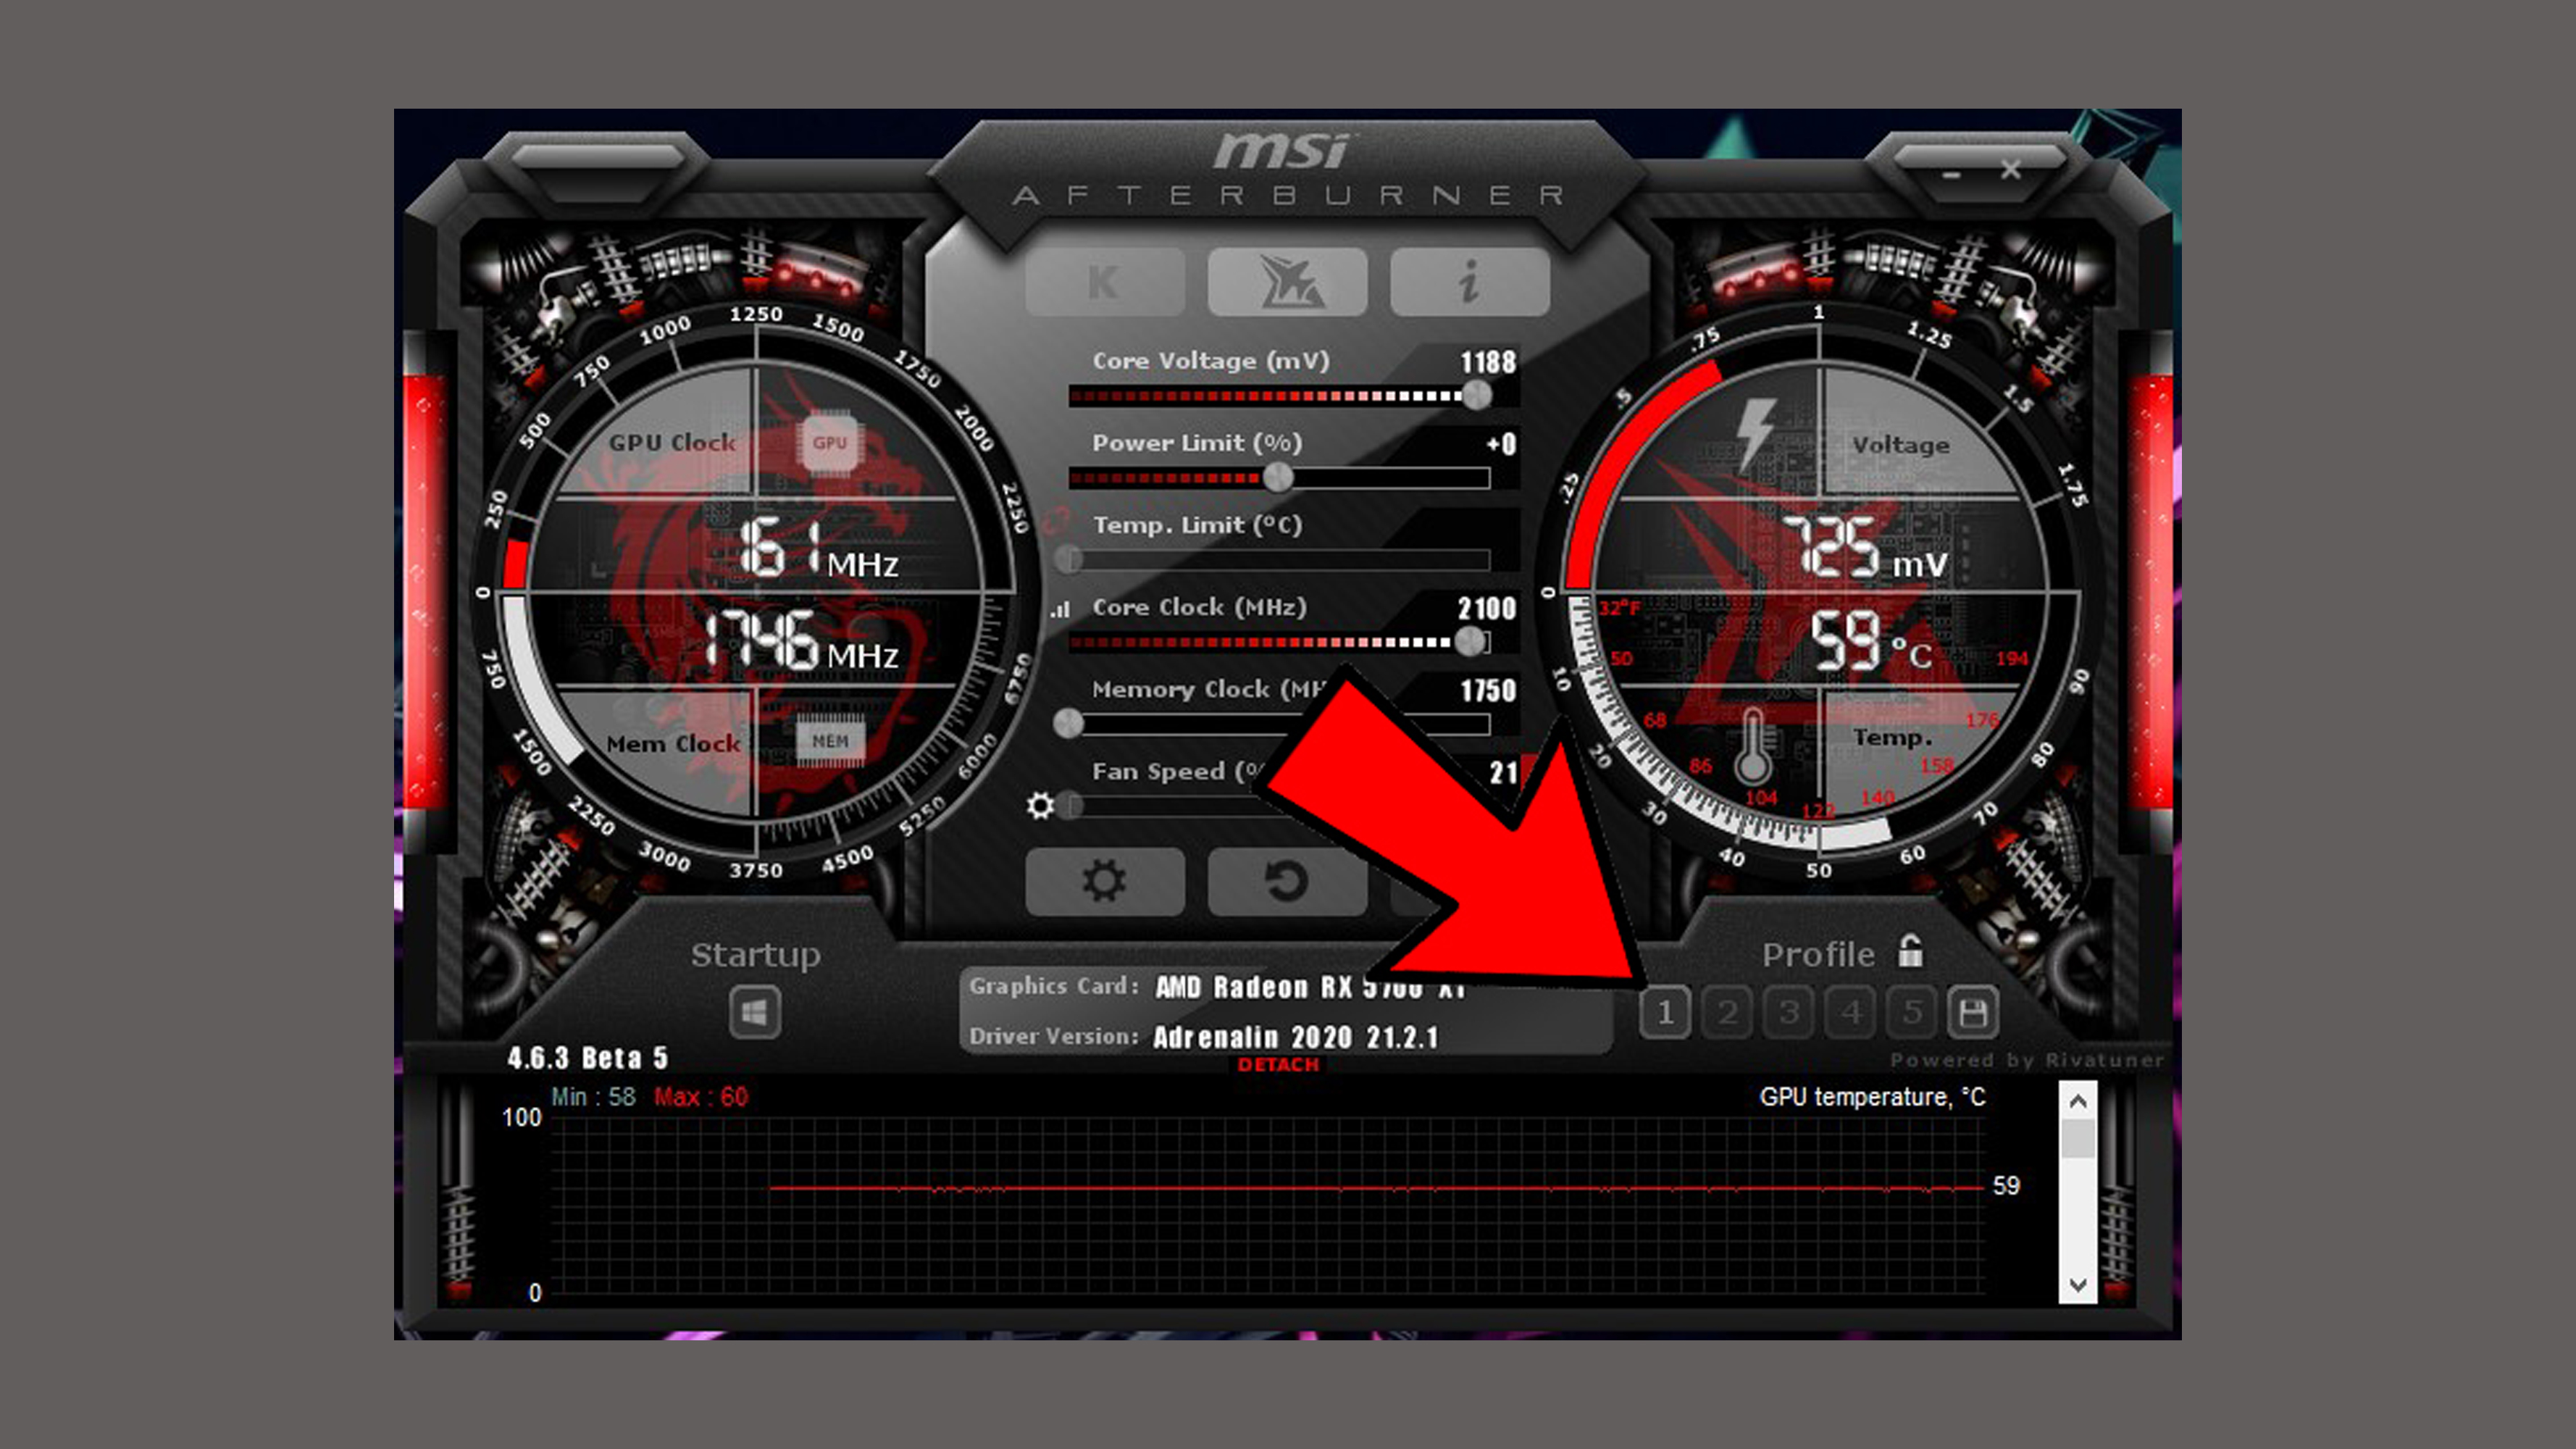
The first thing you should do is save your default settings as a profile. So before doing any tweaking, click the floppy disk save icon at the bottom right corner, then click ‘1’. This is handy if you lose track of your overclocking and want to just reset everything to base levels.
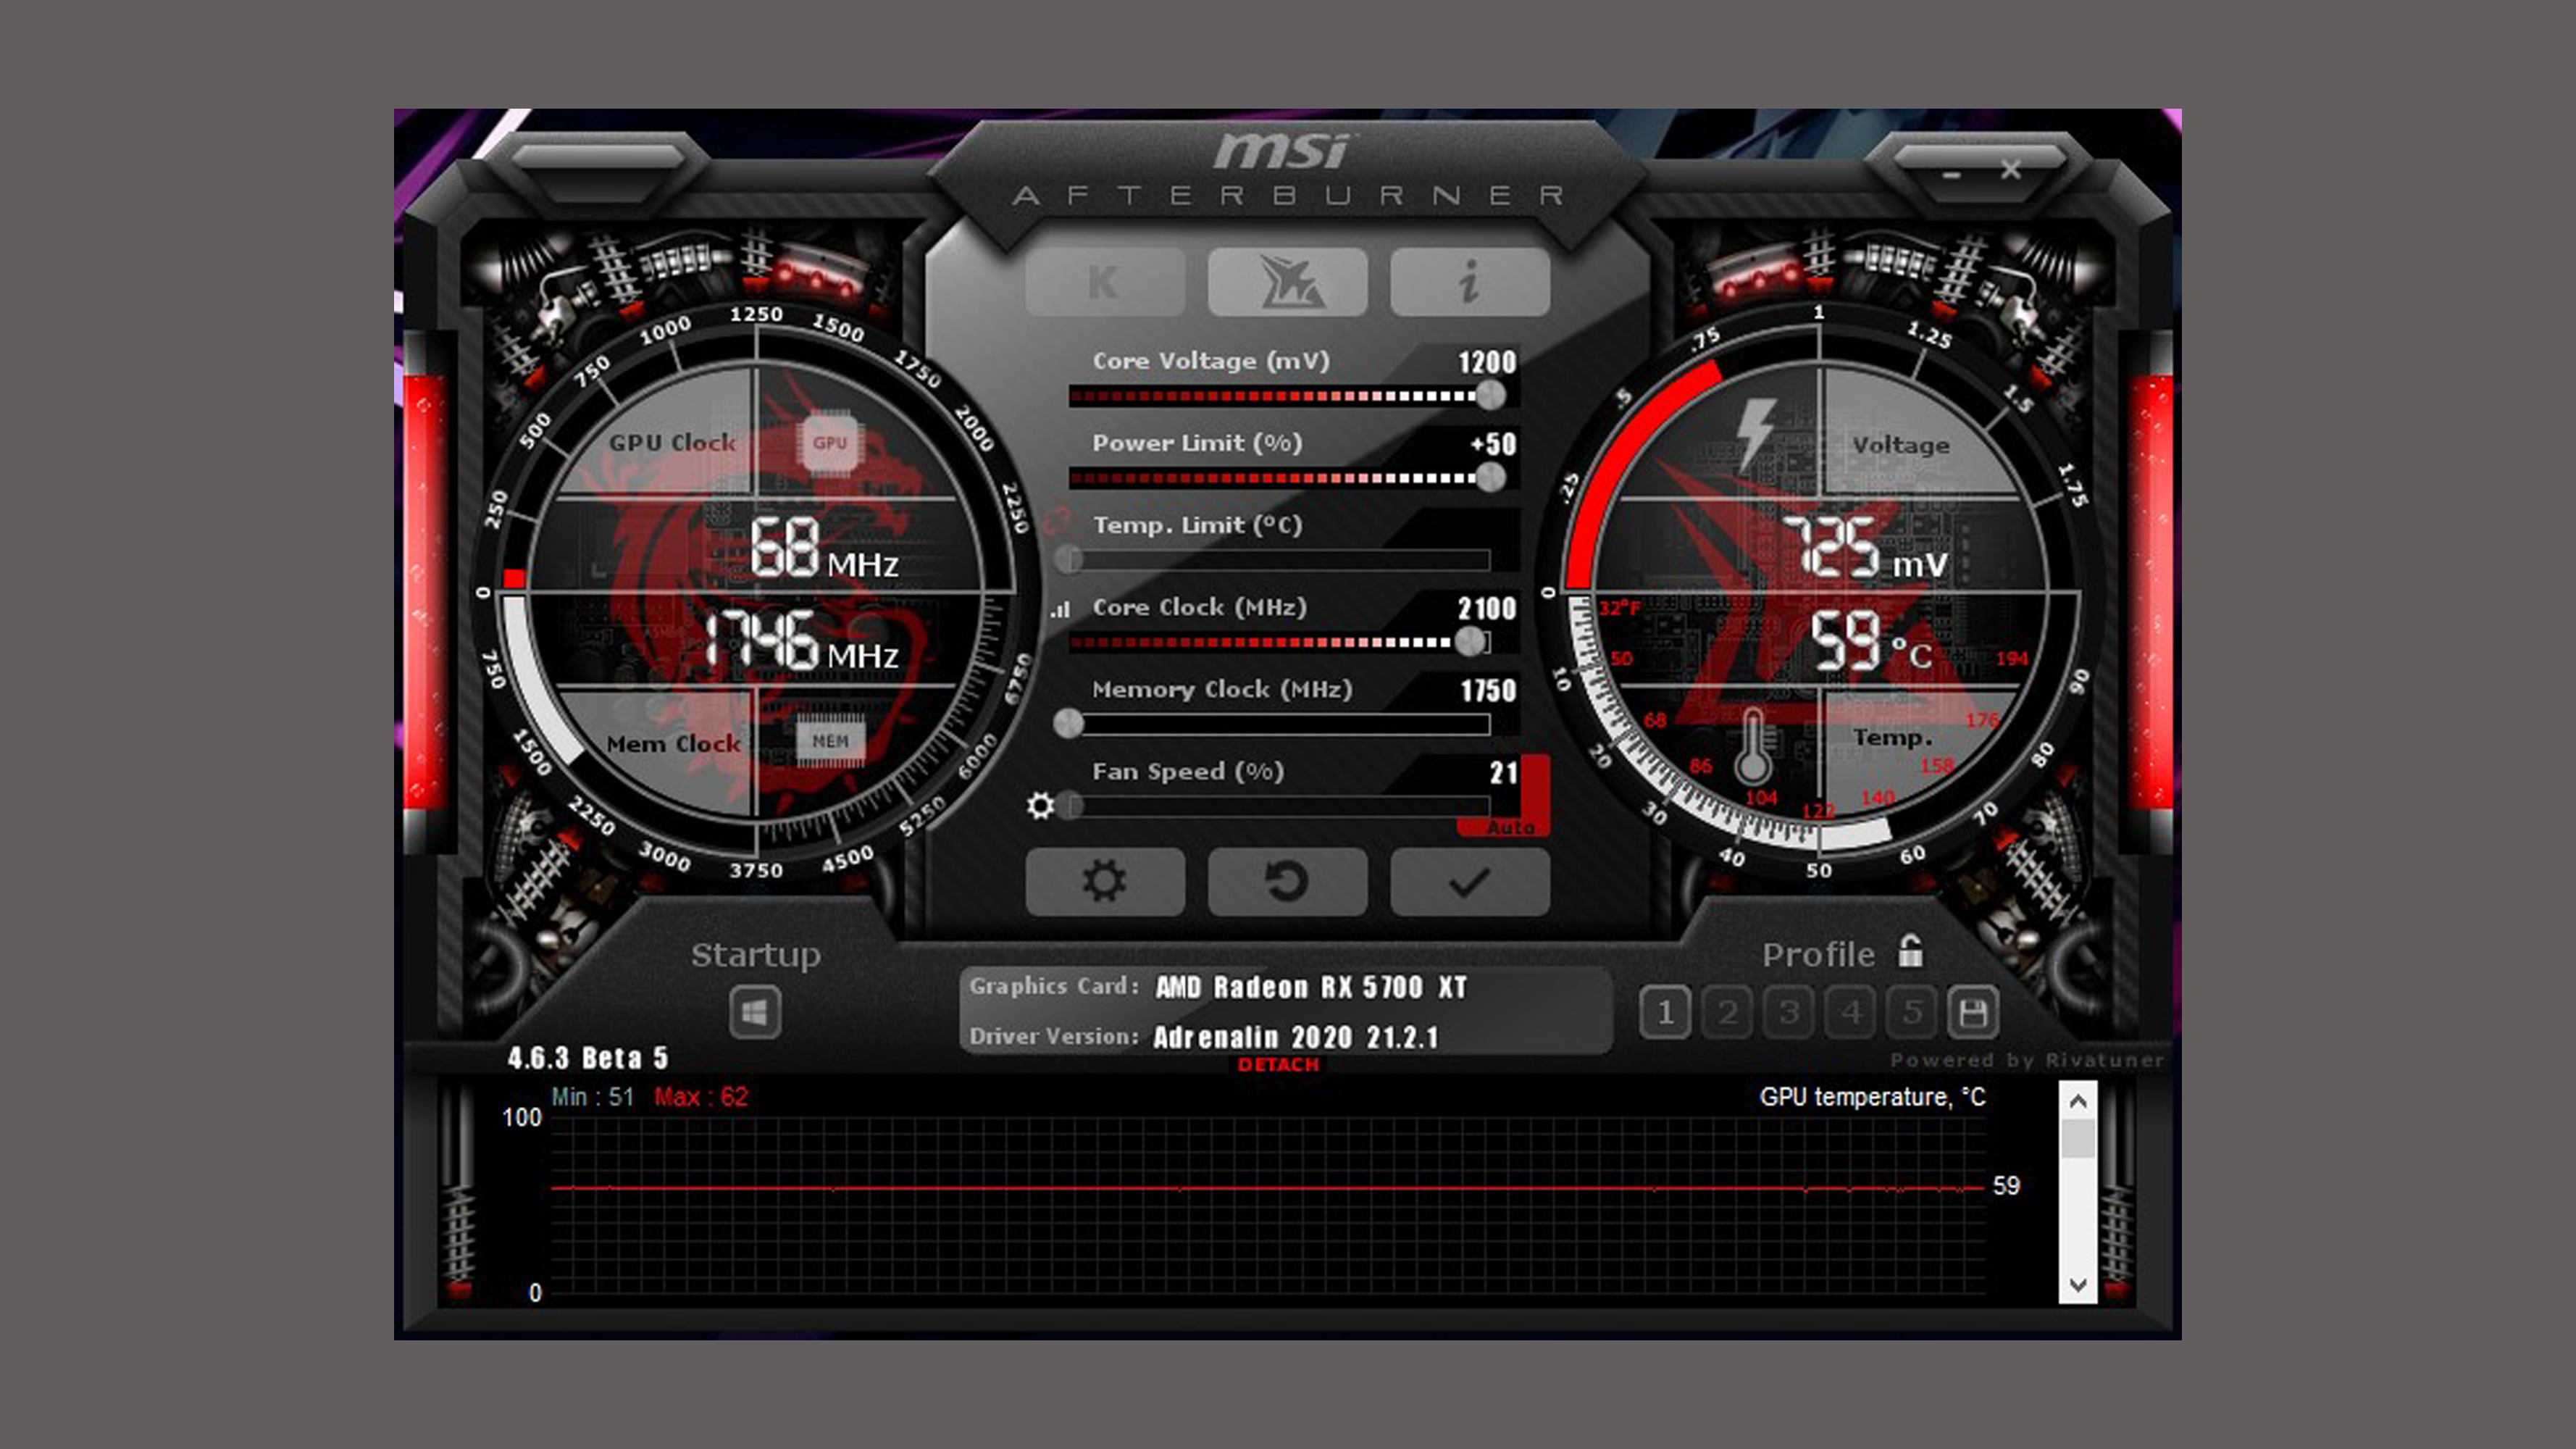
Next, do each item in the below bulleted list in order, and between each increment you increase run Heaven Benchmark to test the stability and temperature of your card. If at any point the benchmark gets unstable (artefacting, crashing etc.), decrease the setting in MSI Afterburner until you reach a stable point. Similarly, if your GPU is running at 85-90C or more, then decrease the given slider.
With that in mind, adjust the following sliders in the listed order:
- Increase the Power Limit to the maximum (this will be limited to the maximum Power Limit set by the GPU manufacturer, so it’s perfectly safe).
- Increase the core voltage in 10mV increments
- Increase the Core Clock in 10mHz increments
- Increase the Memory Clock in 25MHz increments
Once you’ve found a balance where you can stably use all the above settings at higher levels at safe temperatures, click the floppy disk ‘Save’ icon then click any of the profile numbers apart from ‘1’ (which you should keep as your baseline settings).
Overclocking with OC Scanner
Another way to work out safe overclock limits for your graphics card is to use OC Scanner (designed for Nvidia RTX 20 and 30 series graphics cards).
At the top of your MSI Afterburner window you should see the Core Voltage, Power Limit and Temp. Slide all these bars all the way to full (if any are greyed out, just ignore them - it means they’ve been locked by the GPU manufacturer and there’s probably a good reason for it).
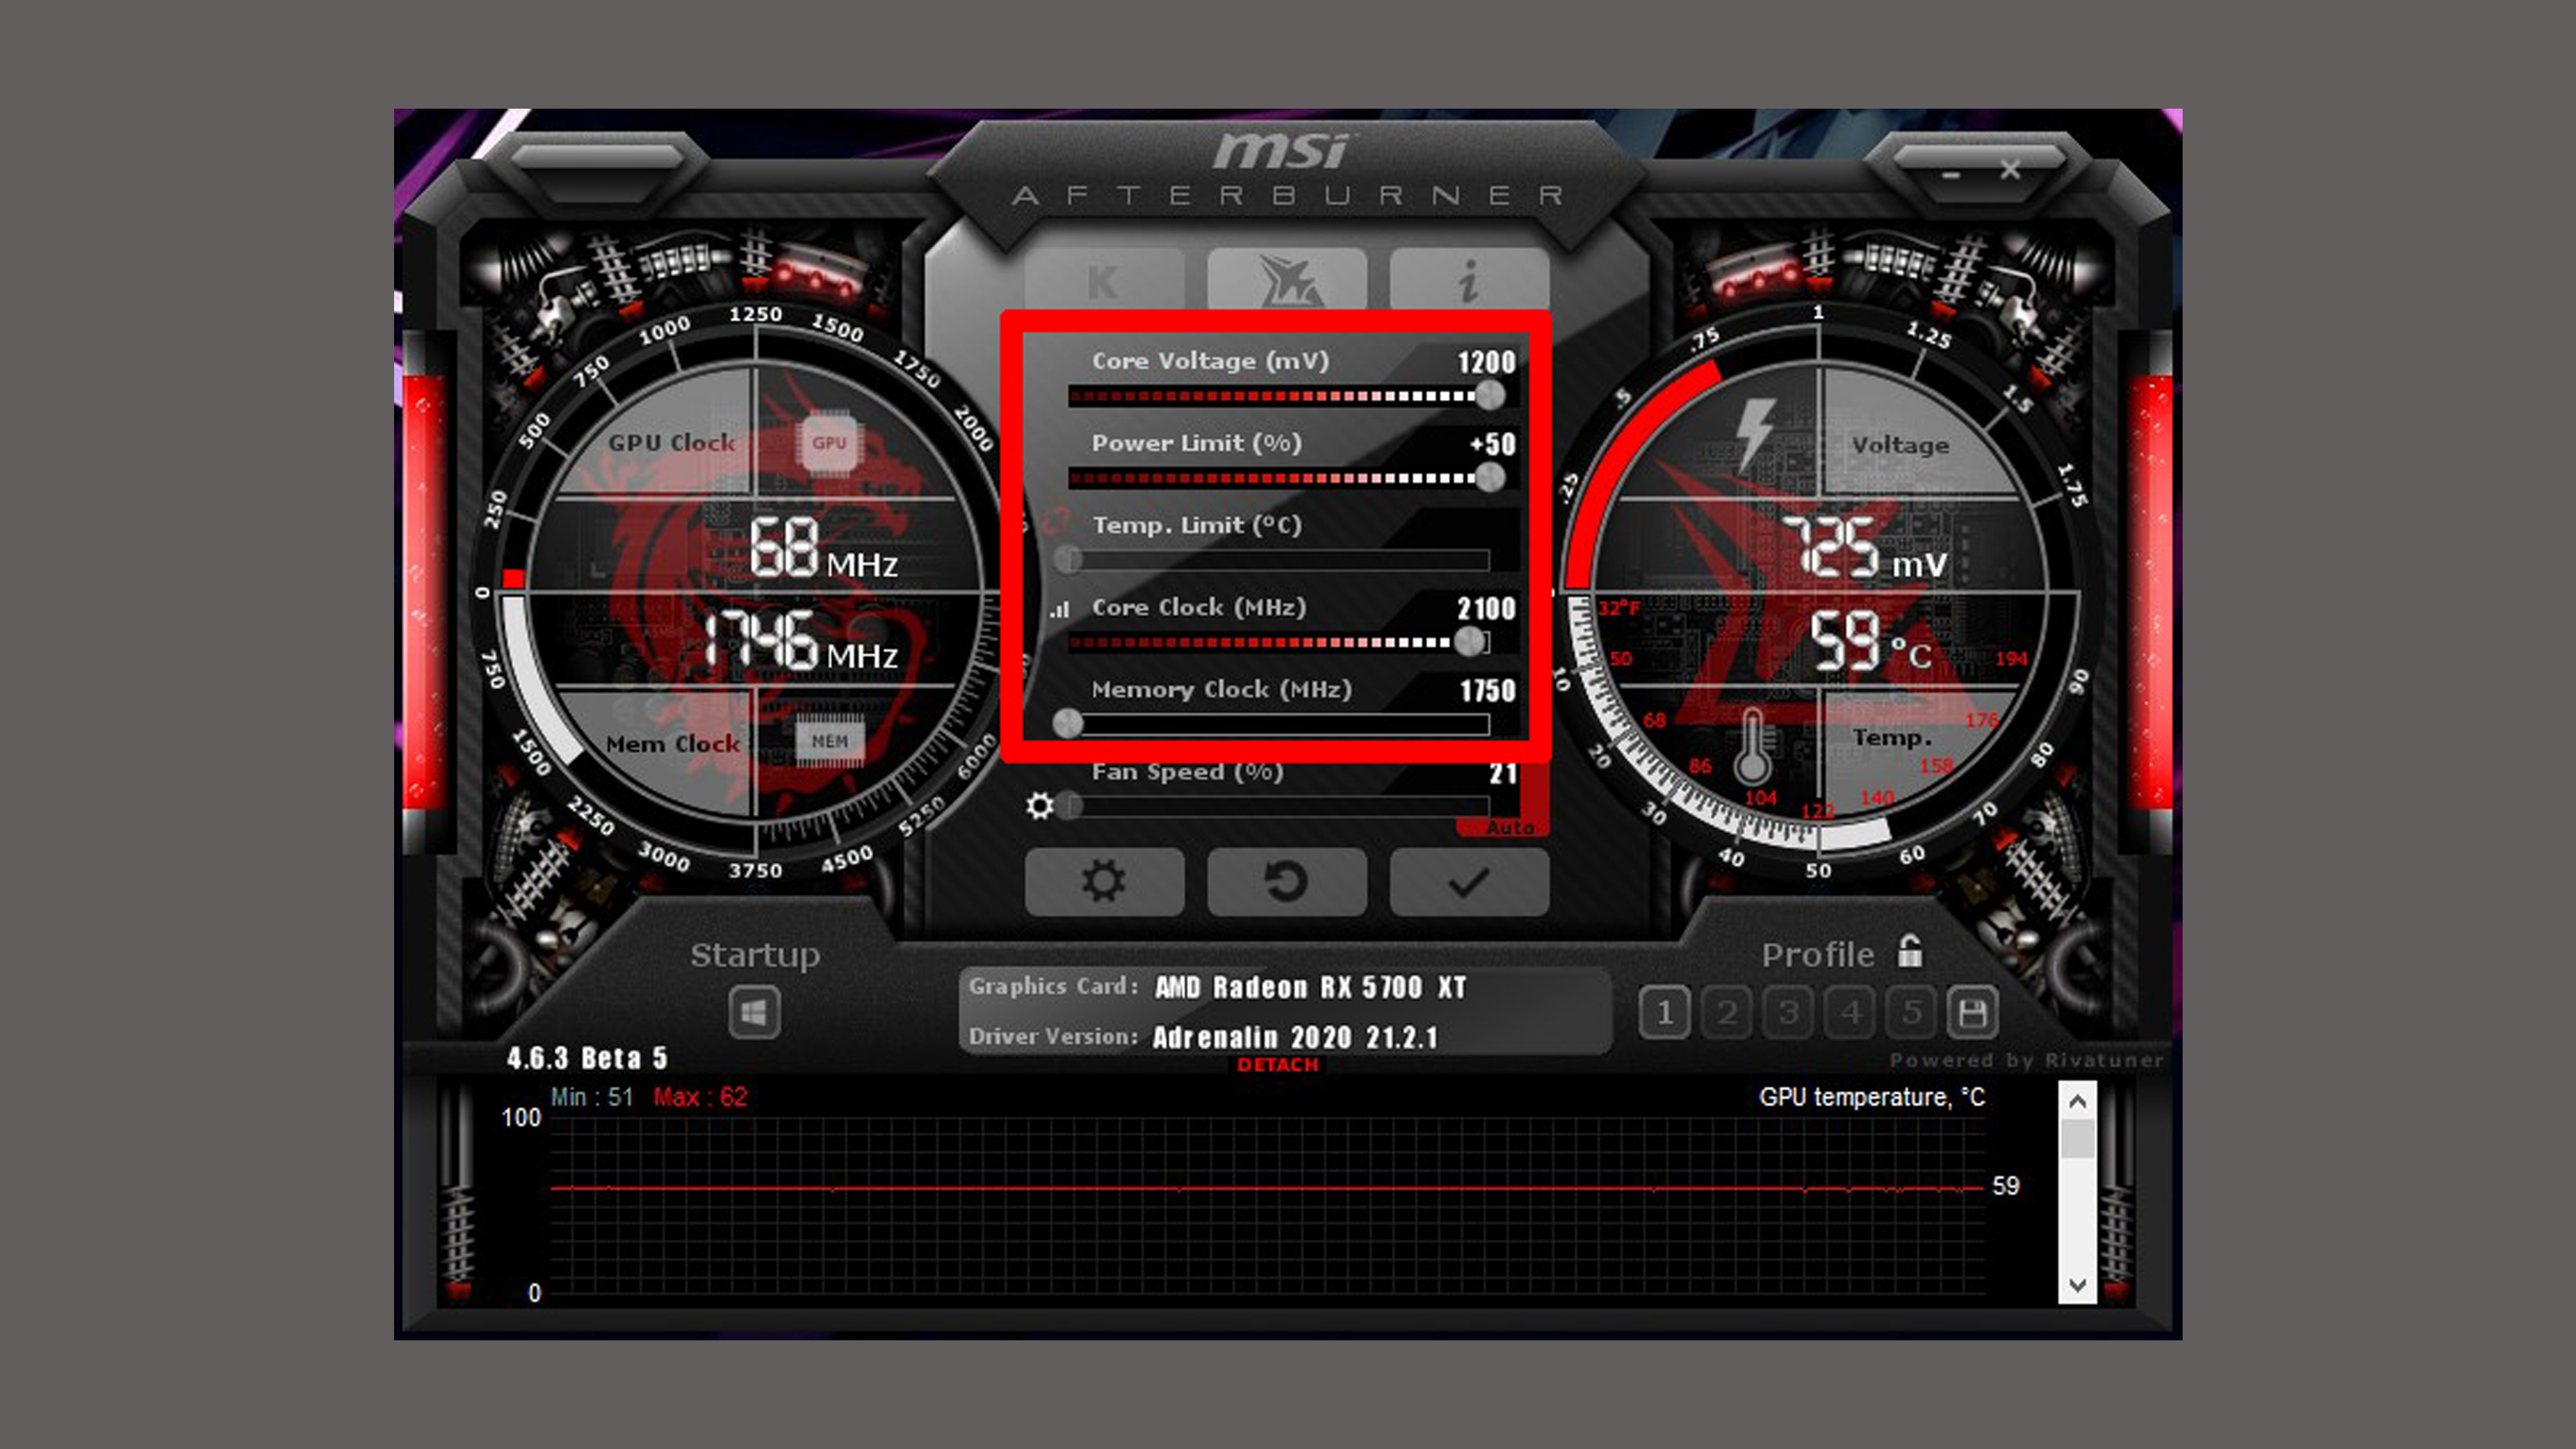
Don’t worry about having these bars full - these will just be the absolute limits within which OC Scanner will be allowed to work, and those maximum limits are preset by the GPU manufacturer so as to still be safe.
Next, click the ‘OC’ icon at the top left corner of Afterburner.
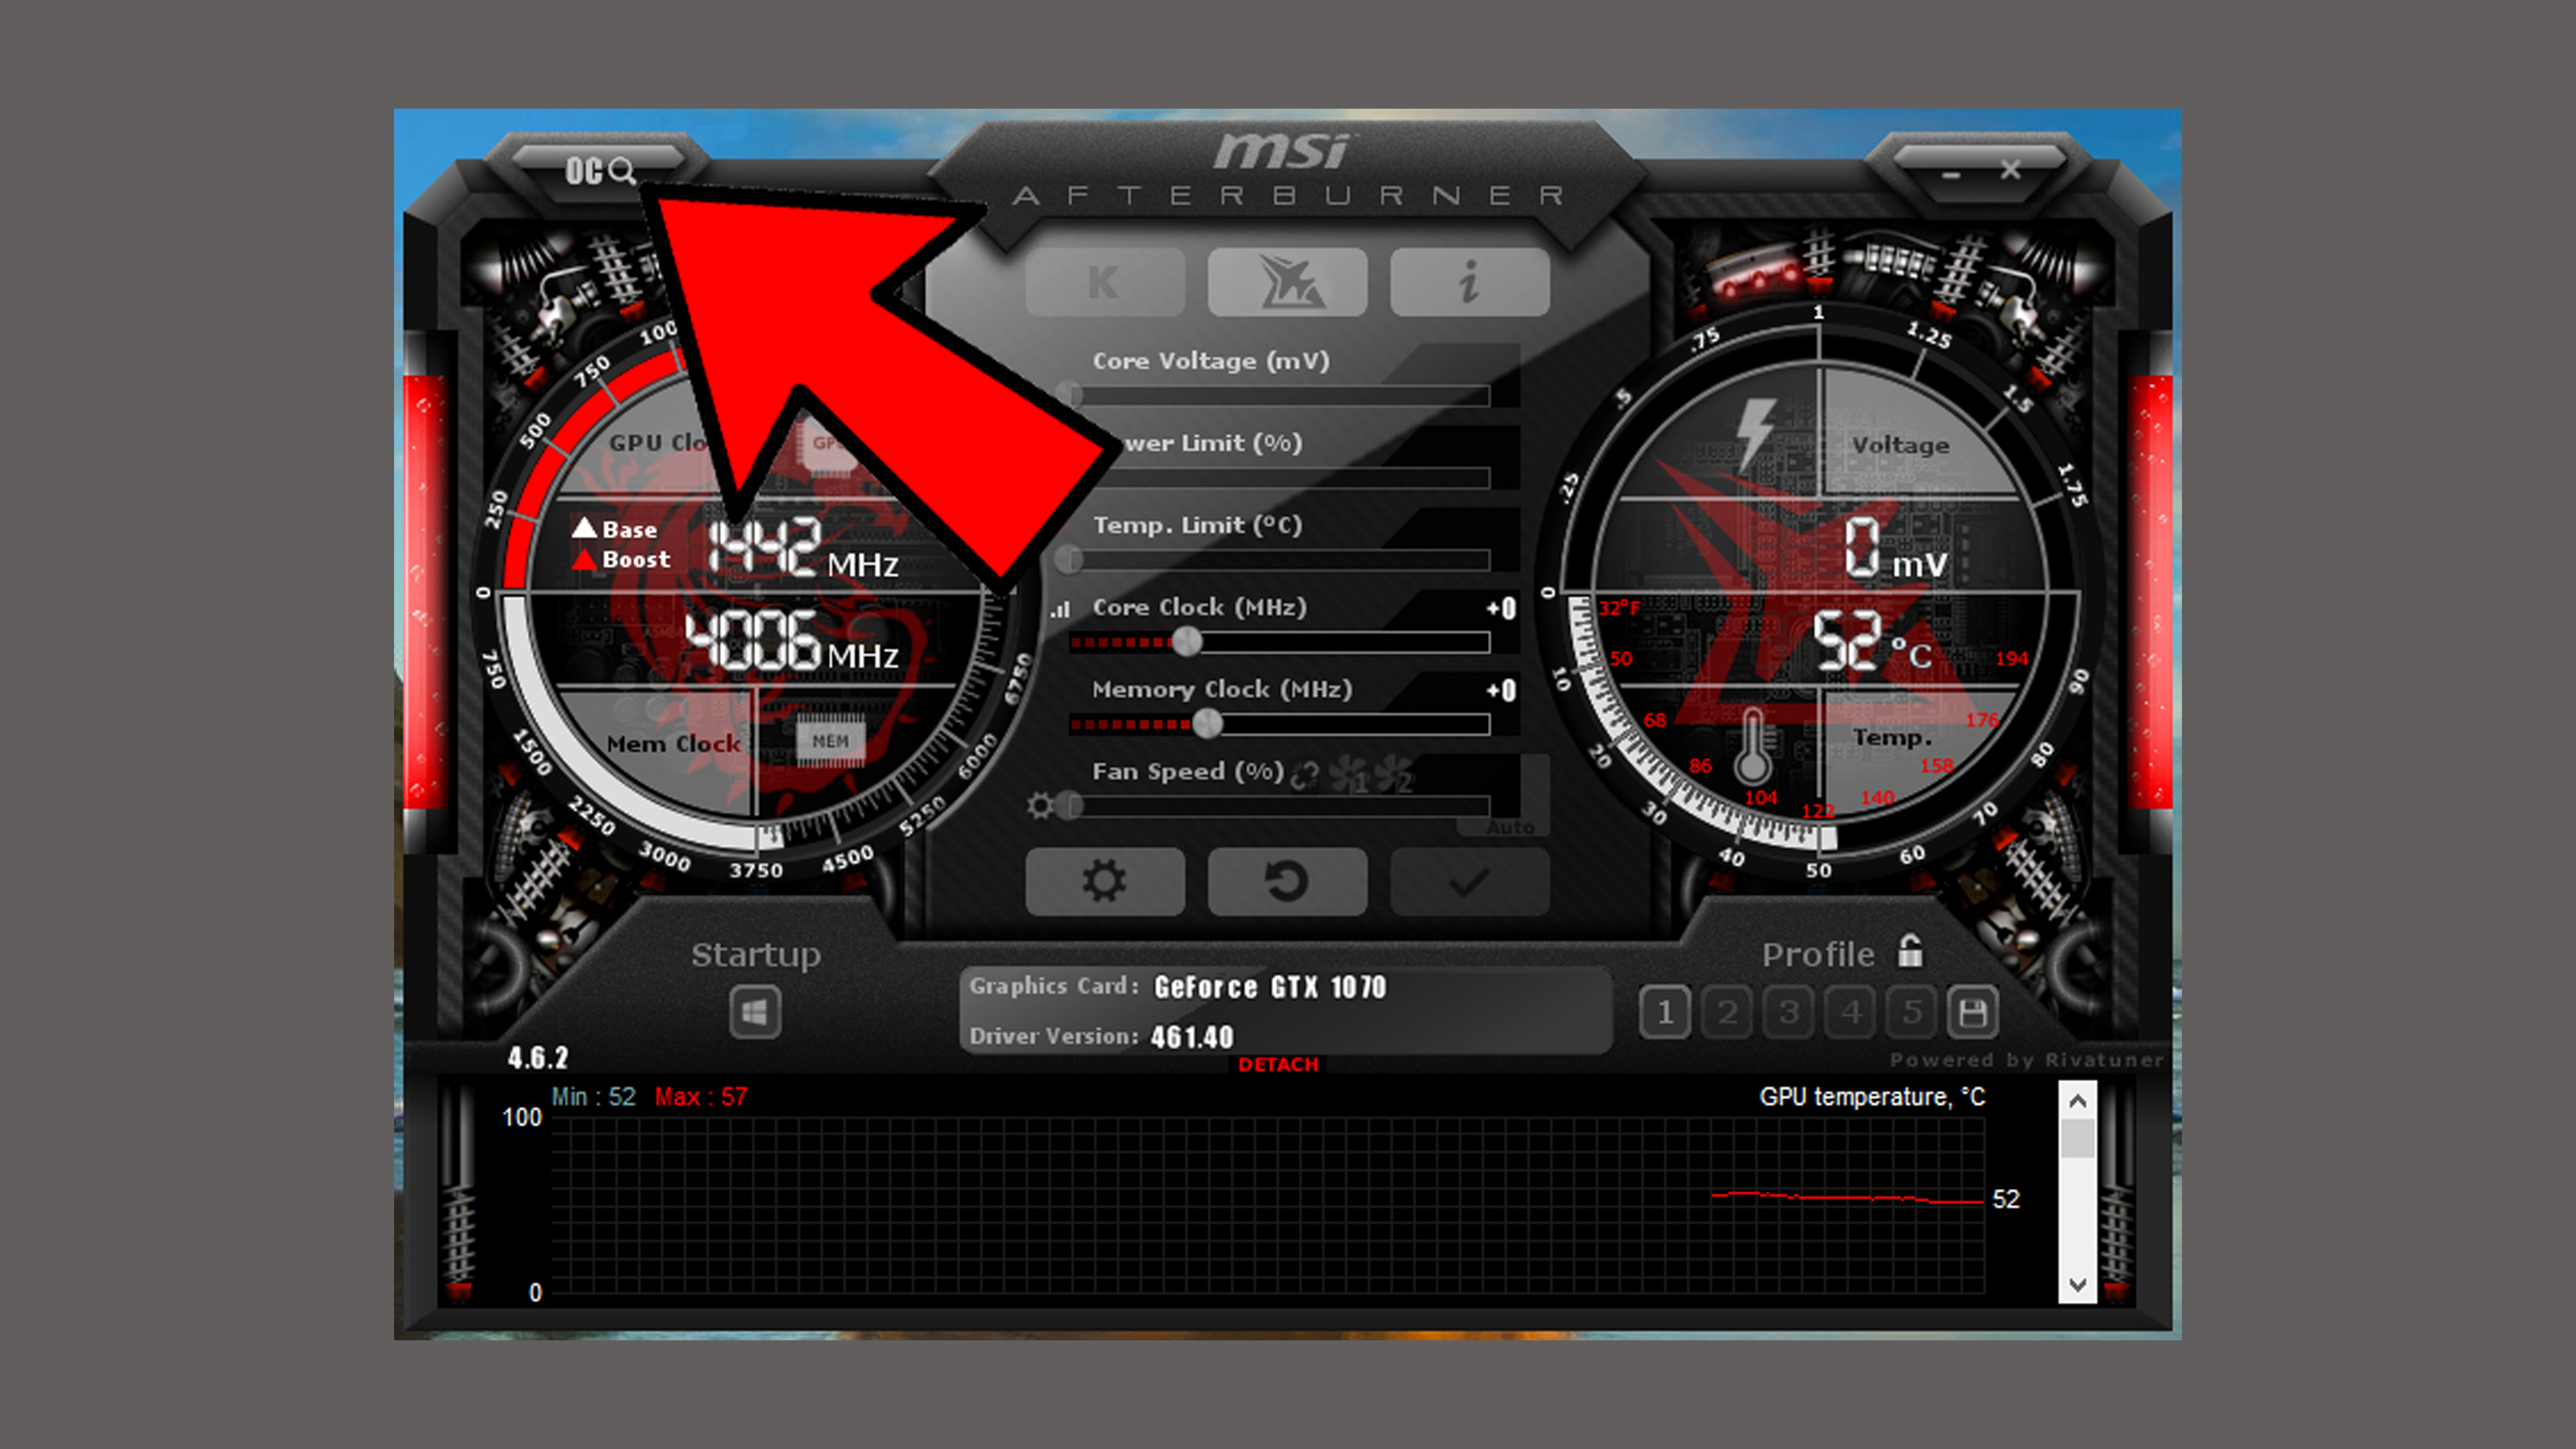
In the OC Scanner window, click Scan. This will run a 15-minute test to work out the highest stable overclock your GPU can safely handle.
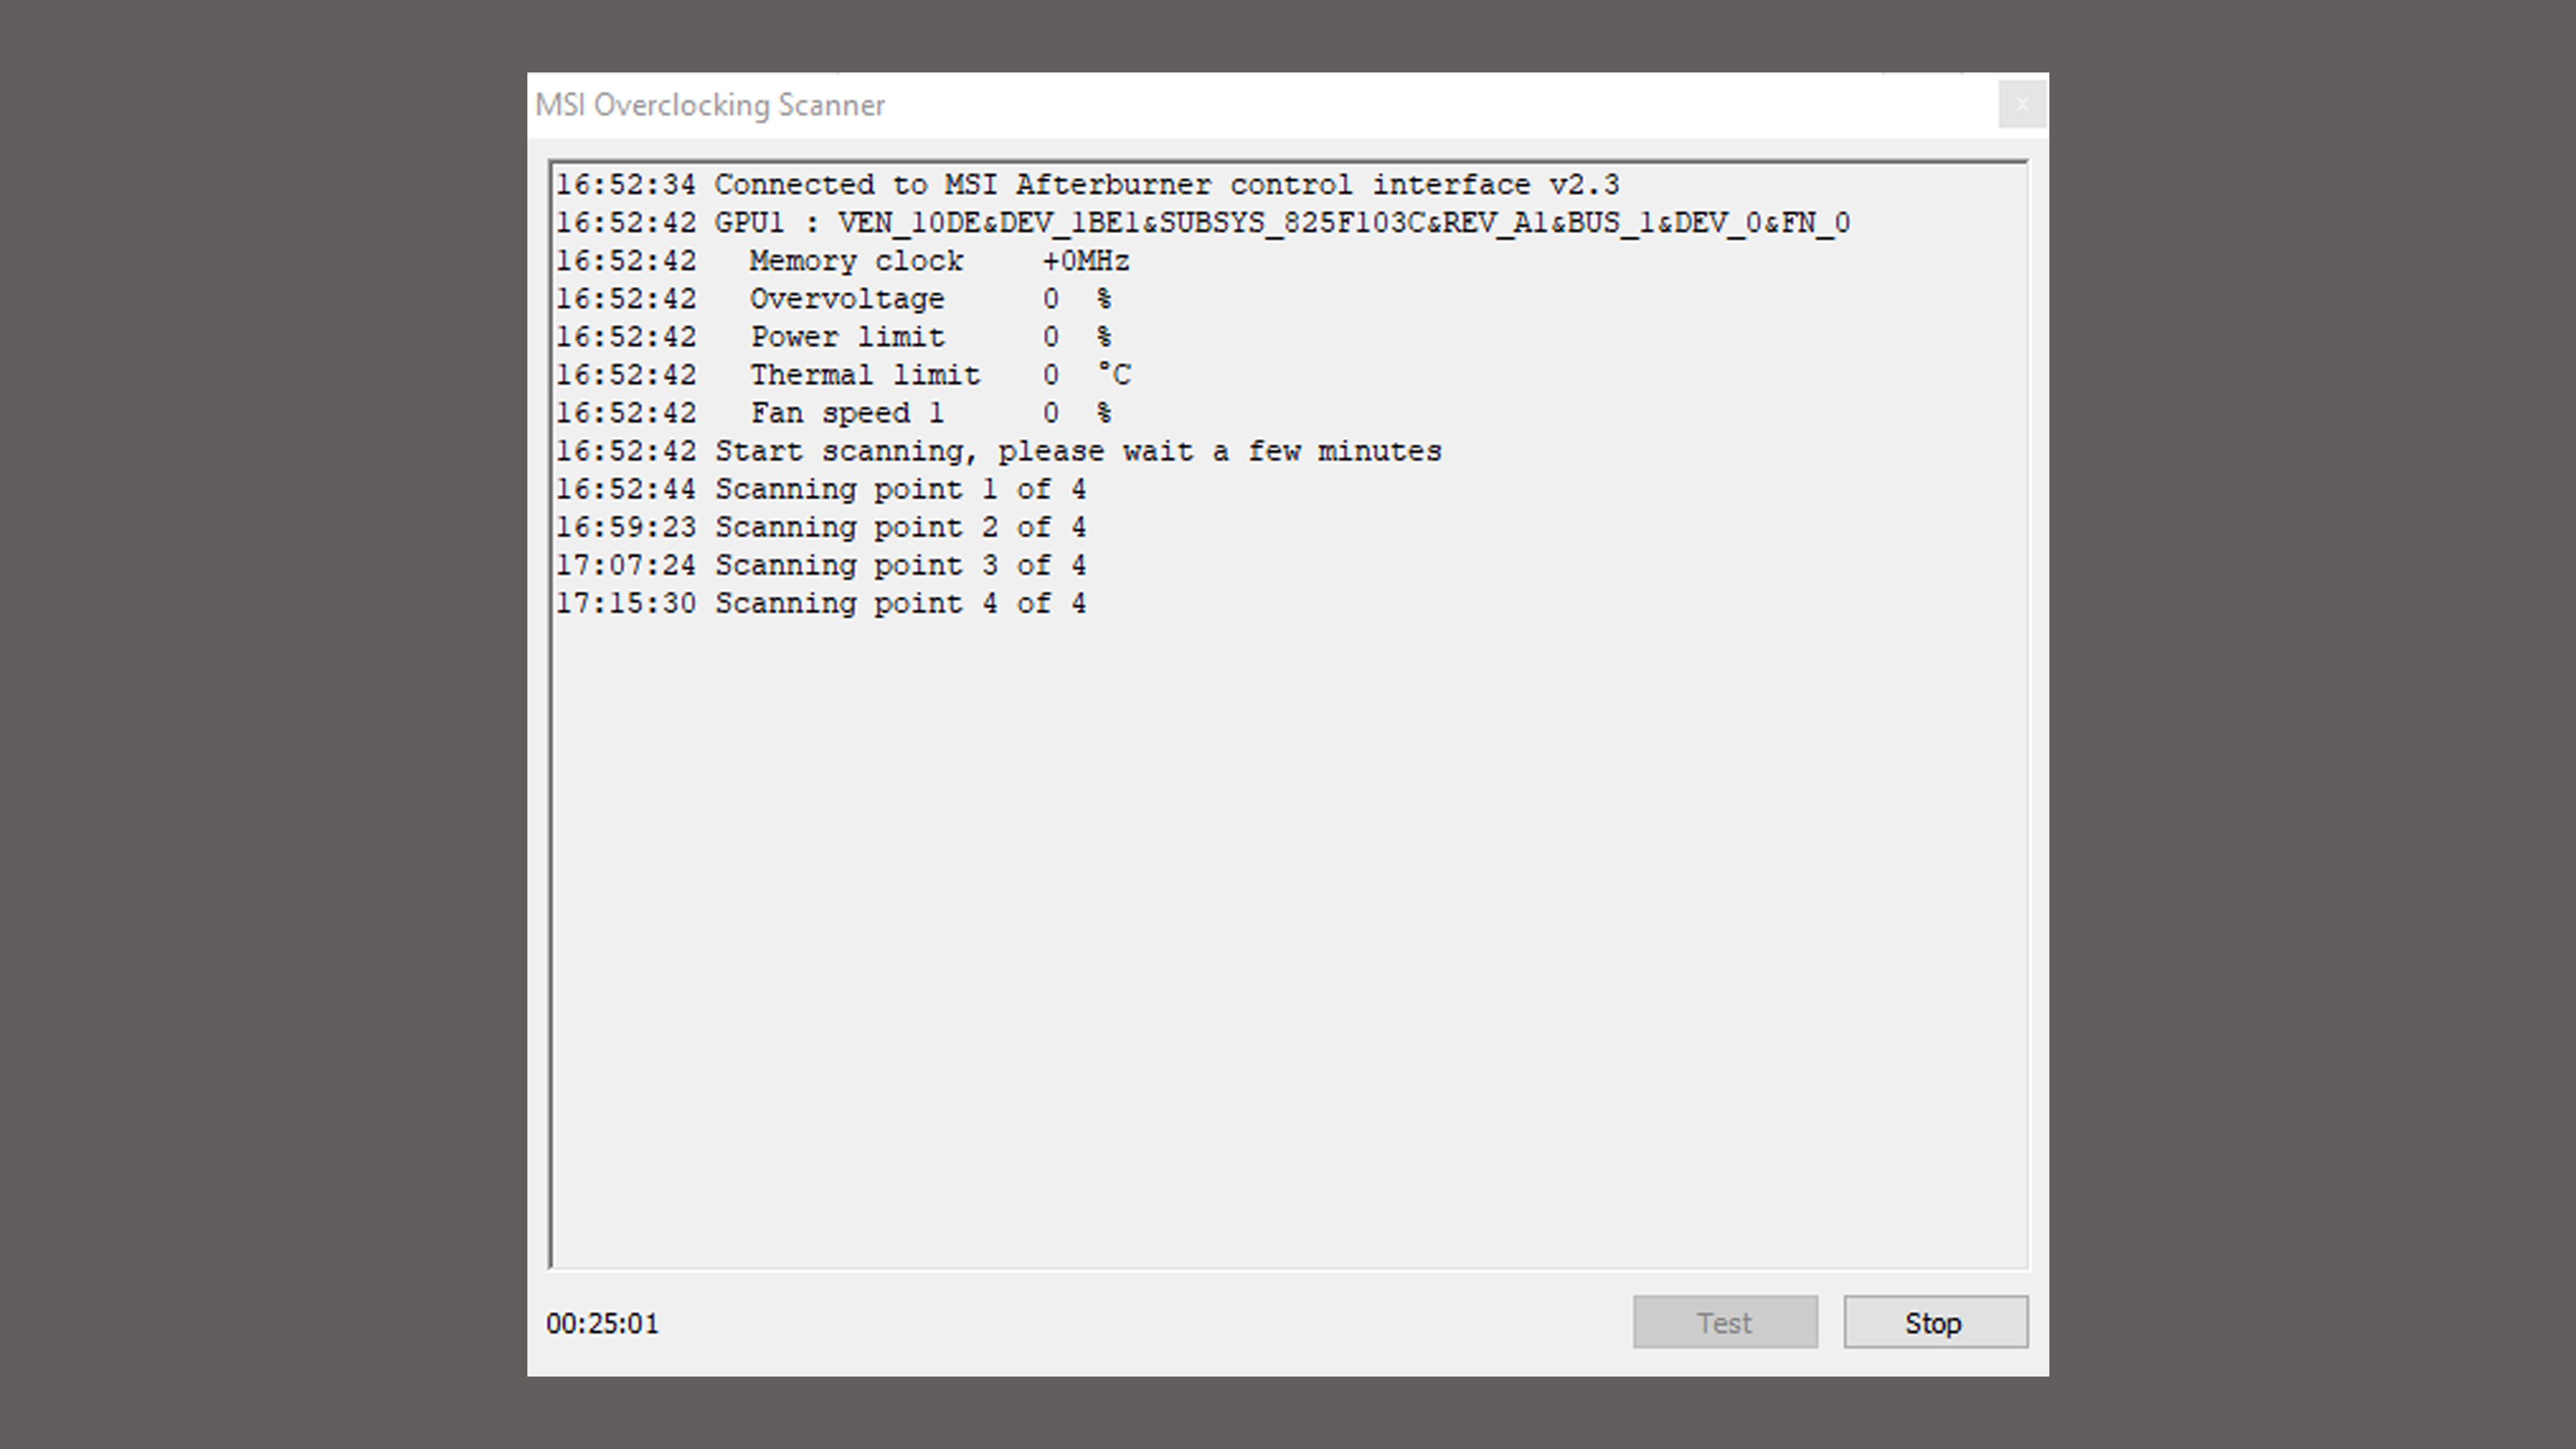
After the test, the Core Clock slider in the main Afterburner window will now display ‘Curve’, indicating that OC Scanner has implemented a frequency/voltage curve preset that will safely overclock your graphics card.

You should also run the ‘Test’ function through OC Scanner, which will test your overclock’s stability, and even give you a ‘confidence level’ indicating how reliable that result is.
Once you’ve run the test and are happy with the result, back in the main Afterburner window click the ‘Apply’ button to apply OC Scanner’s recommended overclock curve. Finally, save this under its own profile by using the Save icon.
Remember that you should still monitor the temperatures and stability of your GPU after you’ve done this, which you can easily do if you set up the OSD.
In-game benchmarking
If you want to test the in-game performance of your overclocks or graphics settings, you can use Afterburner’s built-in benchmarking tool.
Go to Settings -> Benchmark. Here you can create hotkeys to begin and end recording, and select the location and name of the results file.
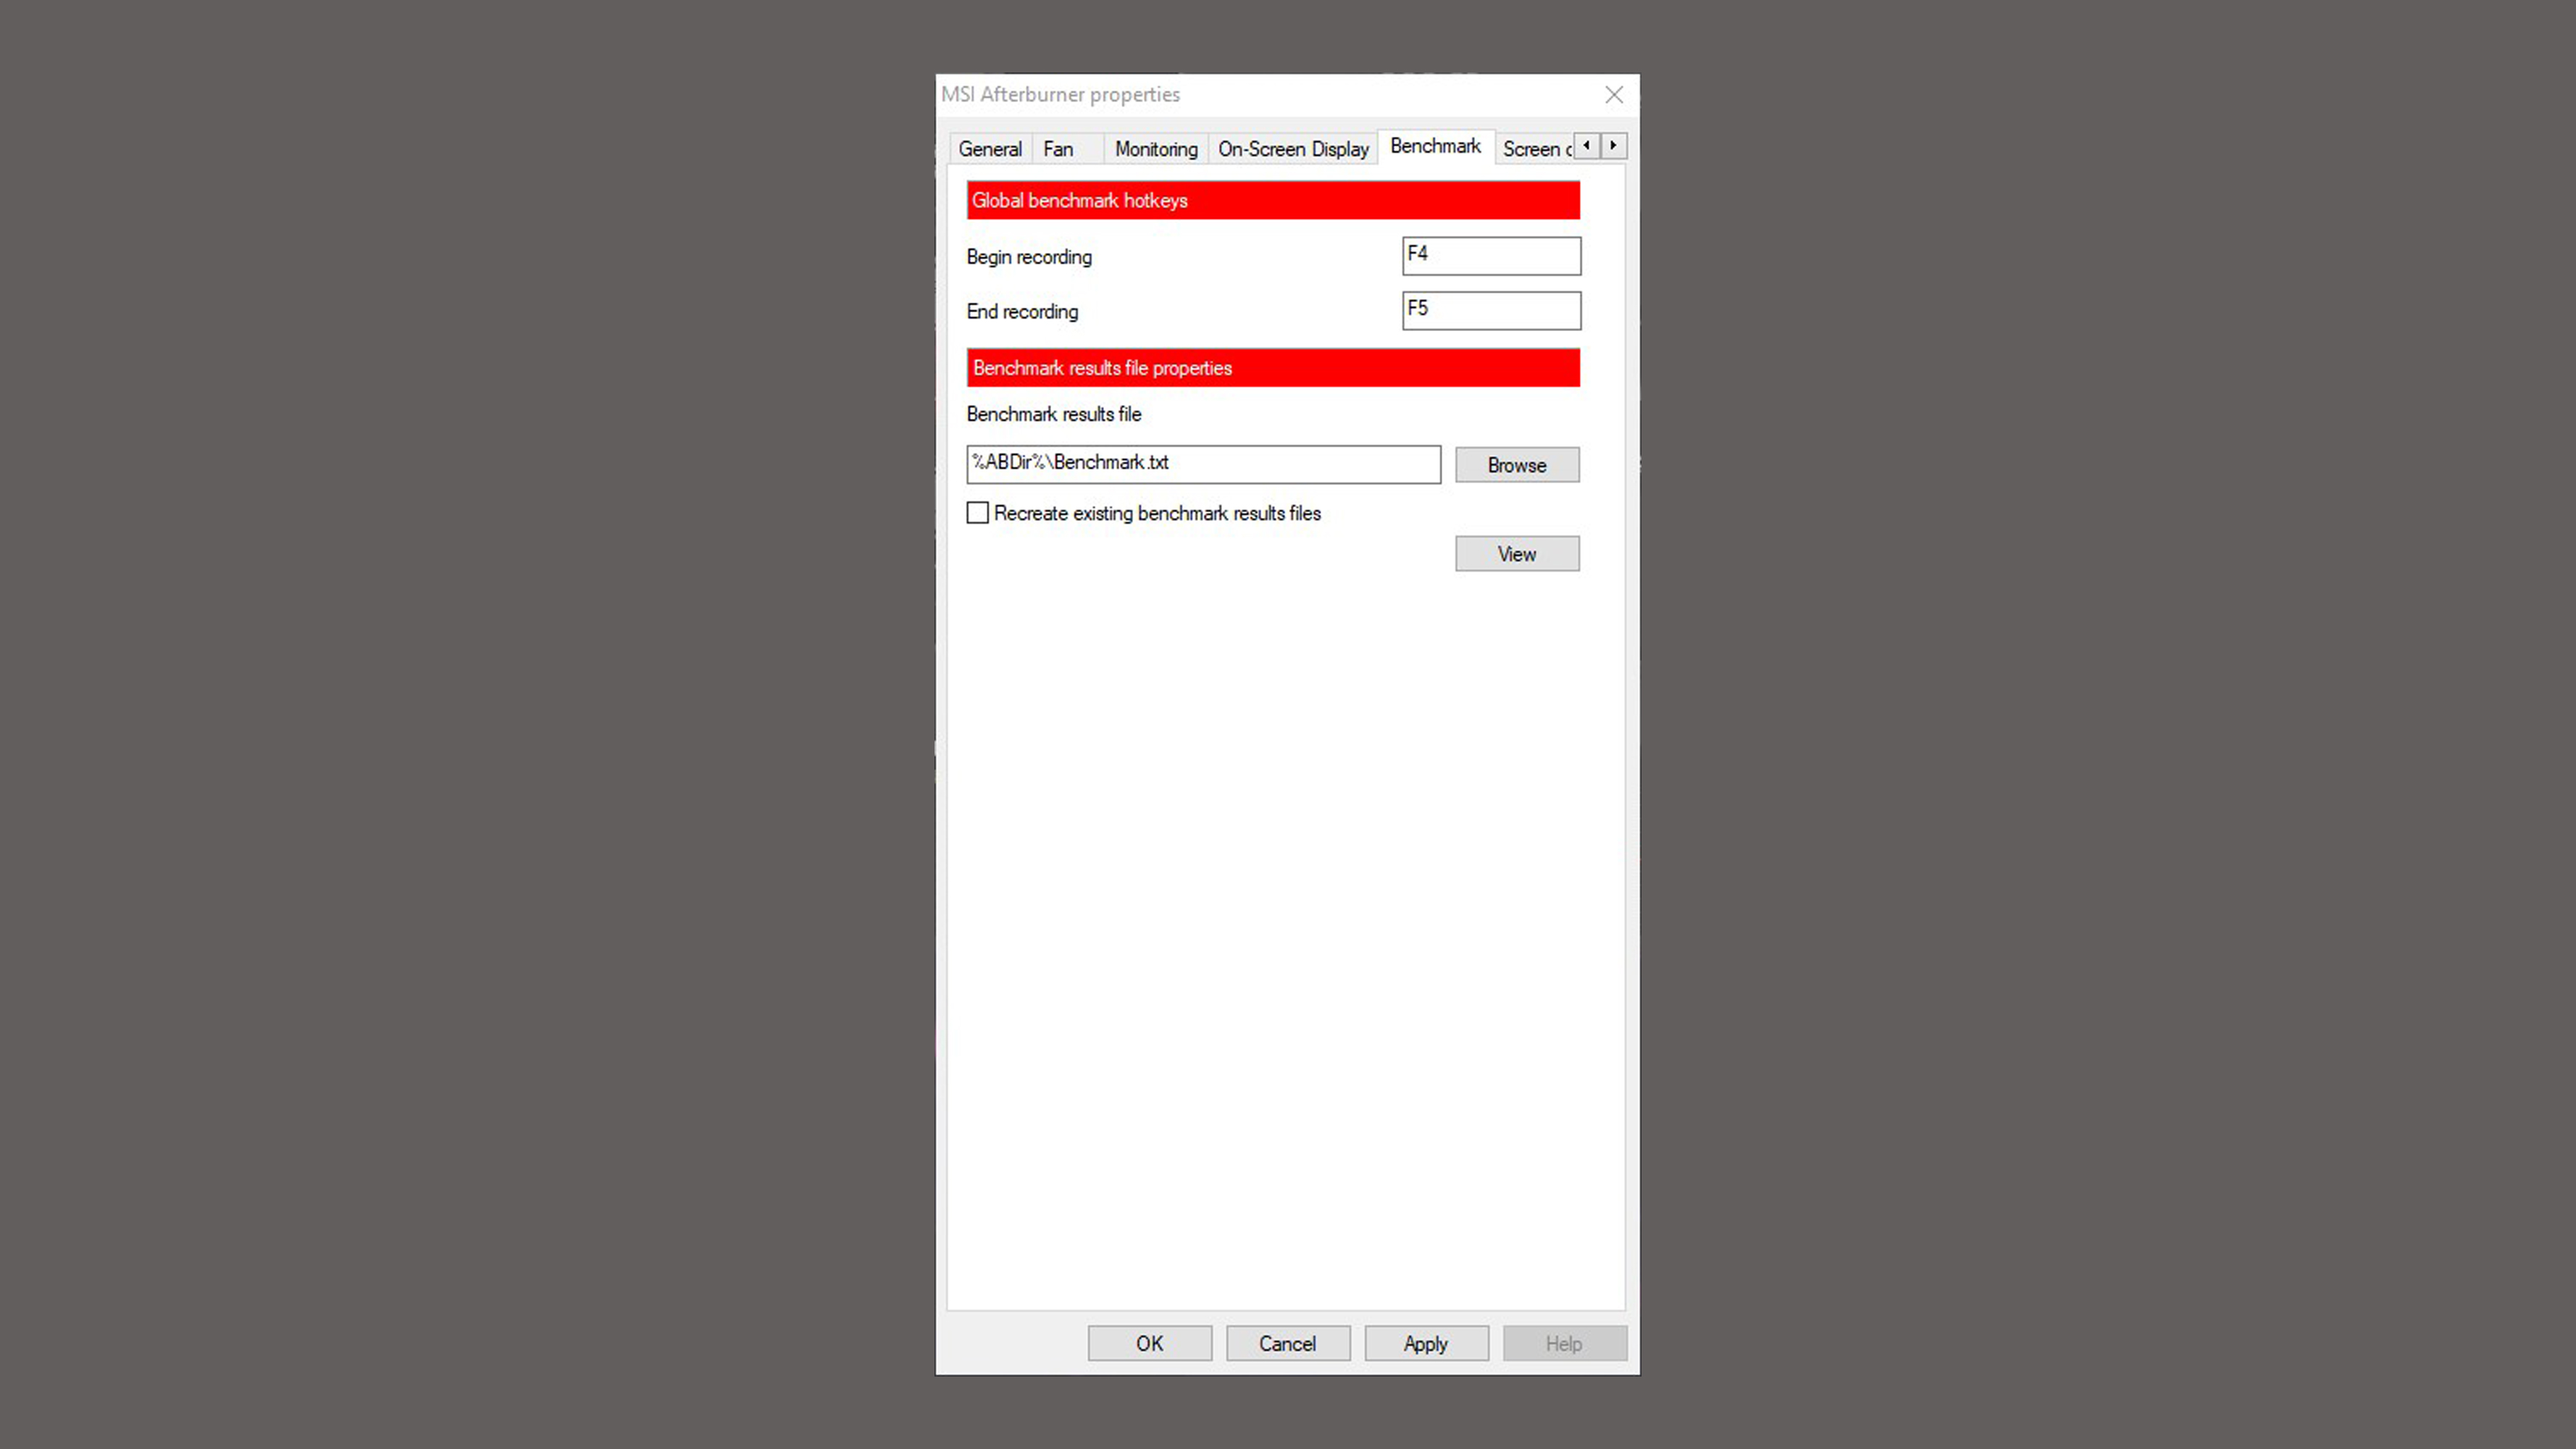
Next, open the game you’d like to use for the benchmarks, then press your ‘Begin recording’ hotkey. When you’re done, hit your ‘End recording’ hotkey.
- We have an in-depth guide on how to overclock your GPU
Robert Zak is a freelance writer for Official Xbox Magazine, PC Gamer, TechRadar and more. He writes in print and digital publishing, specialising in video games. He has previous experience as editor and writer for tech sites/publications including AndroidPIT and ComputerActive! Magazine.
