How to install and set up WordPress
Build a professional website with the world's most popular CMS

If you're looking to start a website, WordPress is a content management system (CMS) that allows you to build a website or blog from scratch, or improve an existing website. It is free and open source software released under the GPL.
WordPress is used by millions of people around the world, including many large organizations, such as The Guardian, Forbes, and The New York Times. Despite the abundance of brand new website builders and content management systems, WordPress remains the most popular choice for webmasters.
So, how do you get started with WordPress? The first step is to install the platform on your web hosting account.
This guide will show you how to install WordPress using different methods.
How to install WordPress with Hostinger
First, head over to Hostinger and select the web hosting plan that's right for you. Once you've chosen your plan, create an account by entering your email address and choosing a strong password. Then, select your preferred payment method and complete the checkout process.
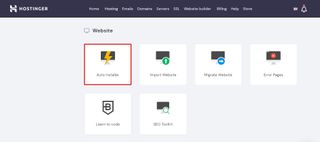
Next, you’ll need to install WordPress. Log into your hPanel dashboard and scroll down to the 'Website' section. Then, click on the 'Auto Installer' icon and select WordPress from the list of scripts.
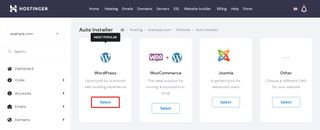
On the next page, enter your domain name, choose a username and password for your WordPress account, and select a language for your site. Finally, click 'Install' and wait a few seconds for the process to complete.
Are you a pro? Subscribe to our newsletter
Sign up to the TechRadar Pro newsletter to get all the top news, opinion, features and guidance your business needs to succeed!
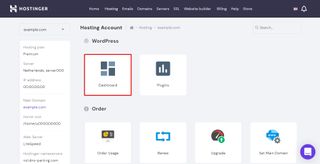
By now, the WordPress dashboard should show up on the screen. Depending on the hosting plan, you may see some pre-installed plugins, such as LiteSpeed Cache to boost performance.
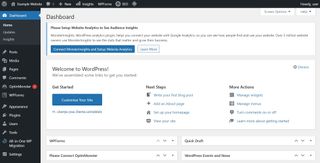
To log into your site's admin panel, simply add '/wp-admin' to the end of your domain name (e.g., example.com/wp-admin) and enter your chosen username and password. From here, you can start customizing your site to match your unique style and personality.
How to install WordPress with Bluehost
Bluehost is a US-based company with robust WordPress site hosting plans. It has a marketplace full of custom themes and plugins for its clients, making it easy to find any extension you might need. The subscriptions start from $3.95/month.
Here’s how to install WordPress with Bluehost:
First, sign up for a Bluehost account. You can choose from several different plans, but we recommend the Basic plan for most users.
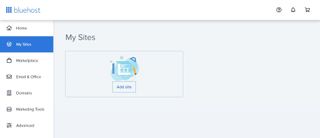
Once you've signed up for an account, log in to your Bluehost control panel and click on the "website section". Next click on the "Install WordPress" icon.
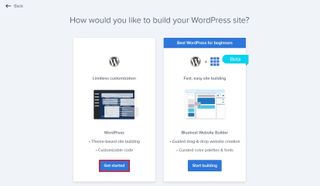
On the next screen, select the domain name where you want to install WordPress and click "Check Domain".
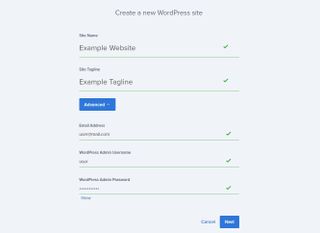
Now that you've selected your domain, it's time to choose a theme for your WordPress site. Bluehost offers a few free themes, or you can choose from the many themes available in the WordPress theme directory.
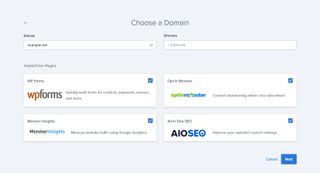
Once you've selected a theme, it's time to start adding content to your WordPress site. You can create new pages and posts, add images and videos, and more. Be sure to check out the Bluehost Knowledge Base for more information on using WordPress.
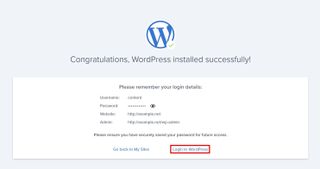
Click Login to WordPress to sign in to the dashboard. Alternatively, return to the My Sites tab from Bluerock and view the site you’ve created.
How to install WordPress with HostGator
HostGator is one of the most budget-friendly web hosts on the market. The most affordable plan costs $2.75/month and includes a free domain name, unmetered bandwidth, unlimited disk space, and Google Ads credits for launching an online business.
To install WordPress with HostGator, simply go to their website and fill out your information in the signup section. Once you have completed and submitted your information, you will receive an email from HostGator with your login credentials.

Now that you have your login credentials, you can begin the process of installing WordPress. First, you will need to log into your HostGator account and navigate to the "My Accounts" page. From there, click on the "WordPress Installer" link under the "Advanced Features" section.
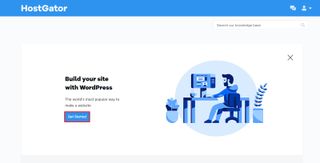
On the next page, you will be asked to select which domain you would like to install WordPress on. After making your selection, click on the "Check Domain" button.
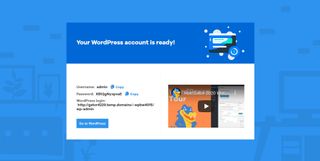
Once your domain has been checked, you will be taken to the next page where you will be able to choose your WordPress settings. Be sure to fill out all of the required fields and then click on the "Install WordPress" button.
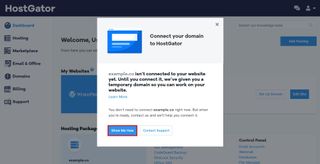
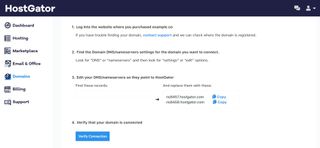
- Those who buy the domain on another provider will have to replace their current nameservers with the one provided by HostGator, shown at the bottom of the page. Copy this information, log in to your domain registrant account, and paste it into the DNS settings.
- Return to this page and press Verify Connection. Wait between 24 and 72 hours for the DNS propagation to complete.
How to install WordPress using cPanel
Some hosting providers don’t offer an automatic WordPress installer like the ones we’ve mentioned. However, there’s still an easy way to install WordPress if the host offers cPanel.
cPanel is a widely-used control panel for web hosting management. Depending on the hosting service, it usually has a built-in app installation script that you can use to install WordPress and other CMSs. Some popular examples are Softaculous, Fantastico, or QuickInstall.
If your cPanel is version 92 or up, use WP Toolkit instead. This is a new in-app feature from cPanel, allowing any user to install, configure, and manage a WordPress website.
The steps are more or less the same with all app installers, though we’ll use Softaculous as an example.
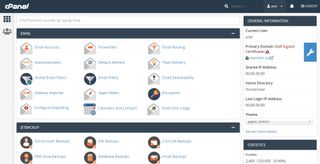
Open cPanel from the hosting account interface. Alternatively, type in your domain name on the web browser and add /cpanel at the end.
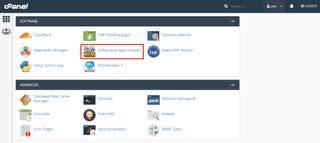
Scroll down to locate the apps installer icon.
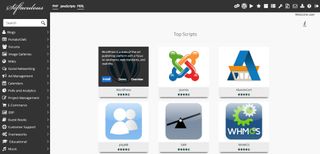
Next, hover over the WordPress icon and click Install.
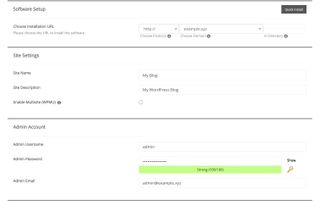
Fill in the required information for the site settings and admin account. It’s also possible to configure the automatic upgrade and backup settings. Once done, press the Install button down below.
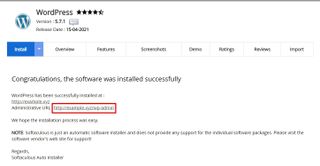
Wait for a few minutes to complete the installation. Then, click on the link provided to access the WordPress dashboard.
How to install WordPress manually using FTP
Locate your FTP account information
The first step to installing WordPress manually is to find your FTP account information.

It’s usually available in your hosting management dashboard on a page typically called FTP Accounts or FTP Manager.
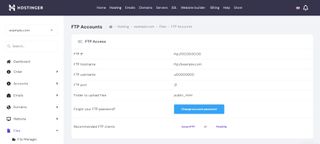
Click on the page to see the account credentials. If you don’t know the password, consider changing it. Keep this tab open.
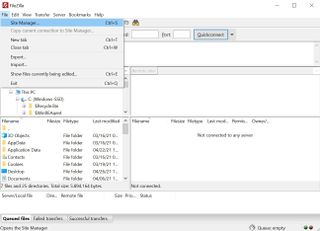
Now, open your FTP client and connect it to your web server. Those using FileZilla can go to File -> Site Manager… on the top menu.
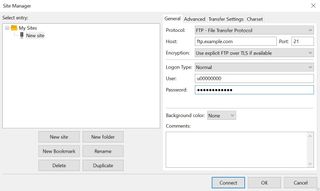
On the window, click New Site. Fill in the FTP account information in the appropriate fields. For the Protocol, select FTP - File Transfer Protocol. Choose to Use explicit FTP over TLS if available for the Encryption. Set the Logon type to Normal.
Finally, press the Connect button.
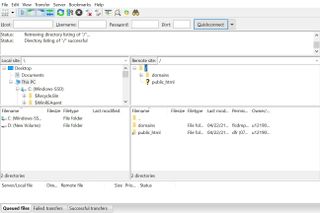
After establishing the connection, the application should look like the picture above. The Local Site panel shows your computer files, while the Remote Site displays the ones inside the WordPress site.
Upload the WordPress files
With the connection established, you can start installing WordPress by transferring the package files to the web server.
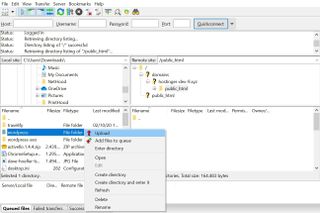
On the Remote Site panel, select the public_html folder. This is the root directory of all the website files.
Then, on the Local Site section, find the extracted WordPress files on your computer. Select all and right-click to Upload them to the public_html directory. Then simply wait for the transfer to complete before moving on to the next step.
Create a new database
Let’s create a database to store all of your WordPress site content.

To do this, log in to your hosting account’s control panel and locate a button that allows access to the MySQL Database. In Hostinger, this setting is available under the Databases section.
The page should have a section where you can create a new MySQL database and user. Fill in the required fields:
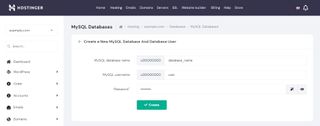
- Database name
- Database username
- Database password
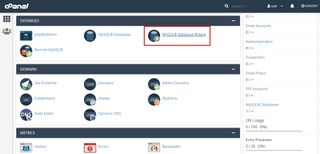
Those using cPanel can create a database by using the MySQL Database Wizard. The required fields are the same as in the previous example.
Configure the wp-config.php file
wp-config.php holds information about the website’s database. You need to configure this file so that WordPress can communicate with the newly-created database and retrieve data from it.
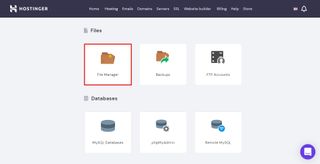
The wp-config.php file is usually accessible from the File Manager on the web host’s control panel, which is where you can organize and edit the website files.
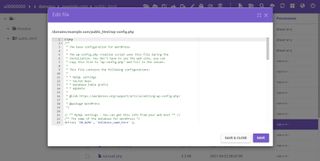
From there, open the public_html web directory. Then locate the wp-config-sample.php file. Rename this to wp-config.php, then open it.
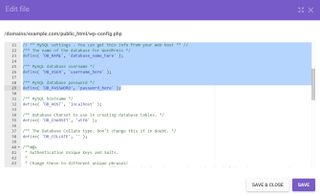
Scroll down until you find the information highlighted above.
Replace the database_name_here, username_here, and password_here with the database information you created in the previous step. Once done, press Save.
Run the WordPress installation script
The WordPress installation can now begin. Type in the website’s domain on the web browser to access the setup page.
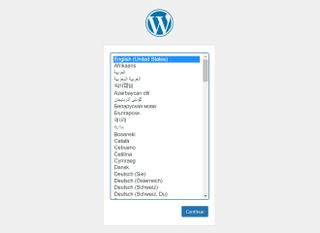
First, select a language to use the software and press Continue.
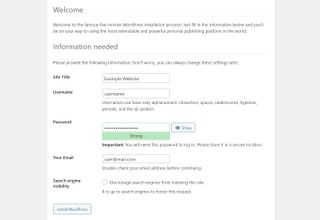
Next, insert the required information about the website and the administrator login credentials. Then click the Install WordPress button.
The WordPress sign-in page will appear. Use the login credentials you created, and the admin panel will show up on the screen. If everything went well, you’ll have just installed WordPress manually.
How to configure permalinks on WordPress
If you're running a WordPress site, there's a good chance you'll want to change the way your permalinks are configured. By default, WordPress uses what's called "ugly" permalinks, which look something like this:
?p=123
While these permalinks work just fine, they're not very user-friendly or SEO-friendly. There are a few different ways you can go about changing your permalink structure. The easiest way is to simply go to Settings > Permalinks in your WordPress dashboard and select the desired permalink structure from the list of options.
If you want to change your permalink structure to something that's not on the list, you can do so by selecting the "Custom Structure" option and entering the desired structure in the field provided. Just be sure to use the proper code for each element of your permalink (e.g. %postname% for the post slug).
Once you've selected or entered your desired permalink structure, simply click "Save Changes" and WordPress will take care of the rest. That's all there is to it! In just a few seconds, you can have much more user-friendly and SEO-friendly permalinks on your WordPress site.
There are a few things to keep in mind when changing your permalink structure. First, if you're using an "ugly" permalink structure (?p=123), changing to a different permalink structure will result in 404 errors for all of your existing content.
To avoid this, you can use a plugin like Redirection to set up redirects from your old URLs to your new ones. Alternatively, you can simply update your .htaccess file with the proper redirect rules.
Second, be sure not to change your permalink structure too frequently. Doing so can result in a loss of traffic and search engine rankings. If you do need to change your permalink structure, make sure you set up redirects from your old URLs to your new ones.
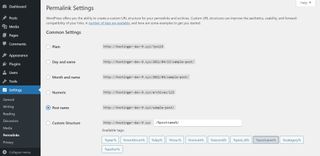
To change the URL structure on WordPress, go to the Settings -> Permalinks tab on the dashboard.
Choose one of the structures provided. The best practice is to use the Post name as it’s short yet descriptive, though it may not be suitable for a news publication. Some also create a custom structure using the category and post name variables to show the user their location on a website.
After picking a URL structure, scroll down to Save Changes.
Which WordPress installation method is best for you?
There are a few things to consider when deciding which method is best for you. If you are new to WordPress, we recommend using the SiteGround Wizard to install WordPress. The SiteGround Wizard makes it easy to install WordPress with just a few clicks. If you are experienced with WordPress, you may want to use the manual installation method. The manual installation gives you more control over the installation process and allows you to fine-tune your settings.
Another thing to consider is whether or not you want a fresh WordPress install or if you want to migrate an existing site to WordPress. Migrating an existing site can be done with either the SiteGround Migration Plugin or by manually exporting your content from your old platform and importing it into WordPress.
- One-click installer via hosting provider - It’s the most effortless way to install WordPress, only requiring a few clicks and a form to fill in.
- cPanel with an apps installer - Use this method if the hosting provider uses cPanel, but doesn’t offer a built-in one-click WordPress installer. The process is just as fast and easy as the previous one.
- Install WordPress manually using FTP - This option is best if the previous methods aren’t available or if you don’t want to get any pre-installed plugins. The process is longer and much more involved, so it’s important to pay attention to the instructions.
Next steps
Now that you know how to install WordPress, all that’s left to do is turn your website into reality. Choose a web hosting company, initiate the software installation, configure the permalinks, and pick some themes and plugins to customize the site.
Make sure to follow our WordPress site tips to set yourself up for success, such as installing an SSL certificate and submitting your website to Google Search Console. These two, in particular, can boost your likelihood of ranking high on search engine results pages.
- We've also rounded up the best website builder
Ruby has been a freelance technology writer for over four years and has a passion for information technology and the Internet in its entirety. She has a wide range of specialities including web hosting, streaming (Firestick, Kodi, and APKs), VPN, information technology, and affiliate marketing. Ruby is a graduate of Bachelor of Science in Commerce from the University of the Philippines, and regularly codes in her free time.
Most Popular


