77 photography tips and tricks for taking pictures of anything
There's a lot to sink your teeth into
Landscape photography techniques, tips and tricks
Tip 1. Using ND grads, strong Neutral Density filters and polarizers
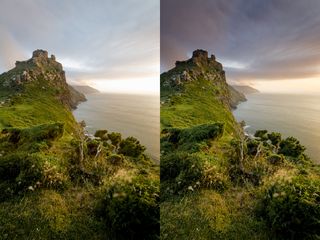
Landscape photographers often carry a range of filters to help them solve exposure problems or achieve an effect that's difficult to recreate in photo editing software.
Although HDR photography and exposure blending in Photoshop have reduced the need for ND grads in the field, solid ND filters and polarising filters still have their place in the landscape pro's camera bag.
Solid Neutral Density filters reduce the amount of light entering the lens, extending shutter speeds for long-exposure landscape photography.
Polarizer filters remove reflections from the surface of water and shiny leaves, and boost the contrast between blue skies and white clouds.
Both of these effects are tough to pull off authentically in Photoshop. They're also more fun to do in-camera…
Tip 2. Level horizons

Most of the time you'll want the horizon in a picture to be level. This is especially true if you're shooting seascapes, otherwise the water will appear to be running out of the frame.
Your camera's Live View screen has a grid overlay that can be activated in the menu to ensure horizons are level, and it may also have an electronic level display that can be superimposed over the image.
Get daily insight, inspiration and deals in your inbox
Sign up for breaking news, reviews, opinion, top tech deals, and more.
If your camera lacks these features, use the rows of autofocus points you can see in the viewfinder as a rough guide to keeping the horizon straight.
Tip 3. Hyperfocal focusing technique

Depth of field is an important consideration when photographing landscapes. It's often desirable to get as much of a view - from foreground details to the distant horizon - to appear as sharp as possible.
To increase the depth of field, choose smaller apertures and then manually focus at the hyperfocal distance. This is the point at which the depth of field will stretch from approximately half the hyperfocal distance to infinity.
The hyperfocal distance changes according to the focal length and aperture being used, so we'd advise using one of the many useful hyperfocal smartphone apps available to do the calculations for you.
- Learn more: Depth of field explained
Tip 4. Long lens landscapes

It's instinctive to reach for a wide-angle lens when photographing landscapes, but a telephoto lens is also an essential part of the creative landscape photographer's camera kit.
A telephoto lens enables you to compress the elements of a scene, making the foreground and background appear closer together than in a photo taken with an ultra-wide lens.
Zoom in with a long lens and mountain ranges will seem more tightly packed, trees in a forests more densely populated.
Telephoto lenses can also make it easier to compose landscape photos as they capture a narrower angle of view compared to wide-angle lenses. Being able to simplify a scenic often makes for stronger pictures.
Tip 5. HDR landscape photos
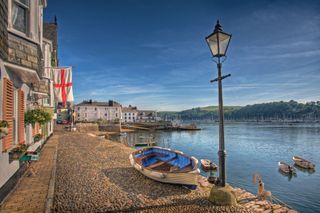
High Dynamic Range (HDR) photography enables you to capture detail in all areas of a picture - from shadows through to highlights - that you normally couldn't squeeze into a single picture.
HDR photography essentially involves taking a number of photos at different exposures - either manually or using your DSLR's autoexposure bracketing function - and then blending the best bits of each exposure into a single image.
Enthusiast and semi-pro DSLRs like the Canon EOS 5D Mark III and the Nikon D800 have built-in HDR photography modes that do the blending for you in-camera. However, for more control and flexibility, do it later in specialist software.
Tip 6. Long-exposure landscapes
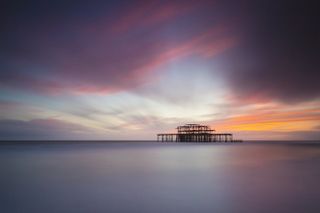
Using a long exposure to photograph a landscape will cause any moving elements to be recorded as motion blur.
Waterfalls, waves and trees on windy days will all add interesting movement to landscape photos if you use a shutter speed of several seconds to photograph them.
Getting a slow enough exposure usually requires a small aperture, low ISO and low light. However, you can also achieve this in bright daylight by attaching a Neutral Density filter to the lens.
ND filters come in a range of strengths, each blocking the amount of light that enters the lens by a different amount.
Strong ND filters, such as the Lee Filters Big Stopper, will allow you to use extremely long exposures on even the brightest days, creating long exposure photos that stretch for many minutes rather than being over in seconds.
A 10-stop ND filter like the Big Stopper or the B+W ND110 can enable you to turn a crashing sea into a milk-smooth millpond.
- Gear guide: Best ND filters: 6 top models tested
Tip 7. Tilt-shift landscapes
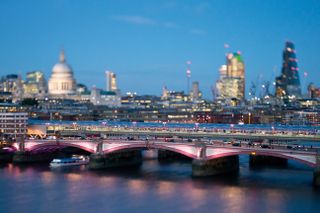
Tilt-shift photography enables you to combine the sharpness of large lens apertures with the extensive depth of field you normally associate with small apertures.
This is achieved by using a tilt-shift lens, which can be both tilted (to control the plane of focus) and shifted (to correct any converging verticals).
However, by tilting the lens to give an ultra-shallow plane of focus and, you can make landscapes look like miniature models.
The most convincing tilt-shift landscapes combine an element of hardware (trains, boats, cars) and a raised shooting position to mimic the view of looking down at toys on a bedroom floor.
Tilt-shift lenses are expensive though, so why not create a fake tilt-shift miniature photo in Photoshop? The results can be just as effective.
Tip 8. Black and white landscapes
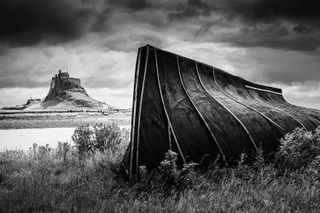
If you want to take great black and white landscape photos, shoot in color. By using your digital camera's raw picture quality setting rather than JPEG, you'll record a color image that you can convert to black and white later in photo editing software such as Lightroom or Photoshop.
Doing it this way means that you have full control over the black and white conversion, such as using dodging and burning techniques to make specific areas of the photo brighter or darker, split-toning the image or adding a color-popping effect.
Even though you're shooting in raw format, select the Monochrome picture style on your DSLR. This will give you a useful black and white preview of the image on the rear screen, even though you're recording a color image.
- Learn more: How to master black and white photography
Tip 9. Panoramas

Instead of using an ultra-wide angle lens to try and squeeze an entire view into a single frame, why not try shooting a panoramic landscape photo instead?
To build a panorama, first take a series of overlapping shots with the camera positioned vertically - this will give you much larger panoramic image than if you use the camera horizontally.
Although specialist panoramic tripod heads are available, they're not always necessary, particularly if you're using software that stitches a panorama automatically. The latest version of Photoshop's Photomerge app is particularly adept at this process.
When you take the pictures that will be combined to make the panorama, use manual settings - manual exposure, manual focus and a manual white balance preset - to ensure consistency across every picture.
Tip 10. Infrared photos
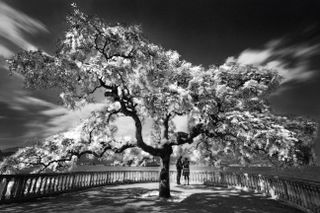
Although you can create a fake infrared effect in Photoshop, nothing beats the thrill of doing it in-camera. Infrared landscapes can be in black or white or color, with both offering a very different look and feel.
For the best photos, it's worth considering getting an old DSLR converted to infrared. You won't be able to use it for regular color photography once the IR conversion has been carried out, but it's much more convenient than having to mess around with IR filters on an unconverted camera.
Tip 11. Minimalist landscapes
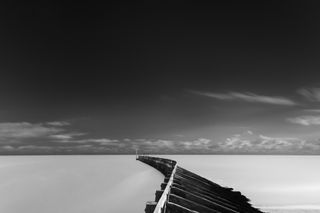
Usually black and white, often square and frequently realized with the help of Neutral Density filters, minimalist landscape photographs are more about what you leave out than what you leave in.
Telephoto zooms will help you to frame interesting details that would make for a great minimalist landscape. Look for single trees, lone clouds and isolated rocks. Fog, snow and featureless skies will provide a suitable blank canvas for this type of picture too.
Current page: Landscape photography techniques, tips and tricks
Prev Page Portrait photography techniques, tips and tricks Next Page Macro photography techniques, tips and tricksPhil Hall is an experienced writer and editor having worked on some of the largest photography magazines in the UK, and now edit the photography channel of TechRadar, the UK's biggest tech website and one of the largest in the world. He has also worked on numerous commercial projects, including working with manufacturers like Nikon and Fujifilm on bespoke printed and online camera guides, as well as writing technique blogs and copy for the John Lewis Technology guide.
Most Popular


