Time-lapse photography: how to capture your first time-lapse video
Learn how to shoot time-lapse photography the easy way
If you’d like to make an easy, and indeed logical, transition from shooting stills to shooting video, time-lapse photography is the best way to do it. Not only is time-lapse photography based on still images, the technique shows the passing of time in such an interesting way that even mundane scenes can be brought to life and made to look magnificent.
So, what is time-lapse photography? In a nutshell, it’s a movie that’s made up of a sequence of still images that show the passage of time. This could be minutes, hours, days or even weeks.
To shoot a time-lapse you need to attach a camera to a tripod so it’s fully supported and can’t move. You then, using either an in-camera intervalometer or one built into a shutter remote, set frequency – how often an image will be taken, the total number of frames to be taken, and on some in-camera intervalometers you can even set a start time so the time-lapse could start shooting when you’re asleep for instance.
- Buying guide: The 10 best tripods you can buy right now
Interval/frequency
The period of time between each shot taken will always depend on how fast or slow elements in the scene are moving. If there’s little wind and cloud movement is minimal, you may want to set an interval of one shot every 30 seconds. Whereas if there’s a lot of movement it may be every five seconds or less.
The advantage of the latter is that you’ll shoot more frames in a shorter space of time, but if there’s little movement the longer interval means you’ll capture more movement from one shot to the next. Getting a feel for the exact interval time in different situations all comes down to practice, so if you’d like to get it right first time do some test shoots where you shoot enough images for 10 seconds of footage to see how different intervals look.
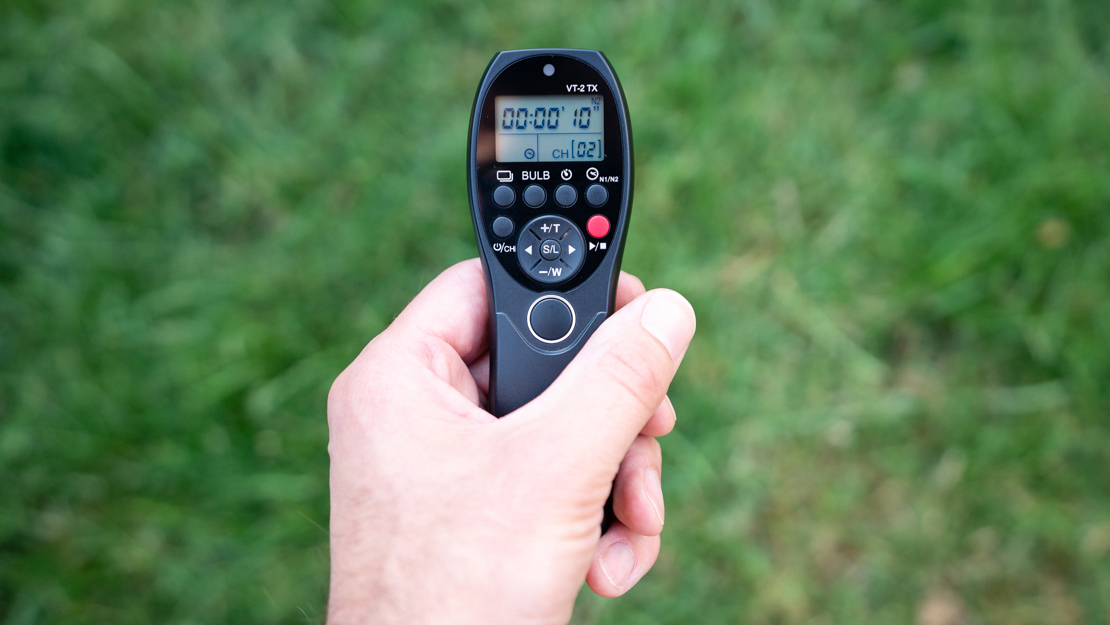
Total number of shots
Shooting time-lapse photography is time-consuming and you have to set enough time aside to be able to shoot the images you need to then create a movie that plays at the standard 24fps. The total number of images you’ll need to shoot ultimately depends on how long you want your time-lapse to be.
Basically, for every one second you need 24 frames, so simply multiply the number of seconds required by 24. For a 30 second time-lapse you’d need to shoot 720 images, and if the camera was set up to take a shot every five seconds that would take an hour to shoot. If you were shooting at a 30-second interval it would take an eye-watering six-hours to shoot the required number of images. Some scenes need it, so if this is the case make sure you have a chair, a good book and a flask of tea!
Get daily insight, inspiration and deals in your inbox
Sign up for breaking news, reviews, opinion, top tech deals, and more.
Manual vs aperture priority

There are two main options for shooting mode when shooting a time-lapse. The first is to put the camera into manual mode so that exposure is fixed and any brightening or darkening of the scene will be picked up. An advanced version of this is where you shoot a day to night scene and make minor adjustments to shutter speed and ISO as the scene gradually darkens.
The second, and easier, option is to shoot in aperture priority mode. This is the mode where you set ISO and aperture, and the camera sets the appropriate shutter speed for a correct exposure.
When shooting in this mode you’ll need to set the necessary amount of exposure compensation if required. One of the problems with aperture priority is that if there are flashing lights or quick changes in brightness between one shot to the next, the camera will be fooled into under and overexposure which will ultimately result in flicker.
Flicker is when the brightness of frames is slightly different so that when the time-lapse is played back as a video you see a flicker. More advanced software can remove this, but there’s also another way of reducing this problem and it all comes down to the lens you use.
- Learn more: The Exposure Triangle
The kit you’ll need
The great thing about time-lapse photography is that it can be as simple or complicated as you like, so at the basic end there’s very little you actually need beyond a camera, kit lens and tripod. And if your camera has a built-in intervalometer you won’t even need a shutter remote with one built in.
We’ve already discussed flicker, and one of the other causes of flicker is autofocus lenses. The problem here is that each time the aperture stops down to take a shot, the exact amount it closes down to is imperceptibly different each time, which makes no difference when shooting generally. But when shooting a sequence of images for time-lapse, that difference becomes noticeable as flicker because of the ever so slight variation in exposure.
The most effective way to combat the problem is to shoot with a manual lens. This may be an old lens made by the manufacturer of your camera or a modern third-party option from the likes of Samyang or Tokina
The most effective way to combat the problem is to shoot with a manual lens. This may be an old lens made by the manufacturer of your camera or a modern third-party option from the likes of Samyang or Tokina. With these lenses, you will, of course, have to focus manually, but the fact that the aperture is set manually and is separate from the camera means that it’s fixed in one position and won’t cause flicker.
If you have filters such as a polariser and ND grads make sure you use them to control exposure and to shoot the best images possible. If you don’t have grads you could underexpose shots by one or two stops and recover the foreground in post, but filters will always be the better option because they will allow you to maintain optimum image quality.
- Buying guide: Best ND Grad filters
Camera set-up for time-lapse photography
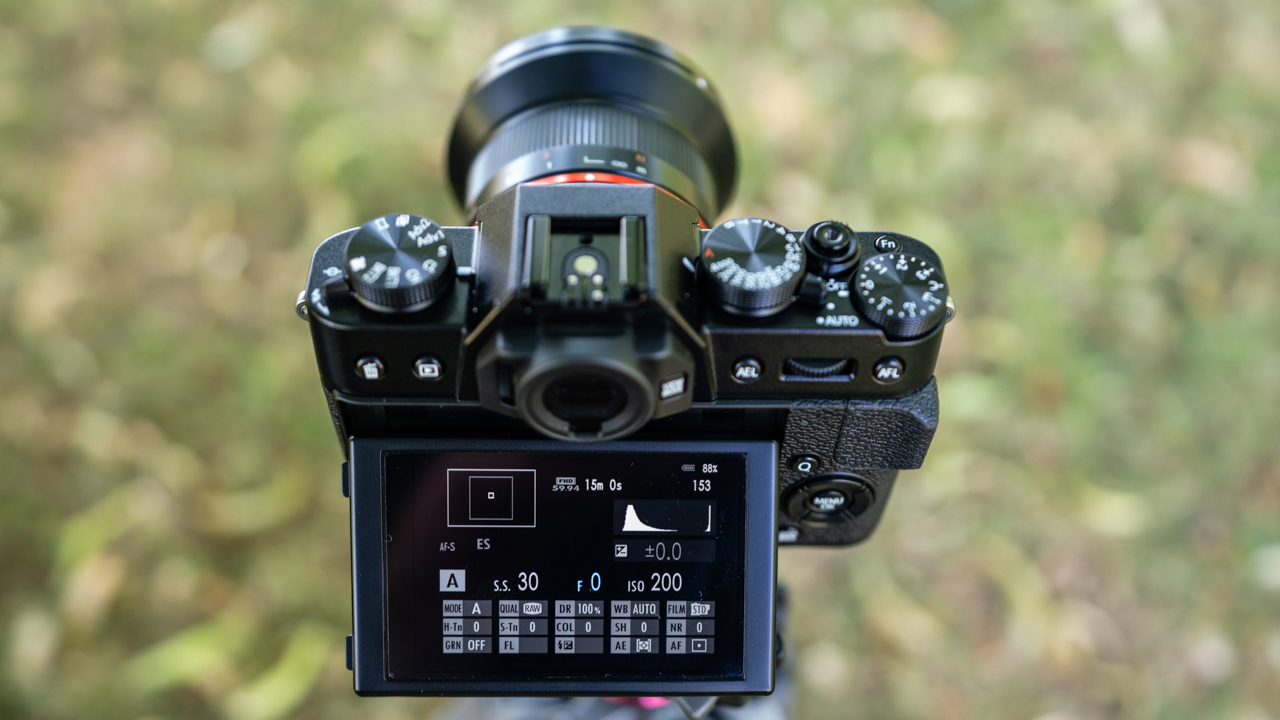
1. Camera settings
Attach your camera to a tripod to ensure it remains fixed in position for the duration of the shoot. For your first time-lapses it’s worth shooting in aperture priority before moving on to manual. Set ISO to 100 with aperture at f/11, and apply any exposure compensation that’s required if shooting in aperture priority, or if in manual mode set the appropriate shutter speed.
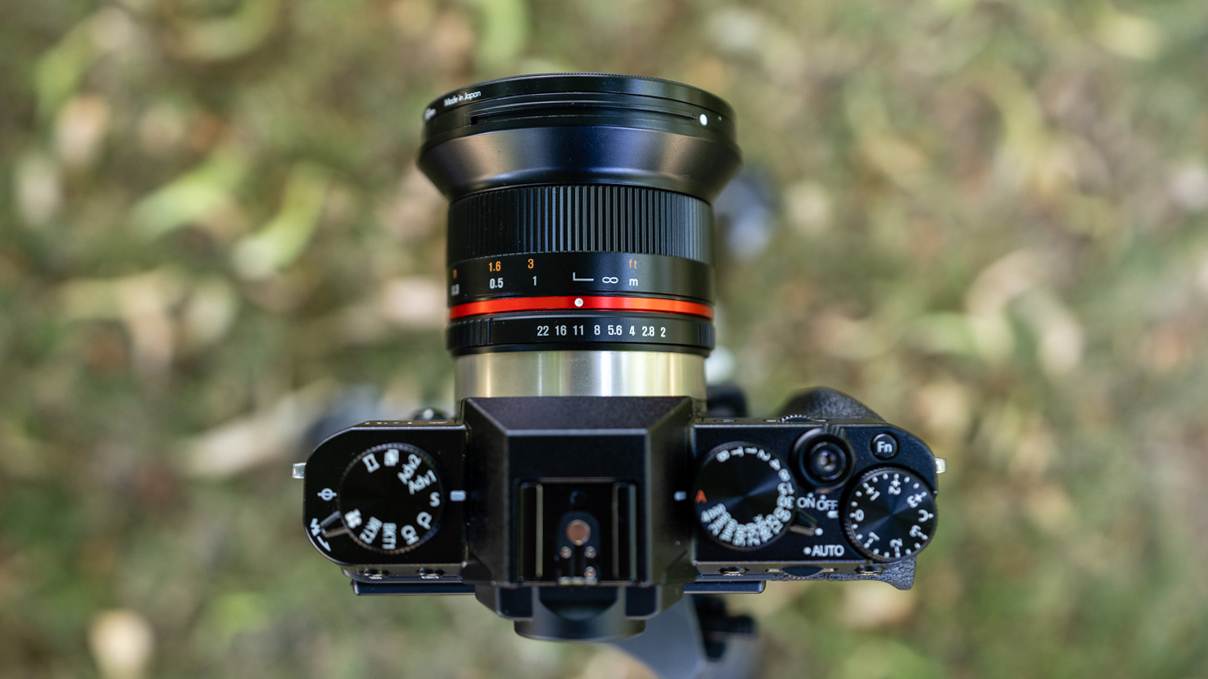
2. Lens and focus
If you have a manual lens like this Samyang 12mm f/2 you’ll not have to worry too much about flicker, especially if you choose to shoot in manual. But regardless of whether using a manual or AF lens, make sure focusing is set to manual and focus one-third of the distance into the scene behind the foreground. This will provide a large depth-of-field.
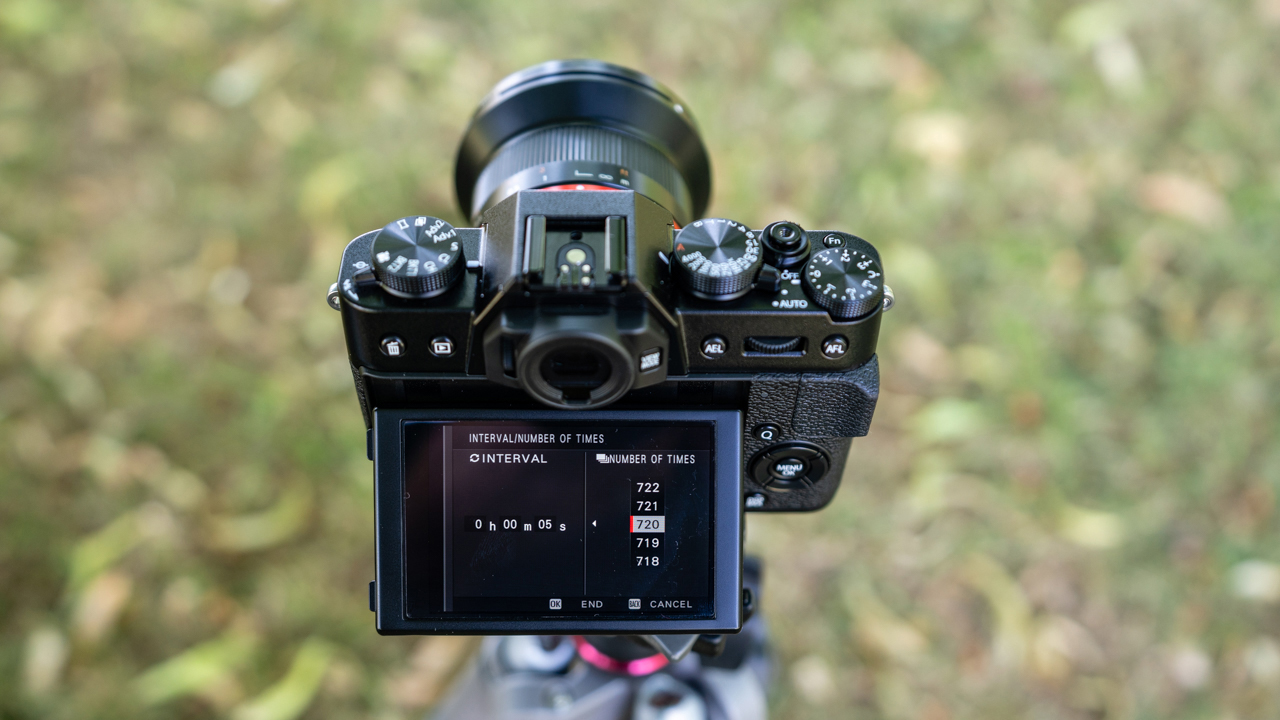
3. Interval settings
Frequency and total number of shots depend on the movement in the scene and the desired duration of the resulting time-lapse. Remember, 720 shots taken at a five-second interval will take an hour to complete, and is a reasonable starting point until you learn more about the process. If you’d like a shorter shooting time try a two-second interval.
Software and processing
Shooting a time-lapse is only half of the process. Once you have all of your stills you’ll need special software to piece them together into a movie. There are both free versions and fully featured paid options that are used by the professionals, so you can decide what works best for you. We’ll take a look at three options in a moment.
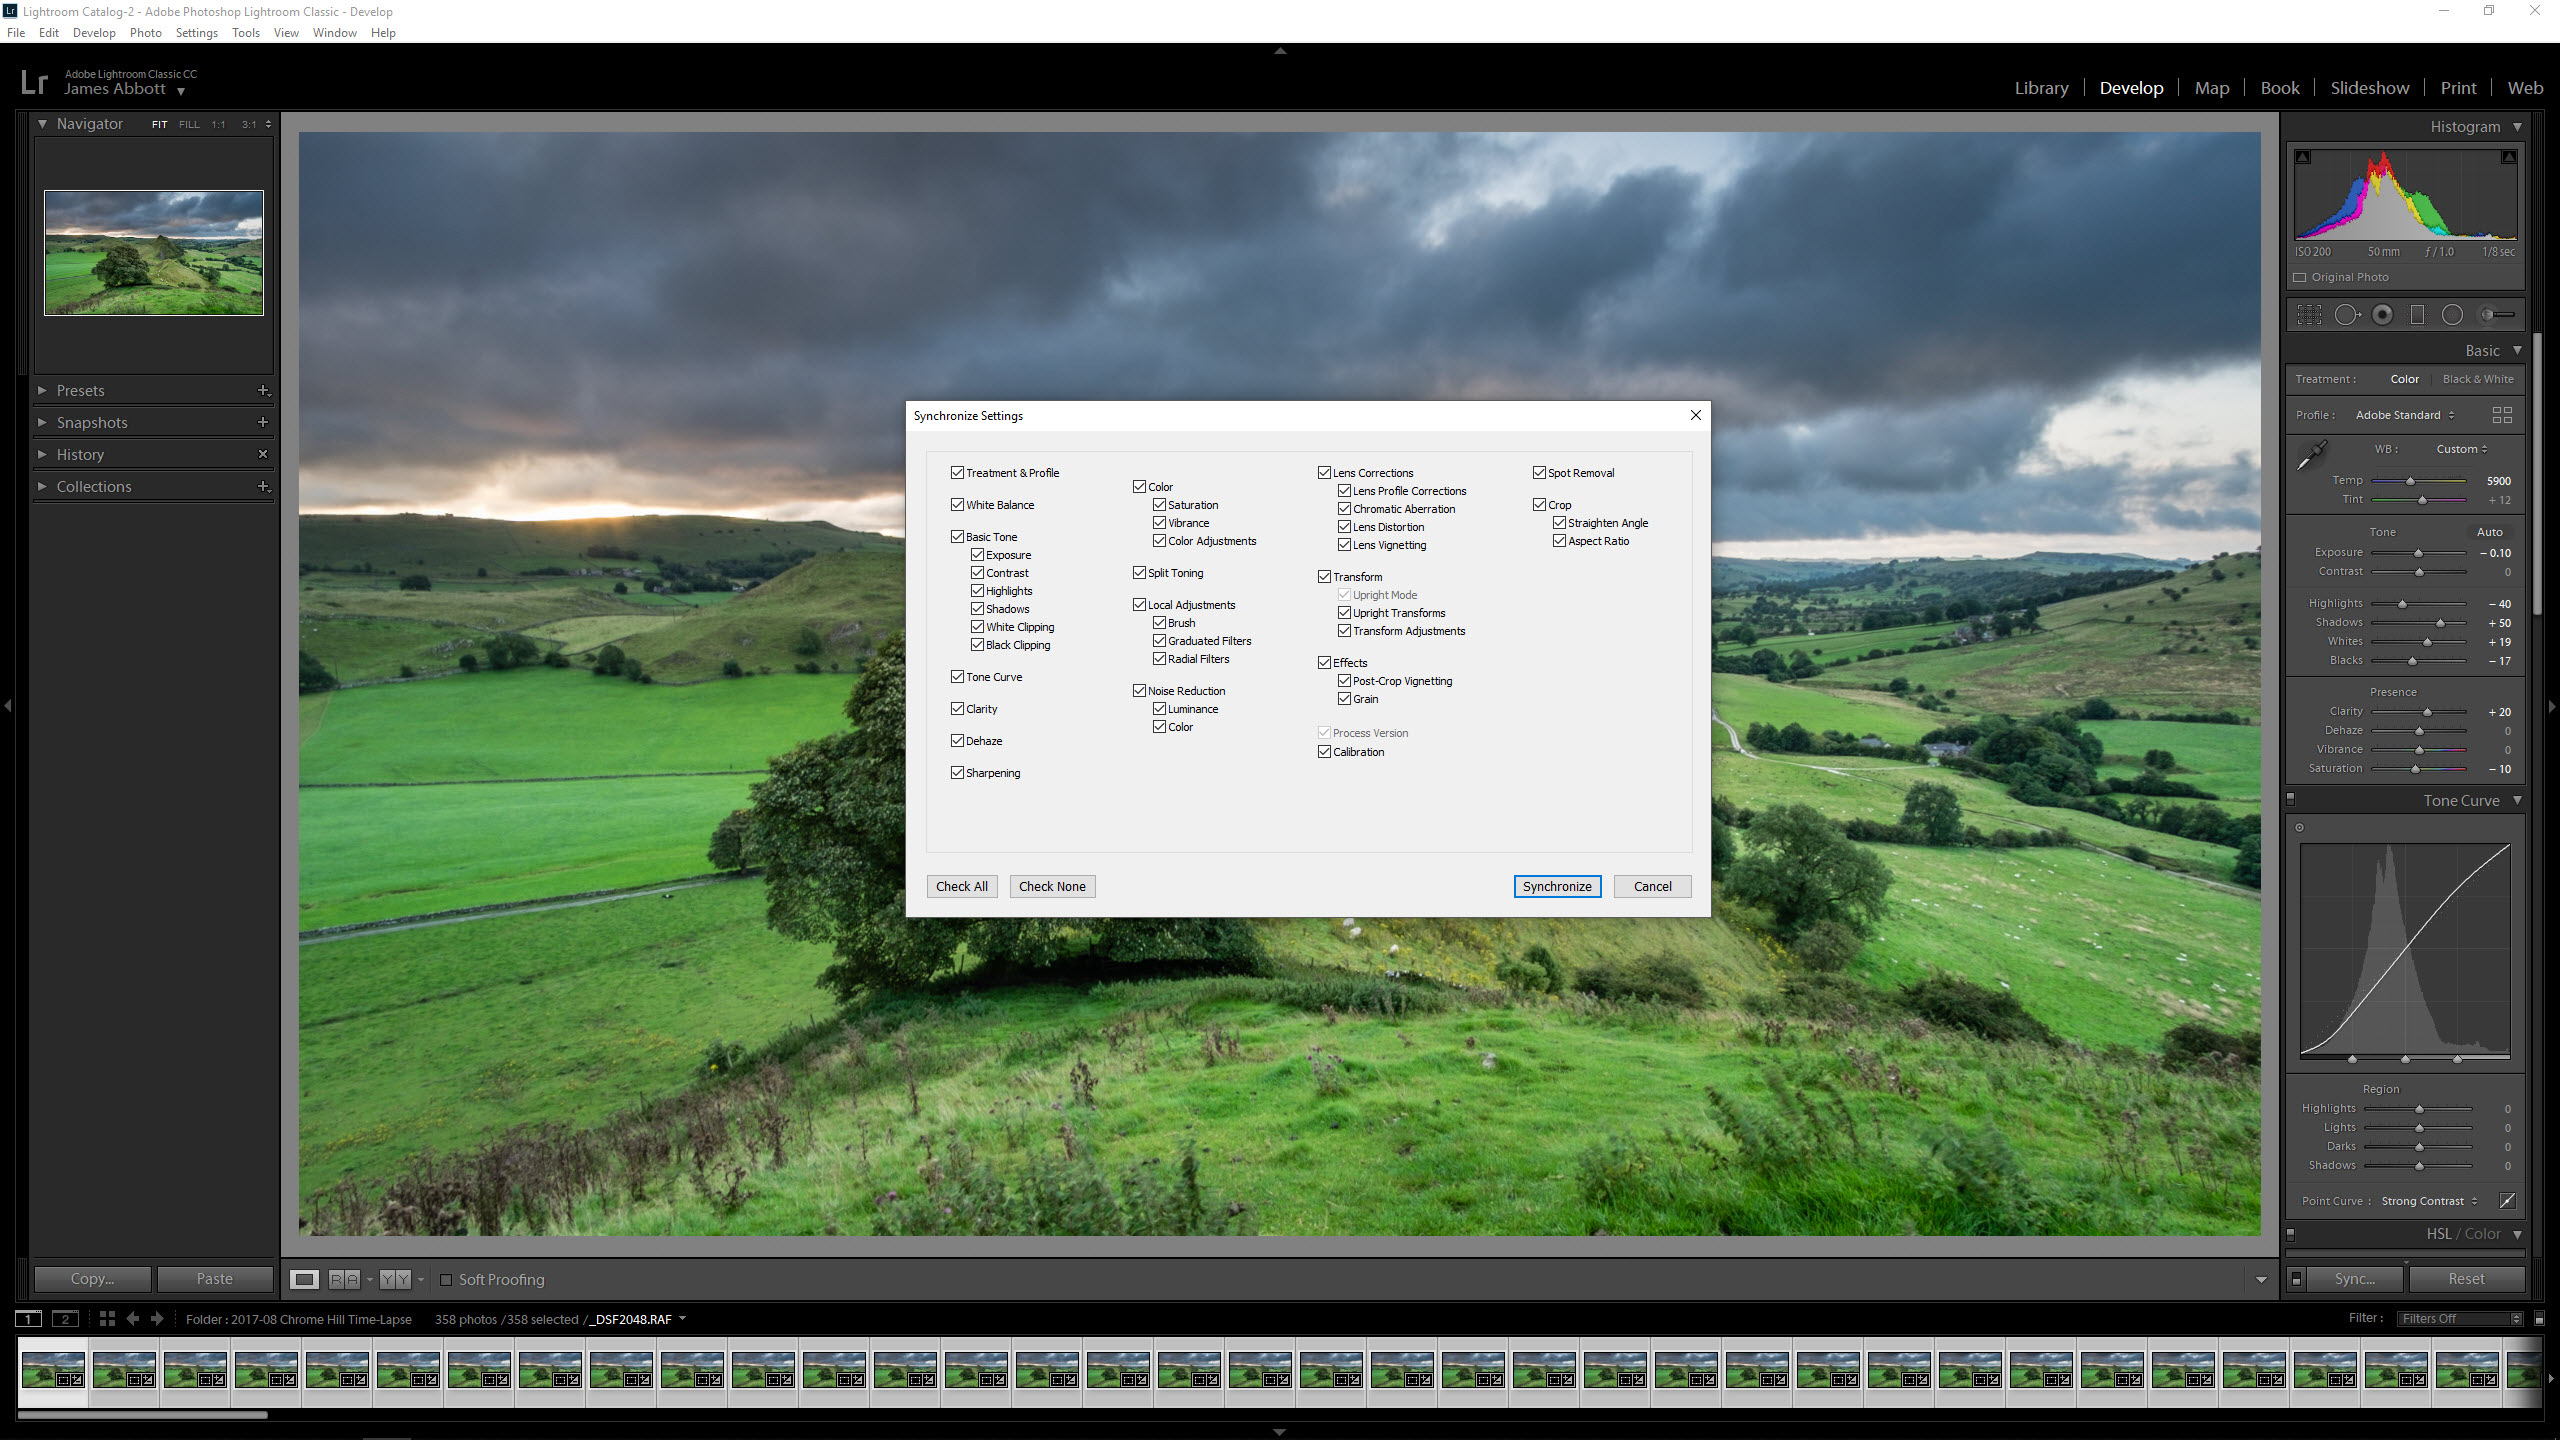
1. Bulk process in Lightroom
Assuming you’ve shot raw files you’ll need to process these in software such as Lightroom. Process the first image how you would like it to look, including a 16:9 crop, and then apply the same settings to all of the images before exporting. When you do export these, set sRBG for the color space and the file type to JPEG.
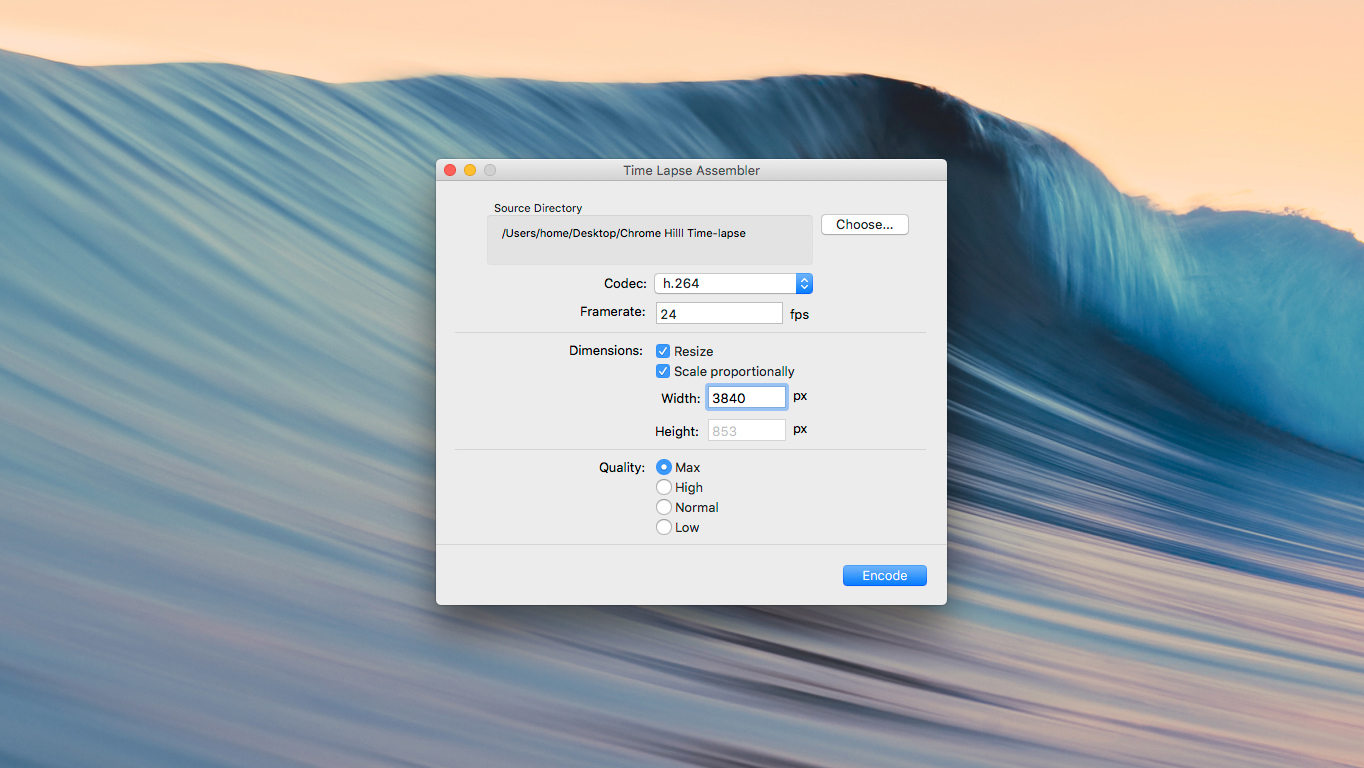
2. Time-lapse software
Open your time-lapse software (see below for options) and select the source folder of images. Set the frame rate to 24fps, the Codec to h.264 and quality as high as possible. You can either resize the video or not, but if you output your JPEGs at the desired resolution you won’t need to worry about this part. Hit Encode or OK and wait for your time-lapse to process. It’s that easy.
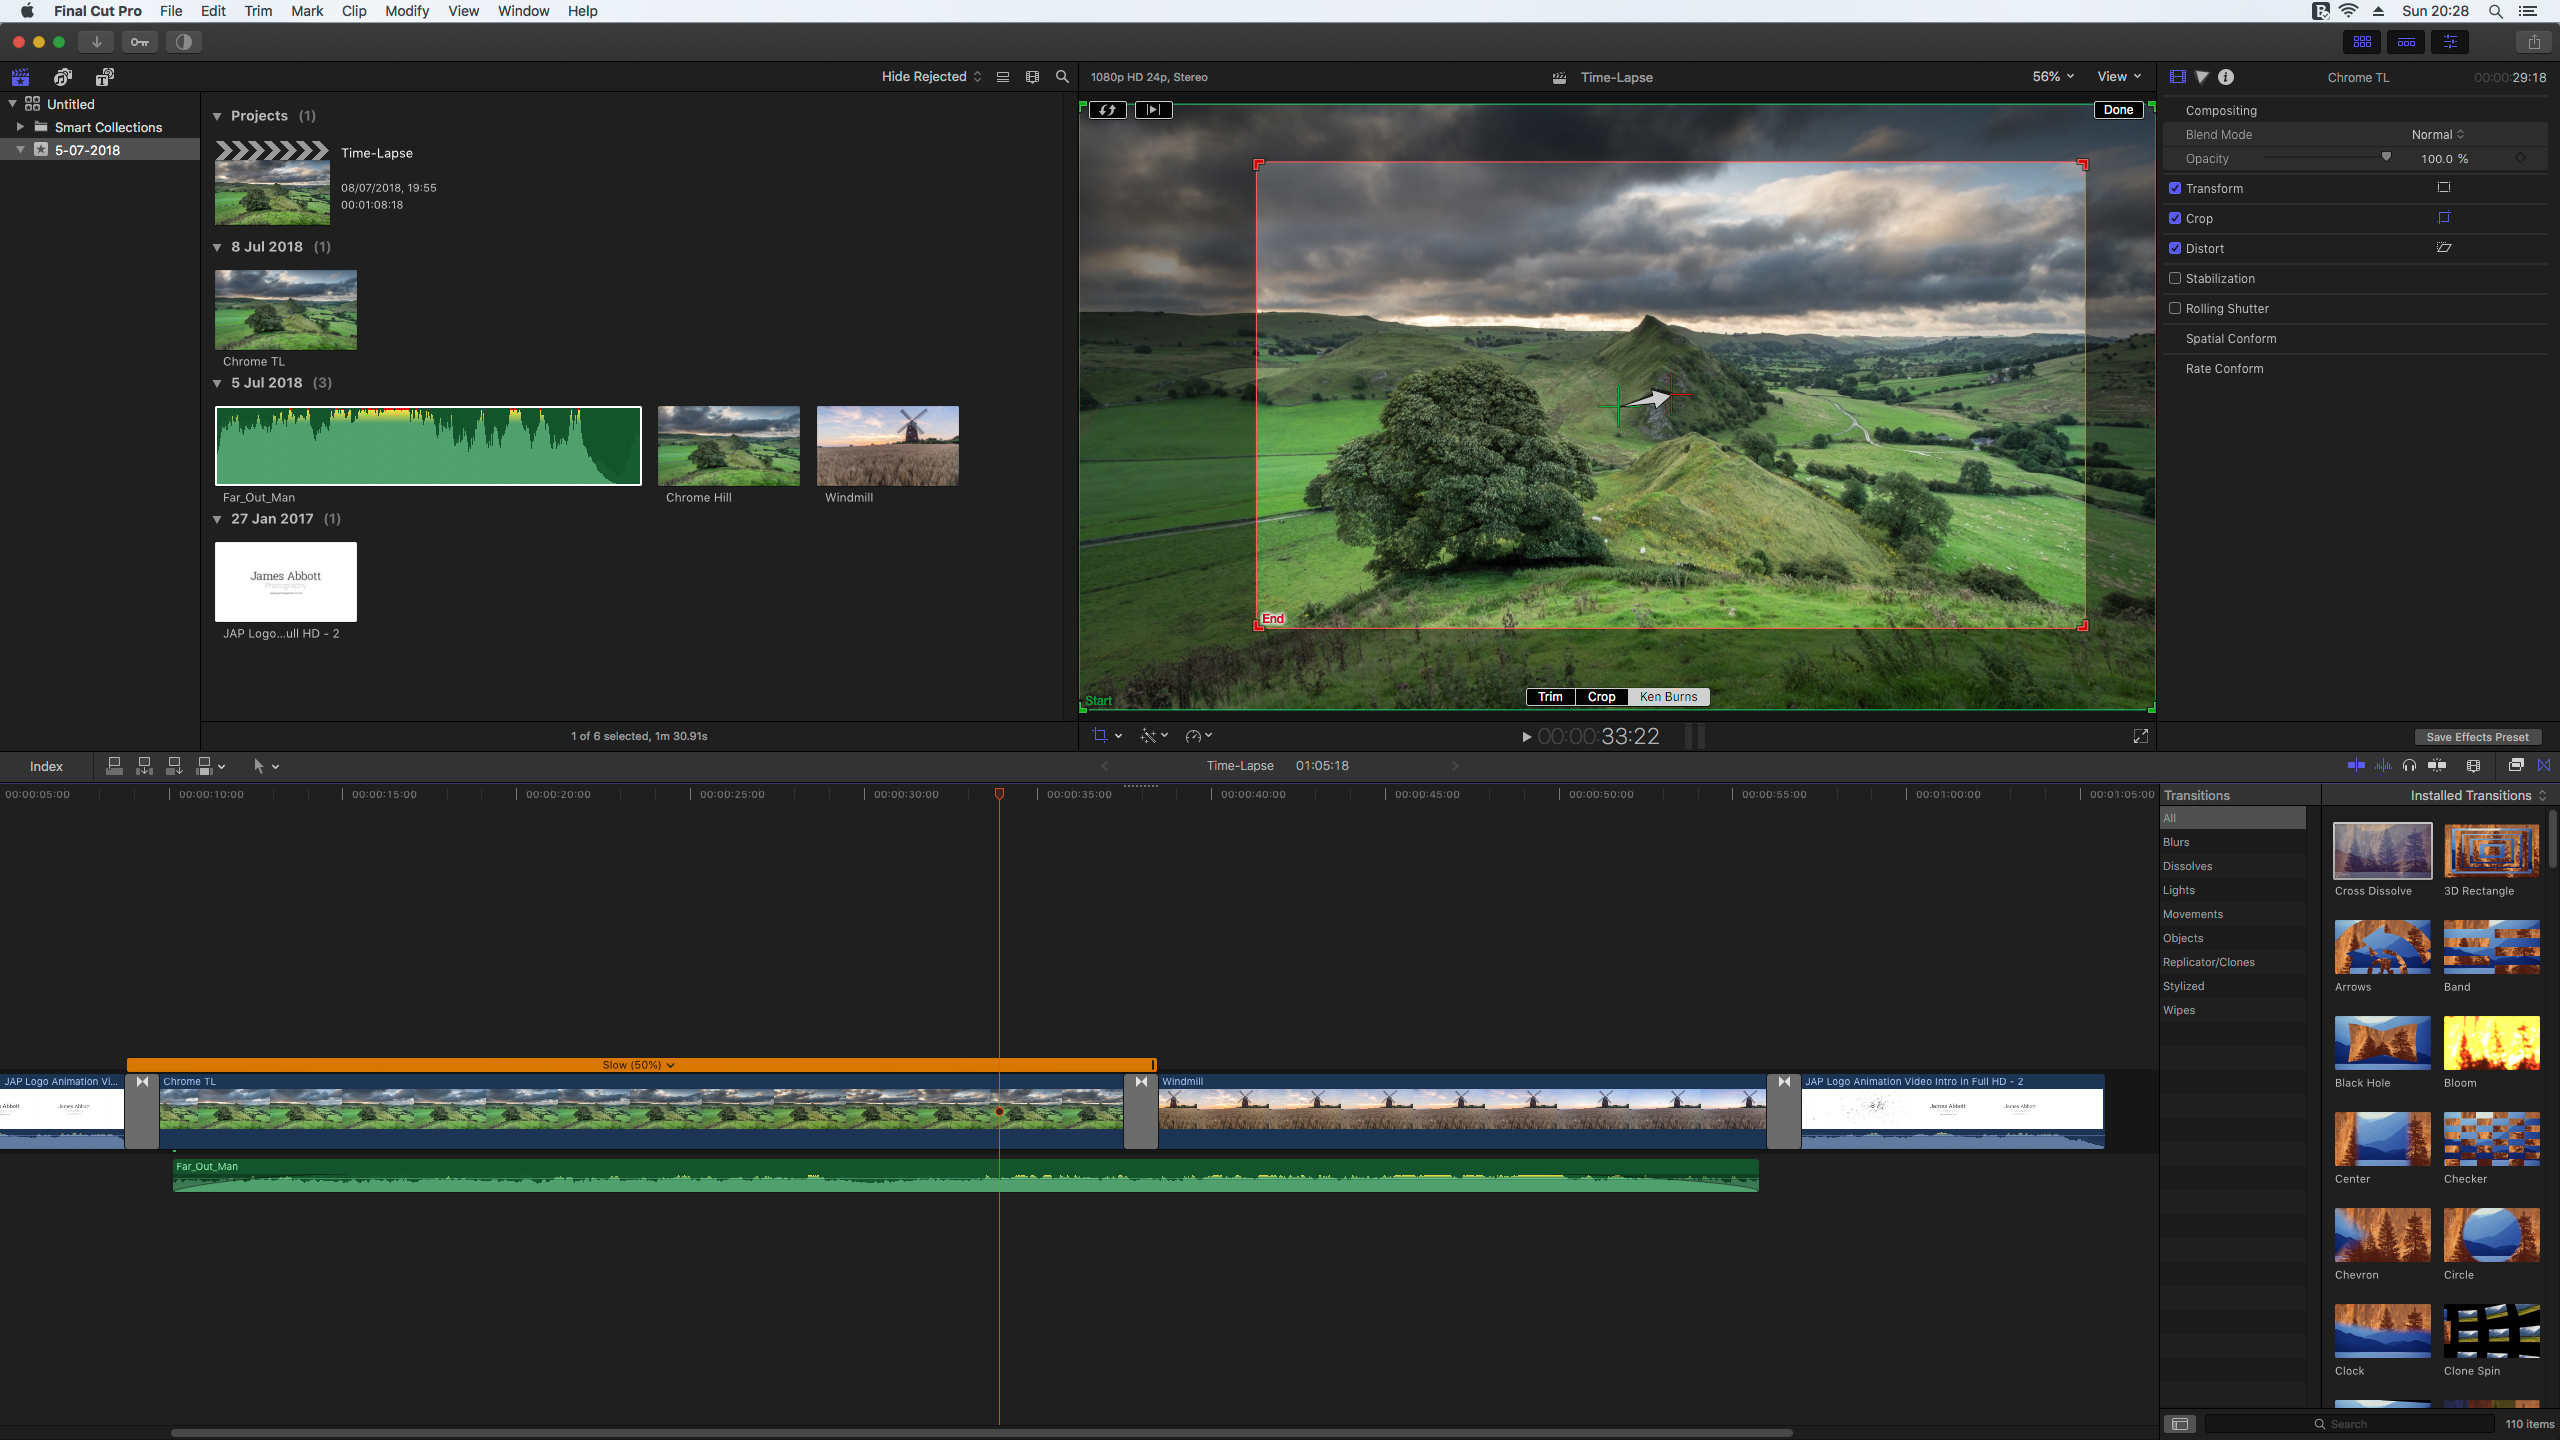
3. Adding music and effects
To add music and more advanced editing effects you’ll need to use video editing software such as Final Cut Pro, Adobe Premiere or iMovie. The time-lapses shown here were imported into Final Cut Pro where the music and Ken Burns (zoom effect were added). To maintain image quality the stills were exported in 4K dimensions, but the video output in 1080p.
Software options
Free for Mac – Time-lapse Assembler
Arguably the best free Time-lapse software available, Time-lapse Assembler is unbelievably easy to use. Unfortunately, it’s only available for Mac so if you’re a Windows user you’ll have to look at a different option if you wish to use free time-lapse software.
Free for PC – Startrails.de
As the name suggests Startrails.de is actually software designed for creating star trail images, but it also allows you to create a basic time-lapse. It’s easy to use and considered one of the best options for creating star trails on a PC, so a double bonus if you shoot this type of photography.
Fully featured pro option for Mac & PC - LR Timelapse
This software is one of the best options available and works as a Lightroom plugin. It offers a wide variety of features not available with Startrails.de and Time-lapse Assembler, and the free version of LR Timelapse allows you to make a time-lapse comprising up to 400 still images.
James Abbott is a professional photographer and freelance photography journalist. He contributes articles about photography, cameras and drones to a wide range of magazines and websites where he applies a wealth of experience to testing the latest photographic tech. James is also the author of ‘The Digital Darkroom: The Definitive Guide to Photo Editing’.
