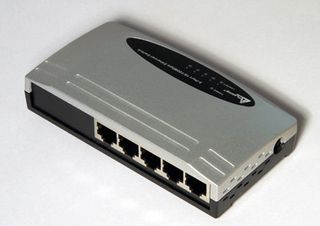
Suppose you're using a single Windows computer linked directly to your broadband modem and want to give a second computer access to the internet. You can simply upgrade to a dedicated broadband router. However, it's cheaper to plug both computers into use a low-cost network hub and then activate Windows' Internet Connection Sharing (ICS) functionality on the internet-connected machine.
When you originally installed your broadband modem drivers, the machine may have had ICS configured. To check this, open the Control Panel and doubleclick 'Network Connections'. The broadband connection entry should have the word 'Shared' next to it if ICS is configured.
If so, this machine will automatically work as the network's DHCP server. Now boot up the new computer, open a browser and you should be able to visit a website.
If ICS isn't configured, double-click on the broadband connection in the Network Connections window. Click the 'Properties' button in the resulting window and select the Advanced tab. Click the tickbox marked 'Allow other network users to connect through this computer's internet connection'. Press 'OK', and reboot your new machine to ensure it picks up its network details properly.
Sharing files
Sharing files and folders on a private Windows network is simple, and thanks to Samba – which is installed by default in distros such as Ubuntu – you can also see them in Linux.
To share a folder, you first need to turn on file sharing. From Computer, open the Tools menu and choose 'Folder Options...'. Click on the View tab and scroll to the bottom of the list of tickboxes. Ensure that the box marked 'Use Simple File Sharing (Recommended)' is ticked, then click 'OK' to continue.
Get daily insight, inspiration and deals in your inbox
Sign up for breaking news, reviews, opinion, top tech deals, and more.
To share a folder, simply right-click it and select 'Sharing and Security'. A window will pop up. On the Sharing tab, click the tickbox next to 'Share this folder on the network' and enter a name. If you want others on the local network to be able to change files, also ensure that the 'Allow network users to change my files' box is ticked. Click 'OK' and news of the new share should propagate to the other machines.
Vista should find the computer and its share, but in XP you can add a new network place from the Start menu by following the Add New Network Place wizard and browsing to the local workgroup (usually called 'WORKGROUP') for the new share.
Sharing printers
If you have several computers, why not share your printer so that anyone on your network can use it?
To do this, log in as an administrator on the computer that has the printer attached. Access the Control Panel and select 'Printers and Faxes'. On the subsequent window, right-click on the printer and select 'Sharing...'. In the Sharing tab of the Printer Properties window that appears, click the 'Share this printer' radio button and give it a name.
To connect to the printer from another computer, open its Control Panel and select 'Printers and Faxes'. In the subsequent window, select 'Add Printer' from the File menu. The Add Printer wizard will appear. Click 'Next', select the networked printer option, click 'Next' again, select 'Browse for a printer' and press 'Next' once again.
Browse your network and select the printer. Press 'Next' again and 'Yes' on the subsequent pop-up that warns of drivers carrying viruses. Windows will now install the driver for your printer, after which you should be able to use it just as if it were local to your machine.
Current page: How to set up a basic home network
Prev Page Home networking tips and basics Next Page How to set up a dedicated home media network


