The A to Z of Photography: Histogram
The histogram is one of the most useful tools on your camera
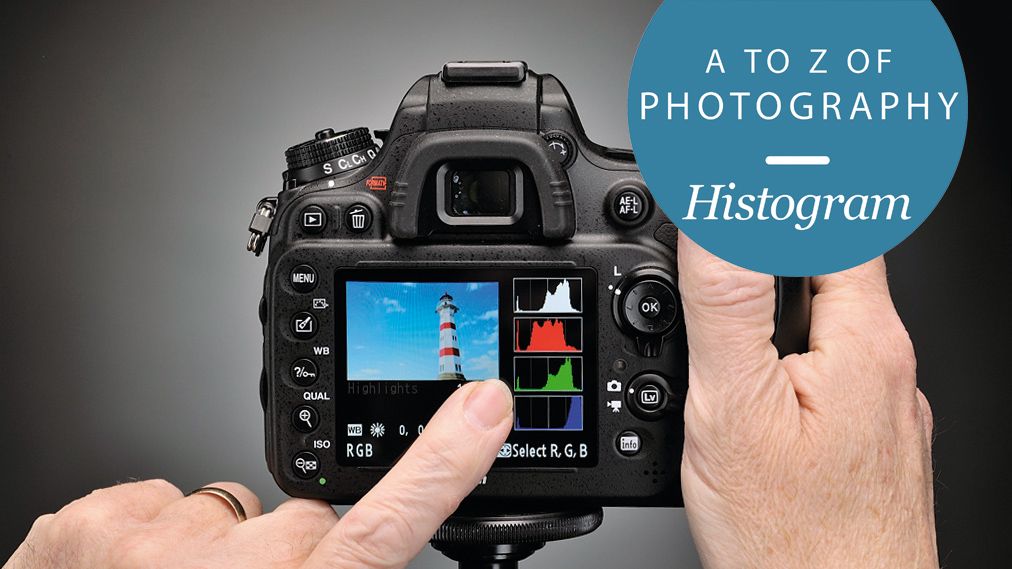
The histogram is one of the great advantages of digital cameras. A histogram is simply a graph that represents the distribution of tonal information throughout an image, and it can help you to diagnose and rectify exposure problems.
At the left of the graph are the shadows and darker tones, the centre represents midtones, and on the right are lighter tones and highlights. In most, but not all, situations you’ll want to make sure the left and right edges of the graph don’t touch the sides of the histogram box, as this indicates that those tones have been 'clipped' to pure black or white, with detail in the corresponding areas of the image lost.
There’s a common misconception that a ‘healthy’ histogram should show an even distribution of tones throughout the shadows, midtones and highlights. But, while this may be true of a subject such as a perfectly exposed landscape, it's not the case for every image.
If, for example you’re shooting a model wearing black in a white studio the histogram certainly won’t be evenly spread – it would instead show two peaks, one towards the shadows end of the histogram and one near the highlights end. It would look irregular, but it would be correct.
Live View histogram

Some cameras can display a histogram on the LCD screen when you're shooting in Live View mode, and those with an electronic viewfinder (EVF) can often also show a live histogram in the viewfinder. With other cameras a histogram may only be available when reviewing images after it has been taken on the LCD – you'll need to select the relevant view mode. This is still useful – you can reshoot if necessary – but obviously less so than a live histogram on the LCD or in the viewfinder when shooting.
- Looking to take your photography to the next level? Check out our guide to the Best entry-level DSLRs
You can also view a histogram in most raw processing and image editing software such as Lightroom, Capture One, DxO Optics and Photoshop. This enables you to see how edits you're making are affecting the tonal range of an image in a way that you may not be able to perceive by looking at the image on the screen, which can be particularly useful when you're working with predominantly light or dark images, where there’s a fine line between a correct exposure and loss of detail.
Common histograms

High contrast
Some scenes – typically landscapes that feature a bright sky and darker landscape – have a greater tonal range than your camera can cope with. You can use an neutral density graduated filter to reduce the difference in brightness between the sky and the landscape, or shoot at a different time when the lighting is less harsh.

Low contrast
Some subjects contain no highlights or shadows. Such subjects should be exposed so that the graph is as far to the right as possible without overexposing tones, known as ‘exposing to the right’.

High-key subject
In some shots, it’s perfectly acceptable for highlight areas to be burnt out. A perfect example of this is when shooting against a white backdrop in a studio.

Low-key subject
Dark scenes will have a graph that peaks on the left-hand side. Clipped shadows in such shots may not be a problem if you want some areas of the shot to appear jet black for effect.
Get daily insight, inspiration and deals in your inbox
Sign up for breaking news, reviews, opinion, top tech deals, and more.
James Abbott is a professional photographer and freelance photography journalist. He contributes articles about photography, cameras and drones to a wide range of magazines and websites where he applies a wealth of experience to testing the latest photographic tech. James is also the author of ‘The Digital Darkroom: The Definitive Guide to Photo Editing’.
