TechRadar Verdict
Editing is easy, many tools and effects are available, as you’d expect from a modern video editor, plus it brings new ideas and excellent screen grabbing capabilities. It’s definitely one to check out.
Pros
- +
Simple video editor with clever approaches to classic tools
- +
Fluid edits, even on older hardware
- +
Fantastic screen grabbing features
- +
Vast Stock Media Library to explore
Cons
- -
Mac only
- -
The novel features may be confusing for veteran editors
- -
Cannot import footage directly from camcorders
Why you can trust TechRadar
ScreenFlow started its existence as a highly proficient screen capture tool for the Mac. And although this is still its primary focus, it has morphed into a versatile video editing tool. So let’s take a look and see how it squares up to the intense competition.
You can easily import clips and photos into ScreenFlow, either by using its import feature, which lets you browse through the drives connected to your Mac and choose the files you need, or, more simply, by dragging a file straight from the Finder into ScreenFlow’s Timeline or Media Library. You cannot however grab media from a camera: you need to find another way to get clips off that device first before adding them to your project.
Editing
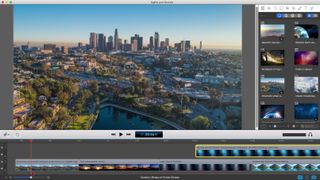
Editing is pretty straightforward: drag the file you want onto the Timeline, trim its edges or split the clip, move it around, insert photos or audio files, place them on multiple layers, split the sound from the video file - pretty much everything you’d expect from a non-linear video editor, you get with ScreenFlow.
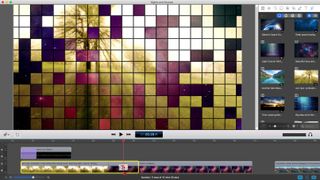
There is however one part of the editing process which this app does in a surprising way, but is so intuitive when you think about it, it’s surprising we haven’t encountered that idea elsewhere. Look in the menus and it doesn’t seem that ScreenFlow supports transitions, but that’s because its implementation is so clever: move a clip in the timeline over another, and they seem to merge where they overlap. This overlap creates the transition. By default, it’s a basic cross dissolve, but click on its cogwheel menu to choose from thirty seven others. To increase or decrease the transition, simply drag one of the clips further in or out respectively.
Animating properties over time is usually done with the use of keyframes. Not so in ScreenFlow. This app uses Action buttons. Click on one and a coloured box appears over the selected clip, at the playhead’s location. What’s great about this method is the effect you create is easily customisable: you can move the start or end of the effect simply by dragging its edges, or move it to another location on the clip by dragging it from the middle of that box. This action feature can be added to any clip, be they video, photos or even text. It makes animating much easier and intuitive than most other video editors. You may find working with keyframes a cumbersome idea after animating the ScreenFlow way.
Effects and filters
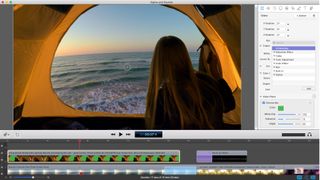
Other tools you’d expect from a video editor these days, effects and filters, are present in ScreenFlow, but again, they’re not in an obvious menu. However once you’ve located them, you can alter a clip’s saturation, brightness and contrast, add distortion effects, blurs, chroma keying and so much more.
There is a new feature introduced with ScreenFlow 8 which can greatly speed up the addition of such effects, should you wish to apply the same ones to multiple clips: you can copy and paste those effects from one clip to others. A fantastic timesaver.
Retiming clips (speeding them up, slowing them down, and even making the clip go backwards) is possible via the clip’s Inspector window.
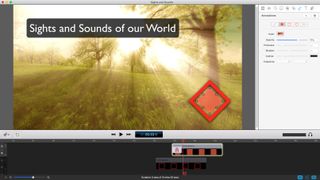
Should you need to add circles, squares, lines or freehand drawings, you can do that from the Annotation section. These are good tools to create objects, which you can animate as described above, if you want to highlight specific parts of a video, or just create interesting visuals.
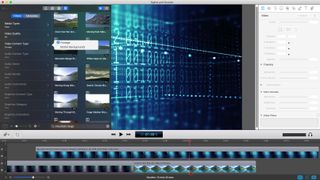
Templates and stock media
Another useful addition are Templates. If you work on similar-styled videos regularly, you can create a template filled with placeholder clips, so that when you create a new recording, everything is how you need it, and where you need it, like an intro video, lower thirds, etc. it’s all there for you so you don’t have to reinvent the wheel each and every time. Fantastic.
ScreenFlow 8 gives you access to a Stock Media Library. This section contains thousands upon thousands of clips, photos and music, which you can search through using keywords and filters. It’s an amazing resource but it comes at. cost. Although you can preview each file for free, if you wish to use them in your project it will set you back $60 per year for unlimited access. Shop around however, and you’ll find this price is actually unbelievably reasonable for the content that’s on offer.
Screen grabbing
A facet of ScreenFlow that hardly any other video editing app touches on, is its screen grabbing feature. Ever since its inception, this has been a core function of the software and it does an absolutely remarkable job with it. The process is incredibly simple: when you start a new recording, you can select any and all of the following: your computer’s screen, the computer’s audio, video from the FaceTime camera, and external audio.
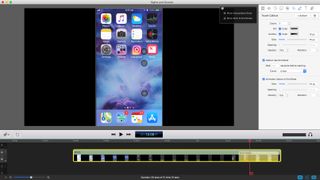
If you’ve got an iOS device physically connected to your Mac, you also have the option of capturing its screen.
This means you can create a tutorial, narrate it and film yourself all at the same time, and ScreenFlow doesn’t miss a beat. As long as there’s space in the drive it uses to cache all that data, everything works seamlessly.
If you’d rather narrate after the fact, you can do this as you edit. You even have the option to mute the video already present in your timeline as you record your voice-over, all from within the ScreenFlow.
Once you’re finished recording, everything is added into your timeline, ready for you to edit it. You can highlight specific sections of your screen with what ScreenFlow calls Callouts. You have two separate sections available to you: one dedicated to a Mac’s screen, where you can show or hide the mouse cursor, enlarge it to make it easier to see, make circles appear around the cursor when you’ve clicked on the mouse, or highlight the foreground window, among others. The other is focused on the iOS screen where you can simulate touch controls by animating little circles over the screen to give a visual representation of fingers touching the interface.
Final verdict
ScreenFlow offers everything you’d expect from a non-linear video editing application, and even comes up with very novel and effective ways of using certain traditional tools, but the highlight of this software is its amazing screen recording features, and its new Stock Media Library.
- We've also highlighted the best video editing software
Steve has been writing about technology since 2003. Starting with Digital Creative Arts, he's since added his tech expertise at titles such as iCreate, MacFormat, MacWorld, MacLife, and TechRadar. His focus is on the creative arts, like website builders, image manipulation, and filmmaking software, but he hasn’t shied away from more business-oriented software either. He uses many of the apps he writes about in his personal and professional life. Steve loves how computers have enabled everyone to delve into creative possibilities, and is always delighted to share his knowledge, expertise, and experience with readers.
Most Popular


